
Android studio 3版本編譯Gradle3.0 JNI的.so工程
Android Studio 3版本以上已經不再支援android.useDeprecatedNdk,這是我看過的比較細緻的一篇文章,文章原址:
一、最近更新Android studio 到3.0 版本,發現編寫jni 時,報錯了,錯誤如下:
Error:Execution failed for task ':app:compileDebugNdk'.
> Error: Flag android.useDeprecatedNdk is no longer supported and will be removed in the next version of Android Studio. Please switch to a supported build system.
 Consider using CMake or ndk-build integration. For more information, go to:
  https://d.android.com/r/studio-ui/add-native-code.html#ndkCompile
  To get started, you can use the sample ndk-build script the Android
  plugin generated for you at:
  /Users/apple/Desktop/AndroidJNITest/app/build/intermediates/ndk/debug/Android.mk
 Alternatively, you can use the experimental plugin:
  https://developer.android.com/r/tools/experimental-plugin.html
 To continue using the deprecated NDK compile for another 60 days, set
 android.deprecatedNdkCompileLease=1512283120054 in gradle.properties
找到了很久,都是按照以前的方法編寫和配置,應該還不會錯,結果仔細檢視,3.0版本的android studio 不支援
android.useDeprecatedNdk這種方式配置ndk,錯誤提示使用CMake 或則另外一種方式,上網找了一下,大多都是使用CMake 方式。
因此,寫這個文章記錄下來。
二、概念普及一下
1、我們先將寫好的C/C++程式碼編譯成對應平臺的動態庫(windows是.dll檔案,linux是.so檔案)。
2、下面我們來舉個栗子:使用AndroidStudio來實現JNI
3、要實現JNI先下載NDK,那麼NDK又是什麼呢?(面試寶典來了,趕緊掏出小本本)
- NDK是一系列工具的集合
- NDK提供了一份穩定、功能有限的API標頭檔案宣告
- NDK的釋出,使“Java+C”的開發方式終於轉正,成為官方支援的開發方式
- NDK將使Android平臺支援C開發的開端
三、舉個例子,(編寫android 串列埠庫)
1、工具:Android studio3.0

2、新建工程
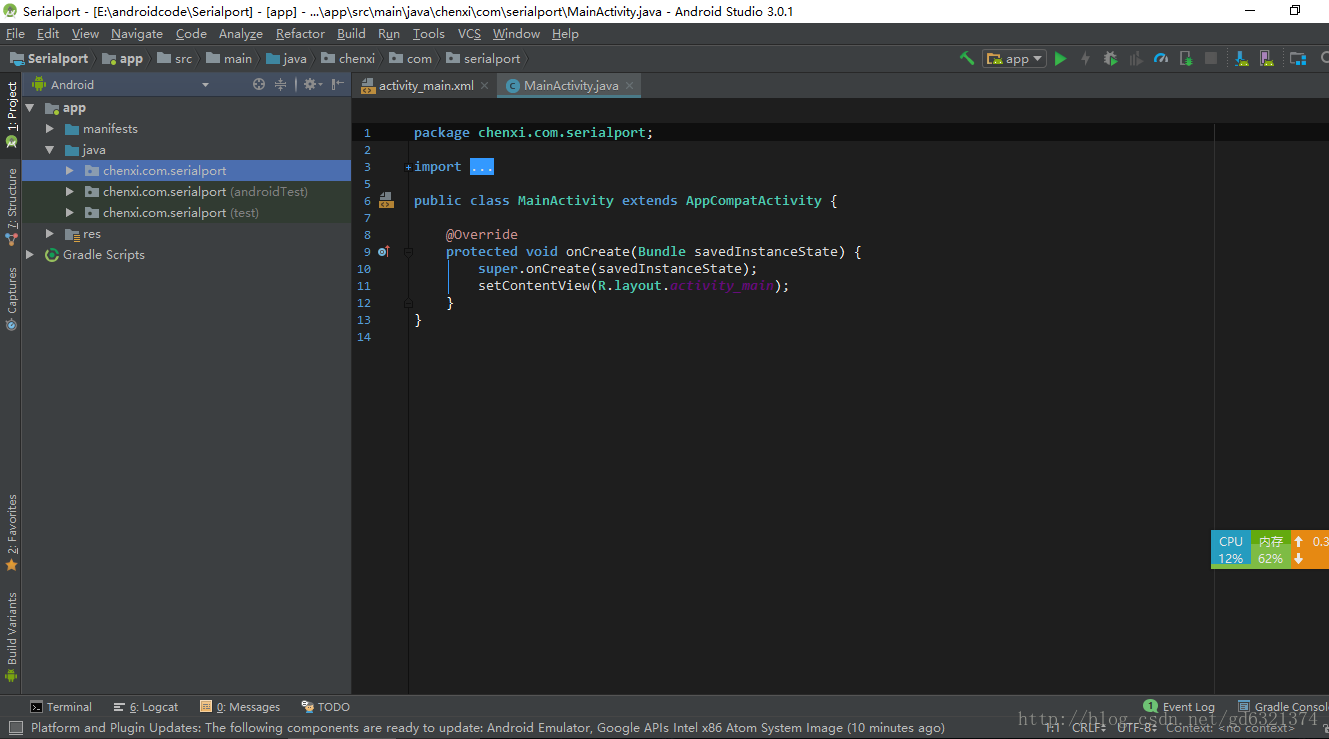
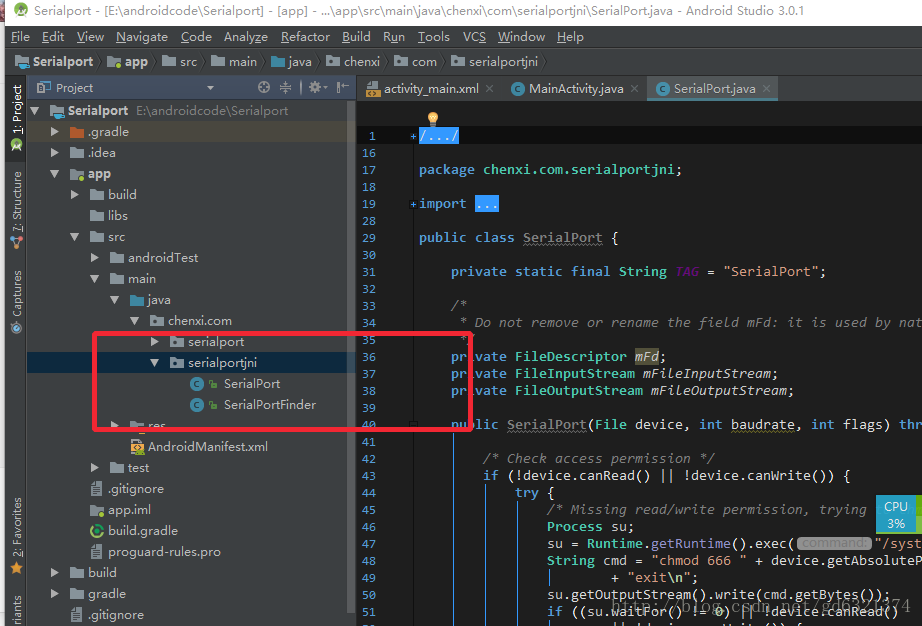
2.1 在src\main\java\chenxi\com 包下建立serialportjni 包

2.2 將Serialport類拷貝到serialportjni包下面,如圖
2.3 使用javah 命令生成.h標頭檔案
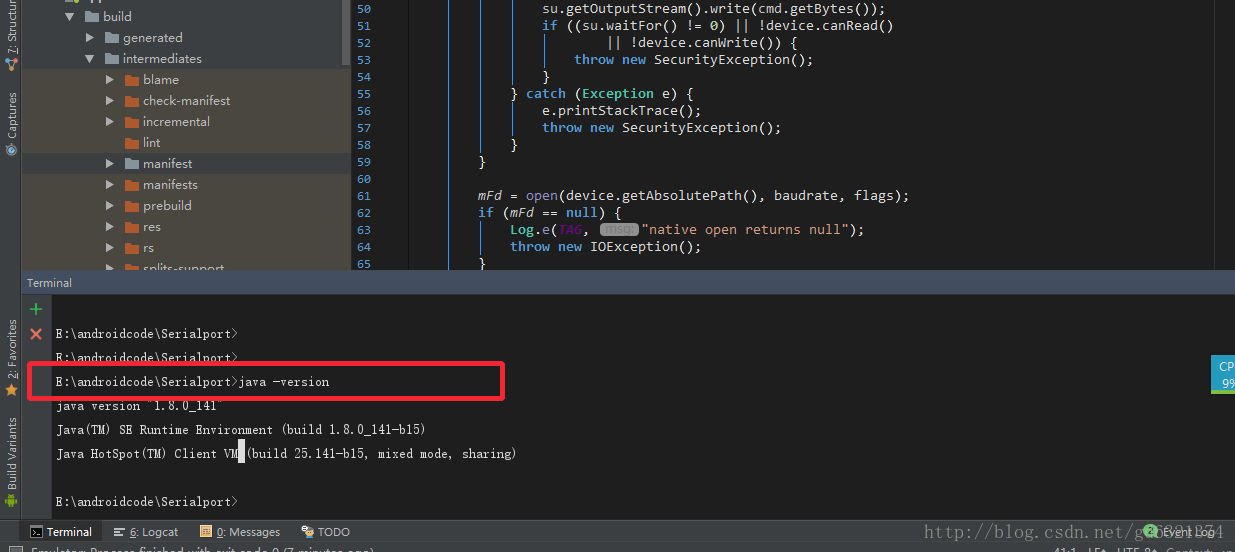
2.3.1 確認當前系統已經安裝相應的JDK,並且在windows 控制檯使用java -version 檢視是否配置好相關的環境變數。
2.3.2 在android studio 開啟控制檯到相應工程目錄下
* javah
* javah native方法宣告的java類的全類名
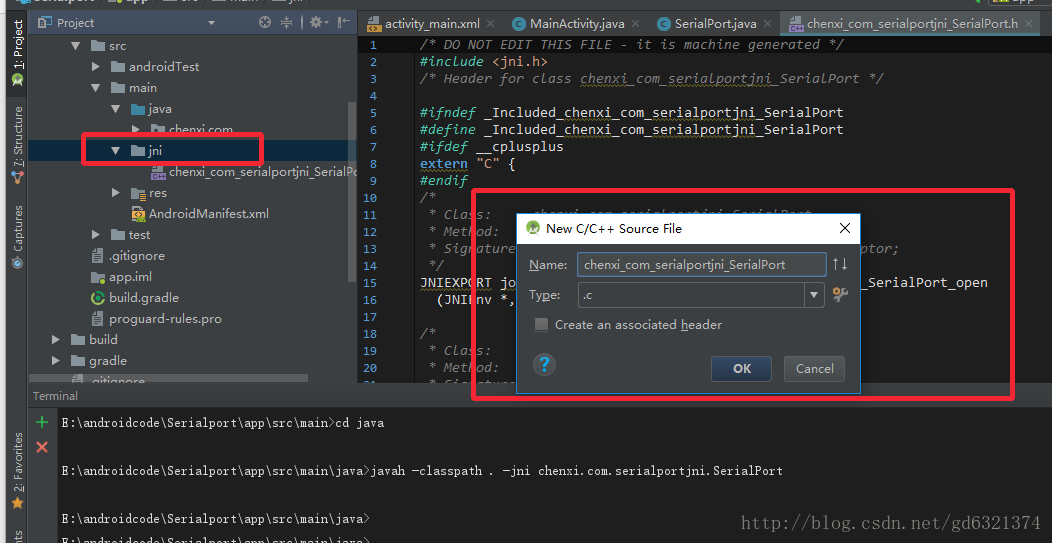
2.3.3 生成標頭檔案

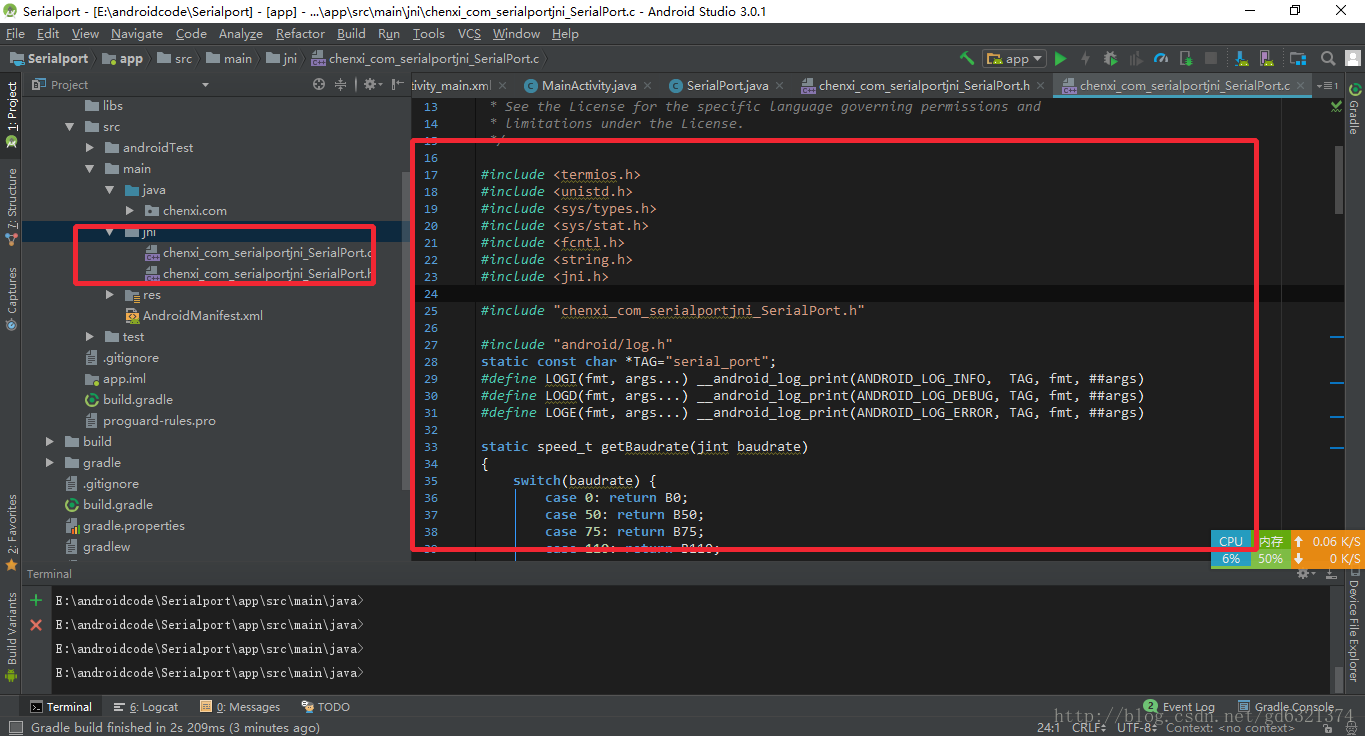
javah -classpath . -jni chenxi.com.serialportjni.SerialPort2.4 建立jni目錄,將相應的介面 xx.h檔案複製到jni目錄下,並且建立同名.c檔案
2.5 編寫相應的介面函式
三、接下來編譯庫檔案,上面一開始提到,android studio 3.0在gradle3.0 不支援android.useDeprecatedNdk.
3.1 上網看,發現需要使用CMake, 因此需要下載CMake 和 LLDB

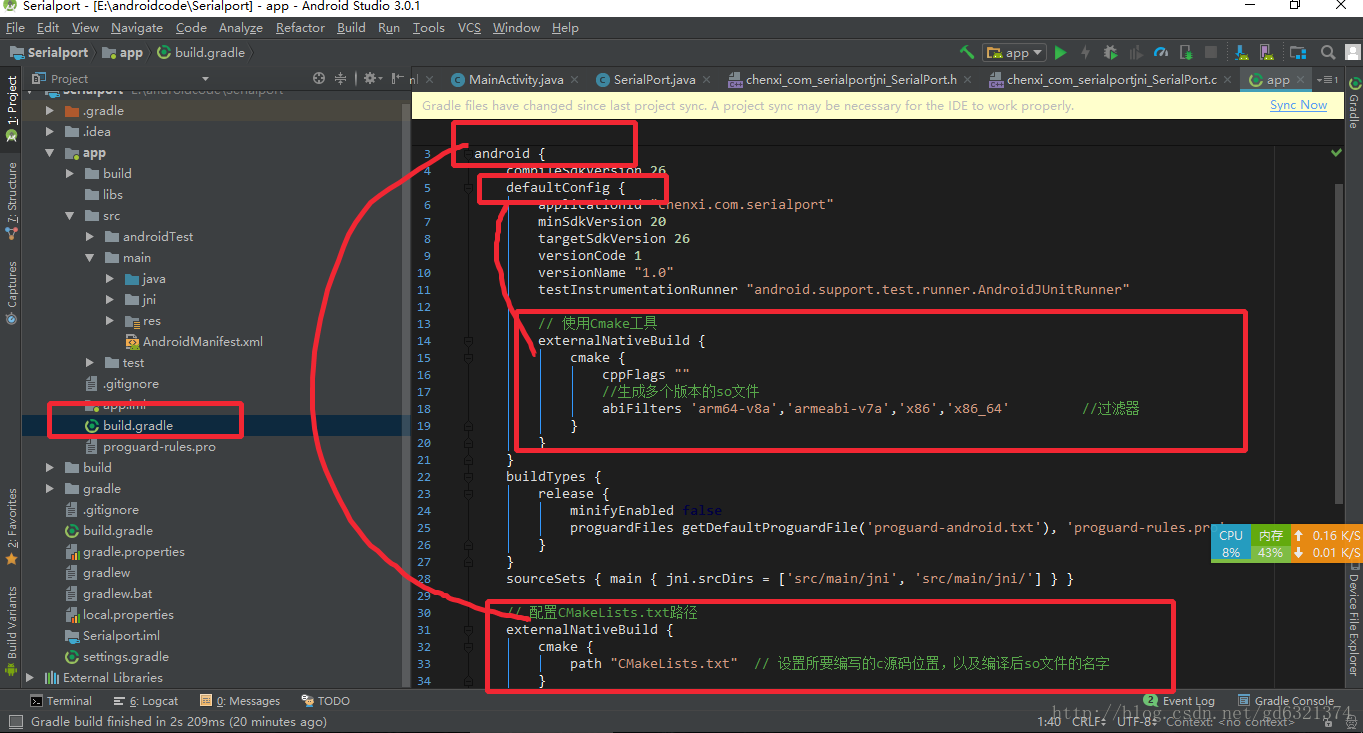
3.2 在工程目錄下的build.gradle的defaultConfig節點中加入
// 使用Cmake工具
    externalNativeBuild {
      cmake {
        cppFlags ""
        //生成多個版本的so檔案
        abiFilters 'arm64-v8a','armeabi-v7a','x86','x86_64'
      }
    }
3.3 在build.gradle的android節點中,加入:
// 配置CMakeLists.txt路徑
  externalNativeBuild {
    cmake {
      path "CMakeLists.txt"  // 設定所要編寫的c原始碼位置,以及編譯後so檔案的名字
    }
  }
3.4 新增CMakeLists.txt檔案到build.gradle檔案同級目錄下,具體內容如下:
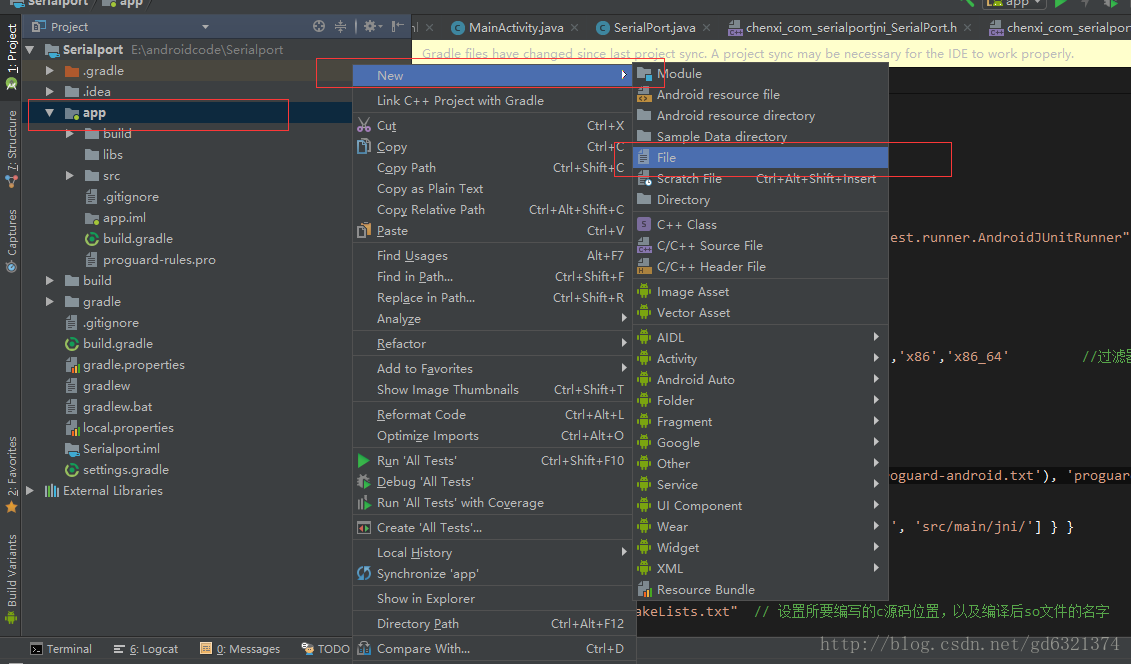
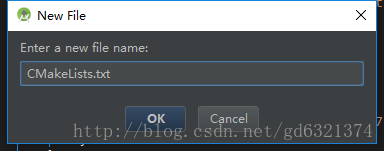
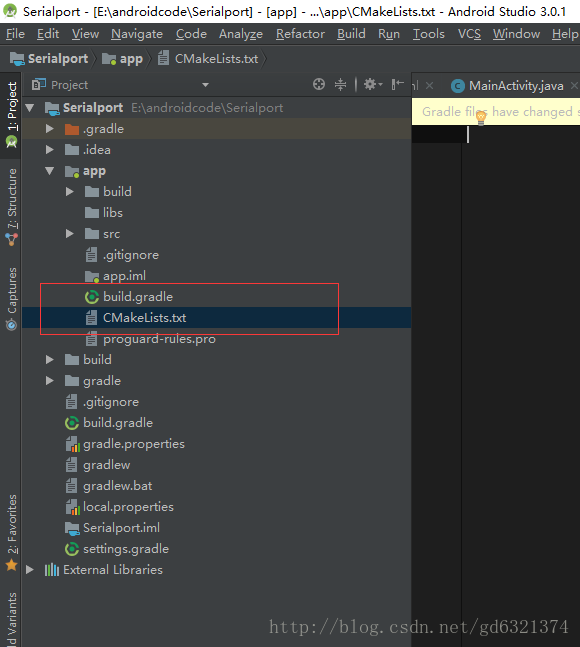
3.5 複製如下文字
# For more information about using CMake with Android Studio, read the
# documentation: https://d.android.com/studio/projects/add-native-code.html

# Sets the minimum version of CMake required to build the native library.
#CMakeLists.txt
cmake_minimum_required(VERSION 3.4.1)

# Creates and names a library, sets it as either STATIC
# or SHARED, and provides the relative paths to its source code.
# You can define multiple libraries, and CMake builds them for you.
# Gradle automatically packages shared libraries with your APK.

add_library( # Sets the name of the library.
      # 設定so檔名稱.
       serial_port

       # Sets the library as a shared library.
       SHARED
       # 設定這個so檔案為共享.

       # Provides a relative path to your source file(s).
       # 設定這個so檔案為共享.
       src/main/jni/chenxi_com_serialportjni_SerialPort.c)

# Searches for a specified prebuilt library and stores the path as a
# variable. Because CMake includes system libraries in the search path by
# default, you only need to specify the name of the public NDK library
# you want to add. CMake verifies that the library exists before
# completing its build.

find_library( # Sets the name of the path variable.
       log-lib

       # Specifies the name of the NDK library that
       # you want CMake to locate.
       log )

# Specifies libraries CMake should link to your target library. You
# can link multiple libraries, such as libraries you define in this
# build script, prebuilt third-party libraries, or system libraries.

target_link_libraries( # Specifies the target library.
            # 制定目標庫.
            serial_port

            # Links the target library to the log library
            # included in the NDK.
            ${log-lib} )
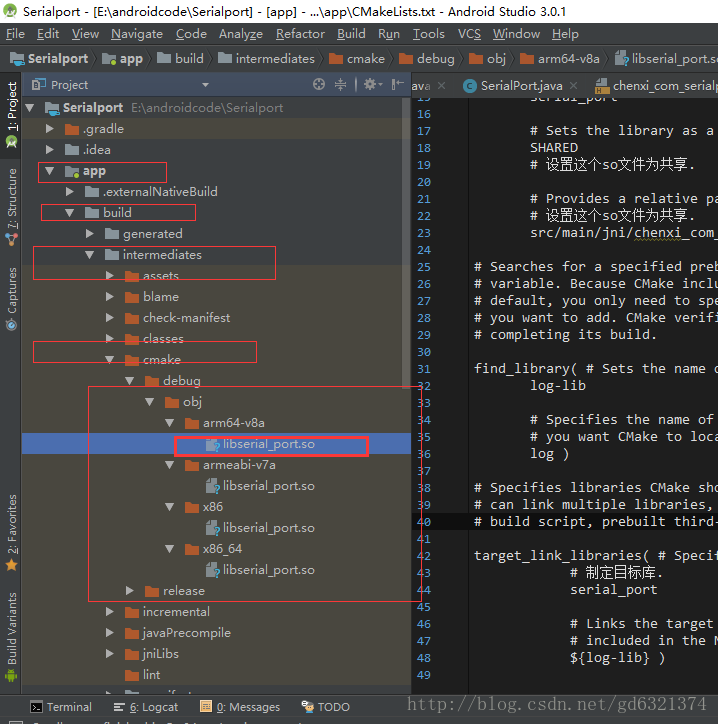
3.6 點選選單“Build - Make project”
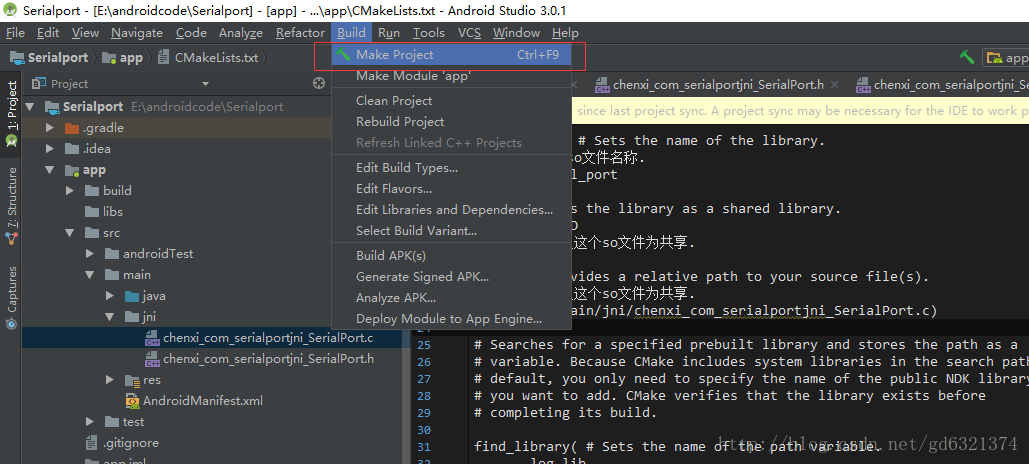
至此,我們所有的流程都做完了,下面來檢查一下我們的成果,見證奇蹟的時候到了:
OK, 記錄到此為止。