單臺伺服器安裝部署fastdfs
一、安裝依賴包:libevent
[root@test-heji-web-165-217 src]# yum -y install libevent二、安裝libfastcommon
[root@test-heji-web-165-217 src]# wget https://github.com/happyfish100/libfastcommon/archive/V1.0.35.tar.gz
[root@test-heji-web-165-217 src]# tar -zxvf V1.0.35.tar.gz
[root@test-heji-web-165-217 src]# cd libfastcommon-1.0.35 三、安裝FastDFS
[root@test-heji-web-165-217 src]# wget https://github.com/happyfish100/fastdfs/archive/V5.10.tar.gz
[root@test-heji-web-165-217 src]# tar -zxvf V5.10.tar.gz
[root@test-heji-web-165-217 src]# cd fastdfs-5.10/
[root@test-heji-web-165-217 fastdfs-5.10]# ./make.sh
[root@test-heji-web-165-217 fastdfs-5.10 安裝完成後的目錄:
1、服務指令碼
[[email protected] fastdfs-5.10]# ll /etc/init.d/ |grep fdfs
-rwxr-xr-x 1 root root   918 Oct 24 11:16 fdfs_storaged
-rwxr-xr-x 1 root root   920 Oct 24 11:16 fdfs_trackerd
2、配置檔案
[[email protected]165-217 fastdfs-5.10]# ll /etc/fdfs
-rw-r--r-- 1 root root 1461 Oct 24 11:16 client.conf.sample
-rw-r--r-- 1 root root 7927 Oct 24 11:16 storage.conf.sample
-rw-r--r-- 1 root root  105 Oct 24 11:16 storage_ids.conf.sample
-rw-r--r-- 1 root root 7389 Oct 24 11:16 tracker.conf.sample
3、命令列工具
[[email protected] fastdfs-5.10]# ll /usr/bin|grep fdfs
-rwxr-xr-x 1 root root 317456 Oct 24 11:16 fdfs_appender_test
-rwxr-xr-x 1 root root 317232 Oct 24 11:16 fdfs_appender_test1
-rwxr-xr-x 1 root root 304080 Oct 24 11:16 fdfs_append_file
-rwxr-xr-x 1 root root 303808 Oct 24 11:16 fdfs_crc32
-rwxr-xr-x 1 root root 304136 Oct 24 11:16 fdfs_delete_file
-rwxr-xr-x 1 root root 304872 Oct 24 11:16 fdfs_download_file
-rwxr-xr-x 1 root root 304464 Oct 24 11:16 fdfs_file_info
-rwxr-xr-x 1 root root 322384 Oct 24 11:16 fdfs_monitor
-rwxr-xr-x 1 root root 1111360 Oct 24 11:16 fdfs_storaged
-rwxr-xr-x 1 root root 327392 Oct 24 11:16 fdfs_test
-rwxr-xr-x 1 root root 326608 Oct 24 11:16 fdfs_test1
-rwxr-xr-x 1 root root 454000 Oct 24 11:16 fdfs_trackerd
-rwxr-xr-x 1 root root 305064 Oct 24 11:16 fdfs_upload_appender
-rwxr-xr-x 1 root root 306088 Oct 24 11:16 fdfs_upload_file
四、配置跟蹤伺服器(tracker server)
1、拷貝tracker server並重命名
[root@test-heji-web-165-217 fastdfs-5.10]# cp /etc/fdfs/tracker.conf.sample /etc/fdfs/tracker.conf
2、配置tracker server
#建立tracker server資料目錄
[root@test-heji-web-165-217 fastdfs-5.10]# mkdir -p /data/fastdfs/tracker

[root@test-heji-web-165-217 fastdfs-5.10]# vi /etc/fdfs/tracker.conf
修改如下:
base_path=/data/fastdfs/tracker
測試啟動tracker server,啟動成功會自動在/data/fastdfs/tracker目錄新建data和logs目錄:
[[email protected] fastdfs-5.10]# /etc/init.d/fdfs_trackerd start
Reloading systemd: [ OK ]
Starting fdfs_trackerd (via systemctl): [ OK ]
[[email protected] fastdfs-5.10]# ll /data/fastdfs/tracker/
total 8
drwxr-xr-x 2 root root 4096 Oct 24 11:30 data
drwxr-xr-x 2 root root 4096 Oct 24 11:30 logs
檢視是否有 tracker 程序:
[root@test-heji-web-165-217 fastdfs-5.10]# ps aux | grep tracker
root     23791  0.0  0.0  80000  1660 ?        Sl   11:30   0:00 /usr/bin/fdfs_trackerd /etc/fdfs/tracker.conf
root 24005 0.0 0.0 112664 972 pts/1 S+ 11:33 0:00 grep --color=auto tracker檢視22122埠使用:
[root@test-heji-web-165-217 fastdfs-5.10]# ss -lntup|grep 22122
tcp    LISTEN     0      1024      *:22122                 *:*                   users:(("fdfs_trackerd",pid=23791,fd=5))
五、配置儲存伺服器(storage server)
1、拷貝storage server樣例配置檔案並重命名
[root@test-heji-web-165-217 fastdfs-5.10]# cp /etc/fdfs/storage.conf.sample /etc/fdfs/storage.conf2、配置storage server
#建立storage server資料目錄
[[email protected]165-217 fastdfs-5.10]# mkdir -p /data/fastdfs/storage

#編輯storage server配置檔案storage.conf,需要修改內容如下:
[[email protected]165-217 fastdfs-5.10]# vi /etc/fdfs/storage.conf

base_path=/data/fastdfs/storage
tracker_server=139.199.165.217:22122
store_path0=/data/fastdfs/storage
測試啟動storage server,啟動成功會自動在/data/fastdfs/tracker目錄新建data和logs目錄(啟動storage server的前提是tracker server必須事先已啟動)
[root@test-heji-web-165-217 fastdfs-5.10]# /etc/init.d/fdfs_storaged start
Starting fdfs_storaged (via systemctl):                    [  OK  ]
[root@test-heji-web-165-217 fastdfs-5.10]# ll /data/fastdfs/storage/
total 8
drwxr-xr-x 187 root root 4096 Oct 24 11:58 data
drwxr-xr-x   2 root root 4096 Oct 24 11:57 logs
檢視是否有 storage 程序:
[root@test-heji-web-165-217 web_user]# ps aux | grep storage
root      6535  0.0  0.0 112664   976 pts/0    S+   14:39   0:00 grep --color=auto storage
root 26033 0.0 0.8 82164 66828 ? Sl 11:57 0:01 /usr/bin/fdfs_storaged /etc/fdfs/storage.conf檢視埠使用:
[root@test-heji-web-165-217 web_user]# ss -lntup|grep 23000
tcp    LISTEN     0      1024      *:23000                 *:*                   users:(("fdfs_storaged",pid=26033,fd=5))
六、配置client端
1、拷貝client樣例配置檔案並重命名
[root@test-heji-web-165-217 fastdfs-5.10]# cp /etc/fdfs/client.conf.sample /etc/fdfs/client.conf2、配置client
建立client端資料目錄:
[root@test-heji-web-165-217 web_user]# mkdir -p /data/fastdfs/client編輯client端的配置檔案client.conf,需要修改內容如下:
[[email protected] web_user]# vi /etc/fdfs/client.conf

base_path=/data/fastdfs/client
tracker_server=139.199.165.217:22122
七、檔案上傳測試
[root@test-heji-web-165-217 web_user]#  /usr/bin/fdfs_upload_file /etc/fdfs/client.conf /home/web_user/timg.jpg
group1/M00/00/00/Cmg3Alnu6LaAA8HpAALrljlEhos614.jpg
返回的檔案ID即說明檔案已經上傳成功,圖片的訪問地址為:139.199.165.217/group1/M00/00/00/Cmg3Alnu6LaAA8HpAALrljlEhos614.jpg.
現在圖片的訪問地址訪問不了,因為還沒裝 FastDFS 的 Nginx 模組fastdfs-nginx-module。
八、安裝fastdfs-nginx-module
檢視nginx已經安裝的擴充套件:
[[email protected]-heji-web-165-217 src]# /usr/local/nginx/sbin/nginx -V
configure arguments: --prefix=/usr/local/nginx --user=nginx --group=nginx --with-http_ssl_module --with-http_gzip_static_module --http-client-body-temp-path=/usr/local/nginx/tmp/client/ --http-proxy-temp-path=/usr/local/nginx/tmp/proxy/ --http-fastcgi-temp-path=/usr/local/nginx/tmp/fcgi/ --with-poll_module --with-file-aio --with-http_realip_module --with-http_addition_module --with-http_random_index_module --with-pcre --with-http_stub_status_module --with-stream[root@test-heji-web-165-217 src]# wget http://nchc.dl.sourceforge.net/project/fastdfs/FastDFS%20Nginx%20Module%20Source%20Code/fastdfs-nginx-module_v1.16.tar.gz
[root@test-heji-web-165-217 src]# tar -zxvf fastdfs-nginx-module_v1.16.tar.gz
[root@test-heji-web-165-217 src]# cd fastdfs-nginx-module/
[root@test-heji-web-165-217 fastdfs-nginx-module]# vi src/config
刪除local字眼:
複製fastdfs原始碼配置檔案:
[root@test-heji-web-165-217 fastdfs-nginx-module]# cp /usr/local/src/fastdfs-5.10/conf/http.conf  /etc/fdfs/
[root@test-heji-web-165-217 fastdfs-nginx-module]# cp /usr/local/src/fastdfs-5.10/conf/mime.types  /etc/fdfs/
拷貝fastdfs-nginx-module模組中配置檔案到/etc/fdfs目錄中並編輯
[[email protected] logs]# cp /usr/local/src/fastdfs-nginx-module/src/mod_fastdfs.conf  /etc/fdfs/
[[email protected] logs]# vi /etc/fdfs/mod_fastdfs.conf
#修改內容如下:
connect_timeout=10
base_path=/data/fastdfs/fastdfs-nginx-module
tracker_server=139.199.165.217:22122
url_have_group_name = true
store_path0=/data/fastdfs/storage
group_name=group1(預設配置為group1)

group_name=group1
storage_server_port=23000
store_path_count=1
store_path0=/data/fastdfs/storage建立目錄:
root@test-heji-web-165-217 logs]# mkdir -p /data/fastdfs/fastdfs-nginx-module進入nginx原始碼目錄:
[[email protected]-heji-web-165-217 ~]# cd nginx-1.10.1/
#重新編譯
[[email protected]-heji-web-165-217 nginx-1.10.1]# ./configure   --prefix=/usr/local/nginx --user=nginx --group=nginx --with-http_ssl_module --with-http_gzip_static_module --http-client-body-temp-path=/usr/local/nginx/tmp/client/ --http-proxy-temp-path=/usr/local/nginx/tmp/proxy/ --http-fastcgi-temp-path=/usr/local/nginx/tmp/fcgi/ --with-poll_module --with-file-aio --with-http_realip_module --with-http_addition_module --with-http_random_index_module --with-pcre --with-http_stub_status_module --with-stream --add-module=/usr/local/src/fastdfs-nginx-module/src
[[email protected]-heji-web-165-217 nginx-1.10.1]# make關閉nginx:
[root@test-heji-web-165-217 nginx-1.10.1]# service nginx stop
Stopping nginx daemon: nginx.備份舊的nginx程式:
[root@test-heji-web-165-217 fastdfs-nginx-module]# cp /usr/local/nginx/sbin/nginx /usr/local/nginx/sbin/nginx.bak把新的nginx程式覆蓋舊的:
[[email protected] nginx-1.10.1]# cp objs/nginx /usr/local/nginx/sbin/nginx
cp: overwrite ‘/usr/local/nginx/sbin/nginx’? y
測試新的nginx程式是否正確:
[[email protected]165-217 nginx-1.10.1]# /usr/local/nginx/sbin/nginx -t
nginx: the configuration file /usr/local/nginx/conf/nginx.conf syntax is ok
nginx: configuration file /usr/local/nginx/conf/nginx.conf test is successful
平滑重啟nginx:
[[email protected] nginx-1.10.1]# /usr/local/nginx/sbin/nginx -s reload
nginx: [error] invalid PID number “” in “/usr/local/nginx/logs/nginx.pid”
解決方法:
[root@test-heji-web-165-217 nginx-1.10.1]#  /usr/local/nginx/sbin/nginx -c /usr/local/nginx/conf/nginx.conf
[root@test-heji-web-165-217 nginx-1.10.1]# /usr/local/nginx/sbin/nginx -s reload
 [root@test-heji-web-165-217 nginx-1.10.1]# ps -ef | grep nginx
root     17769     1  0 16:21 ?        00:00:00 nginx: master process /usr/local/nginx/sbin/nginx -c /usr/local/nginx/conf/nginx.conf
root 17792 8456 0 16:21 pts/0 00:00:00 grep --color=auto nginx 檢視ngixn版本極其編譯引數:
[[email protected]-heji-web-165-217 nginx-1.10.1]# /usr/local/nginx/sbin/nginx -V
nginx version: nginx/1.10.1
built by gcc 4.8.5 20150623 (Red Hat 4.8.5-16) (GCC)
built with OpenSSL 1.0.2k-fips  26 Jan 2017
TLS SNI support enabled
configure arguments: --prefix=/usr/local/nginx --user=nginx --group=nginx --with-http_ssl_module --with-http_gzip_static_module --http-client-body-temp-path=/usr/local/nginx/tmp/client/ --http-proxy-temp-path=/usr/local/nginx/tmp/proxy/ --http-fastcgi-temp-path=/usr/local/nginx/tmp/fcgi/ --with-poll_module --with-file-aio --with-http_realip_module --with-http_addition_module --with-http_random_index_module --with-pcre --with-http_stub_status_module --with-stream --add-module=/usr/local/src/fastdfs-nginx-module/src
九、配置nginx配置檔案
[root@test-heji-web-165-217 nginx-1.10.1]# vi /usr/local/nginx/conf/nginx.conf
#編輯如下:
 server_name  139.199.165.217;
 # 攔截包含 /group1/M00 請求,使用 fastdfs 這個Nginx模組進行轉發
    location ~/group[0-9]/M00  {
            ngx_fastdfs_module;
}測試配置檔案是否配置正確:
[[email protected]165-217 nginx-1.10.1]# /usr/local/nginx/sbin/nginx -t
ngx_http_fastdfs_set pid=20347
nginx: the configuration file /usr/local/nginx/conf/nginx.conf syntax is ok
nginx: configuration file /usr/local/nginx/conf/nginx.conf test is successful
重啟nginx:
[[email protected]165-217 nginx-1.10.1]# service nginx restart
Restarting nginx daemon: nginxngx_http_fastdfs_set pid=20438
ngx_http_fastdfs_set pid=20439
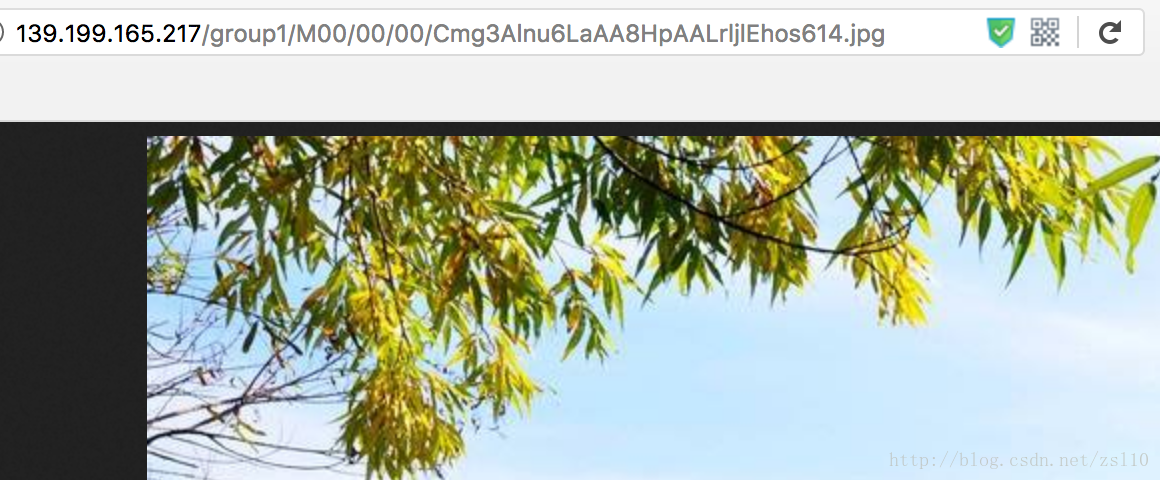
.十、訪問圖片
訪問上一步生成的圖片地址為:
139.199.165.217/group1/M00/00/00/Cmg3Alnu6LaAA8HpAALrljlEhos614.jpg