
使用Remix OS作為X86 Android系統開發OS
源起
在開發過程中,有需要X86上面的方案,因為Nexus Player還沒有到,身邊又沒有其他Intel Android裝置,想到PC就是X86(以及X86_64),為了趕時間,因此決定使用筆記本(MacBook Pro)來安裝一個Android X86系統,用來開發。
根據記憶,下載了Remix OS並安裝到了U盤,啟動,發現確實可以正常使用藍芽連線BLE Periphiral,因此決定就用這個系統。
squashfs的解壓
這篇部落格開始是使用X86_64,後面是X86版本的OS,這兩者的squashfs的壓縮方式不一樣,32Bit的OS需要在官網切換到English之後才可以選擇下載。
Ubuntu 14.04中的unsquashfs版本為4.2,而且支援的compression只有gzip等幾種:
$ unsquashfs -version
unsquashfs version 4.2-git (2013/03/13)
copyright (C) 2013 Phillip Lougher <[email protected]>

This program is free software; you can redistribute it and/or
modify it under the terms of the GNU General Public License
as published by the Free Software Foundation; either version 2,
or (at your option) any later version.

This program is distributed in the hope that it will be useful,
but WITHOUT ANY WARRANTY; without even the implied warranty of
MERCHANTABILITY or FITNESS FOR A PARTICULAR PURPOSE.  See the
GNU General Public License for more details.
unsquashfs system.sfs
Filesystem uses unknown compression, this is unsupported by this version
Decompressors available:
	gzip
	lzo
	xz
可以看到不支援lz4,lzma,所以需要自己去下載最新的來編譯。可以參考:
具體而言就是下載解壓,然後修改Makefile將comment掉的各種support uncomment,然後安裝對應的lib,例如:
sudo apt-get install liblzo2-devsudo apt-get install liblz4-dev
sudo apt-get install liblzma-dev然後就可以解壓了:
 ./unsquashfs /media/hexiongjun/REMIXOSSYS/system.sfs
Parallel unsquashfs: Using 8 processors
1 inodes (20480 blocks) to write

[==========================================================================================================================================================================================\] 20480/20480 100%

created 1 files
created 1 directories
created 0 symlinks
created 0 devices
created 0 fifos
檔案組織安排
U盤個分為了三個可mount分割槽

然後有一個啟動分割槽,其實這個是EFI啟動檔案放置位置:
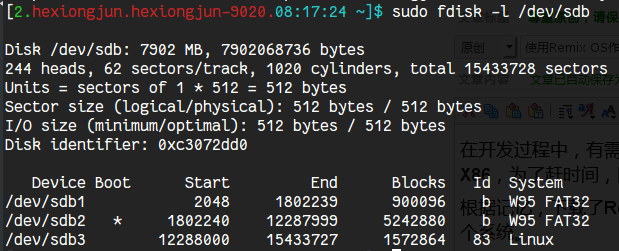
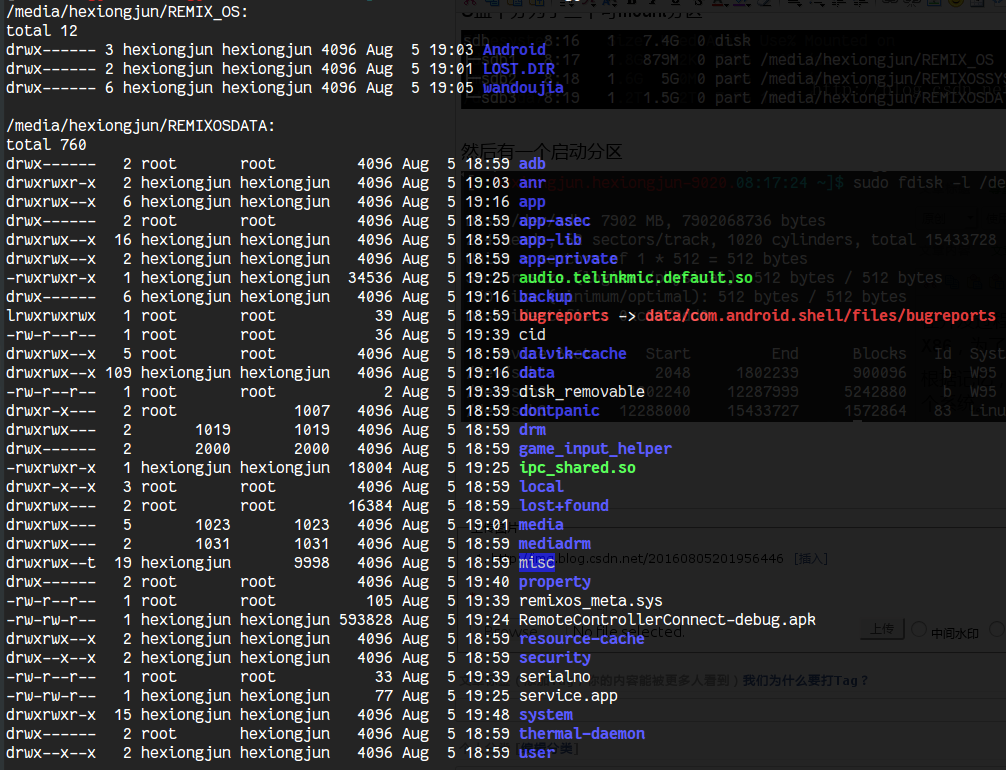
這三個分割槽的內容如下
一個OS分割槽放著系統檔案
一個data分割槽最後會mount到data分割槽
還有一個啟動的分割槽,見前面fdisk結果
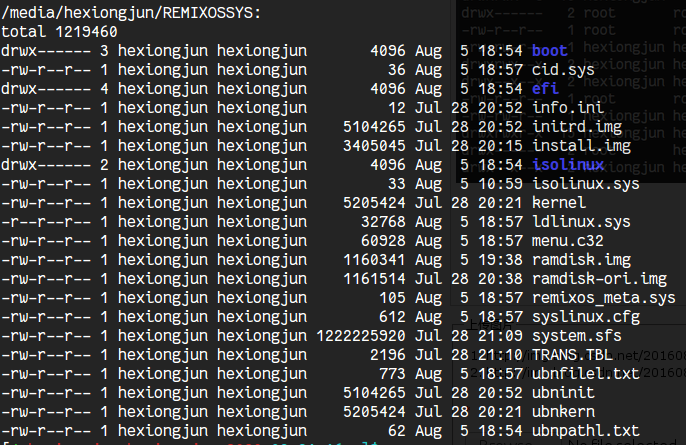
可以看到這裡面有一個ramdisk.img,這個就是X86 android的init ramdisk了,因此如果我們需要更改一些許可權或者init.rc那麼就需要更改檔案。
ramdisk.img的更改
按照普通的cpio init ramdisk的修改方式即可,常用命令如下:
repack:
find . | cpio -o -c | gzip > ../ramdisk_shm1.imgfind . | cpio -H newc -o | gzip > ../uramdisk.cpio.gzextrack:
mkdir ram && cd ram && gunzip -c ../ramdisk.img | cpio -isystem分割槽的修改
這個比較麻煩,因為不是接ext4 fs,而是一個system.sfs檔案,這個檔案是Squashfs的檔案,然後裡面是ext4的system.img

因此第一步我們需要使用對應的工具解包,我們不能直接mount,因為mount的話是ro的,無法rw:

然後產生一個squashfs-root的目錄,這個目錄裡面就是system.img,然後我們mount起來就可以修改檔案內容了。
修改完成後還需要重新制作成squashfs檔案,注意裡面的blocksize為從file資訊獲取的:
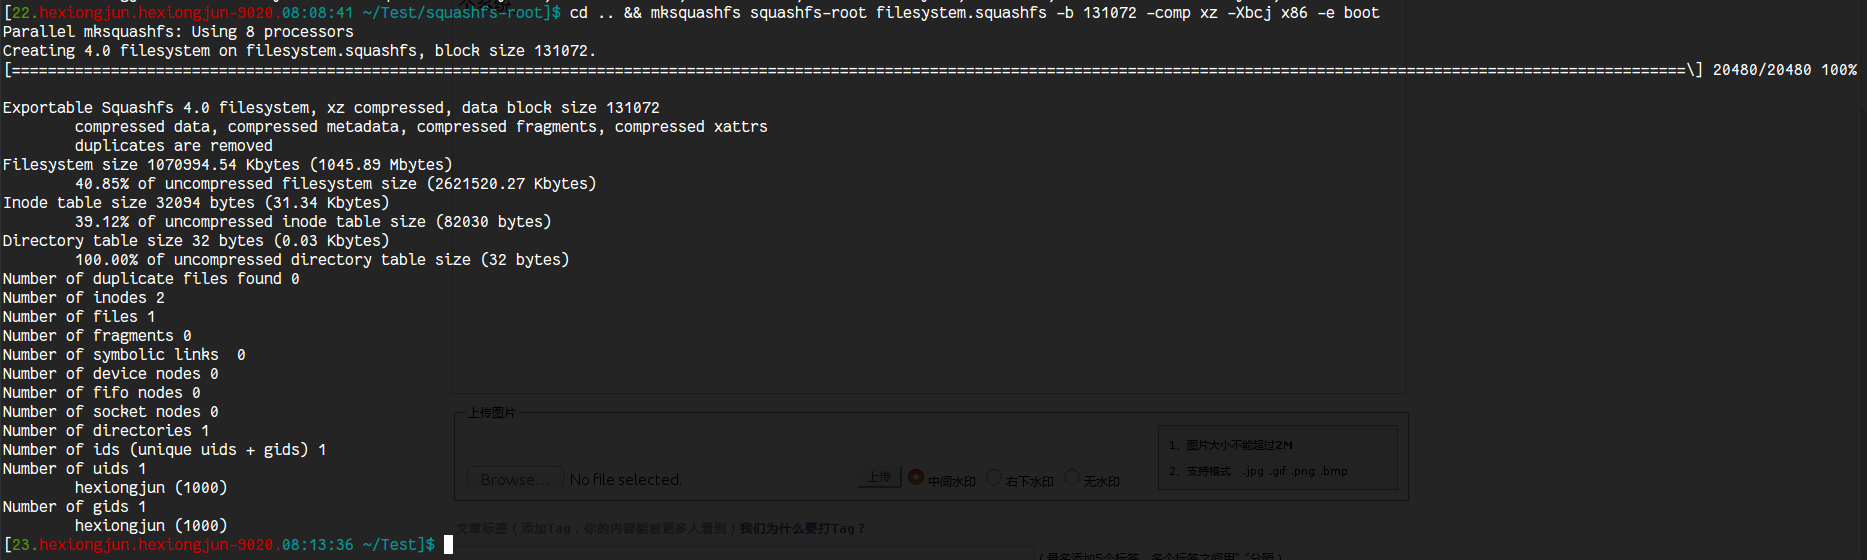
然後就可以使用了。
關於許可權
selinux的許可權問題
新版本的OS中使用getenforece檢視發現是disable的,從cmdline中也可以看出。
su的許可權問題
預設程式碼有su,所以也不是問題
工具
安裝termux,然後apt update,就可以類似Ubuntu一樣,使用apt install vim類似的命令來安裝各種軟體包了,非常方便。
X64 VS X32的兩套庫
在64Bit上面有兩套庫了:

參考:
http://forum.xda-developers.com/remix/remix-os/remix-os-installation-rooting-t3293769