
popupwindow從螢幕右上角彈出
阿新 • • 發佈:2018-12-31
先看下效果圖:
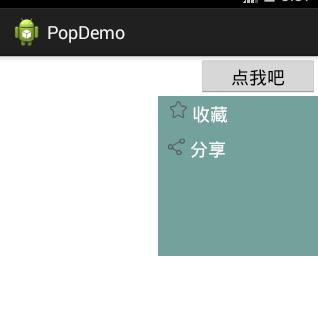
首先需要繼承PopuWindow來自定義我們自己想要的結果,PopwinShare就是我們自定義的,程式碼如下
public class PopWinShare extends PopupWindow {

	private View mainView;
	private LinearLayout layoutCollect, layoutShare;

	public PopWinShare(Activity paramActivity,
			View.OnClickListener paramOnClickListener, int paramInt1,
			int paramInt2) {
		super(paramActivity);
		//窗口布局
		mainView = LayoutInflater.from(paramActivity).inflate(
				R.layout.popwin_layout, null);
		//收藏佈局
		layoutCollect = ((LinearLayout) mainView.findViewById(R.id.ll_collect));
		//分享佈局
		layoutShare = (LinearLayout) mainView.findViewById(R.id.ll_share);
		 //設定每個子佈局的事件監聽器
		if (paramOnClickListener != null) {
			layoutCollect.setOnClickListener(paramOnClickListener);
			layoutShare.setOnClickListener(paramOnClickListener);
		}
		setContentView(mainView);
		//設定寬度
		setWidth(paramInt1);
		//設定高度
		setHeight(paramInt2);
		 //設定顯示隱藏動畫
		setAnimationStyle(R.style.AnimTools);
		//設定背景透明
		setBackgroundDrawable(new ColorDrawable(0));
	}
}
裡面提供了一個構造方法,包含四個引數,第一個引數是上下文的activity,第二個是選單的點選事件,從外邊傳遞進來的,要繫結給每一行的選單,具體的事件實現當然要寫在activity中,後面兩個分別是彈出視窗的寬度和高度。裡面還包含了一個動畫樣式,視窗開啟和關閉時出現動畫的樣式。
採用線性佈局,因為裡面是一行一行豎排的選單,線性佈局更容易控制。大布局裡面放了兩個垂直排列的線性佈局,每個線性佈局中分別有橫向排列的imageview和textview,很簡單的佈局。大布局的背景用了一個圖片,當然也可以自定義一些其他顏色。<?xml version="1.0" encoding="utf-8"?> <LinearLayout xmlns:android="http://schemas.android.com/apk/res/android" android:layout_width="wrap_content" android:layout_height="wrap_content" android:background="#99256663" android:orientation="vertical" > <LinearLayout android:id="@+id/ll_collect" android:layout_width="wrap_content" android:layout_height="wrap_content" android:orientation="horizontal" android:padding="5dp" > <ImageView android:layout_width="wrap_content" android:layout_height="wrap_content" android:layout_marginLeft="7dp" android:scaleType="fitCenter" android:src="@drawable/icon_collect" /> <TextView android:layout_width="wrap_content" android:layout_height="wrap_content" android:layout_marginLeft="5dp" android:text="收藏" android:textColor="#ffffff" android:textSize="18sp" /> </LinearLayout> <LinearLayout android:id="@+id/ll_share" android:layout_width="wrap_content" android:layout_height="wrap_content" android:orientation="horizontal" android:padding="5dp" > <ImageView android:layout_width="wrap_content" android:layout_height="wrap_content" android:layout_marginLeft="5dp" android:scaleType="fitCenter" android:src="@drawable/icon_share" /> <TextView android:layout_width="wrap_content" android:layout_height="wrap_content" android:layout_marginLeft="5dp" android:text="分享" android:textColor="#ffffff" android:textSize="18sp" /> </LinearLayout> </LinearLayout>
對了,貼一下我們要用的縮放動畫,用於PopuWindow顯示和消失的時候:
首先是 push_in,xml:
<?xml version="1.0" encoding="utf-8"?>
 <scale   xmlns:android="http://schemas.android.com/apk/res/android"
        android:interpolator="@android:anim/accelerate_decelerate_interpolator"
        android:fromXScale="1.0"
        android:toXScale="1.0"
        android:fromYScale="0"
        android:toYScale="1.0"
        android:pivotX="0"
        android:pivotY="10%"
        android:duration="200" />
其次是push_out.xml
<?xml version="1.0" encoding="utf-8"?>
<scale   xmlns:android="http://schemas.android.com/apk/res/android"
        android:interpolator="@android:anim/accelerate_decelerate_interpolator"
        android:fromXScale="1.0"
        android:toXScale="1.0"
        android:fromYScale="1.0"
        android:toYScale="0"
        android:pivotX="0"
        android:pivotY="10%"
        android:duration="200" />
然後再styles.xml中進行宣告呼叫即可:
    <style name="AnimTools" parent="@android:style/Animation">
      <item name="android:windowEnterAnimation">@anim/push_in</item>
      <item name="android:windowExitAnimation">@anim/push_out</item>
  </style>
最後看看我們的MainActivity中的程式碼:
public class MainActivity extends Activity implements OnClickListener {

	private Button bt;
	private PopWinShare popWinShare;

	@Override
	protected void onCreate(Bundle savedInstanceState) {
		super.onCreate(savedInstanceState);
		setContentView(R.layout.activity_main);
		bt = (Button) findViewById(R.id.bt);
		bt.setOnClickListener(this);
	}

	@Override
	public void onClick(View v) {

		switch (v.getId()) {
		case R.id.bt:
			if (popWinShare == null) {
				// 自定義的單擊事件
				OnClickLintener paramOnClickListener = new OnClickLintener();
				popWinShare = new PopWinShare(MainActivity.this,
						paramOnClickListener, UIUtils.dip2px(160),
						UIUtils.dip2px(160));
				// 監聽視窗的焦點事件,點選視窗外面則取消顯示
				popWinShare.getContentView().setOnFocusChangeListener(
						new View.OnFocusChangeListener() {

							@Override
							public void onFocusChange(View v, boolean hasFocus) {
								if (!hasFocus) {
									popWinShare.dismiss();
								}
							}
						});
			}
			//設定預設獲取焦點
			popWinShare.setFocusable(true);
			//以某個控制元件的x和y的偏移量位置開始顯示視窗
			popWinShare.showAsDropDown(bt, 0, 0);
			//如果視窗存在,則更新
			popWinShare.update();
			break;

		default:
			break;
		}
	}

	class OnClickLintener implements OnClickListener {

		@Override
		public void onClick(View v) {
			switch (v.getId()) {
			case R.id.ll_collect:

				break;
			case R.id.ll_share:

				break;

			default:
				break;
			}

		}

	}

}
每個子選單的單擊事件用了自定義內部類,在裡面就可以寫每個子選單的單擊事件了,另外就是用到了dip向px轉換的工具類,這個容易,網上有程式碼,就不貼出來了,下面給出了。。。。。