
小程式登入頁驗證
阿新 • • 發佈:2018-12-31
最近在做小程式,需要實現賬號密碼登入,
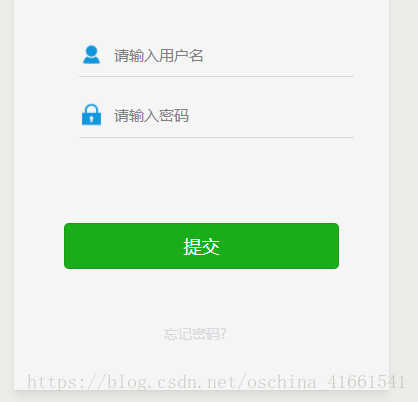
前端頁面:
<!--pages/index/login/login.wxml-->
<view class='pages'>
  <view class='weui-cell-header'>
    <image class='img' src='/static/img/1.png'/>
    <text class='weui-fl'>登入</text>
  </view>
<form bindsubmit='formSubmit' report-submit='true'>
  <view class='box'>
    <view class='section'>
    <view class='section-box'>
    <image class='section-img' src='/static/img/ren.png'/>
    </view>
      <input placeholder='請輸入使用者名稱' name="username" bindblur='togetUsername'  value="" />
    </view>
    <view class='section'>
     <view class='section-box'>
    <image class='section-img' src='/static/img/m.png'/>
    </view>
      <input password='true' bindblur='togetPassword' name="password" placeholder='請輸入密碼'  value="" />
    </view>
    <view class='button'>
     <button type="primary" formType='submit' bindtap='tj'> 提交</button>
    </view>
    </view>
  </form>
    <view class='fpwd' bindtap='findpwd'>
      <text>忘記密碼?</text>
    </view>
</view>
js:
// pages/index/login/login.js
var call=require('../../utils/request.js');
Page({

  /**
   * 頁面的初始資料
   */
  data: {
    username:'',

  },

  /**
   * 生命週期函式--監聽頁面載入
   */
  onLoad: function (options) {
    wx.clearStorage()

  },

  /**
   * 生命週期函式--監聽頁面初次渲染完成
   */
  onReady: function () {

  },

  /**
   * 生命週期函式--監聽頁面顯示
   */
  onShow: function () {

  },

  /**
   * 生命週期函式--監聽頁面隱藏
   */
  onHide: function () {

  },

  /**
   * 生命週期函式--監聽頁面解除安裝
   */
  onUnload: function () {

  },

  /**
   * 頁面相關事件處理函式--監聽使用者下拉動作
   */
  onPullDownRefresh: function () {

  },

  /**
   * 頁面上拉觸底事件的處理函式
   */
  onReachBottom: function () {

  },

  /**
   * 使用者點選右上角分享
   */
  onShareAppMessage: function () {

  },
  togetUsername:function(e){
    this.setData({
      username: e.detail.value,
    })
    console.log(e.detail.value)
  },
  togetPassword:function(e){
    // this.setData({
    //   password: Md5.hexMD5(e.detail.value)
    // })
    console.log(e.detail.value)
  },
  formSubmit: function (e) {
    var that=this;
    // var options=e.detail.value
    // console.log('form發生了submit事件,攜帶資料為:', e.detail.value)
    call.request('login/index', e.detail.value, that.shuffleSuc, that.fail);

  },
  shuffleSuc: function (data) {
    console.log(data)
    var areanum=data.user1.areanum
    wx.setStorageSync("areanum",areanum)
    if(data.code==0){
      wx.redirectTo({
        url: '../information/information',
      })
    }
    else{
      wx.showToast({
        title: data.msg,
        image: '/static/img/close.png',
      })
    }
  },
  // tj:function(e){
  //   wx.navigateTo({
  //     url: '../information/information',
  //   })
  // },
  fail: function () {
    // console.log("失敗")
  },
})
寫完之後要與後臺互動,後臺我用的是jeeweb,所要要先去理解mybatis或者mybatis-plus的API,我這裡直接上程式碼:
package com.zlf.modules.xcx.controller;

import com.zlf.core.security.shiro.authz.annotation.RequiresPathPermission;
import com.zlf.modules.sys.entity.User;
import com.zlf.modules.sys.service.IUserService;
import org.apache.shiro.crypto.hash.SimpleHash;
import org.apache.shiro.util.ByteSource;
import org.springframework.stereotype.Controller;
import org.springframework.web.bind.annotation.RequestMapping;
import org.springframework.web.bind.annotation.RequestMethod;
import org.springframework.web.bind.annotation.ResponseBody;

import javax.annotation.Resource;
import javax.servlet.http.HttpServletRequest;
import javax.servlet.http.HttpServletResponse;
import java.util.HashMap;
import java.util.Map;


@Controller
@RequestMapping("${admin.url.prefix}/xcx/login")
@RequiresPathPermission("xcx:login")
public class XLoginController {
    @Resource
    private IUserService userService;
    @ResponseBody
    @RequestMapping(value = "index", method = { RequestMethod.GET, RequestMethod.POST })
    public Map Login( User user, HttpServletRequest request, HttpServletResponse httpServletResponse) {
        User user1 = userService.login(user.getUsername(), null);
        Map m=new HashMap();
        String msg="使用者名稱不存在!";int code=1;
        //code 1:使用者名稱不存在 2 密碼錯誤 0登入成功
        if (null!=user1) {
            user.setSalt(user1.getSalt());
         //密碼加密處理
            String newPassword = new SimpleHash("md5", user.getPassword(),
                    ByteSource.Util.bytes(user.getCredentialsSalt()), 2).toHex();
            if(newPassword.equals(user1.getPassword())){
                msg="登入成功!";
                code=0;
            }else{
                msg="密碼錯誤!";
                code=2;
            }

        }
        m.put("msg",msg);
        m.put("code",code);
        m.put("user1",user1);
        return m;
    }
}
後臺大致的原理是,由小程式傳過來的使用者名稱和密碼,然後通過使用者名稱查詢一條資料,然後新的密碼通過使用者名稱進行加密,把傳過來的密碼和加密生成的密碼進行對比,成功就允許登入,失敗就不通過,大致就是這個原理