
基於xml的兩種依賴注入方式(建構函式注入,setter注入)
阿新 • • 發佈:2018-12-31
概述
Spring中依賴注入dependency injection(DI)一般來說有兩種形式: 1)基於xml的依賴注入, 2)基於註解的依賴注入。 基於xml的依賴注入方式通常又可以分為:1)建構函式方式注入。2)setter方式注入。環境
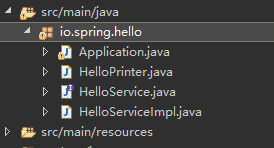
Spring4.3.9, JDK1.8 pom新增spring依賴如下:一個包就夠了。 測試專案結構:<dependency> <groupId>org.springframework</groupId> <artifactId>spring-context</artifactId> <version>4.3.9.RELEASE</version> </dependency>
 目的:將HelloService的例項HelloServiceImpl注入到HelloPrinter中並在Application中通過容器取出來使用。
程式碼如下:
HelloService介面
目的:將HelloService的例項HelloServiceImpl注入到HelloPrinter中並在Application中通過容器取出來使用。
程式碼如下:
HelloService介面
public interface HelloService {
	String sayHello();
}public class HelloServiceImpl implements HelloService {
public String sayHello() {
return "hello";
}
}
HelloPrinter類(未完成版本,在這裡使用不同的方法依賴注入)
Application類public class HelloPrinter { private HelloService helloService; public void print() { System.out.println(helloService.sayHello()); } }
public class Application {

	public static void main(String[] args) {
		ApplicationContext context = new ClassPathXmlApplicationContext("spring.xml");
		HelloPrinter printer = (HelloPrinter) context.getBean("helloPrinter");
		printer.print();
	}
}
依賴注入
建構函式方式
單個引數
HelloPrinter類:添加了建構函式,同時通過建構函式初始化helloServicepublic class HelloPrinter { private HelloService helloService; public HelloPrinter(HelloService helloService) { this.helloService = helloService; } public void print() { System.out.println(helloService.sayHello()); } }
spring.xml配置(以下helloService的配置省略):
<?xml version="1.0" encoding="UTF-8"?>
<beans xmlns="http://www.springframework.org/schema/beans"
    xmlns:xsi="http://www.w3.org/2001/XMLSchema-instance"
    xmlns:context="http://www.springframework.org/schema/context"
    xsi:schemaLocation="http://www.springframework.org/schema/beans
        http://www.springframework.org/schema/beans/spring-beans.xsd
        http://www.springframework.org/schema/context
        http://www.springframework.org/schema/context/spring-context.xsd">

    <bean id="helloService" class="io.spring.hello.HelloServiceImpl" />

    <bean id="helloPrinter" class="io.spring.hello.HelloPrinter">
        <constructor-arg ref="helloService" />
    </bean>

</beans>hello多個引數
1. 按照順序注入 HelloPrinter類:public class HelloPrinter {
private HelloService helloService;
public HelloPrinter(HelloService helloService, String s1, String s2, int id) {
this.helloService = helloService;
System.out.println(s1 + s2 + id);
}
public void print() {
System.out.println(helloService.sayHello());
}
}xml配置:
<bean id="helloService" class="io.spring.hello.HelloServiceImpl" />

<bean id="helloPrinter" class="io.spring.hello.HelloPrinter">
    <constructor-arg ref="helloService" />
    <constructor-arg value="aaa"/>
    <constructor-arg value="bbb"/>
    <constructor-arg value="123"/>
</bean>aaabbb123
hellopublic class HelloPrinter {
private HelloService helloService;
public HelloPrinter(HelloService helloService, String s, int id) {
this.helloService = helloService;
System.out.println(s + id);
}
public void print() {
System.out.println(helloService.sayHello());
}
}xml配置
<bean id="helloService" class="io.spring.hello.HelloServiceImpl" />
<bean id="helloPrinter" class="io.spring.hello.HelloPrinter">
<constructor-arg type="int" value="123"/>
<constructor-arg type="io.spring.hello.HelloService" ref="helloService" />
<constructor-arg type="java.lang.String" value="aaa"/>
</bean>aaa123
hello3. 按照name注入
HelloPrinter
public class HelloPrinter {

	private HelloService helloService;

	public HelloPrinter(HelloService helloService, String s, int id) {
		this.helloService = helloService;
		System.out.println(s + id);
	}

	public void print() {
		System.out.println(helloService.sayHello());
	}

}
<bean id="helloPrinter" class="io.spring.hello.HelloPrinter">
<constructor-arg name="id" value="123"/>
<constructor-arg name="helloService" ref="helloService" />
<constructor-arg name="s" value="aaa"/>
</bean>aaa123
hello4. 按照index注入
HelloPrinter
public class HelloPrinter {

	private HelloService helloService;

	public HelloPrinter(HelloService helloService, String s, int id) {
		this.helloService = helloService;
		System.out.println(s + id);
	}

	public void print() {
		System.out.println(helloService.sayHello());
	}

}<bean id="helloPrinter" class="io.spring.hello.HelloPrinter">
<constructor-arg index="2" value="123"/>
<constructor-arg index="0" ref="helloService" />
<constructor-arg index="1" value="aaa"/>
</bean>setter注入
HelloPrinterpublic class HelloPrinter {
private HelloService helloService;
private String s;
private int id;
public void setHelloService(HelloService helloService) {
this.helloService = helloService;
}
public void setS(String s) {
this.s = s;
}
public void setId(int id) {
this.id = id;
}
public void print() {
System.out.println(helloService.sayHello() + s + id);
}
}xml配置:
<bean id="helloPrinter" class="io.spring.hello.HelloPrinter">
    <property name="helloService" ref="helloService" />
    <property name="s" value="hhhh" />
    <property name="id" value="123123" />
</bean>hellohhhh123123注意:使用構造器注入方式不能出現迴圈的依賴注入 例:
<bean id="helloService" class="io.spring.hello.HelloServiceImpl">
    <constructor-arg name="helloPrinter" ref="helloPrinter" />
</bean>

<bean id="helloPrinter" class="io.spring.hello.HelloPrinter">
    <constructor-arg name="helloService" ref="helloService" />
</bean>Error creating bean with name 'helloService': Requested bean is currently in creation: Is there an unresolvable circular reference?