使用IDEA建立SpringBoot專案
阿新 • • 發佈:2018-12-31
參考:
慕課網 廖師兄:兩小時學會Springboot
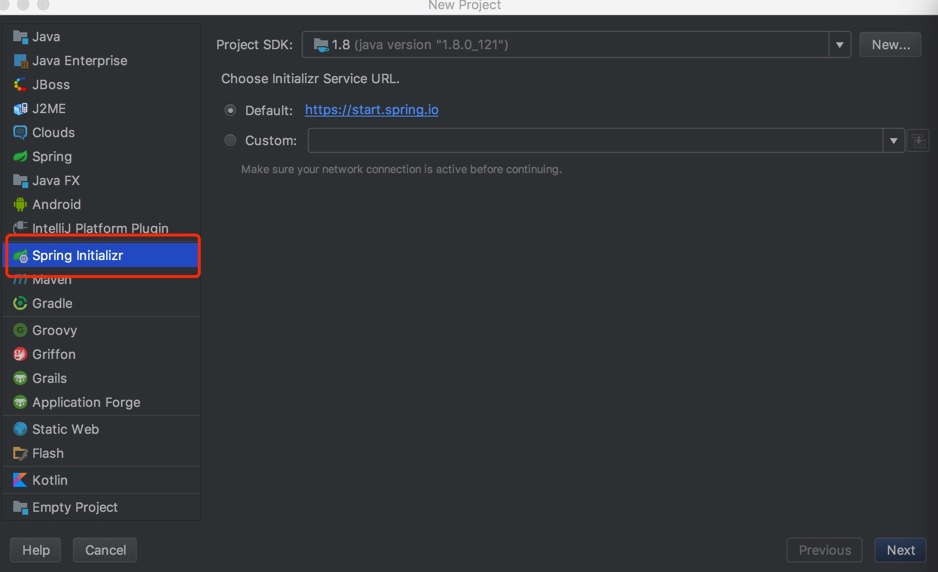
1.開啟IDEA,建立新專案,選擇Spring Initializr
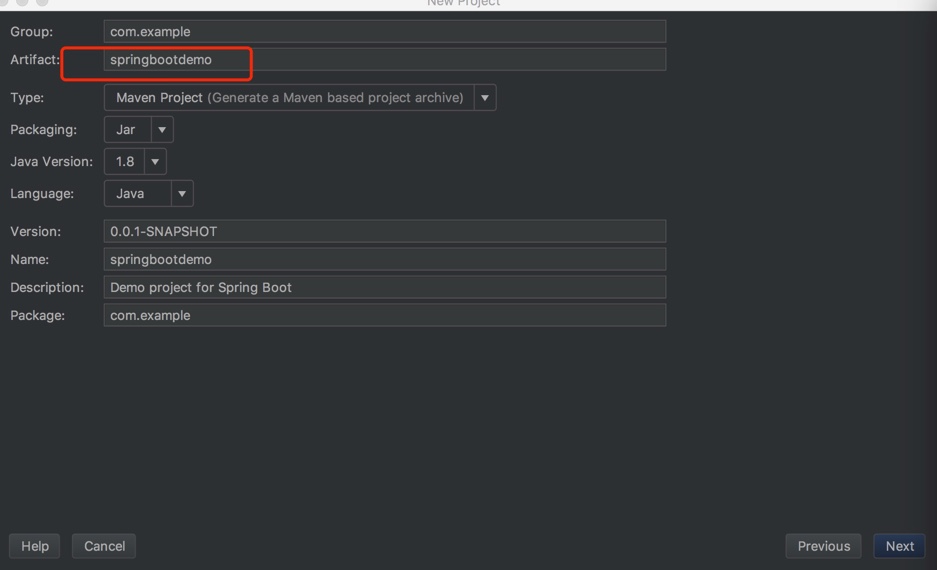
2.輸入Artifact
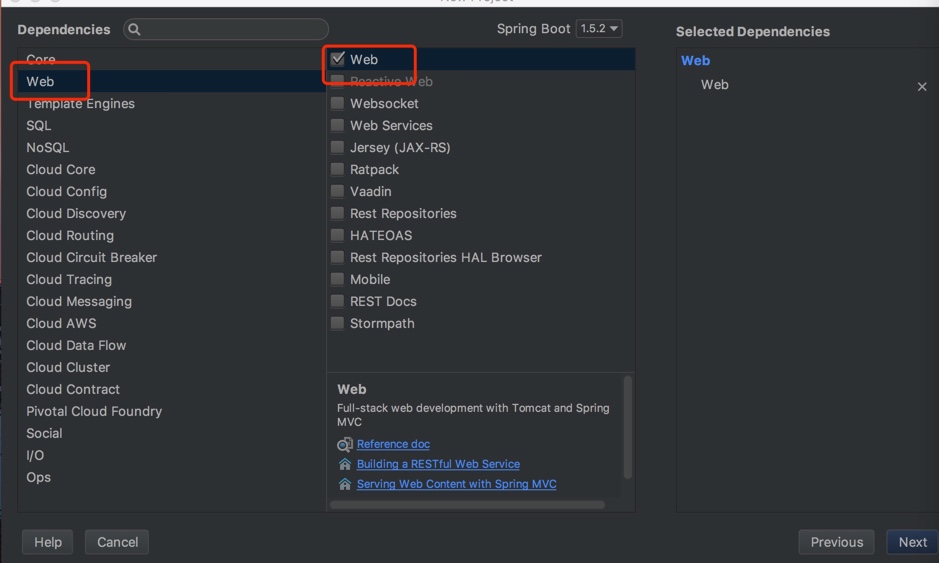
3.勾選Web
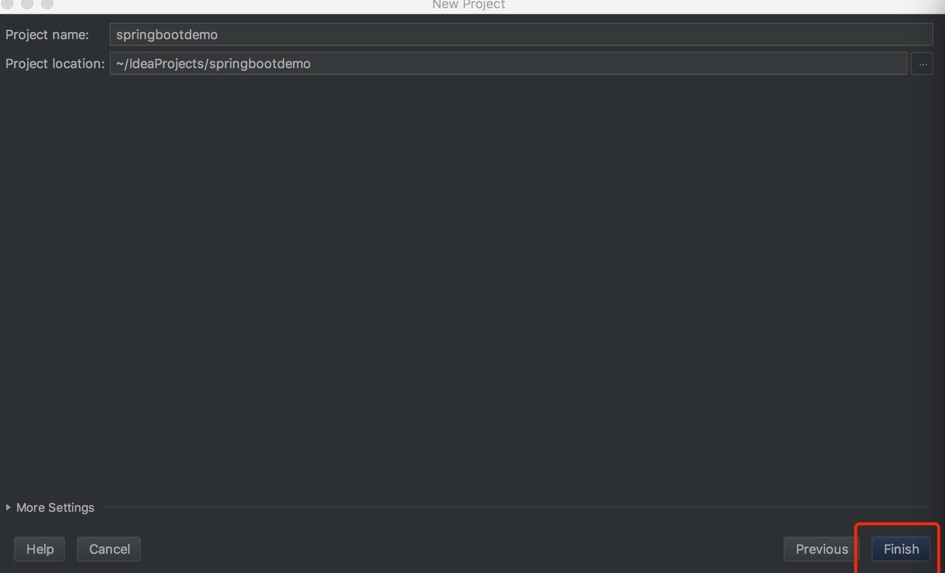
4.點選finish完成
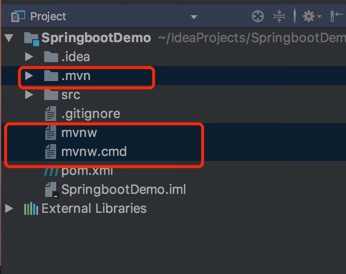
5.進入專案,可以將以下內容刪除
pom.xml檔案:
<?xml version="1.0" encoding="UTF-8"?>
<project xmlns="http://maven.apache.org/POM/4.0.0" xmlns:xsi="http://www.w3.org/2001/XMLSchema-instance"
	xsi:schemaLocation="http://maven.apache.org/POM/4.0.0 http://maven.apache.org/xsd/maven-4.0.0.xsd">
	<modelVersion>4.0.0</modelVersion>

	<groupId>com.example</groupId>
	<artifactId>springbootdemo</artifactId>
	<version>0.0.1-SNAPSHOT</version>
	<packaging>jar</packaging>

	<name>springbootdemo</name>
	<description>Demo project for Spring Boot</description>

	<!--起步依賴-->
	<parent>
		<groupId>org.springframework.boot</groupId>
		<artifactId>spring-boot-starter-parent</artifactId>
		<version>1.5.2.RELEASE</version>
		<relativePath/> <!-- lookup parent from repository -->
	</parent>

	<properties>
		<project.build.sourceEncoding>UTF-8</project.build.sourceEncoding>
		<project.reporting.outputEncoding>UTF-8</project.reporting.outputEncoding>
		<java.version>1.8</java.version>
	</properties>

	<dependencies>
		<!--開發web專案相關依賴-->
		<dependency>
			<groupId>org.springframework.boot</groupId>
			<artifactId>spring-boot-starter-web</artifactId>
		</dependency>
		<!--springboot單元測試-->
		<dependency>
			<groupId>org.springframework.boot</groupId>
			<artifactId>spring-boot-starter-test</artifactId>
			<scope>test</scope>
		</dependency>
	</dependencies>

	<!--maven構建-->
	<build>
		<plugins>
			<plugin>
				<groupId>org.springframework.boot</groupId>
				<artifactId>spring-boot-maven-plugin</artifactId>
			</plugin>
		</plugins>
	</build>


</project>
6.建立一個HelloController
7.程式自動生成的SpringbootdemoApplication,會有一個@SpringBootApplication的註解,這個註解用來標明這個類是程式的入口package com.example; import org.springframework.web.bind.annotation.RequestMapping; import org.springframework.web.bind.annotation.RestController; @RestController public class HelloController { @RequestMapping("/hello") public String hello() { return "hello,this is a springboot demo"; } }
package com.example;

import org.springframework.boot.SpringApplication;
import org.springframework.boot.autoconfigure.SpringBootApplication;

//入口
@SpringBootApplication
public class SpringbootdemoApplication {

	public static void main(String[] args) {
		SpringApplication.run(SpringbootdemoApplication.class, args);
	}
}
@SpringBootApplication開啟了Spring的元件掃描和springboot的自動配置功能,相當於將以下三個註解組合在了一起
(1)@Configuration:表名該類使用基於Java的配置,將此類作為配置類
(2)@ComponentScan:啟用註解掃描
(3)@EnableAutoConfiguration:開啟springboot的自動配置功能
8.執行SpringbootdemoApplication類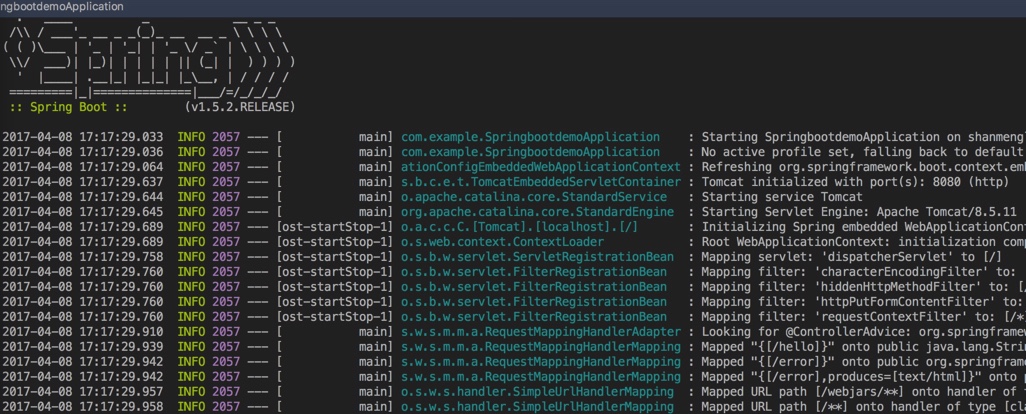
測試:
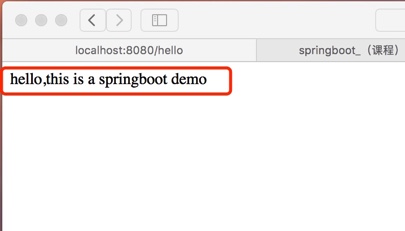
在位址列中輸入http://localhost:8080/hello
9.使用啟動jar包的方式啟動
(1)首先進入專案所在目錄,如果是mac系統在專案上右鍵,選擇Reveal in Finder,Windows系統在專案上右鍵選擇Show in Explorer,即可開啟專案所在目錄
(2)開啟終端,進入專案所在目錄
cd /Users/shanml/IdeaProjects/SpringbootDemo
輸入mvn install,構建專案
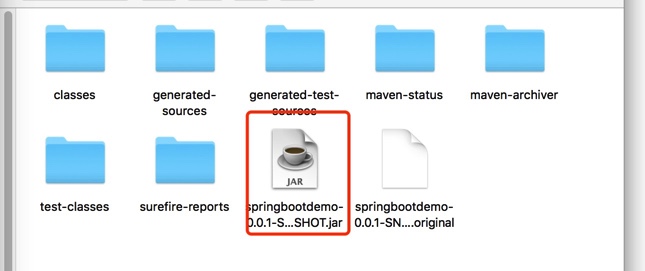
(3)構建成功後,在專案target資料夾下會多出一個jar包
(4)使用java -jar springbootdemo-0.0.1-SNAPSHOT.jar
啟動jar包即可
