Mybatis學習筆記(九) —— Mybatis逆向工程
一、什麼是Mybatis逆向工程?
簡單的解釋就是通過資料庫中的單表,自動生成java程式碼。
我們平時在使用Mabatis框架進行Web應用開發的過程中,需要根據資料庫表編寫對應的Pojo類和Mapper對映檔案,而這個過程重複單一且浪費時間。基於此,MyBatis官方為了讓開發者更加方便快捷地使用MYBatis框架而不必編寫繁瑣的Pojo類以及Mapper檔案,提供了一個十分簡潔的逆向工程的工具。
Mybatis官方提供了逆向工程,可以針對資料庫的表自動生成對應的mybatis程式碼(mapper.java\mapper.xml\pojo類)有了這個工具可以大大簡化我們持久層程式碼的編寫,和寫程式碼過程中出錯的概率。
二、逆向工程的下載
https://github.com/mybatis/generator/releases/tag/mybatis-generator-1.3.2
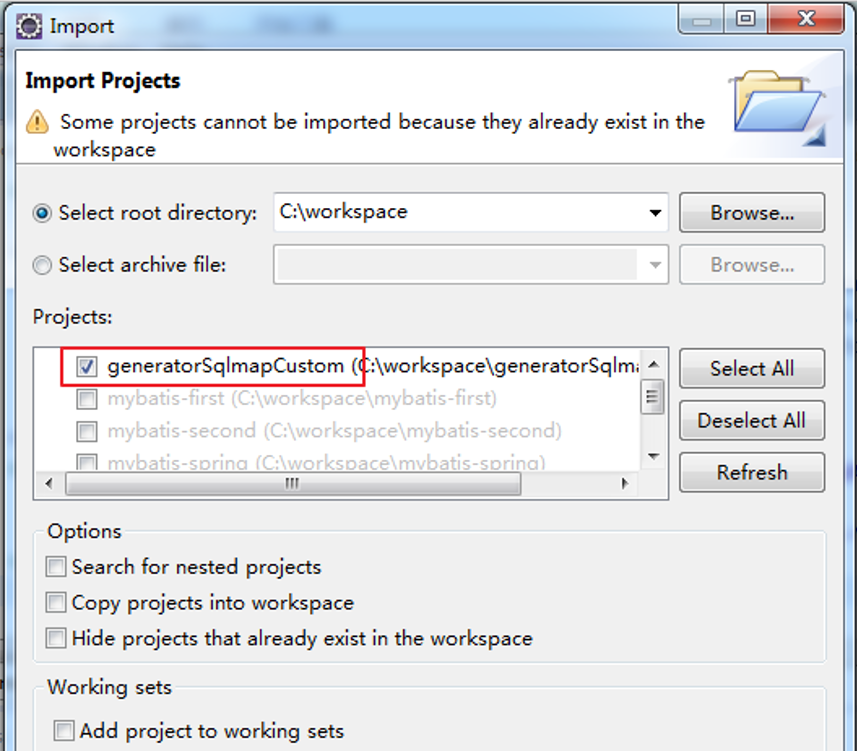
下載完後,先將逆向工程複製到工作空間中

然後再匯入到eclipse中:


三、Mybatis逆向工程的使用步驟
第一步:在generatorConfig.xml中配置Mapper生成的詳細資訊
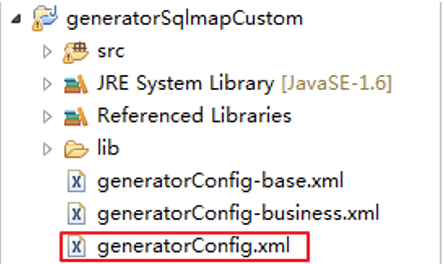
注意修改以下幾點:
-
- 修改要生成的資料庫表
- pojo檔案所在包路徑
- Mapper所在的包路徑
<?xml version="1.0" encoding="UTF-8"?> <!DOCTYPE generatorConfiguration PUBLIC "-//mybatis.org//DTD MyBatis Generator Configuration 1.0//EN" "http://mybatis.org/dtd/mybatis-generator-config_1_0.dtd"> <generatorConfiguration> <context id="testTables" targetRuntime="MyBatis3"> <commentGenerator> <!-- 是否去除自動生成的註釋 true:是 : false:否 --> <property name="suppressAllComments" value="true" /> </commentGenerator> <!--資料庫連線的資訊:驅動類、連線地址、使用者名稱、密碼 --> <jdbcConnection driverClass="com.mysql.jdbc.Driver" connectionURL="jdbc:mysql://localhost:3306/e3mall" userId="root" password="123"> </jdbcConnection> <!-- 預設false,把JDBC DECIMAL 和 NUMERIC 型別解析為 Integer,為 true時把JDBC DECIMAL 和 NUMERIC 型別解析為java.math.BigDecimal --> <javaTypeResolver> <property name="forceBigDecimals" value="false" /> </javaTypeResolver> <!-- targetProject:生成PO類的位置 --> <javaModelGenerator targetPackage="cn.itcast.mybatis.pojo" targetProject=".\src"> <!-- enableSubPackages:是否讓schema作為包的字尾 --> <property name="enableSubPackages" value="false" /> <!-- 從資料庫返回的值被清理前後的空格 --> <property name="trimStrings" value="true" /> </javaModelGenerator> <!-- targetProject:mapper對映檔案生成的位置 --> <sqlMapGenerator targetPackage="cn.itcast.mybatis.mapper" targetProject=".\src"> <!-- enableSubPackages:是否讓schema作為包的字尾 --> <property name="enableSubPackages" value="false" /> </sqlMapGenerator> <!-- targetPackage:mapper介面生成的位置 --> <javaClientGenerator type="XMLMAPPER" targetPackage="cn.itcast.mybatis.mapper" targetProject=".\src"> <!-- enableSubPackages:是否讓schema作為包的字尾 --> <property name="enableSubPackages" value="false" /> </javaClientGenerator> <!-- 指定資料庫表 --> <table schema="" tableName="user"></table> <table schema="" tableName="order"></table> </context> </generatorConfiguration>
第二步:生成逆向工程程式碼
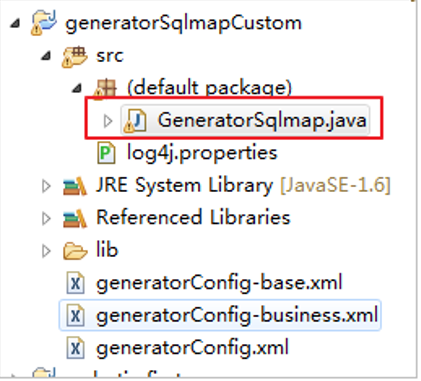
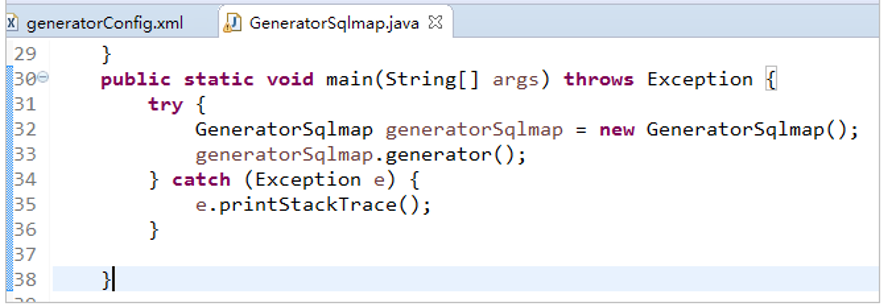
找到下圖所示的java檔案,執行工程main主函式
重新整理工程,發現程式碼生成:
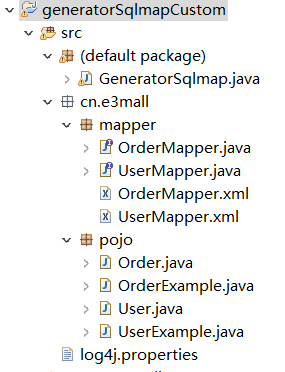
注意:Mapper對映檔案已經存在時,如果重新生成mapper.xml檔案,內容不被覆蓋而是進行內容追加,結果導致mybatis解析失敗。故需要重新生成程式碼時,先刪除原來已經生成的mapper xml檔案再進行生成。Mybatis自動生成的pojo類及對應的mapper.java檔案不是內容而是直接覆蓋沒有此問題。
四、測試逆向工程程式碼
第一步:將生成的程式碼複製到mybatis-spring工程中
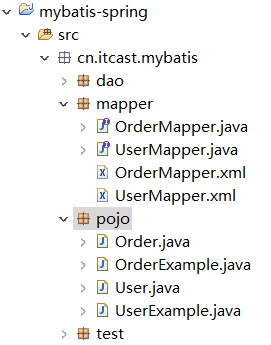
第二步:在applicationContext.xml修改spring配置檔案
    <!-- Mapper代理的方式開發方式,掃描包方式配置代理 -->
    <bean class="org.mybatis.spring.mapper.MapperScannerConfigurer">
        <!-- 配置mapper介面 -->
        <property name="basePackage" value="cn.itcast.mybatis.mapper"/>
    </bean>
第三步:編寫測試方法:
public class UserMapperTest {

    private ApplicationContext context;

    @Before
    public void setUp() throws Exception {
        context = new ClassPathXmlApplicationContext("classpath:applicationContext.xml");
    }

    @Test
    public void testInsert() {
        // 獲取Mapper
        UserMapper userMapper = this.context.getBean(UserMapper.class);
        User user = new User();
        user.setUsername("曹操");
        user.setAddress("魏國");
        user.setSex("男");

        userMapper.insert(user);
    }

    @Test
    public void testSelectByExample() {
        // 獲取Mapper
        UserMapper userMapper = this.context.getBean(UserMapper.class);

        // 建立User物件擴充套件類,使用者設定查詢條件
        UserExample example = new UserExample();
        Criteria criteria = example.createCriteria();
        criteria.andUsernameLike("%張%");

        // 查詢資料
        List<User> list = userMapper.selectByExample(example);
        for (User user : list) {
            System.out.println(user);
        }

    }

    @Test
    public void testSelectByPrimaryKey() {
        // 獲取Mapper
        UserMapper userMapper = this.context.getBean(UserMapper.class);
        User user = userMapper.selectByPrimaryKey(1);
        System.out.println(user);
    }

}
參考文章:https://blog.csdn.net/lisongjia123/article/details/51244029
