
bootstrap圖片剪裁預覽上傳
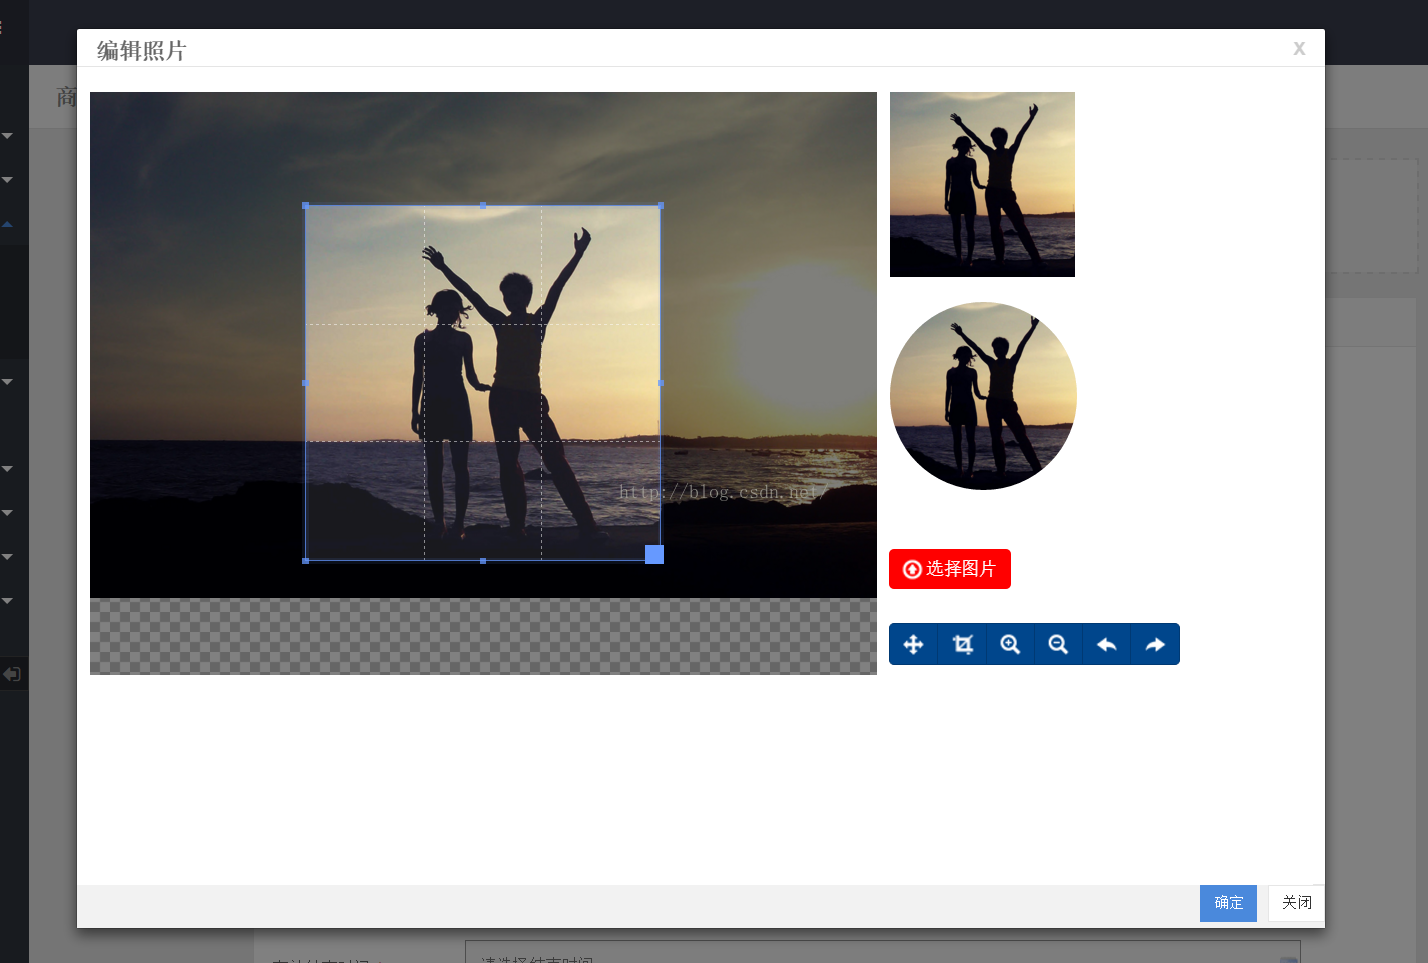
效果圖預覽:
用到的圖片剪裁外掛:http://www.htmleaf.com/jQuery/Image-Effects/201504211716.html
前段ui框架:bootstrap3
java後端框架:spring + mybstis
說明:如果前端ui用的不是bootstrap的框架,則調過第一步,直接將第二步的頁面地址作為彈出框的地址即可,然後在做修改
1.首先說一下bootstrap的模態框:
一般的開啟模態框要在頁面上隱藏一段html程式碼然後用$("#Id").modal('show')顯示模態框或者$("#Id").modal('hide')隱藏模態框,本人覺得有點麻煩,沒有easyui這樣的直接用js程式碼開啟方便 ,所以我對這個模態框進行了封裝。來實現直接用js開啟的效果。原理很簡單就是應以自定義一個jquery的方法,傳遞一些設定的引數,然後js動態生成html程式碼然後將程式碼追加到頁面的body後面,然後在呼叫$("#Id").modal('show')方法來開啟模態框。模態框裡面的內容是動態的 所以就需要一個url地址載入頁面的內容。下面來看js程式碼
bootstrap-utils.js
jQuery.extend({
//模態彈出框
openModel:function(options){
var defaults={//設定預設引數
title:'',//模態框的標題
width:'100%',//模態框的預設寬度
height:$(window).height()-130+"px",//模態框的預設高度,預設取瀏覽器的可視高度
showOkButton:true,//是否顯示確定按鈕
id:"model_js",//模態框id
frameId:"modal_iframe",//iframeId
okButtonContent:"確定",//確定按鈕顯示的內容
cancelButtonContent:"關閉"//取消按鈕顯示的內容
}
var opts = $.extend(defaults,options);
var str = "";
str+="<div class='modal fade' id='"+opts.id+"' tabindex='-1' role='basic' aria-hidden='true'>";
str+=" <div class='modal-dialog'>";
str+=" <div class='modal-content'>";
if(opts.title != ""){
str+=" <div class='modal-header' style='height:30px;'>";
str+=" <button type='button' class='close' data-dismiss='modal' aria-hidden='true' style='margin-top:-10px;'>x</button>";
str+=" <h3 class='modal-title' style='margin-top:-10px;'><b>"+opts.title+"</b></h3>";
str+=" </div>";
}
str+=" <div class='modal-body' style='padding:0px;'>";
str+=" </div>";
str+=" <div class='modal-footer' style='height:35px;padding:0px;'>";
if(opts.showOkButton){
str+=" <button type='button' class='btn btn-primary btn-sm' onclick='"+opts.ok+"();'>"+opts.okButtonContent+"</button>";
}
str+=" <button type='button' class='btn btn-default btn-sm' data-dismiss='modal'>"+opts.cancelButtonContent+"</button>";
str+=" </div>";
str+=" </div>";
str+=" </div>";
str+="</div>";
//如果當前頁面不選在當前id的模態框才追加模態框html
if($("body").find("#"+opts.id+"").length == 0){
$("body").append(str);
}else{
$("body").find("#"+opts.id+"").remove();
$("body").append(str);
}
//如果引數傳遞的寬度或者高度不是px格式的則加上px
var height = (opts.height+"").indexOf("px") >= 0 ? opts.height : opts.height+"px";
var width = (opts.width+"").indexOf("px") >= 0 || (opts.width+"").indexOf("%") >= 0 ? opts.width : opts.width+"px";
//設定頁面iframe的地址
$("#"+opts.id+"").find(".modal-body").html("<iframe name='"+opts.frameId+"' style='width:99%;height:"+height+";border:0px;' scrolling='yes' src='"+opts.url+"'></iframe>");
$("#"+opts.id+"").find(".modal-dialog").css({"width":width,"height":height});
//顯示模態框
$("#"+opts.id+"").modal("show");
}
});
下面來看呼叫方式:
$.openModel({
url:'editPhoto.jsp',
frameId:'bLogoFrame',
id:'bLogoModel',
width:900,
ok:'getCropData'//點選確定按鈕執行的函式
});
2.下面來看editPhoto.jsp
<%@ page language="java" contentType="text/html; charset=UTF-8"
pageEncoding="UTF-8"%>
<%@taglib prefix="c" uri="http://java.sun.com/jsp/jstl/core" %>
<%
request.setAttribute("ctx", request.getContextPath());
%>
<!DOCTYPE html>
<html>
<head>
<meta http-equiv="Content-Type" content="text/html; charset=UTF-8">
<!-- 引入剪裁外掛的css-->
<link rel="stylesheet" type="text/css" href="${ctx}/business/js/crop/css/normalize.css" />
<link rel="stylesheet" type="text/css" href="${ctx}/business/js/crop/css/default.css">
<link href="${ctx }/business/js/crop/assets/css/bootstrap.min.css" rel="stylesheet">
<link href="${ctx }/business/js/crop/dist/cropper.css" rel="stylesheet">
<link href="${ctx }/business/js/crop/css/main.css" rel="stylesheet">
<!--[if IE]>
<script src="http://libs.useso.com/js/html5shiv/3.7/html5shiv.min.js"></script>
<![endif]-->
<style type="text/css">
td{vertical-align:top;padding-left:10px;}
.div_photo{
position:absolute;
width:150px;
height:150px;
border-radius:100px;
}
</style>
<!-- 引入剪裁外掛的js-->
<script src="${ctx }/business/js/crop/assets/js/jquery.min.js"></script>
<script src="${ctx }/business/js/crop/assets/css/bootstrap.min.css"></script>
<script src="${ctx }/business/js/crop/dist/cropper.js"></script>
<script src="${ctx }/business/js/crop/js/main.js"></script>
<script type="text/javascript">
var data;
function getData(){
var result= $('#cropper-img').cropper("getCroppedCanvas");
data=result.toDataURL('image/jpeg',1);//獲取剪裁的圖片並且轉為base64格式
$("#data").val(data);//將剪裁後的base64程式碼儲存的隱藏域中
$("#isValidate").val(1);//設定是否校驗通過
}
</script>
</head>
<body onload="javascript:$('#cropper-img').cropper('setAspectRatio',1);"><!-- 初始化剪裁你外掛的剪裁比例為1:1,如需要其他的檢視文件修改-->
<input style="display:none;" id="getData" onclick="getData();" type="button" value="確定"/>
<input id="isValidate" type="hidden" value="0"/>
<input id="picName" type="hidden" value=""/>
<input id="data" type="hidden" value=""/>
<table style="margin-top:20px;">
<tr style="height:200px;">
<td rowspan="3">
<div class="img-container" style="width:630px;height:400px;margin-left:0px;">
<!-- 傳遞到這個頁面的url不為空則顯示要編輯的圖片,否則顯示預設的圖片-->
<c:choose>
<c:when test="${url != null and url !='' }">
<img id="cropper-img" src="${url }">
</c:when>
<c:otherwise>
<img id="cropper-img" src="${ctx }/res/img/upimg.jpg">
</c:otherwise>
</c:choose>
</div>
</td>
<td>
<div class="docs-preview clearfix">
<div class="img-preview preview-lg"></div>
</div>
<div class="docs-preview clearfix">
<div class="img-preview preview-lg div_photo"></div>
</div>
</td>
</tr>
<tr style="height:20px;">
<td>
<div class="btn-group">
<label class="btn btn-primary btn-upload" style="border:0px;background-color:red;" for="inputImage" title="Upload image file">
<input class="sr-only" id="inputImage" name="file" type="file" accept="image/*">
<span class="docs-tooltip pull-left" data-toggle="tooltip" title="選擇檔案">
<span class="icon icon-upload"></span>
</span>
<span class="pull-right"> 選擇圖片</span>
</label>
</div>
</td>
</tr>
<tr style="height:20px;">
<td>
<div class="btn-group">
<button class="btn btn-primary" data-method="setDragMode" data-option="move" type="button" title="移動">
<span class="docs-tooltip" data-toggle="tooltip" title="$().cropper("setDragMode", "move")">
<span class="icon icon-move"></span>
</span>
</button>
<button class="btn btn-primary" data-method="setDragMode" data-option="crop" type="button" title="裁剪">
<span class="docs-tooltip" data-toggle="tooltip" title="$().cropper("setDragMode", "crop")">
<span class="icon icon-crop"></span>
</span>
</button>
<button class="btn btn-primary" data-method="zoom" data-option="0.1" type="button" title="放大">
<span class="docs-tooltip" data-toggle="tooltip" title="$().cropper("zoom", 0.1)">
<span class="icon icon-zoom-in"></span>
</span>
</button>
<button class="btn btn-primary" data-method="zoom" data-option="-0.1" type="button" title="縮小">
<span class="docs-tooltip" data-toggle="tooltip" title="$().cropper("zoom", -0.1)">
<span class="icon icon-zoom-out"></span>
</span>
</button>
<button class="btn btn-primary" data-method="rotate" data-option="-45" type="button" title="向左旋轉">
<span class="docs-tooltip" data-toggle="tooltip" title="$().cropper("rotate", -45)">
<span class="icon icon-rotate-left"></span>
</span>
</button>
<button class="btn btn-primary" data-method="rotate" data-option="45" type="button" title="向右旋轉">
<span class="docs-tooltip" data-toggle="tooltip" title="$().cropper("rotate", 45)">
<span class="icon icon-rotate-right"></span>
</span>
</button>
</div>
</td>
</tr>
</table>
</body>
</html>
說明:如果前端ui用的不是bootstrap,那麼為了避免樣式的衝突 可以用iframe的方式
例如:<a href="editPhotoInit.jsp">編輯頭像</a>
editPhotoInit.jsp
<%@ page language="java" contentType="text/html; charset=UTF-8"
pageEncoding="UTF-8"%>
<%
String path = request.getContextPath();
String basePath = request.getScheme()+"://"+request.getServerName()+":"+request.getServerPort()+path+"/";
String serviceId = request.getParameter("serviceId");
%>
<iframe src="<%=path %>/editPhoto.jsp?serviceId=<%=serviceId %>" style="width:99%;height:100%;border:0px;overflow:hidden;"></iframe>
然後在用第三步的方法取iframe物件裡的屬性
3.點選確定按鈕的時候在頁面上顯示剪裁後的圖片
第一步中我們講到開啟模態框的方式為:
$.openModel({
url:'editPhoto.jsp',
frameId:'bLogoFrame',
id:'bLogoModel',
width:900,
ok:'getCropData'//點選確定按鈕執行的函式
});
點選ok按鈕後執行的函式
var obj = $(window.frames["bLogoFrame"].document);//獲取當前模態框內容的iframe物件,id即為上面設定的iframeId.
obj.find("#getData").click();//因為不能直接獲取子頁面的方法和屬性,所以就用間接的點選按鈕或者連結的方法,然後再獲取隱藏域的內容,方法有點笨 ,有好的方法可以修改
var isValidate = obj.find("#isValidate").val();//校驗圖片大小及尺寸,1.為校驗通過,0.為不通過
if(isValidate == 1){
var data = obj.find("#data").val();//獲取剪裁後的base64圖片
$("#logo").attr("src",data);//直接將剪裁後的base64圖片顯示在img控制元件中
var pos = data.indexOf("4")+2;
data = data.substring(pos, data.length - pos);//去掉Base64:開頭的標識字元
$("#pic").val(data);//設定項後臺提交的隱藏域的值,去掉base64開頭的標示字元後的值
//設定表單中圖片為校驗通過
if(data != null && data != ""){
$("#addBusinessForm").bootstrapValidator('updateStatus', 'pic', 'VALID');
}
$("#bLogoModel").modal('hide');//關閉模態框
}
}
如果用封裝的方法開啟模態框,獲取模態框的值都需要這樣取(獲取iframe物件,然後在獲取 iframe物件中的元素,屬性或者方法只能用間接的方法取),但是我覺得還是比在頁面中直接寫模態框的程式碼還是簡單可許多呢。
4.上傳圖片
在第三不我們已經把剪裁後的base64的並且去掉了頭部的標示資訊的資料已經放到隱藏域中了,需要注意的是,base64的圖片格式的資料一般來說都比較大,一般的post傳遞按理說是不受長度限制的,但是有時候後還是會出現問題,後臺取不到值為null的情況,所以我們採用
formData+ajax的方式進行表單提交,下面來看程式碼
為提交表單的按鈕繫結事件
$("#submitForm").click(function(){
var $form = $("#myForm");//獲取當前form物件
var bv = $form.data('bootstrapValidator');//獲取bootstrap表單校驗物件
var formData = new FormData($form[0]);//轉換成formData物件
//可以為formData新增資料,例如 :formData.append("file", $("#file_upload")[0].files[0]);
bv.validate();//校驗表單
if(bv.isValid()){
$(obj).addClass('disabled');//置提交按鈕為不可用,防止多次點選
$.ajax({
url : $form.attr('action'), //獲取form表單的提交地址
type : 'POST',
async: false,
data : formData,
/**
* 必須false才會避開jQuery對 formdata 的預設處理
* XMLHttpRequest會對 formdata 進行正確的處理
*/
processData : false,
/**
*必須false才會自動加上正確的Content-Type
*/
contentType : false,
success : function(data) {
var id = data.id;
var opType = data.opType;//操作型別,1.編輯,0.新增
if(data.result == "1"){
alert("提交成功");
}else{
alert(data.message);//顯示錯誤資訊
$(obj).removeClass('disabled');
}
},error:function(){
alert("網路異常,請重試!");
$(obj).removeClass('disabled');
}
});
}else{
alert("表單資料不完整!");
}
});
後端程式碼,上傳到七牛(與阿里雲類似),如果上傳到本地請檢視第五步:
//獲取上傳到七牛的圖片地址
String fileBusLogoPath = new QiniuUpload().base64Upload(‘前段傳過來的base64格式’, ‘upload/photo/logo’);
說明:upload/photo/logo為logo上傳地址,可以配置到屬性配置檔案中
比如:
systemConfig.properties
#七牛訪問地址
qiniuUrl:http://7xsrph.com2.z0.glb.qiniucdn.com
#檔案上傳根目錄
base_path:D:/image/
#商家logo上傳地址
logo_path:upload/logo/
#商家二維碼大小
qrcode_size:1000
怎麼獲取屬性配置檔案的值呢,這個需要在框架啟動的時候把屬性配置檔案的值讀取到java物件中,在spring配置檔案的配置加如下程式碼:
spring.xml
<!-- 載入系統配置檔案 -->
<property name="locations">
<list>
<value>classpath:systemConfig.properties</value>
</list>
</property>
</bean>
CustomizedPropertyConfigurer.java
import java.util.HashMap;
import java.util.Map;
import java.util.Properties;
import org.springframework.beans.BeansException;
import org.springframework.beans.factory.config.ConfigurableListableBeanFactory;
import org.springframework.beans.factory.config.PropertyPlaceholderConfigurer;
public class CustomizedPropertyConfigurer extends PropertyPlaceholderConfigurer {
private static Map<String, Object> ctxPropertiesMap;
@Override
protected void processProperties(ConfigurableListableBeanFactory beanFactory,
Properties props)throws BeansException {
super.processProperties(beanFactory, props);
//load properties to ctxPropertiesMap
ctxPropertiesMap = new HashMap<String, Object>();
for (Object key : props.keySet()) {
String keyStr = key.toString();
String value = props.getProperty(keyStr);
ctxPropertiesMap.put(keyStr, value);
}
}
//static method for accessing context properties
public static Object getContextProperty(String name) {
return ctxPropertiesMap.get(name);
}
}
這樣就可以通過CustomizedPropertyConfigurer類來獲取屬性配置檔案的值
上傳程式碼可以改為:
//獲取logo上傳路徑
String logoPath = (String)CustomizedPropertyConfigurer.getContextProperty("logo_path");
String fileBusLogoPath = new QiniuUpload().base64Upload(‘前段傳過來的base64格式’,logoPath);
然後將 fileBusLogoPath這個地址更新到資料庫欄位中,資料庫儲存的欄位格式為:upload/logo/201605231403202561.jpg
顯示給頁面要拼接上七牛的訪問地址:
圖片完整的路徑為:
String qiniuUrl = (String)CustomizedPropertyConfigurer.getContextProperty("qiniuUrl");
String logUrl = qiniuUrl+"/"+fileBusLogoPath;//圖片完整路徑
七牛上傳工具類:QiniuUpload.java
import java.awt.image.BufferedImage;import java.io.ByteArrayOutputStream;
import java.io.File;
import java.io.FileInputStream;
import java.io.FileNotFoundException;
import java.io.IOException;
import java.net.URL;
import java.text.SimpleDateFormat;
import java.util.Date;
import java.util.Random;
import javax.imageio.ImageIO;
import sun.misc.BASE64Decoder;
import com.qiniu.common.QiniuException;
import com.qiniu.http.Response;
import com.qiniu.storage.UploadManager;
import com.qiniu.util.Auth;
public class QiniuUpload {
private final String accessKey = "";
private final String secretKey = "";
private final String bucketname = "test";
private final String qiniuUrl = "http://7xsrph.com2.z0.glb.qiniucdn.com";//七牛地址
//金鑰配置
Auth auth = Auth.create(accessKey, secretKey);
//建立上傳物件
UploadManager uploadManager = new UploadManager();
//簡單上傳,使用預設策略,只需要設定上傳的空間名就可以了
public String getUpToken(){
return auth.uploadToken(bucketname);
}
/**
* 位元組流上傳
* @param bytes
* @param filePath
* @return
* @throws IOException
*/
public String upload(byte[] bytes,String filePath) throws IOException{
try {
String fileName = filePath+getFileName();
//呼叫put方法上傳
Response res = uploadManager.put(bytes, fileName, getUpToken());
return fileName;
} catch (QiniuException e) {
Response r = e.response;
// 請求失敗時列印的異常的資訊
System.out.println(r.toString());
try {
//響應的文字資訊
System.out.println(r.bodyString());
} catch (QiniuException e1) {
//ignore
}
}
return null;
}
/**
* base64格式圖片上傳
* @param base64
* @param filePath
* @return
* @throws IOException
*/
public String base64Upload(String base64,String filePath) throws IOException{
try {
BASE64Decoder decoder = new BASE64Decoder();
// Base64解碼
byte[] bytes = decoder.decodeBuffer(base64);
for (int i = 0; i < bytes.length; ++i) {
if (bytes[i] < 0) {// 調整異常資料
bytes[i] += 256;
}
}
String fileName = filePath+getFileName();
//呼叫put方法上傳
Response res = uploadManager.put(bytes, fileName, getUpToken());
return fileName;
} catch (QiniuException e) {
Response r = e.response;
// 請求失敗時列印的異常的資訊
System.out.println(r.toString());
try {
//響應的文字資訊
System.out.println(r.bodyString());
} catch (QiniuException e1) {
//ignore
}
}
return null;
}
/**
* 建立待logo的二維碼
* @param filePath
* @param text
* @return
* @throws IOException
*/
public String createQrcode(String filePath,String text) throws IOException{
try {
// fileBusLogoPath.replace(".", "_qrCode.")
URL url = new URL(qiniuUrl+"/"+filePath);
// URLConnection conn = url.openConnection();
// urlcon.connect(); //獲取連線
BufferedImage bufferedImg = ImageIO.read(url);
int width = bufferedImg.getWidth();
String fileName = filePath.replace(".", "_qrCode.");
BufferedImage bi = null;
BufferedImage logo = null;
logo = ImageUtils.resizeImage1(bufferedImg,100, 0.9f, true);
bi = QrCodeUtil.createQrCode(logo,text,width,width);
ByteArrayOutputStream os = new ByteArrayOutputStream();
ImageIO.write(bi, "jpg", os);
//呼叫put方法上傳
Response res = uploadManager.put(os.toByteArray(),fileName, getUpToken());
System.out.println(res.toString());
return fileName;
} catch (QiniuException e) {
Response r = e.response;
// 請求失敗時列印的異常的資訊
System.out.println(r.toString());
try {
//響應的文字資訊
System.out.println(r.bodyString());
} catch (QiniuException e1) {
//ignore
}
}
return null;
}
/**
* 獲取時間格式的檔名稱
* @return
*/
private String getFileName(){
SimpleDateFormat df = new SimpleDateFormat("yyyyMMddHHmmss");
String now = df.format(new Date());
//生成五位隨機數字
Random random = new Random();
int rannum = (int) (random.nextDouble() * (99999 - 10000 + 1)) + 10000;// 獲取5位隨機數
String fileName = now+rannum+".jpg";
return fileName;
}
/**
* 檔案轉byte[]
* @param filePath
* @return
*/
public static byte[] File2byte(String filePath)
{
byte[] buffer = null;
try
{
File file = new File(filePath);
FileInputStream fis = new FileInputStream(file);
ByteArrayOutputStream bos = new ByteArrayOutputStream();
byte[] b = new byte[1024];
int n;
while ((n = fis.read(b)) != -1)
{
bos.write(b, 0, n);
}
fis.close();
bos.close();
buffer = bos.toByteArray();
}
catch (FileNotFoundException e)
{
e.printStackTrace();
}
catch (IOException e)
{
e.printStackTrace();
}
return buffer;
}
public static void main(String args[]) throws IOException{
URL url = new URL("http://imgz.we-going.com/service/1453884689193.jpg");
BufferedImage bufferedImg = ImageIO.read(url);
int width = bufferedImg.getWidth();
// new QiniuUpload().upload(File2byte("D:/image/upload/photo/business/2016/4/2016040923532026335.jpg"),"");
// new QiniuUpload().createQrcode("D:/image/upload/photo/business/2016/4/2016040923532026335.jpg","http://www.baidu.com");
}
}
二維碼工具類:QrCodeUtil.java
import java.awt.BasicStroke;
import java.awt.Color;
import java.awt.Graphics2D;
import java.awt.geom.RoundRectangle2D;
import java.awt.image.BufferedImage;
import java.io.File;
import java.io.FileInputStream;
import java.io.IOException;
import java.io.InputStream;
import java.util.HashMap;
import java.util.Map;
import javax.imageio.ImageIO;
import com.google.zxing.BarcodeFormat;
import com.google.zxing.EncodeHintType;
import com.google.zxing.MultiFormatWriter;
import com.google.zxing.WriterException;
import com.google.zxing.common.BitMatrix;
import com.google.zxing.qrcode.decoder.ErrorCorrectionLevel;
/**
* 二維生成工具類,返回圖片流或生成檔案
* @author ZYL
*
*/
public class QrCodeUtil {
public static void main(String[] args) throws WriterException
{
String content = "766EBCD59621E305170616BA3D3DAC32";
String filePath = "D:/qrCode.jpg";
BufferedImage logo = null;
try
{
File file=new File("D://logo.png");
InputStream is=new FileInputStream(file);
logo = ImageIO.read(is);
// String path= "http://112.126.83.175/laiqu/head/20150612/SERVICE_HEAD_PHOTO_576_20150612123514641.png";
// URL url = new URL(path);
// HttpURLConnection conn = (HttpURLConnection) url.openConnection();
// logo = ImageIO.read(conn.getInputStream());
logo = ImageUtils.resizeImage1(logo,80, 0.9f, true);
createQrCode(logo,content,500,500,filePath);
}
catch (Exception e)
{
e.printStackTrace();
}
}
public static void createQrCode(BufferedImage logo,String content,int width,int height,String filePath){
try {
if(width == 0){width = 500;}
if(height == 0){height = 500;}
QrCodeUtil zp = new QrCodeUtil();
BufferedImage bi = null;
BufferedImage bim = zp.Encode_QR_CODE(content, BarcodeFormat.QR_CODE, width, height, zp.getDecodeHintType());
if(logo != null){
bi = zp.LogoMatrix(bim, logo);
}else{
bi = bim;
}
ImageIO.write(bi, "jpeg", new File(filePath));
} catch (Exception e) {
// TODO: handle exception
e.printStackTrace();
}
}
public static BufferedImage createQrCode(BufferedImage logo,String content,int width,int height){
try {
if(width == 0){width = 500;}
if(height == 0){height = 500;}
QrCodeUtil zp = new QrCodeUtil();
BufferedImage bi = null;
BufferedImage bim = zp.Encode_QR_CODE(content, BarcodeFormat.QR_CODE, width, height, zp.getDecodeHintType());
if(logo != null){
bi = zp.LogoMatrix(bim, logo);
}else{
return bim;
}
// parseQR_CODEImage(bi);
return bi;
} catch (Exception e) {
// TODO: handle exception
e.printStackTrace();
}
return null;
}
/**
* 設定 logo
* @param matrixImage 源二維碼圖片
* @return 返回帶有logo的二維碼圖片
* @throws IOException
*/
public BufferedImage LogoMatrix(BufferedImage matrixImage,BufferedImage logo_) throws IOException{
/**
* 讀取二維碼圖片,並構建繪圖物件
*/
Graphics2D g2 = matrixImage.createGraphics();
int matrixWidth = matrixImage.getWidth();
int matrixHeigh = matrixImage.getHeight();
/**
* 讀取Logo圖片
*/
BufferedImage logo = logo_;
//開始繪製圖片
g2.drawImage(logo,matrixWidth/5*2,matrixHeigh/5*2, matrixWidth/5, matrixHeigh/5, null);//繪製
BasicStroke stroke = new BasicStroke(5,BasicStroke.CAP_ROUND,BasicStroke.JOIN_ROUND);
g2.setStroke(stroke);// 設定筆畫物件
//指定弧度的圓角矩形
RoundRectangle2D.Float round = new RoundRectangle2D.Float(matrixWidth/5*2, matrixHeigh/5*2, matrixWidth/5, matrixHeigh/5,20,20);
g2.setColor(Color.white);
g2.draw(round);// 繪製圓弧矩形
g2.dispose();
matrixImage.flush() ;
return matrixImage ;
}
/**
* 生成二維碼bufferedImage圖片
*
* @param content
* 編碼內容
* @param barcodeFormat
* 編碼型別
* @param width
* 圖片寬度
* @param height
* 圖片高度
* @param hints
* 設定引數
* @return
*/
public BufferedImage Encode_QR_CODE(String content, BarcodeFormat barcodeFormat, int width, int height, Map<EncodeHintType, ?> hints)
{
MultiFormatWriter multiFormatWriter = null;
BitMatrix bm = null;
BufferedImage image = null;
try
{
multiFormatWriter = new MultiFormatWriter();
// 引數順序分別為:編碼內容,編碼型別,生成圖片寬度,生成圖片高度,設定引數
bm = multiFormatWriter.encode(content, barcodeFormat, width, height, hints);
int w = bm.getWidth();
int h = bm.getHeight();
image = new BufferedImage(w, h, BufferedImage.TYPE_INT_RGB);
// 開始利用二維碼資料建立Bitmap圖片,分別設為黑(0xFFFFFFFF)白(0xFF000000)兩色
for (int x = 0; x < w; x++)
{
for (int y = 0; y < h; y++)
{
image.setRGB(x, y, bm.get(x, y) ? 0xFF000000 : 0xFFFFFFFF);
}
}
}
catch (WriterException e)
{
e.printStackTrace();
}
return image;
}
/**
* 設定二維碼的格式引數
*
* @return
*/
public Map<EncodeHintType, Object> getDecodeHintType()
{
// 用於設定QR二維碼引數
Map<EncodeHintType, Object> hints = new HashMap<EncodeHintType, Object>();
// 設定QR二維碼的糾錯級別(H為最高級別)具體級別資訊
hints.put(EncodeHintType.ERROR_CORRECTION, ErrorCorrectionLevel.H);
// 設定編碼方式
hints.put(EncodeHintType.CHARACTER_SET, "utf-8");
// hints.put(EncodeHintType.MAX_SIZE, 350);
// hints.put(EncodeHintType.MIN_SIZE, 100);
hints.put(EncodeHintType.MARGIN, 0);//設定二維碼邊的空度,非負數
return hints;
}
}
圖片處理工具類:ImageUtils.java
import java.awt.Color;
import java.awt.Graphics;
import java.awt.Graphics2D;
import java.awt.GraphicsConfiguration;
import java.awt.GraphicsDevice;
import java.awt.GraphicsEnvironment;
import java.awt.HeadlessException;
import java.awt.Image;
import java.awt.Rectangle;
import java.awt.Transparency;
import java.awt.geom.Ellipse2D;
import java.awt.image.BufferedImage;
import java.awt.image.ConvolveOp;
import java.awt.image.Kernel;
import java.io.ByteArrayInputStream;
import java.io.ByteArrayOutputStream;
import java.io.File;
import java.io.FileInputStream;
import java.io.FileNotFoundException;
import java.io.FileOutputStream;
import java.io.IOException;
import java.io.InputStream;
import java.io.OutputStream;
import java.text.SimpleDateFormat;
import java.util.Date;
import java.util.Iterator;
import java.util.Random;
import javax.imageio.ImageIO;
import javax.imageio.ImageReadParam;
import javax.imageio.ImageReader;
import javax.imageio.stream.ImageInputStream;
import javax.swing.ImageIcon;
import sun.misc.BASE64Decoder;
import sun.misc.BASE64Encoder;
import com.sun.image.codec.jpeg.ImageFormatException;
import com.sun.image.codec.jpeg.JPEGCodec;
import com.sun.image.codec.jpeg.JPEGImageEncoder;
/**
* @作者 王建明
* @建立日期 2012-6-16
* @建立時間 下午02:35:31
* @版本號 V 1.0
*/
public class ImageUtils {
public String path = "";
public ImageUtils(String path) {
this.path = path;
}
public void change(int size) {
compressImg(new File(path), size, null);
}
/**
* @param oldfile
* @param size
* @param newfile
* @return
* @描述 —— 將oldfile的圖片檔案等比例壓縮為size的newfile檔案
*/
public static File compressImg(File oldfile, int size, File newfile) {
if(!newfile.exists())
try {
newfile.createNewFile();
} catch (IOException e1) {
// TODO Auto-generated catch block
//e1.printStackTrace();
System.out.println("無法建立檔案!!!");
return null;
}
BufferedImage bi;
try {
System.out.println("正在壓縮:" + oldfile.getName());
bi = ImageIO.read(new FileInputStream(oldfile));
int width = bi.getWidth();
int height = bi.getHeight();
if (width > size || height > size) {
Image image;
if (width > height) {
height = (int) (bi.getHeight() / (bi.getWidth() * 1d) * size);
image = bi.getScaledInstance(size, height,
Image.SCALE_DEFAULT);
} else {
width = (int) (bi.getWidth() / (bi.getHeight() * 1d) * size);
image = bi.getScaledInstance(width, size,
Image.SCALE_DEFAULT);
}
ImageIO.write(toBufferedImage(image), "jpg",
new FileOutputStream(newfile));
System.out.println("壓縮完成:" + newfile.getName());
return newfile;
} else {
System.out.println("無須壓縮:" + oldfile.getName());
return oldfile;
}
} catch (Exception e) {
e.printStackTrace();
}
return null;
}
public static BufferedImage toBufferedImage(Image image) {
if (image instanceof BufferedImage) {
return (BufferedImage) image;
}
image = new ImageIcon(image).getImage();
BufferedImage bimage = null;
GraphicsEnvironment ge = GraphicsEnvironment
.getLocalGraphicsEnvironment();
try {
int transparency = Transparency.TRANSLUCENT;
GraphicsDevice gs = ge.getDefaultScreenDevice();
GraphicsConfiguration gc = gs.getDefaultConfiguration();
bimage = gc.createCompatibleImage(image.getWidth(null), image
.getHeight(null), transparency);
} catch (HeadlessException e) {
}
if (bimage == null) {
int type = BufferedImage.TYPE_INT_RGB;
bimage = new BufferedImage(image.getWidth(null), image
.getHeight(null), type);
}
Graphics g = bimage.createGraphics();
g.drawImage(image, 0, 0, null);
g.dispose();
return bimage;
}
/**
* @return
* @描述 —— 生成隨機名字,不可能重複(用於檔案的命名)
*/
public static String getRandomName() {
Random r = new Random();
SimpleDateFormat sdf = new SimpleDateFormat("yyyyMMdd_HHmmssSSS");
StringBuffer sb = new StringBuffer();
sb.append(r.nextInt(100));
sb.append(r.nextInt(100));
sb.append("_");
sb.append(sdf.format(new Date()));
sb.append("_");
sb.append(r.nextInt(100));
sb.append(r.nextInt(100));
return sb.toString();
}
/**
* @param inputFile原始檔
* @param outFile生成檔案
* @param width指定寬度
* @param height指定高度
* @param proportion是否等比例操作
* @return
* @描述 —— 是否等比例縮放圖片
*/
public static boolean compressPic(String inputFile, String outFile,
int width, int height, boolean proportion) {
try {
// 獲得原始檔
File file = new File(inputFile);
if (!file.exists()) {
return false;
}
Image img = ImageIO.read(file);
// 判斷圖片格式是否正確
if (img.getWidth(null) == -1) {
return false;
} else {
int newWidth;
int newHeight;
// 判斷是否是等比縮放
if (proportion == true) {
// 為等比縮放計算輸出的圖片寬度及高度
double rate1 = ((double) img.getWidth(null))
/ (double) width + 0.1;
double rate2 = ((double) img.getHeight(null))
/ (double) height + 0.1;
// 根據縮放比率大的進行縮放控制
double rate = rate1 > rate2 ? rate1 : rate2;
newWidth = (int) (((double) img.getWidth(null)) / rate);
newHeight = (int) (((double) img.getHeight(null)) / rate);
} else {
newWidth = width; // 輸出的圖片寬度
newHeight = height; // 輸出的圖片高度
}
// 如果圖片小於目標圖片的寬和高則不進行轉換
/*
* if (img.getWidth(null) < width && img.getHeight(null) <
* height) { newWidth = img.getWidth(null); newHeight =
* img.getHeight(null); }
*/
BufferedImage tag = new BufferedImage((int) newWidth,
(int) newHeight, BufferedImage.TYPE_INT_RGB);
// Image.SCALE_SMOOTH 的縮略演算法 生成縮圖片的平滑度的,優先順序比速度高 生成的圖片質量比較好 但速度慢
tag.getGraphics().drawImage(
img.getScaledInstance(newWidth, newHeight,
Image.SCALE_SMOOTH), 0, 0, null);
FileOutputStream out = new FileOutputStream(outFile);
// JPEGImageEncoder可適用於其他圖片型別的轉換
JPEGImageEncoder encoder = JPEGCodec.createJPEGEncoder(out);
encoder.encode(tag);
out.close();
}
} catch (IOException ex) {
ex.printStackTrace();
}
return true;
}
/**
* @param srcFile原始檔
* @param outFile輸出檔案
* @param x座標
* @param y座標
* @param width寬度
* @param height高度
* @return
* @描述 —— 裁剪圖片
*/
public static boolean cutPic(String srcFile, String outFile, int x, int y,
int width, int height) {
FileInputStream is = null;
ImageInputStream iis = null;
try {
// 如果源圖片不存在
if (!new File(srcFile).exists()) {
return false;
}
// 讀取圖片檔案
is = new FileInputStream(srcFile);
// 獲取檔案格式
String ext = srcFile.substring(srcFile.lastIndexOf(".") + 1);
// ImageReader聲稱能夠解碼指定格式
Iterator<ImageReader> it = ImageIO.getImageReadersByFormatName(ext);
ImageReader reader = it.next();
// 獲取圖片流
iis = ImageIO.createImageInputStream(is);
// 輸入源中的影象將只按順序讀取
reader.setInput(iis, true);
// 描述如何對流進行解碼
ImageReadParam param = reader.getDefaultReadParam();
// 圖片裁剪區域
Rectangle rect = new Rectangle(x, y, width, height);
// 提供一個 BufferedImage,將其用作解碼畫素資料的目標
param.setSourceRegion(rect);
// 使用所提供的 ImageReadParam 讀取通過索引 imageIndex 指定的物件
BufferedImage bi = reader.read(0, param);
// 儲存新圖片
File tempOutFile = new File(outFile);
if (!tempOutFile.exists()) {
tempOutFile.mkdirs();
}
ImageIO.write(bi, ext, new File(outFile));
return true;
} catch (Exception e) {
e.printStackTrace();
return false;
} finally {
try {
if (is != null) {
is.close();
}
if (iis != null) {
iis.close();
}
} catch (IOException e) {
e.printStackTrace();
return false;
}
}
}
/**
* @param doubleValue
* @return
* @描述 —— 將浮點型資料保留整數位轉換成int型
*/
public static Integer getRoundIntFromDouble(Double doubleValue) {
return Integer.parseInt(String.valueOf(Math.round(doubleValue)));
}
public static String GetImageStr(String imgFilePath) {// 將圖片檔案轉化為位元組陣列字串,並對其進行Base64編碼處理
byte[] data = null;
// 讀取圖片位元組陣列
try {
InputStream in = new FileInputStream(imgFilePath);
data = new byte[in.available()];
in.read(data);
in.close();
} catch (IOException e) {
e.printStackTrace();
}
// 對位元組陣列Base64編碼
BASE64Encoder encoder = new BASE64Encoder();
return encoder.encode(data);// 返回Base64編碼過的位元組陣列字串
}
public static byte[] GenerateImage(String imgStr) {// 對位元組陣列字串進行Base64解碼並生成圖片
if (imgStr == null) // 影象資料為空
return null;
BASE64Decoder decoder = new BASE64Decoder();
try {
// Base64解碼
byte[] bytes = decoder.decodeBuffer(imgStr);
for (int i = 0; i < bytes.length; ++i) {
if (bytes[i] < 0) {// 調整異常資料
bytes[i] += 256;
}
}
return bytes;
} catch (Exception e) {
return null;
}
}
public static boolean GenerateImage(String imgStr, String imgFilePath) {// 對位元組陣列字串進行Base64解碼並生成圖片
if (imgStr == null) // 影象資料為空
return false;
BASE64Decoder decoder = new BASE64Decoder();
try {
// Base64解碼
byte[] bytes = decoder.decodeBuffer(imgStr);
for (int i = 0; i < bytes.length; ++i) {
if (bytes[i] < 0) {// 調整異常資料
bytes[i] += 256;
}
}
// 生成jpeg圖片
OutputStream out = new FileOutputStream(imgFilePath);
out.write(bytes);
out.flush();
out.close();
return true;
} catch (Exception e) {
return false;
}
}
//將base64圖片剪裁成圓形
public static boolean cutImgToRound(String image,String url){
if(image == null){
return false;
}
try {
BufferedImage bi1 = null;
BASE64Decoder decoder = new BASE64Decoder();
// Base64解碼
byte[] bytes = decoder.decodeBuffer(image);
for (int i = 0; i < bytes.length; ++i) {
if (bytes[i] < 0) {// 調整異常資料
bytes[i] += 256;
}
}
ByteArrayInputStream in = new ByteArrayInputStream(bytes); //將b作為輸入流;
bi1 = ImageIO.read(in);
// 根據需要是否使用 BufferedImage.TYPE_INT_ARGB
BufferedImage bi2 = new BufferedImage(bi1.getWidth(), bi1.getHeight(),
BufferedImage.TYPE_INT_RGB);
Ellipse2D.Double shape = new Ellipse2D.Double(0, 0, bi1.getWidth(), bi1
.getHeight());
Graphics2D g2 = bi2.createGraphics();
g2.setBackground(Color.WHITE);
g2.fill(new Rectangle(bi2.getWidth(), bi2.getHeight()));
g2.setClip(shape);
// 使用 setRenderingHint 設定抗鋸齒
g2.drawImage(bi1, 0, 0, null);
g2.dispose();
ImageIO.write(bi2, "jpg", new File(url));
return true;
} catch (Exception e) {
// TODO: handle exception
return false;
}
}
/*public static void cutImgToRound(String imageUrl,String url){
BufferedImage bi1 = null;
try {
bi1 = ImageIO.read(new File(imageUrl));
} catch (IOException e1) {
// TODO Auto-generated catch block
e1.printStackTrace();
}
// 根據需要是否使用 BufferedImage.TYPE_INT_ARGB
BufferedImage bi2 = new BufferedImage(bi1.getWidth(), bi1.getHeight(),
BufferedImage.TYPE_INT_RGB);
Ellipse2D.Double shape = new Ellipse2D.Double(0, 0, bi1.getWidth(), bi1
.getHeight());
Graphics2D g2 = bi2.createGraphics();
g2.setBackground(Color.WHITE);
g2.fill(new Rectangle(bi2.getWidth(), bi2.getHeight()));
g2.setClip(shape);
// 使用 setRenderingHint 設定抗鋸齒
g2.drawImage(bi1, 0, 0, null);
g2.dispose();
try {
ImageIO.write(bi2, "jpg", new File(url));
} catch (IOException e) {
// TODO Auto-generated catch block
e.printStackTrace();
}
}*/
//生成二維碼
public static void createQrCode(String imageUrl,String url,String size,String text){
try {
int qrCodeSize = 100;
if(StringUtil.isNorBlank(size)){
qrCodeSize = Integer.parseInt(size);
}
BufferedImage bi = null;
BufferedImage logo = null;
logo = ImageUtils.resizeImage1(ImageIO.read(new File(imageUrl)),100, 0.9f, true);
bi = QrCodeUtil.createQrCode(logo,text,qrCodeSize,qrCodeSize);
ImageIO.write(bi, "jpg", new File(url));
} catch (IOException e) {
// TODO Auto-generated catch block
e.printStackTrace();
}
}
/**
* 等比縮放圖片
*
* @param originalFile 原始檔
* @param newLength 新的長度
* @param quality 照片質量(介於0~1之間)
* @param lengthFlag 長度標識(1、true newLength表示新圖片寬;2、false newLength表示新圖片高)
* @throws IOException
*/
public static BufferedImage resizeImage1(BufferedImage originalFile,int newLength, float quality, boolean lengthFlag) throws IOException {
FileOutputStream out = null;
try {
if (quality > 1) {
throw new IllegalArgumentException("Quality has to be between 0 and 1");
}
Image i = (Image)originalFile;
Image resizedImage = null;
int iWidth = i.getWidth(null);
int iHeight = i.getHeight(null);
if (lengthFlag) {
resizedImage = i.getScaledInstance(newLength, (newLength * iHeight) / iWidth, Image.SCALE_SMOOTH);
} else {
resizedImage = i.getScaledInstance((newLength * iWidth) / iHeight, newLength, Image.SCALE_SMOOTH);
}
// This code ensures that all the pixels in the image are loaded.
Image temp = new ImageIcon(resizedImage).getImage();
// Create the buffered image.
BufferedImage bufferedImage = new BufferedImage(temp.getWidth(null), temp.getHeight(null), BufferedImage.TYPE_INT_RGB);
// Copy image to buffered image.
Graphics g = bufferedImag