
小程式購物車實現及mvvm嘗試
功能介紹
好奇微信小程式是如何製作的,也對盒馬app感興趣,就嘗試寫了這個盒馬小程式。實現了app的部分功能,還有部分功能未實現,和大家一起學習
文章末有GitHub源專案程式碼地址
已實現的功能
- 購物車的操作。新增商品、刪除商品
- 新增收貨地址
- 點選二維碼圖片能掃一掃
- 圖片輪播效果
- 滾動檢視展示商品詳情
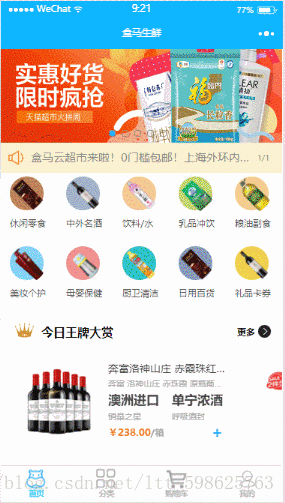
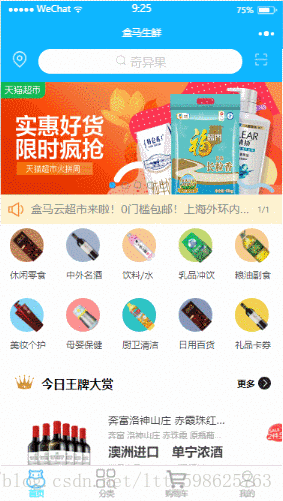
專案效果圖
頁面簡介
購物車的操作

新增收貨地址
部分功能點實現介紹
將商品加入購物車
我使用easymock構建了一些資料,用於商品在列表展示。
這是wxml,用於商品的展示。
<scroll-view scroll-y> 在執行for迴圈遍歷資料內容的時候,為每一個商品添加了index,用於確定使用者將哪一件商品加入了購物車。給加號添加了一個繫結事件,使用者點選加號,能將該商品放入購物車列表。
js部分程式碼:
這裡最重要的是在app.js中添加了一個全域性變數cardList,用於儲存使用者加入購物車的商品。這樣,就能實現多個頁面都能對購物車列表的資料進行操作了。
globalData: {
  cardList: []
}
商品展示介面:頁面開始載入的時候,就請求資料,用於商品列表的顯示。
wx.request({
  url: "https://www.easy-mock.com/mock/5a223b51707056548f086d8b/hema/getGoods",
  success: (res) => {
    console.log(res.data.data.goods);
    this.setData({
      goods: res.data.data.goods
    })
  }
})
使用者將商品加入購物車執行的操作
addInCart: function(e) {
  const good = this.data.goods[e.currentTarget.id]; // 根據index,判斷使用者點選了哪個商品加入購物車
  const cart = app.globalData.cardList; // 獲取購物車列表
  cart.push(good); // 使用者選擇商品加入購物車後,將該商品加入購物車列表
},
調整商品的購買數量
將商品加入購物車後,還有可能對新增的商品進行加減,調整購買數量。
購物車wxml介面:
<block wx:for="{{goodsList}}" wx:key="index" data-index="index">
    <view class="weui-cell">
        <view class="weui-cell__hd">
            <icon type="success" color="#23a3ff"></icon>
        </view>
        <view class="weui-cell__bd">
            <image src="{{item.image}}" />
        </view>
        <view class="weui-cell__ft right">
            <text class="proIntr left">{{item.name}}</text>
            <text class="price left">¥{{item.price}}/{{item.unit}}</text>
            <view class="count">
                <text class="reduce left" bindtap="reduceCount" id="{{index}}">-</text>
                <text class="number left">{{item.count}}</text>
                <text class="add left" bindtap="addCount" id="{{index}}">+</text>
            </view>
        </view>
    </view>
</block>
給加號減號分別添加了點選事件,迴圈時還要用index標出使用者對購物車的哪一件商品進行了加減操作。
js部分:
onLoad: function (options) {
  this.setData({
    // 頁面載入時就給購物車顯示商品數量
    goodsList: app.globalData.cardList
  });
  this.sumMoney();
},
// 增加商品數量
addCount:function (e) {
  var that = this;
  console.log(e);
  const goodId = e.currentTarget.id;
  console.log(that.data.goodsList[goodId]);
  that.data.goodsList[goodId].count++;
  console.log(that.data.goodsList[goodId]);
  this.setData({
    goodsList: that.data.goodsList
  })
  this.sumMoney();
},
// 減少商品數量
reduceCount: function(e) {
  var that = this;
  const goodId = e.currentTarget.id;
  // console.log(that.data.goodsList[goodId]);
  if(that.data.goodsList[goodId].count <= 1) {
    that.data.goodsList[goodId].count = 1;
    wx.showModal({
      title: '數量小於1',
      content: '不允許操作',
      duration: 2000
    })
  } else {
    that.data.goodsList[goodId].count--;
  }
  // console.log(that.data.goodsList[goodId]);
  this.setData({
    goodsList: that.data.goodsList
  })
  this.sumMoney();
},
// 計算所有商品的錢數
sumMoney: function() {
  var count = 0;
  const goods = this.data.goodsList;
  console.log(goods);
  for(let i = 0; i < goods.length; i++) {
    // console.log(goods[i].count);
    // console.log(goods[i].price);
    count += goods[i].count*goods[i].price;
  }
  // console.log(count);
  this.setData({
    sum: count
  })
},
這個介面,我不確定獲得的資料是什麼,就反覆測試了多次。
新增預設收貨地址
在輸入地址的介面,為每一個輸入框都添加了監聽輸入的事件,用於監聽使用者輸入的內容。
例如:
<view class="weui-cell">
    <view class="weui-cell__hd">
        <text class="weui-label mr60">收貨地址</text>
    </view>
    <view class="weui-cell__bd">
        // 繫結的監聽輸入框事件 bindinput="getAddress"
        <input bindinput="getAddress" class="weui-input" placeholder="請輸入收貨地址" />
    </view>
</view>
我將獲得的使用者輸入的預設地址儲存到了storage中。
【劃重點:微信小程式的storage儲存大小是由限制的,不能將大量資料放在storage中】
js部分:
// 頁面的初始資料,使用者輸入的收貨地址、門牌號、姓名、聯絡電話
data: {
address: '',
num: '',
name: '',
phone: ''
},
backToChooseAddr: function() {
wx.navigateTo({
  url: "../chooseAddress/chooseAddress"
});
},
getAddress: function(e) {
this.setData({
  address: e.detail.value
})
},
getNum: function(e) {
this.setData({
  num: e.detail.value
})
},
getName: function(e) {
this.setData({
  name: e.detail.value
})
},
getPhone: function(e) {
this.setData({
  phone: e.detail.value
})
},
// 使用者點選儲存後,對輸入的資料進行儲存,並反饋儲存狀態
saveInfo: function() {
wx.setStorage({
  key: "name",
  data: [{address:this.data.address}, {num: this.data.num}, {name: this.data.name}, {phone: this.data.phone}],
  success: function() {
    wx.showToast({
      title: "地址儲存成功",
      icon: 'success',
      duration: 2000
    })
    setTimeout(function(){
      wx.navigateTo({
        url: "../chooseAddress/chooseAddress"
      })
    },1000);

  }
})
使用者預設收貨地址的顯示,就從storage中按照key-value的方式取出使用者存在storage中的地址資訊。
js部分:
onShow: function () {
  var that = this;
  wx.getStorage({
    key: "name",
    success: function(res) {
      console.log(res);
      if(res.data.length > 0) {
        that.setData({
          address: res.data[0].address,
          num: res.data[1].num,
          name: res.data[2].name,
          phone: res.data[3].phone
        })
      }
    }
  })
圖片輪播和滾動檢視部分
圖片輪播
給swiper元件新增current=’{{activeIndex}}’就能判斷當前展示圖片的下標,再根據下標該表小圓點的展示狀態(給相應的小圓點一個active類,有不同的樣式)。小圓點也綁定了點選事件,能根據使用者點選不同的小圓點,動態改變圖片的展示狀態。
<swiper class="page__bd__scroll" current='{{activeIndex}}' bindchange='swiperTab'>
  <swiper-item>
    <image class="page__scroll__item" src=""/>
  </swiper-item>
  <swiper-item>
    <image class="page__scroll__item" src=""/>
  </swiper-item>
  <swiper-item>
    <image class="page__scroll__item" src=""/>
  </swiper-item>
  <swiper-item>
    <image class="page__scroll__item" src=""/>
  </swiper-item>
  <swiper-item>
    <image class="page__scroll__item" src=""/>
  </swiper-item>
</swiper>

<ul class="page__scroll__btns">
  <li class="page__scroll__btn {{activeIndex==0?'active':''}}" bindtap="changeTag" data-index="0"></li>
  <li class="page__scroll__btn {{activeIndex==1?'active':''}}" bindtap="changeTag" data-index="1"></li>
  <li class="page__scroll__btn {{activeIndex==2?'active':''}}" bindtap="changeTag" data-index="2"></li>
  <li class="page__scroll__btn {{activeIndex==3?'active':''}}" bindtap="changeTag" data-index="3"></li>
  <li class="page__scroll__btn {{activeIndex==4?'active':''}}" bindtap="changeTag" data-index="4"></li>
</ul>
js部分:
// activeIndex 是當前播放圖片的下標
data: {
  activeIndex: 0
},
// 點選不同的小圓點切換不同的圖片
changeTag:  function(e){
  var type = e.target.dataset.index;
  this.setData({
    activeIndex: type
  });
},
// 滑動切換圖片,獲取點選的下標,改變相應小圓點的狀態
swiperTab: function(e){
  var type = e.detail.current;
  this.setData({
    activeIndex: type
  });
},
遇到的問題
1、在寫靜態介面的時候,給子元素一個margin值,一直會影響父元素的margin值,糾結了好久才知道這個問題可以用bfc的知識解決。給父元素新增一個overflow: hidden,通過這種方法建立一個bfc,就能避免子元素的margin樣式影響到父元素。
2、從後臺或者從其他地方獲取資料時,很難一眼看出來傳值的內容是什麼,我就把資料輸出到控制檯,一點點判斷。
3、非同步問題。js是非同步執行的。比如執行到取資料的時候,程式不會等著取到資料再執行下一步,而是立即執行下一步。這點在輸出資料和設定資料時要尤為注意。
收穫
寫完這些還是收穫滿滿的。
感觸最大的就是要善於查文件。微信的weui提供了很多樣式,只要引入樣式庫,照著使用文件寫,能少很多事。還有就是微信小程式的api,裡面有很多微信小程式自帶的api,很方便。
面對bug心理承受也更大了。學會了一些除錯技巧。使用easymock構建模擬資料。
對底層的盒子模型、非同步等東西有了更深一層的理解。
專案地址:
https://github.com/TeanLee/hema
如果覺得還不錯的話,給個小星星start鼓勵一下哦
比心
聯絡方式:
如果有建議,歡迎聯絡我,一起學習。
wechat: ltt598625763
email: [email protected]