【VSCode】Windows下VSCode編譯除錯c/c++【更新】
————————– 2017.06.10 更新————————-
便攜版已更新,點此獲取便攜版
用於cpptools外掛的配置檔案更新
更新的launch.json
// Available variables which can be used inside of strings.
// ${workspaceRoot}: the root folder of the team
// ${file}: the current opened file
// ${fileBasename}: the current opened file's basename - 1
- 2
- 3
- 4
- 5
- 6
- 7
- 8
- 9
- 10
- 11
- 12
- 13
- 14
- 15
- 16
- 17
- 18
- 19
- 20
- 21
- 22
- 23
- 24
- 25

更新的tasks.json
{
    "version": "0.1.0",
    "command": "g++",
    "args": ["-g","${file}","-o","${file}.exe"],    // 編譯命令引數
    "problemMatcher": {
        "owner": "cpp",
        "fileLocation": ["relative", "${workspaceRoot}"],
        "pattern": {
            "regexp": "^(.*):(\\d+):(\\d+):\\s+(warning|error):\\s+(.*)$",
            "file": 1,
            "line": 2,
            "column": 3,
            "severity": 4,
            "message": 5
        }
    }
}- 1
- 2
- 3
- 4
- 5
- 6
- 7
- 8
- 9
- 10
- 11
- 12
- 13
- 14
- 15
- 16
- 17

————————– 以下是原文 ————————-
這篇文章為blackkitty記錄在windows下使用vscode編譯除錯c/c++的詳細過程
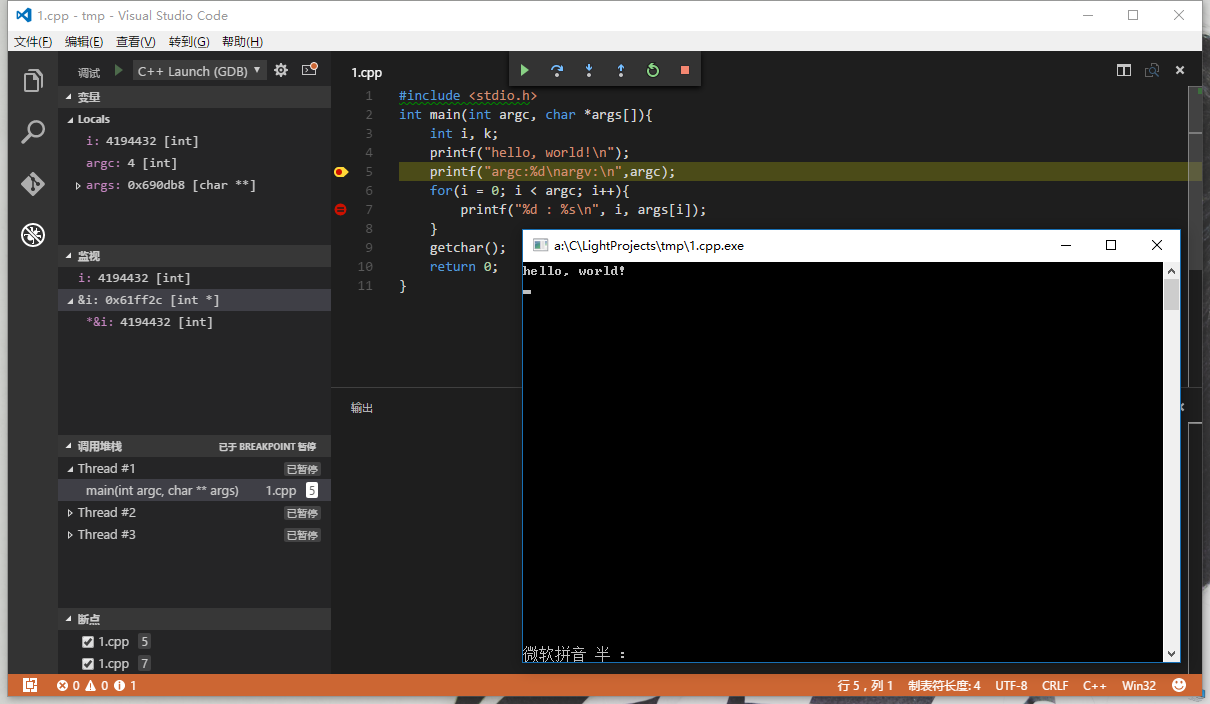
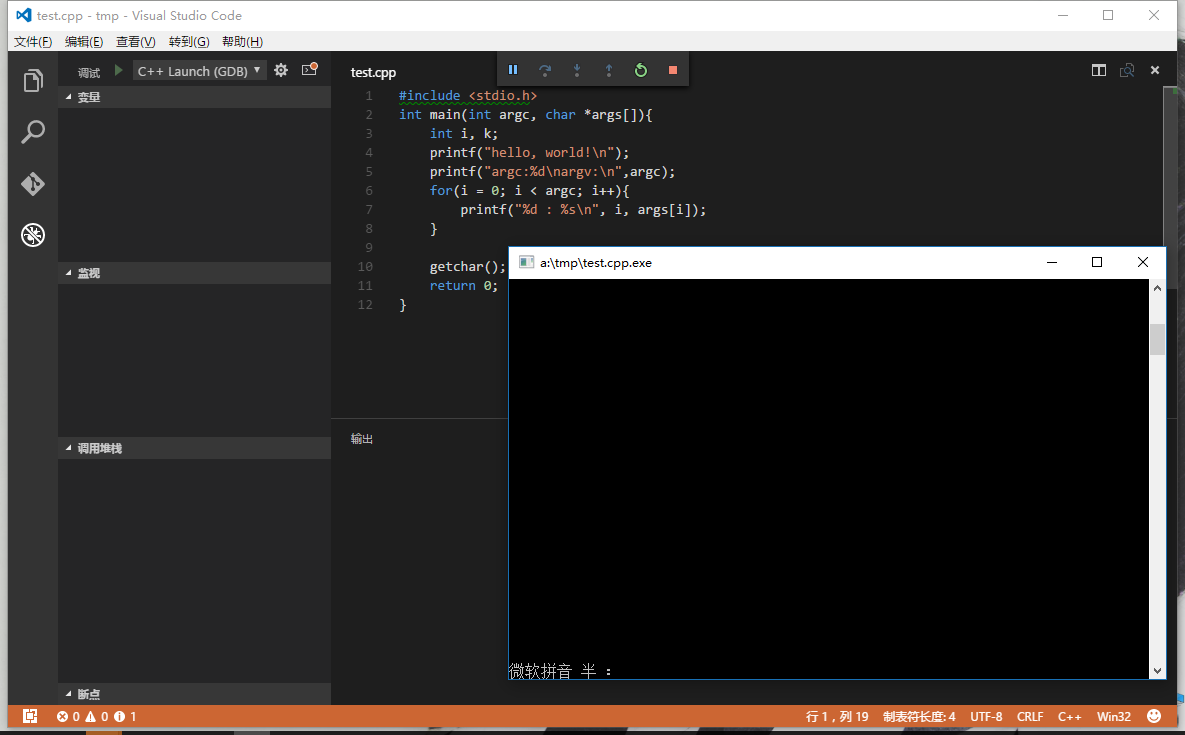
首先看效果
設定斷點,變數監視,呼叫堆疊的檢視:
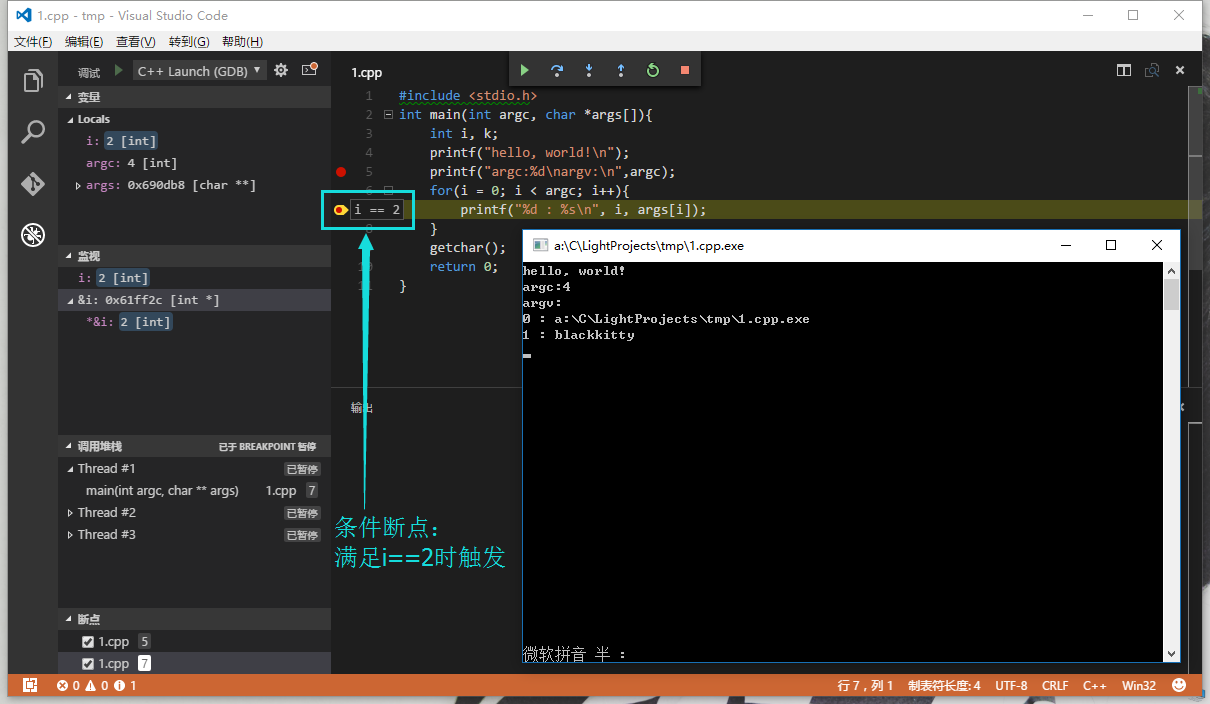
條件斷點的使用:
下面是配置過程:
總體流程:
- 下載安裝vscode
- 安裝cpptools外掛
- 安裝編譯、除錯環境
- 修改vscode除錯配置檔案
- 完了
安裝cpptools外掛
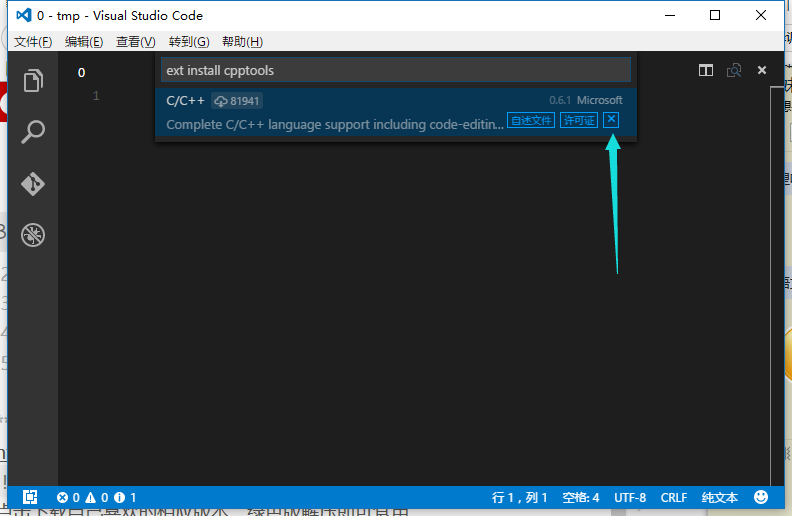
開啟vscode,按ctrl+e開啟快速命令框,輸入以下命令後等待
ext install cpptools
vscode在短暫的聯網查詢後會列出外掛列表,如圖:
點選箭頭所指處的按鈕安裝外掛,安裝過程可能會有些慢耐心等待
安裝完成後vscode會提示你重啟vscode,此時重啟即可
安裝編譯、除錯環境
目前windows下除錯僅支援 Cygwin 和 MinGW。
這裡使用的是MinGW.
下面是MinGW的安裝配置過程:
http://mingw.org/
進入官網點選右側 Download Installer下載安裝器
開啟安裝器點選install準備安裝:
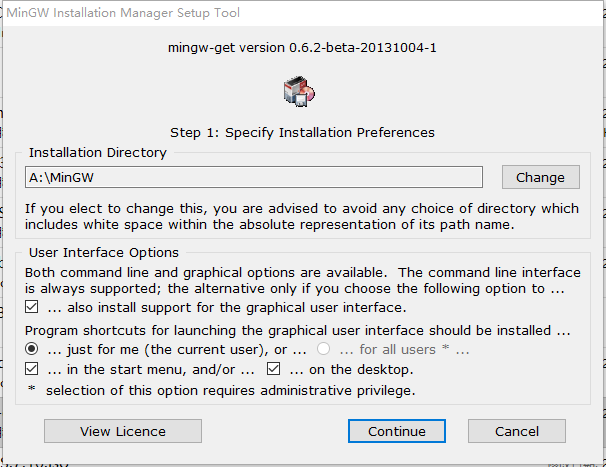
選擇一個安裝目錄,預設為C:\MinGW這裡選擇的是A:\MinGW
點選Continue開始安裝,安裝過程需聯網,若安裝時提示error則需翻牆安裝
安裝過程很快,結束後Continue按鈕恢復為可用狀態,點選完成安裝。
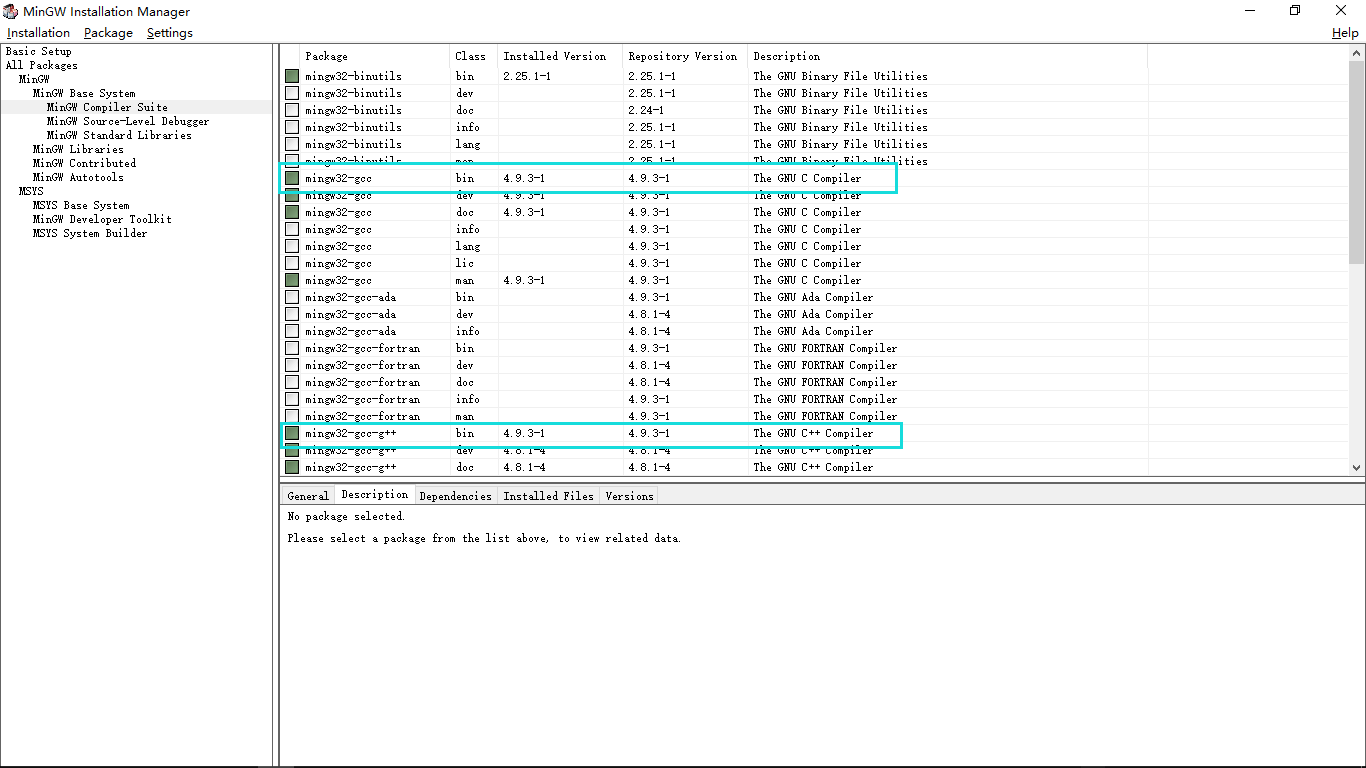
開啟MinGW安裝管理器進行進一步配置
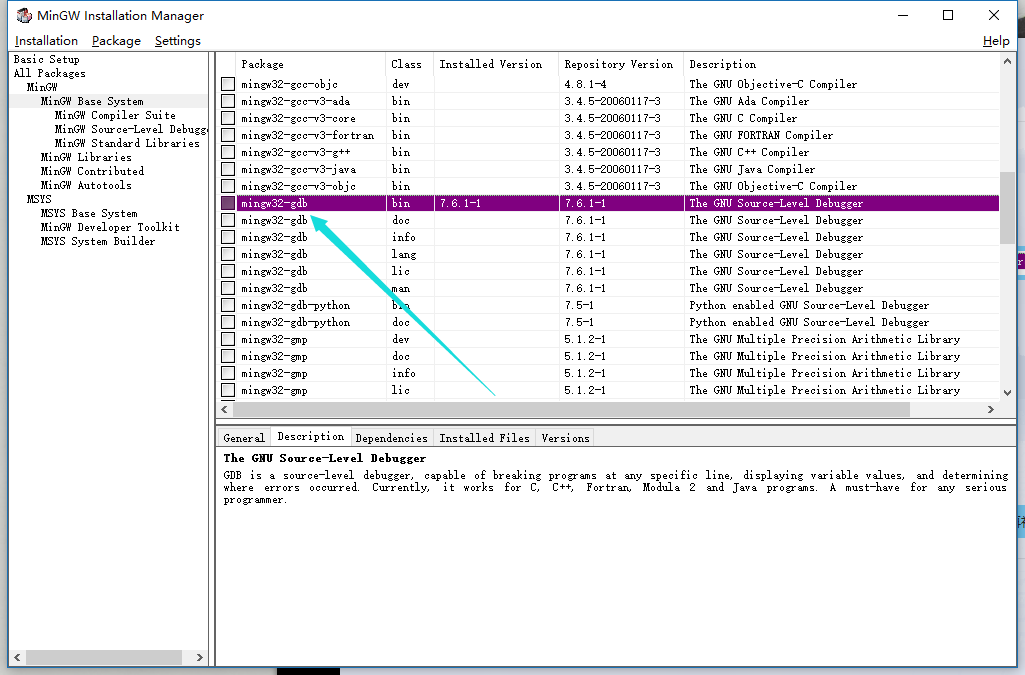
注意這裡gdb必選,否則無法除錯
選中幾個需要的項右鍵Make for Installation進行標記,其中gcc和g++為c和c++編譯器
選擇完全部想要安裝的項後點擊左上角Installation選單下的Apply Changes應用修改,過程需聯網,中間出現error可先繼續,若最後失敗則需翻牆更新,建議翻牆
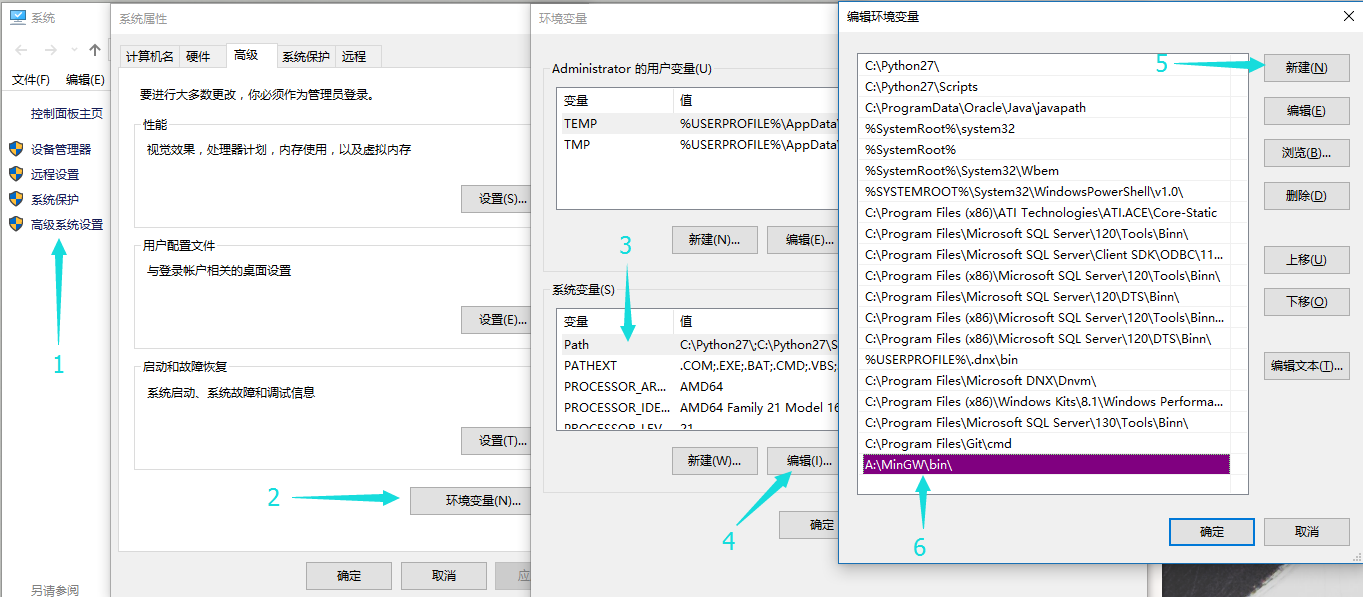
然後配置系統環境變數path,這一步為必須
在 我的電腦 上右鍵 屬性:
然後按照下面步驟做即可,注意最後新建的項要與之前MinGW安裝位置相對應
修改vscode除錯配置檔案
再次開啟vscode,注意配置系統環境變數path後重啟一下vscode
注意vscode除錯需要在開啟的資料夾中進行
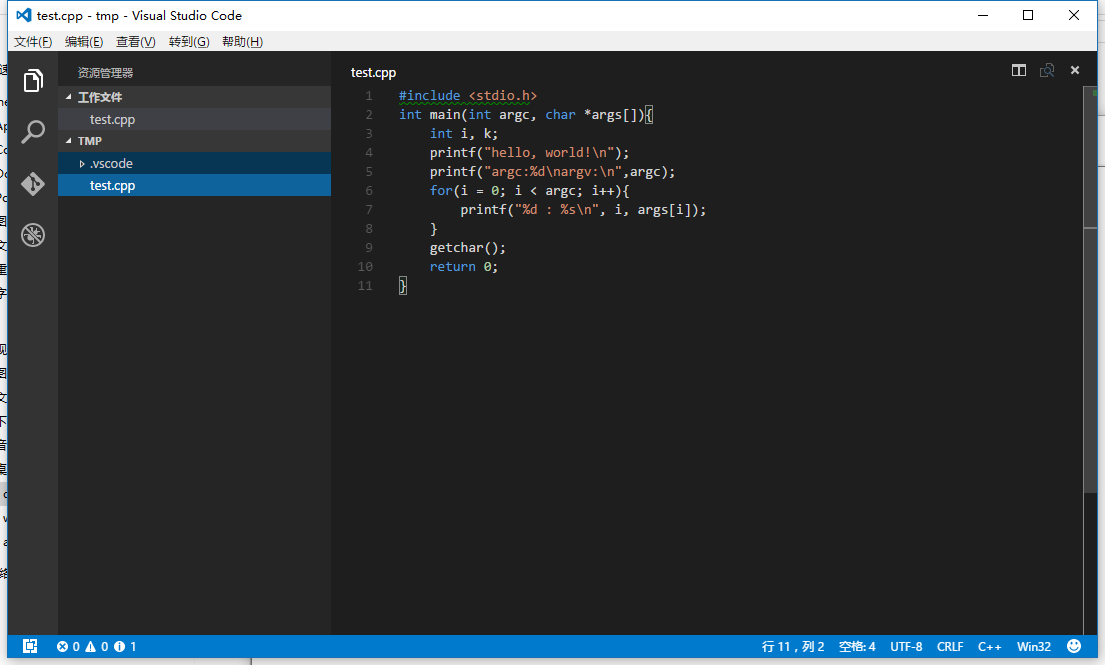
開啟資料夾後,新建test.cpp進行輸入程式碼測試:
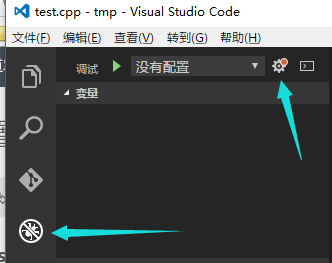
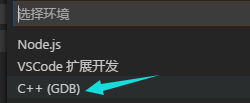
如圖示進入除錯介面選擇C++:
然後會在工作目錄下的生成一個launch.json的啟動配置檔案:
使用下面程式碼替換該檔案:
{
    "version": "0.2.0",
    "configurations": [
        {
            "name": "C++ Launch (GDB)",                 // 配置名稱,將會在啟動配置的下拉選單中顯示
            "type": "cppdbg",                           // 配置型別,這裡只能為cppdbg
            "request": "launch",                        // 請求配置型別,可以為launch(啟動)或attach(附加)
            "launchOptionType": "Local",                // 偵錯程式啟動型別,這裡只能為Local
            "targetArchitecture": "x86",                // 生成目標架構,一般為x86或x64,可以為x86, arm, arm64, mips, x64, amd64, x86_64
            "program": "${file}.exe",                   // 將要進行除錯的程式的路徑
            "miDebuggerPath":"a:\\MinGW\\bin\\gdb.exe", // miDebugger的路徑,注意這裡要與MinGw的路徑對應
            "args": ["blackkitty",  "1221", "# #"],     // 程式除錯時傳遞給程式的命令列引數,一般設為空即可
            "stopAtEntry": false,                       // 設為true時程式將暫停在程式入口處,一般設定為false
            "cwd": "${workspaceRoot}",                  // 除錯程式時的工作目錄,一般為${workspaceRoot}即程式碼所在目錄
            "externalConsole": true,                    // 除錯時是否顯示控制檯視窗,一般設定為true顯示控制檯
            "preLaunchTask": "g++"                    // 除錯會話開始前執行的任務,一般為編譯程式,c++為g++, c為gcc
        }
    ]
}- 1
- 2
- 3
- 4
- 5
- 6
- 7
- 8
- 9
- 10
- 11
- 12
- 13
- 14
- 15
- 16
- 17
- 18
- 19

注意miDebuggerPath要與MinGw的路徑對應
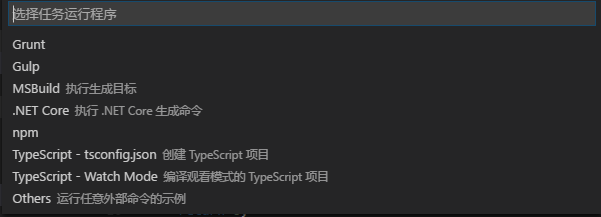
替換後儲存,然後切換至test.cpp,按F5進行除錯,此時會彈出一個資訊框要求你配置任務執行程式,點選它~
在這裡隨便選一個:
然後用下面程式碼替換:
{
    "version": "0.1.0",
    "command": "g++",
    "args": ["-g","${file}","-o","${file}.exe"],    // 編譯命令引數
    "problemMatcher": {
        "owner": "cpp",
        "fileLocation": ["relative", "${workspaceRoot}"],
        "pattern": {
            "regexp": "^(.*):(\\d+):(\\d+):\\s+(warning|error):\\s+(.*)$",
            "file": 1,
            "line": 2,
            "column": 3,
            "severity": 4,
            "message": 5
        }
    }
}- 1
- 2
- 3
- 4
- 5
- 6
- 7
- 8
- 9
- 10
- 11
- 12
- 13
- 14
- 15
- 16
- 17

儲存一下,然後切換至test.cpp,再次按F5啟動除錯~
完了!

