
springboot啟動環境變數profile maven打包profile內部原理
springboot啟動處理步驟:
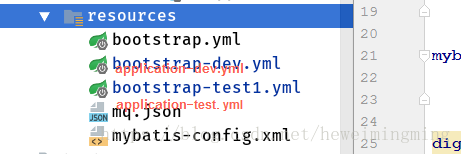
1、不接配置中心的情況下,啟動的時候springboot預設會載入bootstrap.yml 以及 bootstrap-{profile}在bootstrap.yml中 spring.profiles.active: dev 指定。
另外說一下,載入順序如下: bootstrap.yml 》 bootstrap-dev.yml 》 application.yml 》
application-dev.yml
也就是說先載入bootstrap開頭的再去載入application開頭的;同為bootstrap開頭的bootstrap.yml比bootstrap-dev.yml先載入,同為application開頭的同理。
如果這4個配置檔案中存在相同的屬性,那麼後加載的屬性值會覆蓋掉前載入的屬性值。
測試程式碼如下:
@Slf4j
@Configuration
public class TestConfig {

    @Value("${test.p}")
    private String testProfile;

    @Bean
    public String test(){
        System.out.println("test.p="+testProfile);
        log.info("test.p="+testProfile);
        return "";
    }
}
bootstrap-dev.yml:
test.p bootstrap-test1.yml:
test.p: test在idea中指定啟動引數 spring.profiles.active=dev,相當於在java -jar -Dspring.profiles.active=dev

啟動應用列印:

把啟動引數改為test1,啟動列印:
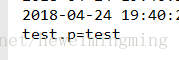
以上的操作證明了springboot在啟動的時候只會載入指定的profile對應的bootstrap-profile檔案,而不會載入未指定的profile檔案。
2、有時候我們不希望在啟動的時候才指定profile,例如不想在生產環境指定這個啟動引數,那麼這個時候我們可以在mvn構建的時候就做處理。處理的步驟是這樣的:
①、父pom檔案建立多個profile
<profiles>
        <profile>
            <id>sit</id>
            <properties>
                <profiles.active>dev</profiles.active>
            </properties>
        </profile>
        <profile>
            <id>production</id>
            <properties>
                <profiles.active>test</profiles.active>
            </properties>
        </profile>
    </profiles>
②、多個子專案情況下,子pom檔案使用maven邏輯指定過濾的properties檔案,讀取properties檔案下的內容:
properties內容如下:
spring.profiles.active=test
spring.cloud.config.uri=xxx
這裡會讀取到這兩個變數,spring.profiles.active和spring.cloud.config.uri
子專案pom檔案如下設定:
<build>
        <finalName>${project.artifactId}</finalName>
        <plugins>
            <plugin>
                <groupId>org.apache.maven.plugins</groupId>
                <artifactId>maven-compiler-plugin</artifactId>
                <configuration>
                    <source>1.8</source>
                    <target>1.8</target>
                </configuration>
            </plugin>

            <plugin>
                <groupId>org.springframework.boot</groupId>
                <artifactId>spring-boot-maven-plugin</artifactId>
                <version>${spring.boot.version}</version>
                <executions>
                    <execution>
                        <goals>
                            <goal>repackage</goal>
                        </goals>
                    </execution>
                </executions>
            </plugin>
        </plugins>

        <filters>
            <filter>src/main/profiles/profile-${profiles.active}.properties</filter>
        </filters>
        <resources>
            <resource>
                <filtering>true</filtering>
                <directory>src/main/resources</directory>
            </resource>
        </resources>
    </build>
其中profiles.active在maven打包的時候-P指定
讀取到的配置spring.profiles.active和spring.cloud.config.uri會替換掉bootstrap.properties檔案中的變數:
bootstrap.properties內容如下:
spring.application.name=jd-xx
spring.profiles.active=${spring.profiles.active}

spring.cloud.config.uri=${spring.cloud.config.uri}
spring.cloud.config.enabled=true
這裡打包出來的結果是:
spring.application.name=jd-xx
spring.profiles.active=dev

spring.cloud.config.uri=xxx
spring.cloud.config.enabled=true
這樣就在maven打包的時候指定了profile為dev,不需要再啟動的時候再次指定profile了。指定了profile後,讀取的檔案原理同上,也是讀取bootstrap.yml以及application-profile.yml或者bootatrap-profile.yml 。
完畢!