Mac OSX 上安裝 Tomcat 7 及管理介面
I’ve made the switch over to Apple on my development machines and as I’m starting my new company soon I’ve got myself a new MacBook Pro machine of which I will be transporting to and from the office so I’ve been installing my entire development on it and thought I’d blog about how to set-up Tomcat 7 on MacOSX to use as a development environment… It’s rather straight forward but thought I’d post it up anyway to help others!
Tomcat 7 is the first release of Tomcat to support the Servlet 3.0, EL 2.2 and JSP 2.2 specifications.
Tomcat 7 requires Java 1.6 to be installed on your Apple Mac based computer, if your running Leopard (10.5) or Snow Leopard (10.6) you are good to go already as these versions of OSX comes pre-installed with Java, however users of OSX Lion (10.7) and more than likely Mountain Lion (10.8) will need to enable Java of which I’ll now explain how to do so, if your not using Lion or Mountain Lion you can skips to the main install notes now!
Enabling Java on OSX Lion and OSX Mountain Lion
You can also check (to be on the safe side) your version of Java that you have installed on your machine by running the following command from the terminal:-
java -version
Installing Tomcat 7 on your Mac
1) First step is to download Tomcat from the Apache Tomcat website or which can be found here:
2) Opening or un-archiving the download will now create a new folder – more than likely this will be in your downloads folder unless you choose a different folder to download the file to.
3) Our next step is to ‘move’ the extracted folder to a system location of which we will run Tomcat from, we do this like so (obviously change your version number/download directory to suite your requirements):-
sudo mkdir /usr/local
sudo mv ~/Downloads/apache-tomcat-7.0.29  /usr/local
To make it easy to switch and upgrade Tomcat versions in future we’ll use a symbolic link to alias the tomcat folder, we do this like so:-
sudo ln -s /usr/local/apache-tomcat-7.0.29 /Library/Tomcat
We now need to change the ownership of the /Library/Tomcat folder:-
sudo chown -R <your OSX username> /Library/Tomcat
We now need to set all the scripts under ‘/Library/Tomcat/bin’ to executable, we do this like so:-
sudo chmod +x /Library/Tomcat/apache-tomcat-7.0.29/bin/*.sh
You’ve done it! – You can start Tomcat manually by running:-
/Library/Tomcat/bin/startup.sh
You can stop it by running:-
/Library/Tomcat/bin/shutdown.sh
Tomcat is now installed and working, you should be able to access it on your machine using this URL: http://localhost:8080/
A handy little GUI tool to start and stop Tomcat
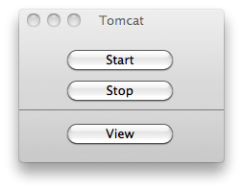
In a development environment, instead of having to open up the console each time, I have found a handy little tool that allows you to easily Stop, Start and open up the Tomcat enviroment… Its called ‘Tomcat Controller’ and can be downloaded from here: http://www.activata.co.uk/tomcatcontroller/
It provides a nice interface as shown below:-
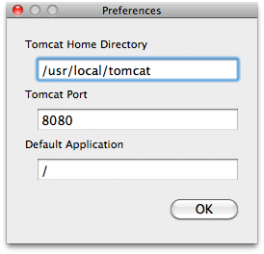
You will however need to open up the ‘Preferences’ and change the Tomcat location to match your new set-up.


