
tensorflow 模型的持久化
簡介
持久化的意義在於:
1. 可以儲存訓練的中間結果, 下次從斷點開始繼續訓練.
2. 將模型的訓練/預測/線上服務部署 獨立開來.
如表格所示, 根據 model-api 與 save-format 的不同, 還有種搭配.
| model-api | save-format |
|---|---|
| estimator | checkpoint |
| low-level-api | saved_model |
checkpoints
含多個檔案, 有 .meta,.data,.index等多個字尾的檔案. 變數與結構分開儲存.
with low-level-api
官方文件見參考[5].
tf.Saver
類. 用來儲存與恢復網路中的變數.Saver#save(self, sess, save_path, global_step=None, ...)
Args:
global_step: 影響到 model.ckpt-global_step.xxx 等檔案的命名.
通過實驗發現, 多次呼叫的話, 它會自動刪除舊的資料, 只保留最新的5個版本的檔案.Saver#restore(self, sess, save_path)
with estimator
Estimator的子類的建構函式中, 有引數 model_dir, 指定了ckpt檔案的存放位置. 首次訓練時, 直接建立. 後續訓練或預測時, 直接載入已有的資訊, 增量訓練或預測.
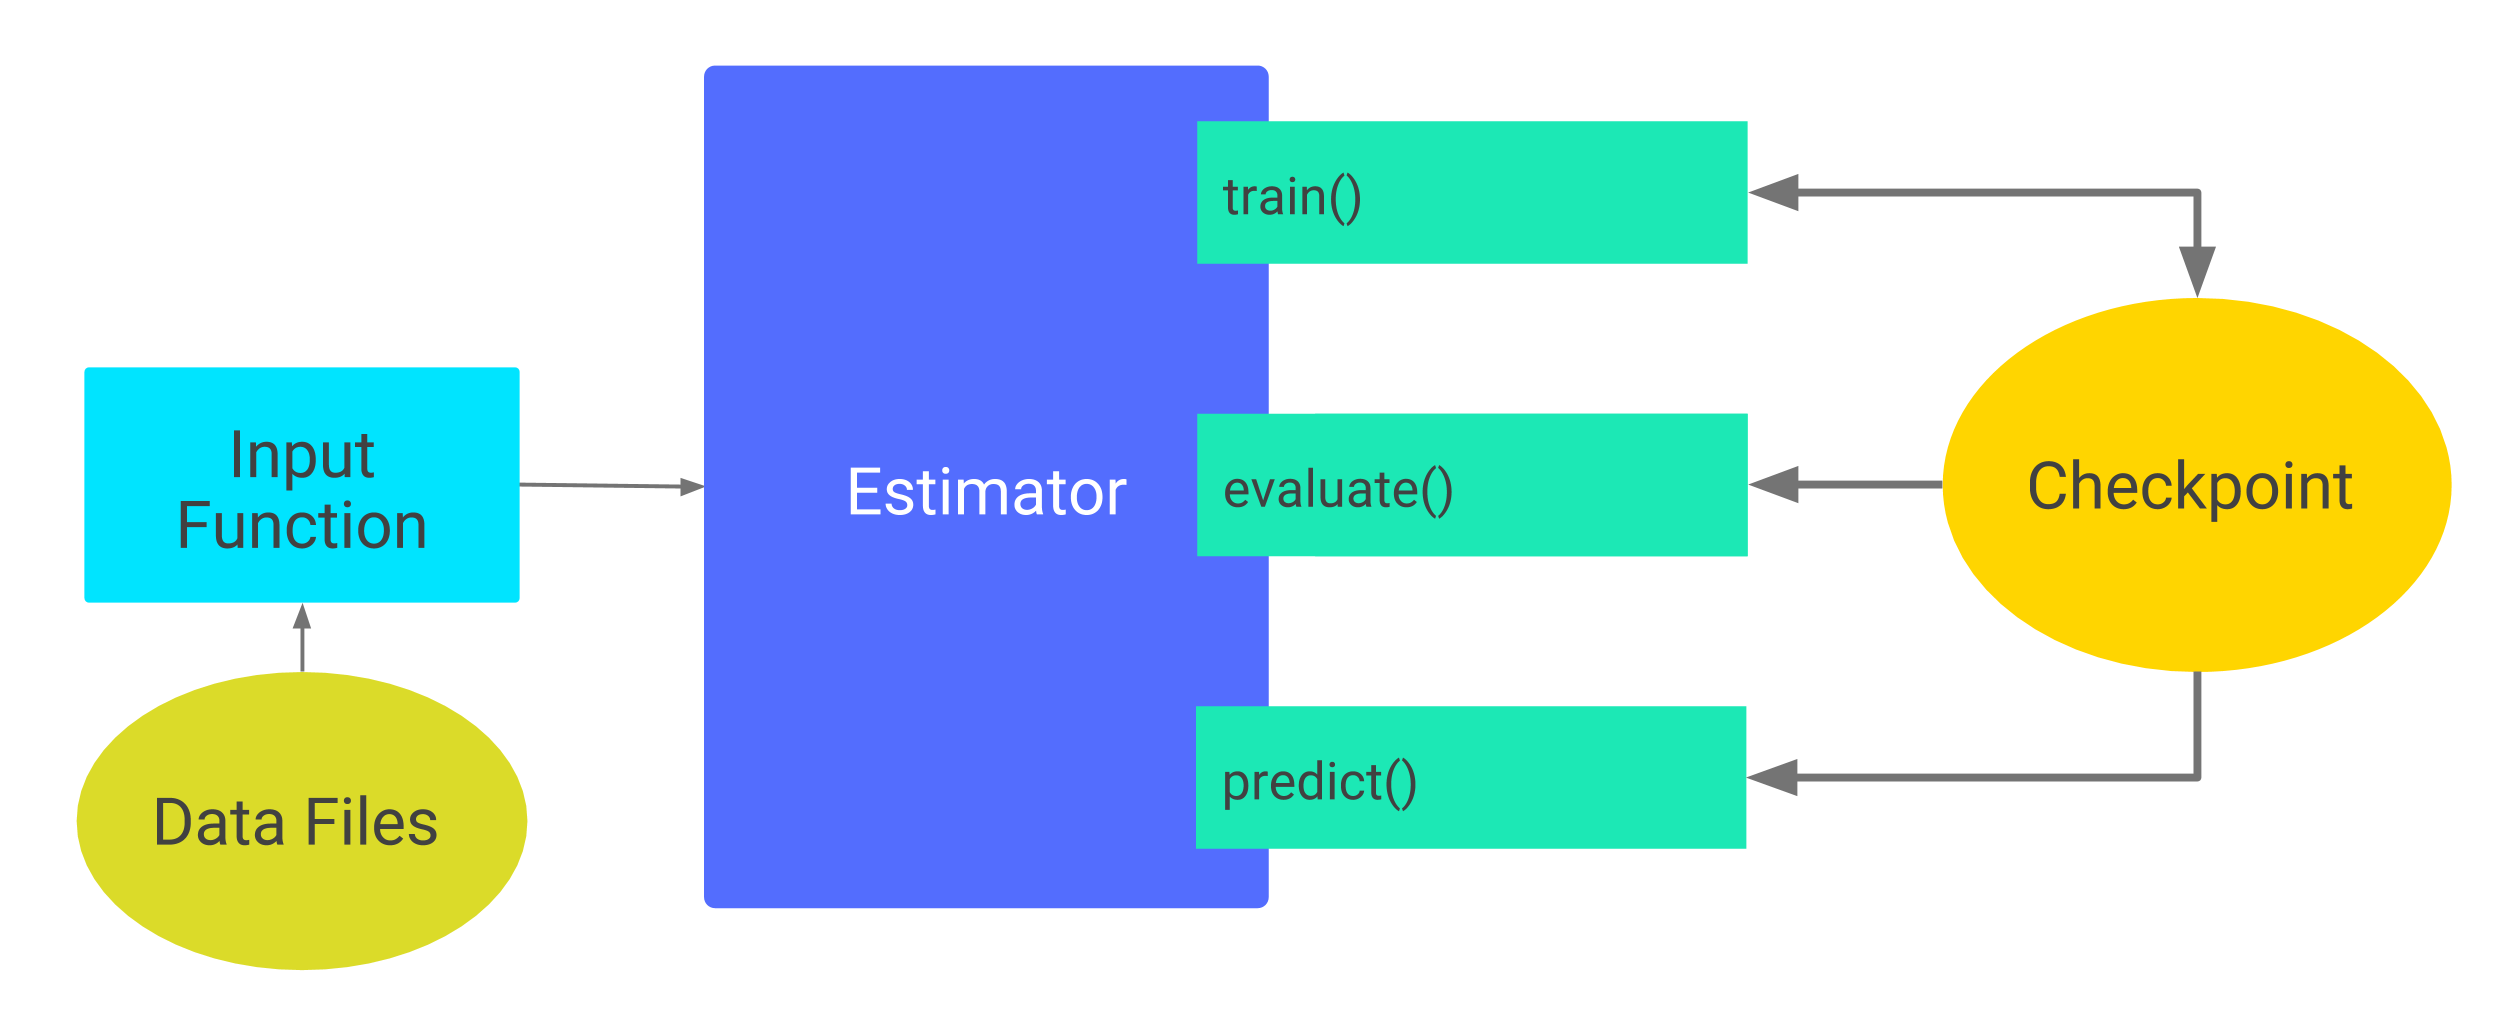
figure estimator儲存ckpt時的用法圖示
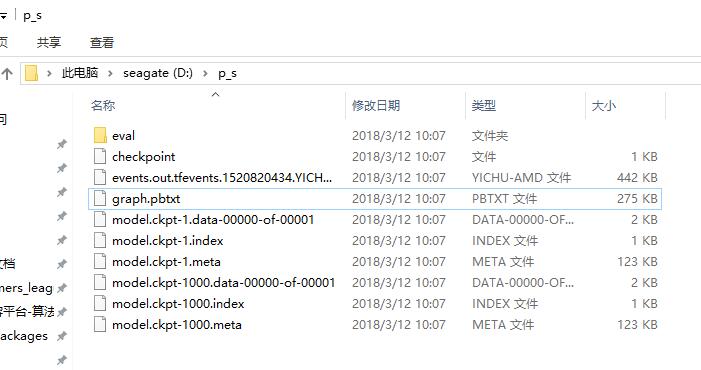
figure 本地實驗, 得到的目錄下內容
use it for prediction
對於訓練好的ckpt, 我們可以恢復它的結構與權重, 送入新的資料拿相應的預測結果.
詳見[7]
import tensorflow as tf
sess=tf.Session()
#First let's load meta graph and restore weights
saver = tf.train.import_meta_graph('my_test_model-1000.meta')
saver.restore(sess,tf.train.latest_checkpoint('./' SavedModel
同時儲存變數及 model 的結構.
官方文件見參考[1] .
signatures:一個model就像一個函式一樣, 有輸入有 輸出,
with low-level-api
個人喜歡用這種. 程式碼示例見參考[2].
tf.saved_model.builder.SavedModelBuilder(export_dir)
得到 builder 物件, 做後續的構建.export_dir引數對應的目錄不能已存在.tensorflow.python.saved_model.builder_impl.SavedModelBuilder#add_meta_graph_and_variables(self, sess, tags, signature_def_map=None,...)
Args:
- tags
傳的是一個集合, 如tags=[tag_constants.TRAINING]. 它就是當前儲存的計算圖的名字, 後續載入的時候就靠名字來匹配. - signature_def_map
計算圖的簽名. 拿來做預測時, 這個計算圖就像是一個函式, 有輸入有輸出, 所以它也要有相應的 signature. 這是一個{str:signature_def}形式的map.
- tags
signature_def 相關函式
tf.saved_model.signature_def_utils.build_signature_def(inputs=None, outputs=None, method_name=None)
Args:- inputs
a proto map of string totensor info, 可用下面的build_tensor_info()函式得到. - outputs
與上面類似.
- inputs
tf.saved_model.utils.build_tensor_info(tensor)
返回的就是TensorInfo proto.
整個構建過程中有多層map.:
signature_def_map = \
    {
        str: build_signature_def(inputs=
                                    {
                                        str: build_tensor_info(input_tensor)
                                    }
                             ,
                                outputs=
                                    {
                                     str: build_tensor_info(output_tensor)
                                    }
        )
    }
目錄結構
遞迴地檢視目錄下內容, 是這樣的:
.pb 的意思是 protocol buffer 格式.
$ find
.
./saved_model.pb
./variables
./variables/variables.data-00000-of-00001
./variables/variables.index
with Estimators
MetaGraph = MetaGraphDef + signature
saved_model_cli
一個命令列工具, 用來 inspect 或 execute 你的 saved model, 見參考 [4] .
在 python 環境下, 它的位置為 \site-packages\tensorflow\python\tools\saved_model_cli.py .
常用命令
#顯示幫助資訊和usage
python saved_model_cli.py show -h

# 檢視計算圖中的所有 tag-sets
python saved_model_cli.py show --dir D:/tmp/model_save_restore/

# 根據上一步顯示的tag, 檢視該tag對應計算圖中所有的 SignatureDef keys
python saved_model_cli.py show --dir D:/tmp/model_save_restore/ --tag_set serve

# 檢視 tag 對應計算圖中指定signature_def key的簽名內容.
#This is very useful when you want to know the tensor key value, dtype and shape of the input tensors for executing the computation graph later.
python saved_model_cli.py show --dir D:/tmp/model_save_restore/ --tag_set serve --signature_def serving_default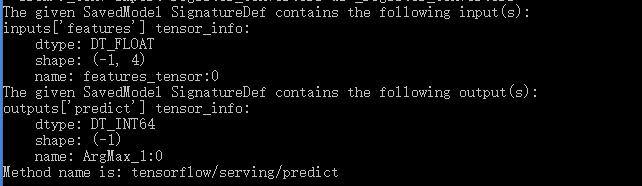
figure saved_model_cli 執行截圖