Jenkins新增slave節點遇到的問題
slave節點映象製作1.0:
先下載帶jdk8的映象,在此基礎上安裝ssh,git等
dockerfile:
FROM 10.19.248.12:30100/library/gongan-jdk8:2.0
RUN rpm -ivh https://dl.fedoraproject.org/pub/epel/epel-release-latest-7.noarch.rpm \
&& rpm --import /etc/pki/rpm-gpg/RPM-GPG-KEY-EPEL-7 \
&& yum install -y yum-priorities
RUN yum install -y \
net-tools \
openssh-clients \
openssh-server \
vim \
sshpass \
sudo \
git
RUN echo “root:123456”|chpasswd
RUN ssh-keygen -t dsa -f /etc/ssh/ssh_host_dsa_key
RUN ssh-keygen -t rsa -f /etc/ssh/ssh_host_rsa_key
RUN ssh-keygen -t ecdsa -f /etc/ssh/ssh_host_ecdsa_key -N “”
RUN ssh-keygen -t dsa -f /etc/ssh/ssh_host_ed25519_key
RUN ssh-keygen -t rsa -P “” -f ~/.ssh/id_rsa && \
cp ~/.ssh/id_rsa.pub ~/.ssh/authorized_keys && \
sed -i “s/#.StrictHostKeyChecking.
RUN mkdir /var/run/sshd
jenkins上slave的配置:


遇到的問題:
1、master連不上slave:ssh: connect to host 172.16.47.38 port 22: Connection refused
解決方式:安裝上文的dockerfile重新制作映象,啟動後執行/usr/sbin/sshd啟動ssh服務
2、No entry currently exists in the Known Hosts file for this host. Connections will be denied until this new host and its associated key is added to the Known Hosts file.
Key exchange was not finished, connection is closed.

解決方式:進入master,修改配置檔案“~/.ssh/config”,加上這兩行,重啟伺服器。
StrictHostKeyChecking no
UserKnownHostsFile /dev/null
或者手動清空known_hosts檔案

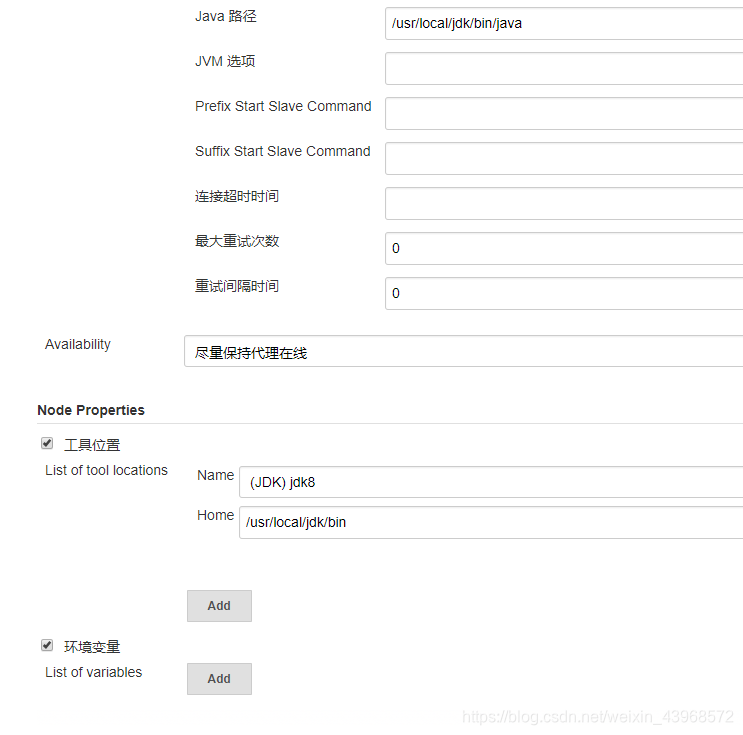
然後修改jenkins的slave節點配置:

slave節點映象製作2.0:
FROM 10.19.248.12:30100/staging/centos-jxy:latest
RUN yum -y install openssh-clients;yum -y install bridge-utils;yum -y install iproute;yum -y install openssh-server;yum -y install vim;yum -y install docker;yum -y install git;yum -y install sshpass;yum -y install sudo;yum -y install java-1.8.0-openjdk*; yum clean all; systemctl enable sshd.service;
RUN echo "root:123456"|chpasswd
RUN systemctl enable docker.service
COPY config /etc/selinux/config
COPY docker.service /usr/lib/systemd/system/docker.service
COPY docker /etc/sysconfig/docker
CMD ["/usr/sbin/init"]
/etc/sysconfig/docker修改內容

/usr/lib/systemd/system/docker.service修改內容
ExecStart=/usr/bin/dockerd --insecure-registry=10.19.248.12:30100 -H tcp://0.0.0.0:2375 -H unix:///var/run/docker.sock

安裝maven3.2.3
1.建立一個maven資料夾
mkdir /usr/local/maven
2.上傳apache-maven-3.2.3-bin.tar.gz到/usr/local/maven/目錄下
3.解壓
tar -zxvf apache-maven-3.2.3-bin.tar.gz -C /usr/local/maven/
4.設定環境變數
vim /etc/profile
在/etc/profile的檔案末尾新增以下配置:
export M2_HOME=/usr/local/maven/apache-maven-3.2.3
export PATH=
JAVA_HOME/jre/bin:
PATH
執行source命令讓新配置立即生效:
source /etc/profile
5.讓環境變數永久生效
vim ~/.bashrc
加入source /etc/profile
6.測試
mvn -v
安裝 Nodejs
安裝版本:10.10.0
1、安裝必要的編譯軟體包
yum install gcc gcc-c++
2、從原始碼下載Nodejs
yum install wget
cd /usr/local/src
wget https://npm.taobao.org/mirrors/node/v10.10.0/node-v10.10.0.tar.gz
3、解壓 nodejs 安裝包
tar xvf node-v10.10.0.tar.gz
4、進入解壓的 node 資料夾,開始編譯
cd node-v10.10.0/
./configure
make
5、安裝Nodejs
make install
6、驗證是否正確安裝
node -v
