[Android開發]從Android官方Demo談RecyclerView的用法
RecyclerView是Android5.0中出現的新控制元件,官方API解釋就一句話:
A flexible view for providing a limited window into a large data set
整體架構如下圖:
RecyclerView的靈活性體現在6個方面:
- 可以控制顯示方式,包括三個內建的不覺管理器,也可以定製
- LinearLayoutManager 以垂直或水平滾動列表方式顯示專案
- GridLayoutManager 在網格中顯示專案
- StaggeredGridLayoutManager 瀑布了流中顯示專案
- 預設情況下顯示增加刪除的動畫,也擴RecyclerView.ItemAnimator定製
- 預設情況無分割線,可以擴充套件ItemDecoration定製
參考資料
官方Demo效果
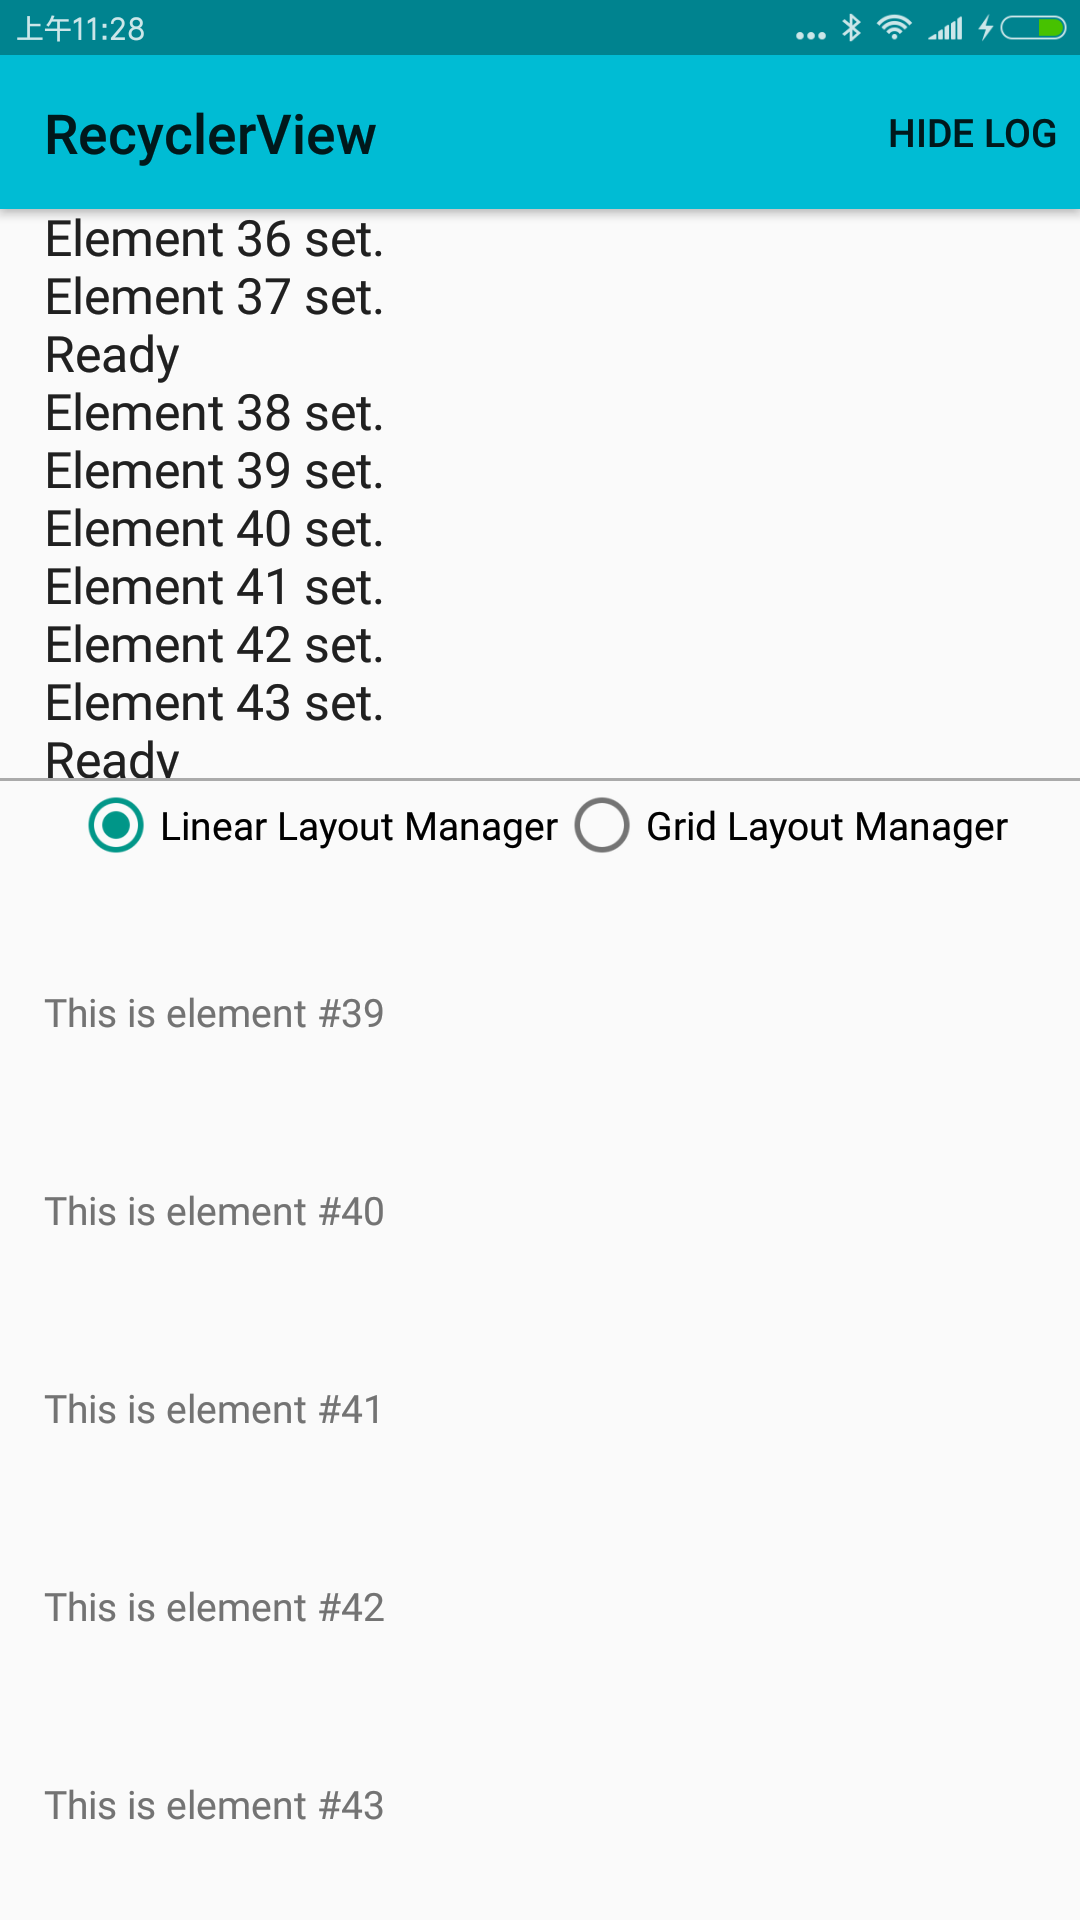
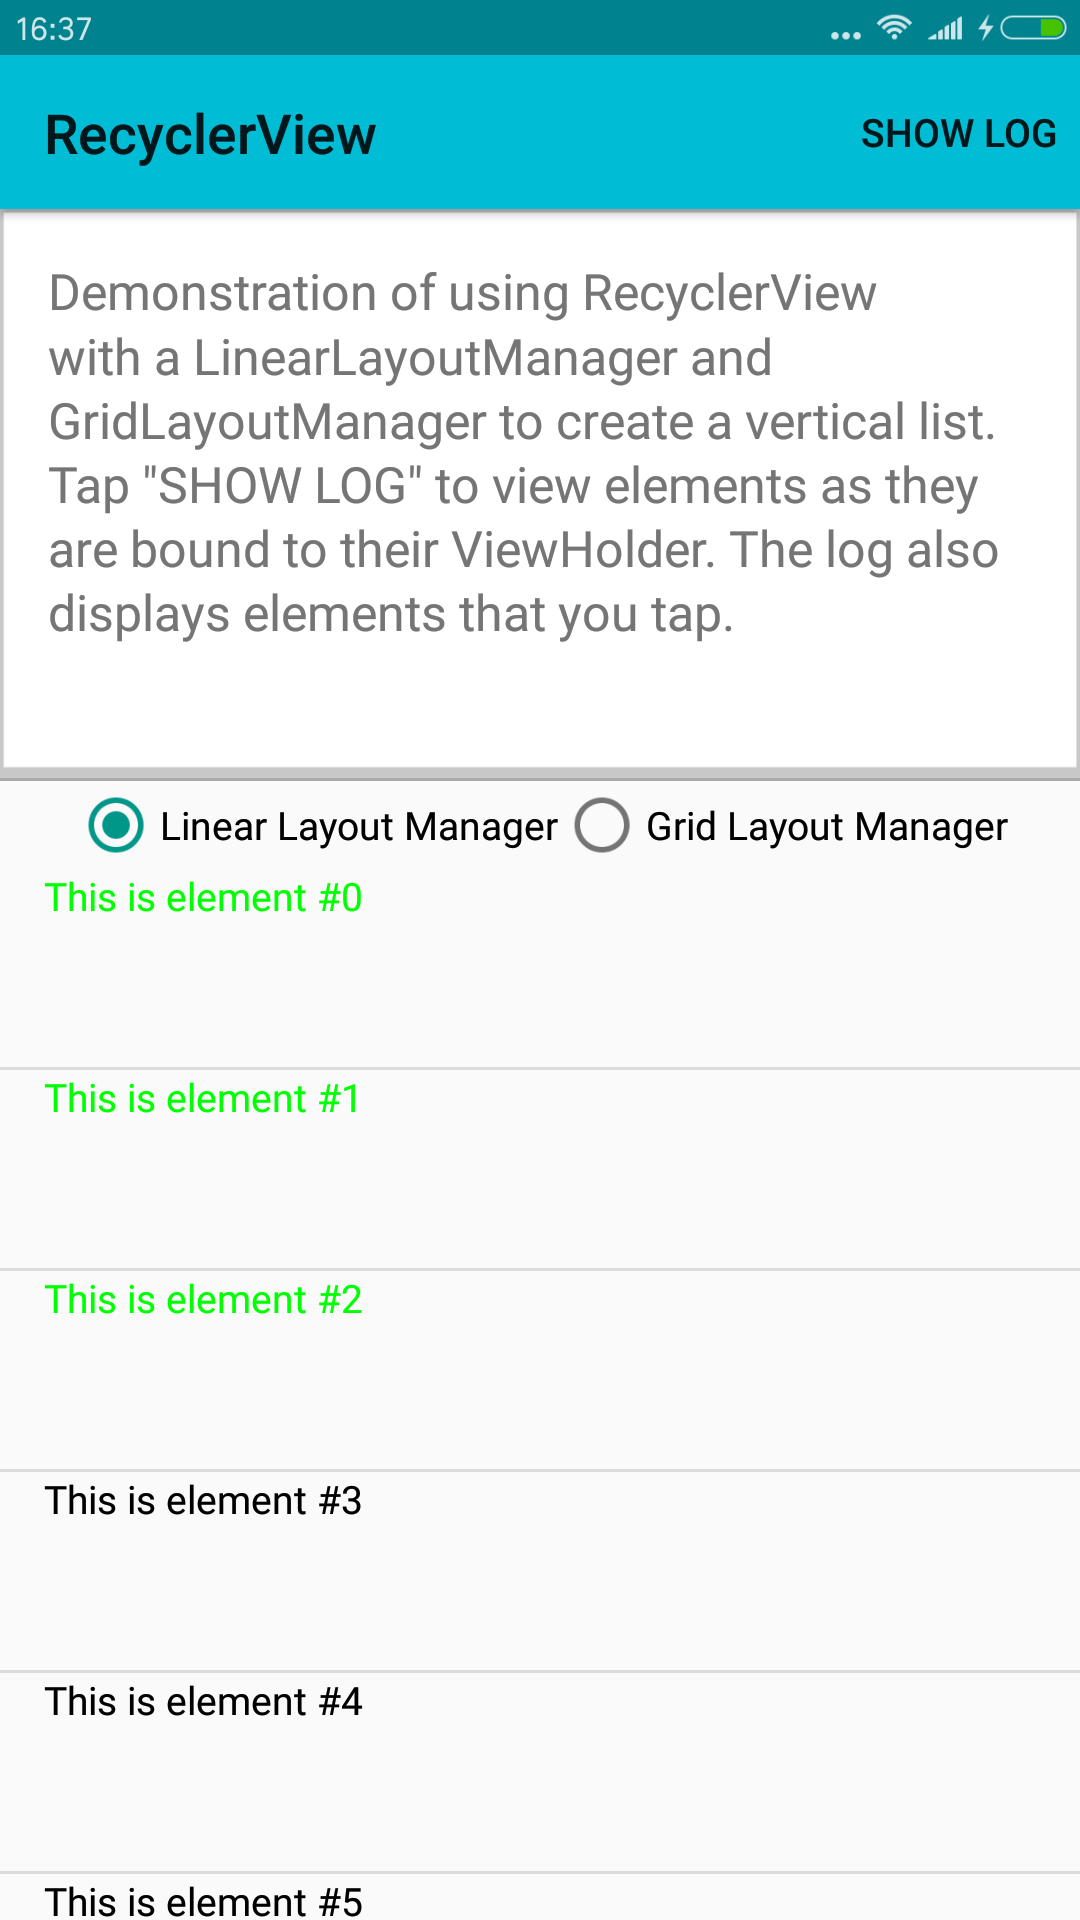
官方提供了一個Demo(github地址)的執行效果是這樣的:

程式碼比較簡單,重要的內容包括RecyclerView的初始化和其對應的Adapter的構造。
引申需求
設定分割線
分割線官方並沒有提供預設的型別,預設也並沒有分隔線。要提供分隔線必須自己實現RecyclerView.ItemDecoration。
/**
* An ItemDecoration allows the application to add a special drawing and layout offset
* to specific item views from the adapter's data set. This can be useful for drawing dividers
* between items, highlights, visual grouping boundaries and more.
*
* <p>All ItemDecorations are drawn in the order they were added, before the item
* views (in {@link ItemDecoration#onDraw(Canvas, RecyclerView, RecyclerView.State) onDraw()}
* and after the items (in {@link ItemDecoration#onDrawOver(Canvas, RecyclerView,
* RecyclerView.State)}.</p>
*/ import android.content.Context;
import android.content.res.TypedArray;
import android.graphics.Canvas;
import android.graphics.Rect;
import android.graphics.drawable.Drawable;
import android.support.v7.widget.LinearLayoutManager;
import android.support.v7.widget.RecyclerView;
import android.view.View;
/**
* 參考:https://android.googlesource.com/platform/development/+/master/samples/Support7Demos/src
* /com/example/android/supportv7/widget/decorator/DividerItemDecoration.java#101
*/
public class DividerItemDecoration extends RecyclerView.ItemDecoration {
private static final int[] ATTRS = new int[]{
android.R.attr.listDivider
};
public static final int HORIZONTAL_LIST = LinearLayoutManager.HORIZONTAL;
public static final int VERTICAL_LIST = LinearLayoutManager.VERTICAL;
private Drawable mDivider;
private int mOrientation;
public DividerItemDecoration(Context context, int orientation) {
final TypedArray a = context.obtainStyledAttributes(ATTRS);
mDivider = a.getDrawable(0);
a.recycle();
setOrientation(orientation);
}
public void setOrientation(int orientation) {
if (orientation != HORIZONTAL_LIST && orientation != VERTICAL_LIST) {
throw new IllegalArgumentException("invalid orientation");
}
mOrientation = orientation;
}
@Override
public void onDraw(Canvas c, RecyclerView parent) {
if (mOrientation == VERTICAL_LIST) {
drawVertical(c, parent);
} else {
drawHorizontal(c, parent);
}
}
public void drawVertical(Canvas c, RecyclerView parent) {
final int left = parent.getPaddingLeft();
final int right = parent.getWidth() - parent.getPaddingRight();
final int childCount = parent.getChildCount();
for (int i = 0; i < childCount; i++) {
final View child = parent.getChildAt(i);
android.support.v7.widget.RecyclerView v = new android.support.v7.widget.RecyclerView(parent.getContext());
final RecyclerView.LayoutParams params = (RecyclerView.LayoutParams) child
.getLayoutParams();
final int top = child.getBottom() + params.bottomMargin;
final int bottom = top + mDivider.getIntrinsicHeight();
mDivider.setBounds(left, top, right, bottom);
mDivider.draw(c);
}
}
public void drawHorizontal(Canvas c, RecyclerView parent) {
final int top = parent.getPaddingTop();
final int bottom = parent.getHeight() - parent.getPaddingBottom();
final int childCount = parent.getChildCount();
for (int i = 0; i < childCount; i++) {
final View child = parent.getChildAt(i);
final RecyclerView.LayoutParams params = (RecyclerView.LayoutParams) child
.getLayoutParams();
final int left = child.getRight() + params.rightMargin;
final int right = left + mDivider.getIntrinsicHeight();
mDivider.setBounds(left, top, right, bottom);
mDivider.draw(c);
}
}
/**
* outRect是用來設定left、top、right、bottom的padding值的
* */
@Override
public void getItemOffsets(Rect outRect, int itemPosition, RecyclerView parent) {
if (mOrientation == VERTICAL_LIST) {
outRect.set(0, 0, 0, mDivider.getIntrinsicHeight());
} else {
outRect.set(0, 0, mDivider.getIntrinsicWidth(), 0);
}
}
}
點選事件
RecyclerView本身不提供單擊和長按事件,需要自己實現。分為幾個步驟。
第一步,需要在CustomAdapter中自己定義回撥介面。
    /**
     * 點選事件介面
     * */
    public interface OnItemClickListener{
        void onItemClick(View view,int position);
        void onItemLongClick(View view,int position);
    }
    private OnItemClickListener onItemClickListener;

    public void setOnItemClickListener(OnItemClickListener onItemClickListener) {
        this.onItemClickListener = onItemClickListener;
    }
第二步,在CustomAdapter中的onBindViewHolder(ViewHolder viewHolder, final int position)中呼叫介面函式。
    @Override
    public void onBindViewHolder(ViewHolder viewHolder, final int position) {
        Log.d(TAG, "Element " + position + " set.");

        // Get element from your dataset at this position and replace the contents of the view
        // with that element
        viewHolder.getTextView().setText(mDataSet[position]);
        viewHolder.setColor(position);
        if (onItemClickListener!=null){
            //可以獲得每個item的包裝類itemView
            viewHolder.itemView.setOnClickListener(new View.OnClickListener() {
                @Override
                public void onClick(View v) {
                    onItemClickListener.onItemClick(v,position);
                }
            });
            viewHolder.itemView.setOnLongClickListener(new View.OnLongClickListener() {
                @Override
                public boolean onLongClick(View v) {
                    onItemClickListener.onItemLongClick(v,position);
                    return true;
                }
            });
        }
    }
第三步,在CustomAdapter初始化的地方傳入該介面例項。
 mAdapter.setOnItemClickListener(new CustomAdapter.OnItemClickListener() {
            @Override
            public void onItemClick(View view, int position) {
               ××××單擊事件××××××
            }

            @Override
            public void onItemLongClick(View view, int position) {
              ××××長按事件××××××
            }
        });
多選模式
多選模式可以採用ActionMode來進行UI設計,本質上是通過長按進入ActionMode模式,可以點選按鈕取消多選模式。
這裡配合上面的點選事件,僅僅模擬了多選的操作,而沒有新增ActionMode。
mAdapter.setOnItemClickListener(new CustomAdapter.OnItemClickListener() {
    @Override
    public void onItemClick(View view, int position) {
        if (isOnLonCliked){
            addOrRemove(position);
            Log.i(TAG, position+"OnLonCliked");
        }else {
            Toast.makeText(getActivity(),position+" clicked",Toast.LENGTH_LONG).show();
        }
    }
    @Override
    public void onItemLongClick(View view, int position) {
        isOnLonCliked=true;
        Log.i(TAG, position+"OnLonCliked");
    }
});
其中,addOrRemove(int position)多選的邏輯。
**
 * 模擬多選情況
 * */
private void  addOrRemove(int position){
    if(mAdapter.positionSet.contains(position)){
        mAdapter.positionSet.remove(position);
    }else {
        mAdapter.positionSet.add(position);
    }
    if (mAdapter.positionSet.size()==0){
        isOnLonCliked=false;
    }
    mAdapter.notifyDataSetChanged();
}
CustomAdapter中有一個集合在記錄多選模式下已經點選的位置,點選時判斷該集合是否包含了該位置,如果已經包含,就取消顏色,否則改變顏色。
/**
 * Provide views to RecyclerView with data from mDataSet.
 */

     ××××××省略無關程式碼××××××××××××××

    public static Set<Integer> positionSet = new HashSet<>();

    // BEGIN_INCLUDE(recyclerViewSampleViewHolder)
    /**
     * Provide a reference to the type of views that you are using (custom ViewHolder)
     */
    public static class ViewHolder extends RecyclerView.ViewHolder {
        public final TextView textView;

        public ViewHolder(View v) {
            super(v);
            // Define click listener for the ViewHolder's View.
            v.setOnClickListener(new View.OnClickListener() {
                @Override
                public void onClick(View v) {
                    Log.d(TAG, "Element " + getAdapterPosition() + " clicked.");
                }
            });
            textView = (TextView) v.findViewById(R.id.textView);
            Log.d(TAG, "ViewHolder ");
        }

        public TextView getTextView() {
            return textView;
        }
        public void setColor(int position){
            if (positionSet.contains(position)){
                textView.setTextColor(Color.GREEN);
            }else {
                textView.setTextColor(Color.BLACK);
            }

        }
    }
××××××省略無關程式碼××××××××××××××
最後達成的效果是
長按RecyclerView中的某一項,會進入到多選模式
如果點選的項已經在CustomAdapter中的集合中,則去除這些項,如果集合清空,則退出多選模式
多選模式下再點選某些項,這些項會記錄到CustomAdapter中的集合中


