[python爬蟲] Selenium爬取內容並存儲至MySQL資料庫
阿新 • • 發佈:2019-01-04
前面我通過一篇文章講述瞭如何爬取CSDN的部落格摘要等資訊。通常,在使用Selenium爬蟲爬取資料後,需要儲存在TXT文字中,但是這是很難進行資料處理和資料分析的。這篇文章主要講述通過Selenium爬取我的個人部落格資訊,然後儲存在資料庫MySQL中,以便對資料進行分析,比如分析哪個時間段發表的部落格多、結合WordCloud分析文章的主題、文章閱讀量排名等。
這是一篇基礎性的文章,希望對您有所幫助,如果文章中出現錯誤或不足之處,還請海涵。下一篇文章會簡單講解資料分析的過程。
一. 爬取的結果
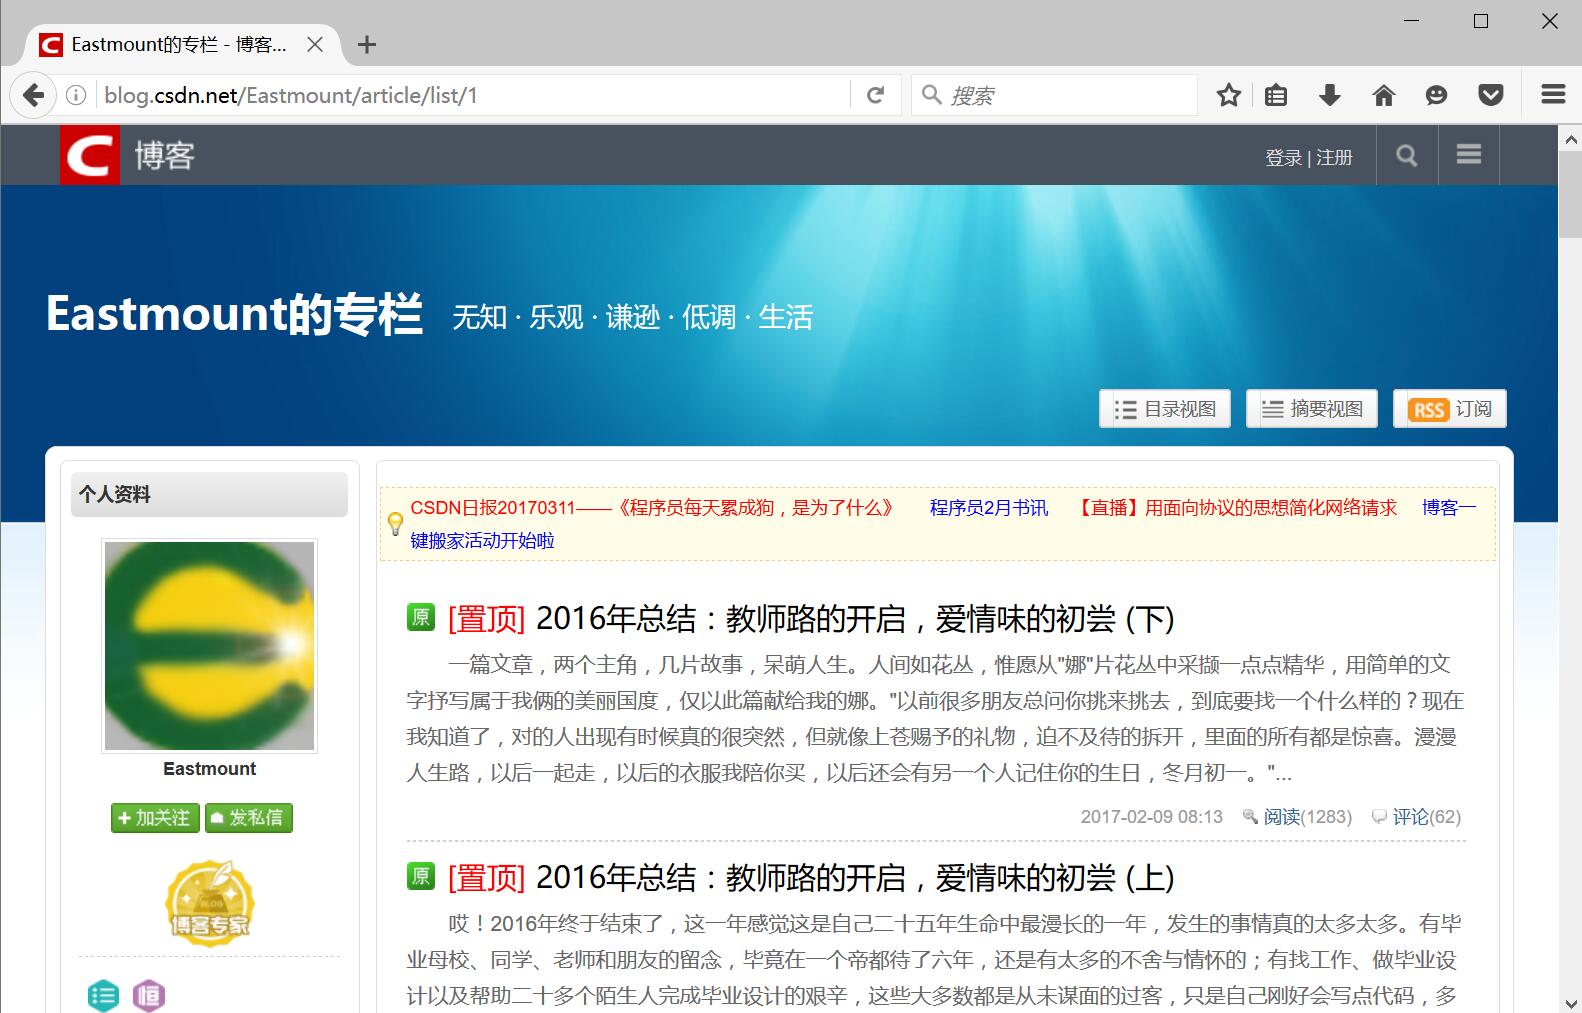
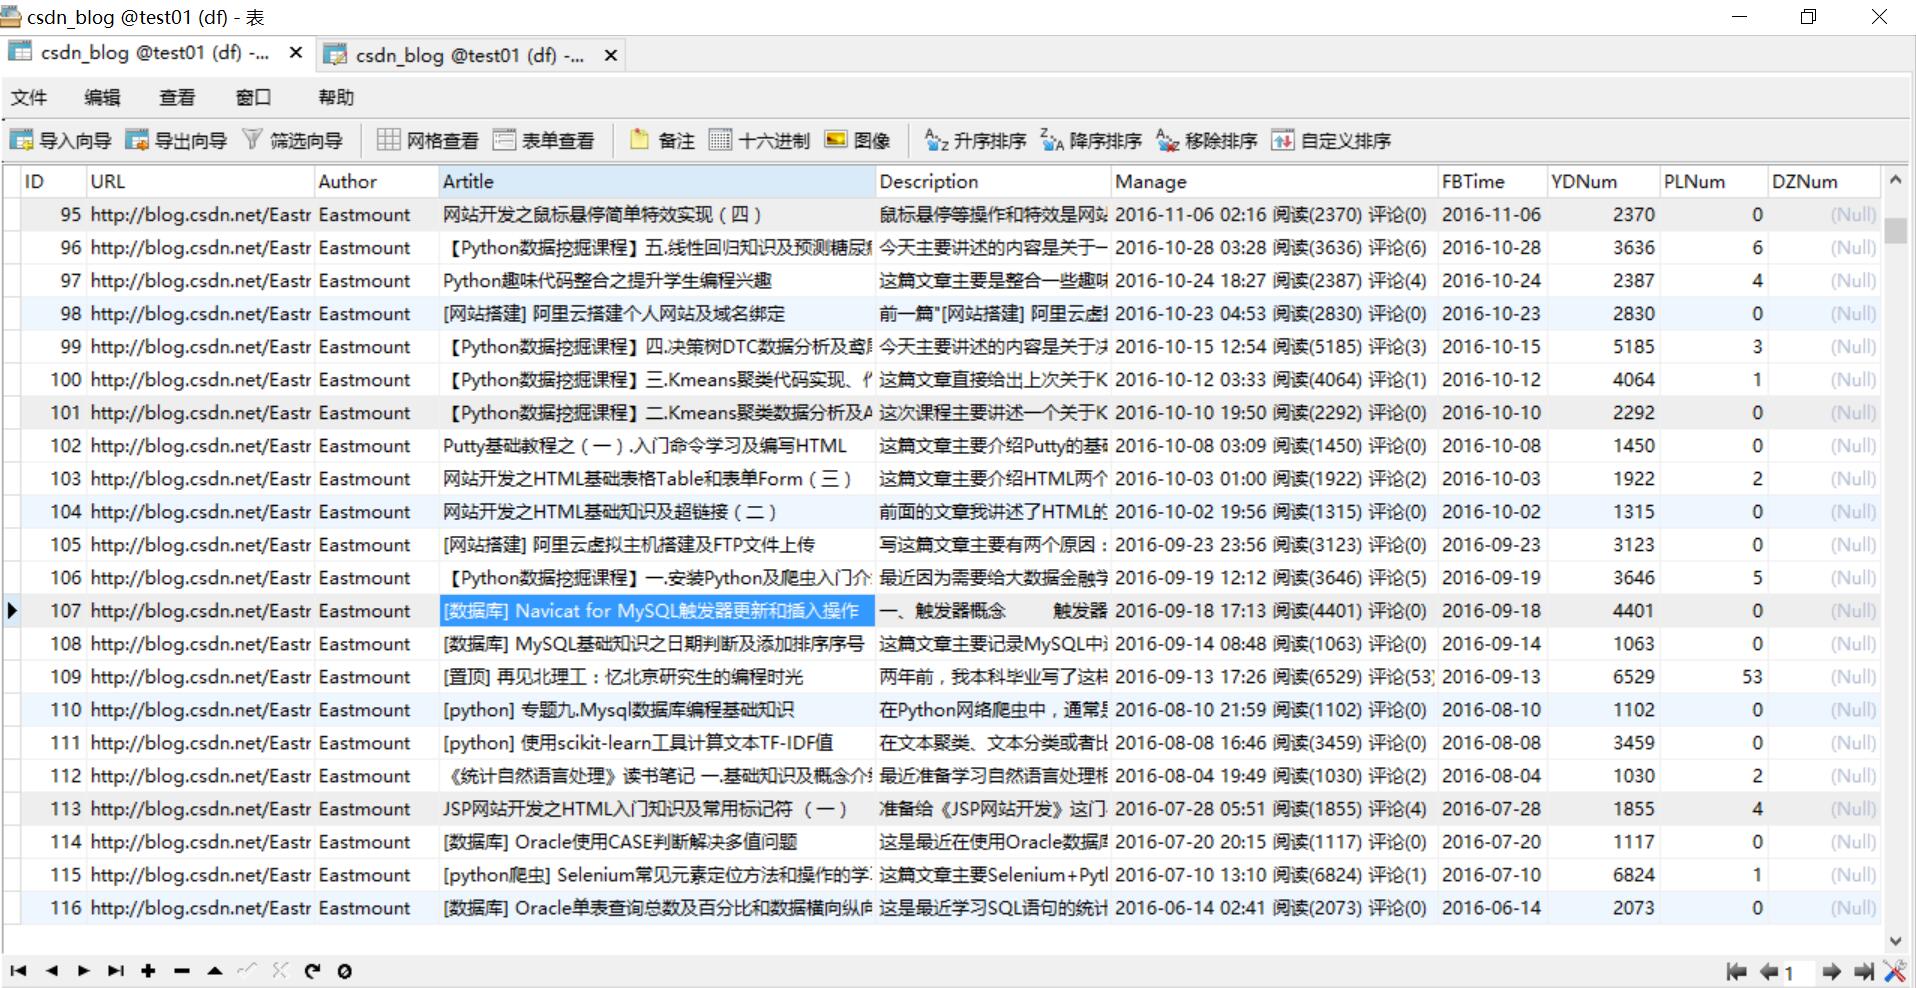
爬取並存儲至MySQL資料庫的結果如下所示:
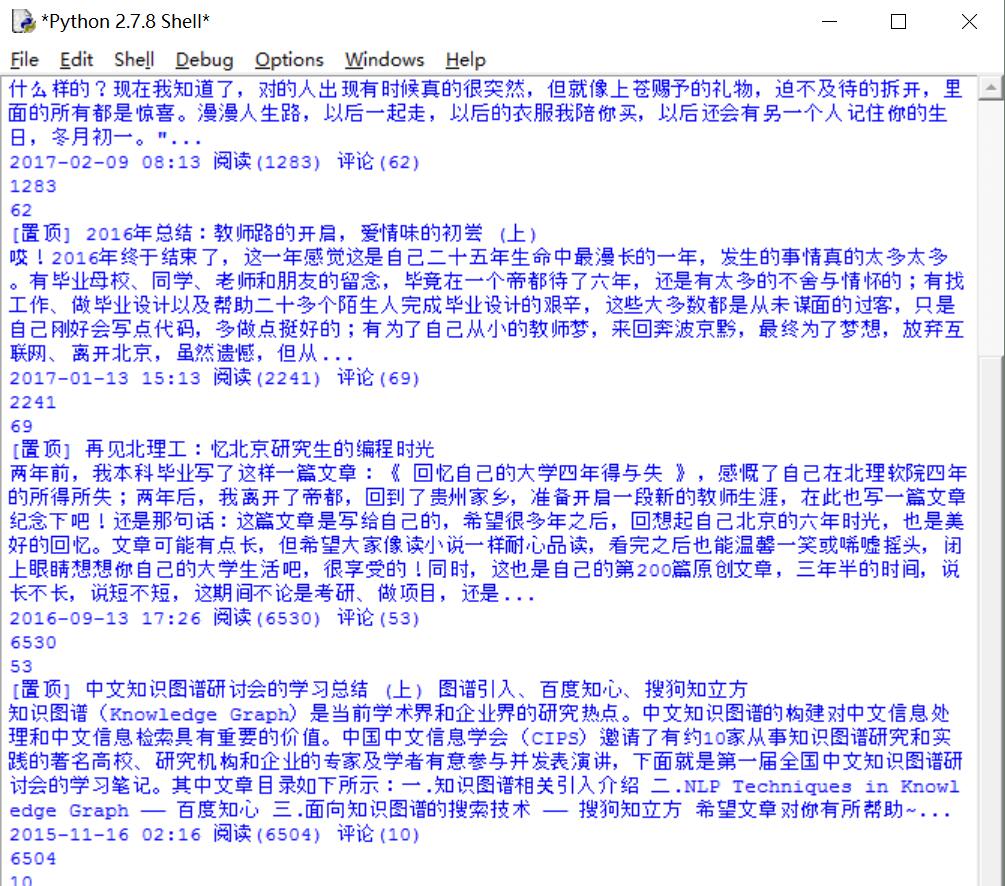
執行過程如下圖所示:
二. 完整程式碼分析
完整程式碼如下所示:
# coding=utf-8

from selenium import webdriver
from selenium.webdriver.common.keys import Keys
import selenium.webdriver.support.ui as ui
import re
import time
import os
import codecs
import MySQLdb

#開啟Firefox瀏覽器 設定等待載入時間
driver = webdriver.Firefox()
wait = ui.WebDriverWait(driver,10)

#獲取每個博主的部落格頁面低端總頁碼
def getPage():
    print 'getPage'
    number = 0
    texts = driver.find_element_by_xpath("//div[@id='papelist']").text
    print '頁碼', texts
    m = re.findall(r'(\w*[0-9]+)\w*',texts) #正則表示式尋找數字
    print '頁數:' + str(m[1])
    return int(m[1])

#主函式
def main():
    #獲取txt檔案總行數
    count = len(open("Blog_URL.txt",'rU').readlines())
    print count
    n = 0
    urlfile = open("Blog_URL.txt",'r')

    #迴圈獲取每個博主的文章摘資訊
    while n < count:  #這裡爬取2個人部落格資訊,正常情況count個博主資訊
        url = urlfile.readline()
        url = url.strip("\n")
        print url
        driver.get(url)
        #獲取總頁碼
        allPage = getPage()
        print u'頁碼總數為:', allPage
        time.sleep(2)

        #資料庫操作結合
        try:
            conn=MySQLdb.connect(host='localhost',user='root',
                                 passwd='123456',port=3306, db='test01')
            cur=conn.cursor() #資料庫遊標

            #報錯:UnicodeEncodeError: 'latin-1' codec can't encode character
            conn.set_character_set('utf8')
            cur.execute('SET NAMES utf8;')
            cur.execute('SET CHARACTER SET utf8;')
            cur.execute('SET character_set_connection=utf8;')

            #具體內容處理
            m = 1 #第1頁
            while m <= allPage:
                ur = url + "/article/list/" + str(m)
                print ur
                driver.get(ur)

                #標題
                article_title = driver.find_elements_by_xpath("//div[@class='article_title']")
                for title in article_title:
                    #print url
                    con = title.text
                    con = con.strip("\n")
                    #print con + '\n'

                #摘要
                article_description = driver.find_elements_by_xpath("//div[@class='article_description']")
                for description in article_description:
                    con = description.text
                    con = con.strip("\n")
                    #print con + '\n'

                #資訊
                article_manage = driver.find_elements_by_xpath("//div[@class='article_manage']")
                for manage in article_manage:
                    con = manage.text
                    con = con.strip("\n")
                    #print con + '\n'

                num = 0
                print u'長度', len(article_title)
                while num < len(article_title):
                    #插入資料 8個值
                    sql = '''insert into csdn_blog
                                (URL,Author,Artitle,Description,Manage,FBTime,YDNum,PLNum)
                            values(%s, %s, %s, %s, %s, %s, %s, %s)'''
                    Artitle = article_title[num].text
                    Description = article_description[num].text
                    Manage = article_manage[num].text
                    print Artitle
                    print Description
                    print Manage
                    #獲取作者
                    Author = url.split('/')[-1]
                    #獲取閱讀數和評論數
                    mode = re.compile(r'\d+\.?\d*')
                    YDNum = mode.findall(Manage)[-2]
                    PLNum = mode.findall(Manage)[-1]
                    print YDNum
                    print PLNum
                    #獲取釋出時間
                    end = Manage.find(u' 閱讀')
                    FBTime = Manage[:end]
                    cur.execute(sql, (url, Author, Artitle, Description, Manage,FBTime,YDNum,PLNum))

                    num = num + 1
                else:
                    print u'資料庫插入成功'
                m = m + 1


        #異常處理
        except MySQLdb.Error,e:
            print "Mysql Error %d: %s" % (e.args[0], e.args[1])
        finally:
            cur.close()
            conn.commit()
            conn.close()

        n = n + 1

    else:
        urlfile.close()
        print 'Load Over'

main()
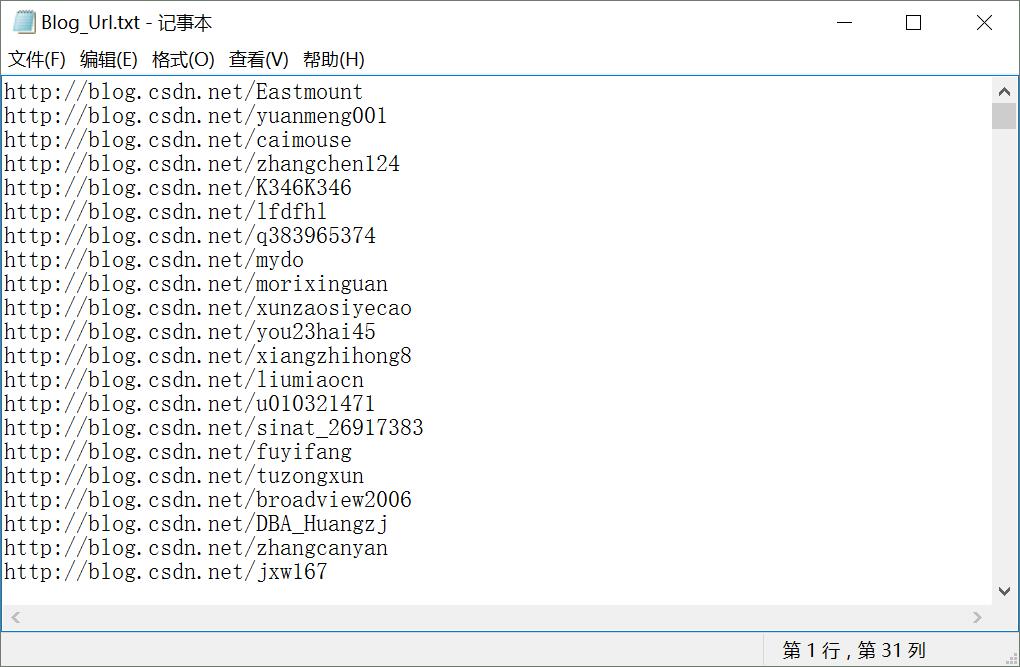
在Blog_Url.txt檔案中放置需要爬取使用者的部落格地址URL,如下圖所示。注意在此處,作者預先寫了個爬取CSDN所有專家的URL程式碼,這裡為訪問其他人用於提升閱讀量已省略。
分析過程如下所示。
1.獲取博主總頁碼
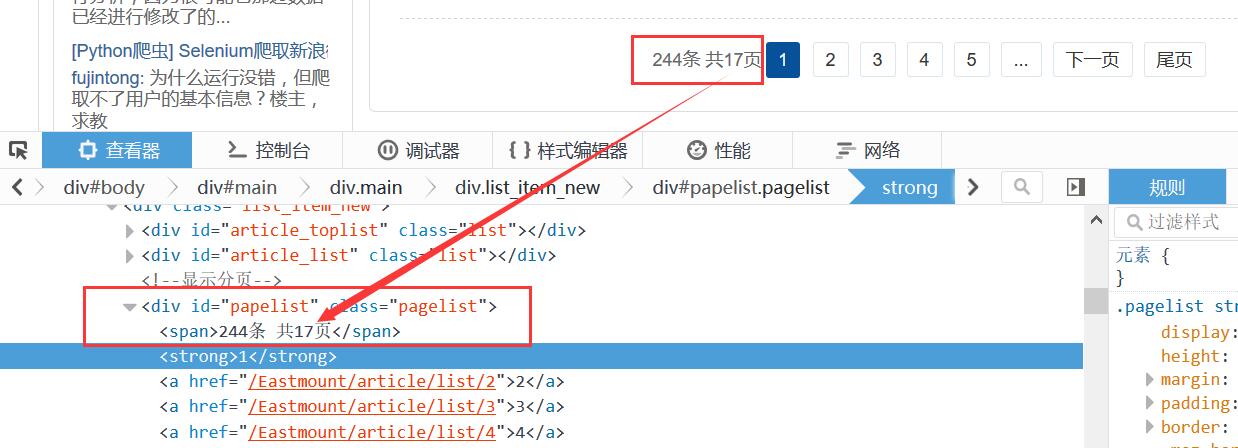
首先從Blog_Url.txt讀取博主地址,然後訪問並獲取頁碼總數。程式碼如下:
比如獲取總頁碼位17頁,如下圖所示:#獲取每個博主的部落格頁面低端總頁碼 def getPage(): print 'getPage' number = 0 texts = driver.find_element_by_xpath("//div[@id='papelist']").text print '頁碼', texts m = re.findall(r'(\w*[0-9]+)\w*',texts) #正則表示式尋找數字 print '頁數:' + str(m[1]) return int(m[1])
2.翻頁DOM樹分析
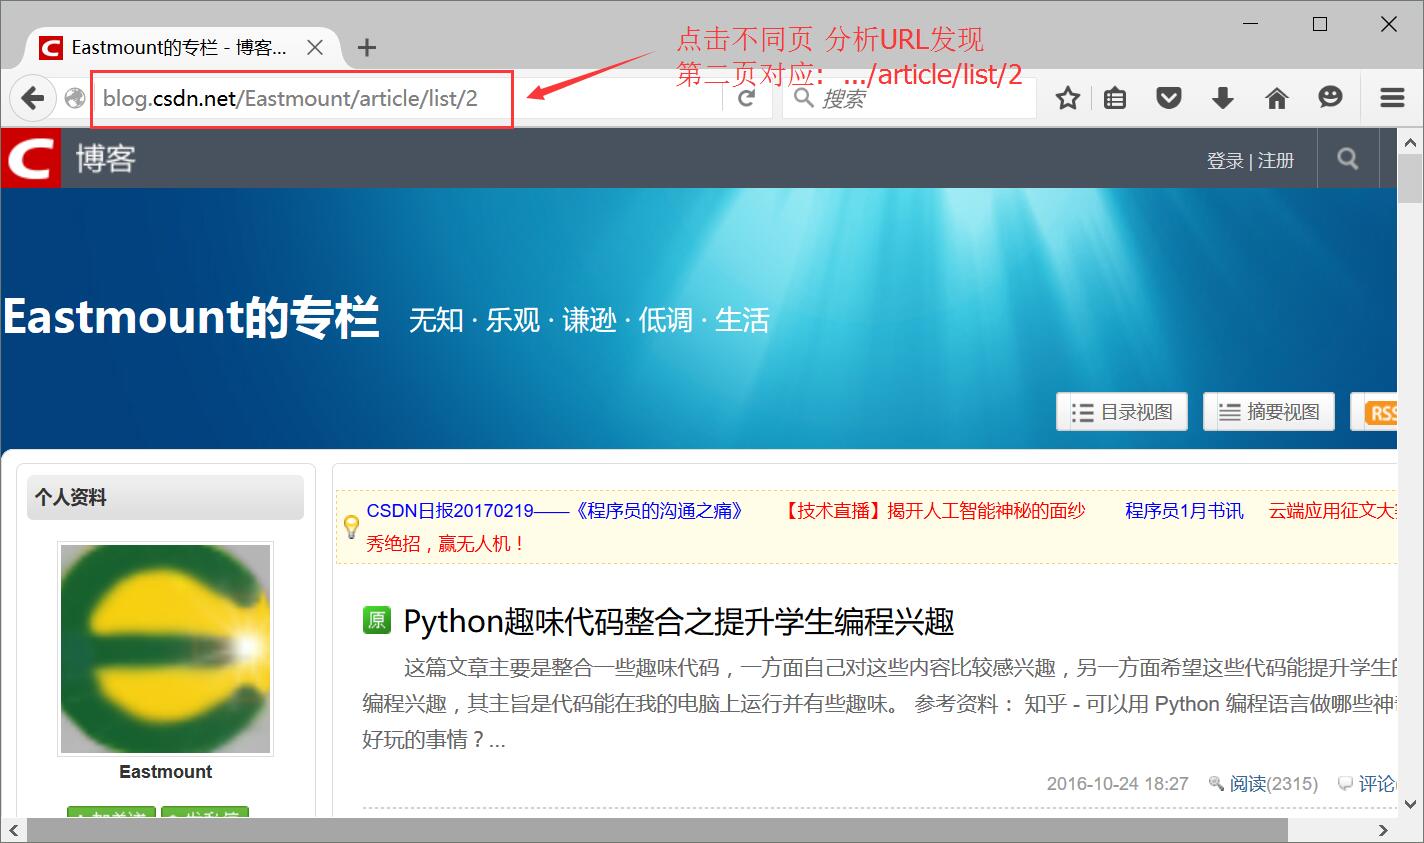
這裡的部落格翻頁採用的是URL連線,比較方便。
如:http://blog.csdn.net/Eastmount/article/list/2
故只需要 :1.獲取總頁碼;2.爬取每頁資訊;3.URL設定進行迴圈翻頁;4.再爬取。
也可以採用點選"下頁"跳轉,沒有"下頁"停止跳轉,爬蟲結束,接著爬取下一個博主。
3.獲取詳細資訊:標題、摘要、時間
然後審查元素分析每個部落格頁面,如果採用BeautifulSoup爬取會報錯"Forbidden"。
發現每篇文章都是由一個<div></div>組成,如下所示,只需要定位到該位置即可。
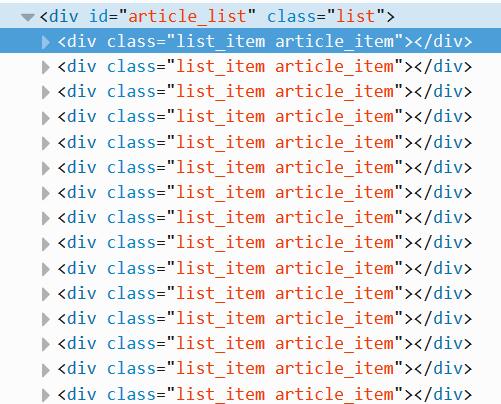
這裡定位到該位置即可爬取,這裡需要分別定位標題、摘要、時間。
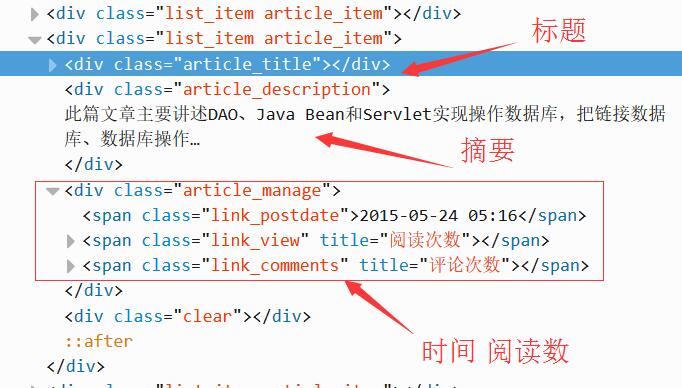
程式碼如下所示。注意,在while中同時獲取三個值,它們是對應的。
#標題
article_title = driver.find_elements_by_xpath("//div[@class='article_title']")
for title in article_title:
    con = title.text
    con = con.strip("\n")
    print con + '\n'

#摘要
article_description = driver.find_elements_by_xpath("//div[@class='article_description']")
for description in article_description:
    con = description.text
    con = con.strip("\n")
    print con + '\n'

#資訊
article_manage = driver.find_elements_by_xpath("//div[@class='article_manage']")
for manage in article_manage:
    con = manage.text
    con = con.strip("\n")
    print con + '\n'

num = 0
print u'長度', len(article_title)
while num < len(article_title):
    Artitle = article_title[num].text
    Description = article_description[num].text
    Manage = article_manage[num].text
    print Artitle, Description, Manage
4.特殊字串處理
獲取URL最後一個/後的博主名稱、獲取字串時間、閱讀數程式碼如下:
#獲取博主姓名
url = "http://blog.csdn.net/Eastmount"
print url.split('/')[-1]
#輸出: Eastmount

#獲取數字
name = "2015-09-08 18:06 閱讀(909) 評論(0)"
print name
import re
mode = re.compile(r'\d+\.?\d*')
print mode.findall(name)
#輸出: ['2015', '09', '08', '18', '06', '909', '0']
print mode.findall(name)[-2]
#輸出: 909


#獲取時間
end = name.find(r' 閱讀')
print name[:end]
#輸出: 2015-09-08 18:06

import time, datetime
a = time.strptime(name[:end],'%Y-%m-%d %H:%M')
print a
#輸出: time.struct_time(tm_year=2015, tm_mon=9, tm_mday=8, tm_hour=18, tm_min=6,
#      tm_sec=0, tm_wday=1, tm_yday=251, tm_isdst=-1)
三. 資料庫相關操作
SQL語句建立表程式碼如下:
CREATE TABLE `csdn` (
  `ID` int(11) NOT NULL AUTO_INCREMENT,
  `URL` varchar(100) COLLATE utf8_bin DEFAULT NULL,
  `Author` varchar(50) COLLATE utf8_bin DEFAULT NULL COMMENT '作者',
  `Artitle` varchar(100) COLLATE utf8_bin DEFAULT NULL COMMENT '標題',
  `Description` varchar(400) COLLATE utf8_bin DEFAULT NULL COMMENT '摘要',
  `Manage` varchar(100) COLLATE utf8_bin DEFAULT NULL COMMENT '資訊',
  `FBTime` datetime DEFAULT NULL COMMENT '釋出日期',
  `YDNum` int(11) DEFAULT NULL COMMENT '閱讀數',
  `PLNum` int(11) DEFAULT NULL COMMENT '評論數',
  `DZNum` int(11) DEFAULT NULL COMMENT '點贊數',
  PRIMARY KEY (`ID`)
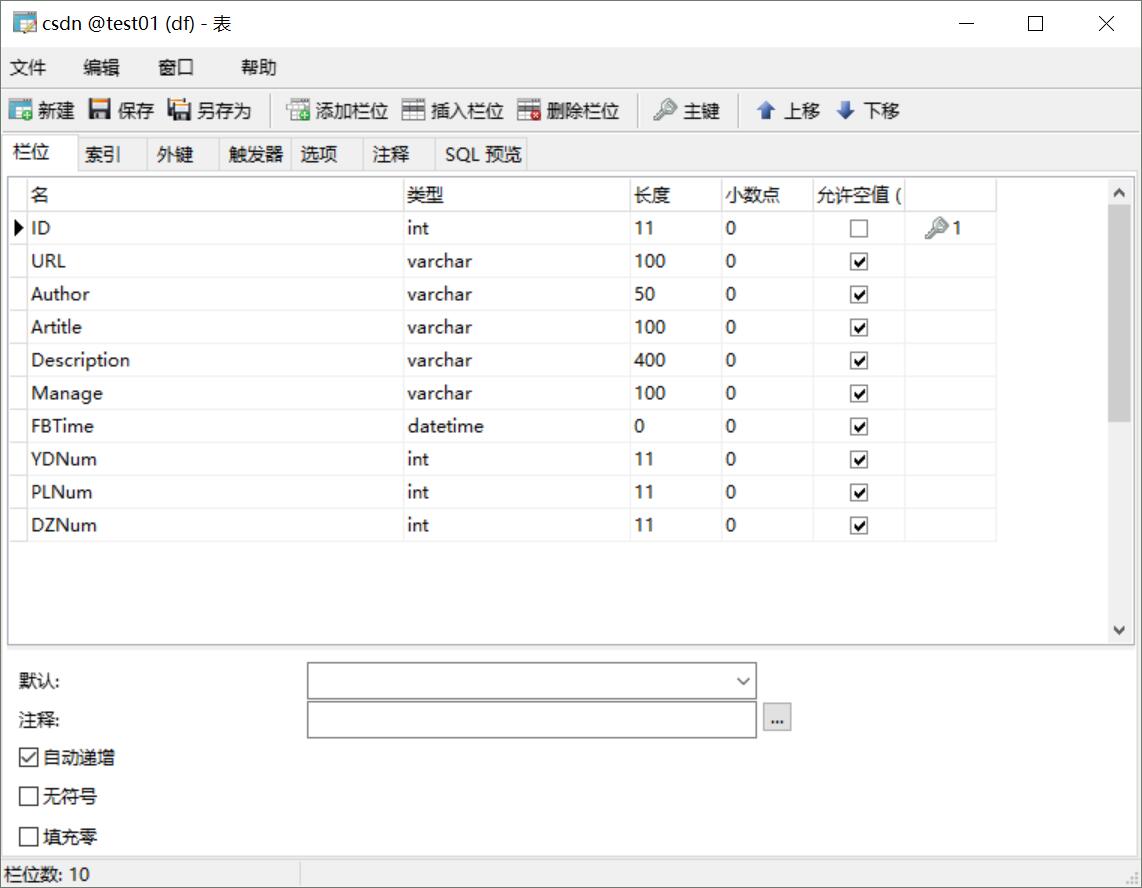
) ENGINE=InnoDB AUTO_INCREMENT=9371 DEFAULT CHARSET=utf8 COLLATE=utf8_bin;# coding:utf-8
import MySQLdb
try:
conn=MySQLdb.connect(host='localhost',user='root',passwd='123456',port=3306, db='test01')
cur=conn.cursor()
#插入資料
sql = '''insert into student values(%s, %s, %s)'''
cur.execute(sql, ('yxz','111111', '10'))
#檢視資料
print u'\n插入資料:'
cur.execute('select * from student')
for data in cur.fetchall():
print '%s %s %s' % data
cur.close()
conn.commit()
conn.close()
except MySQLdb.Error,e:
print "Mysql Error %d: %s" % (e.args[0], e.args[1])注意,在下載過程中,有的網站是新版本的,無法獲取頁碼。
比如:http://blog.csdn.net/michaelzhou224
這時需要簡單設定,跳過這些連結,並儲存到檔案中,核心程式碼如下所示:
#獲取每個博主的部落格頁面低端總頁碼
def getPage():
    print 'getPage'
    number = 0
    #texts = driver.find_element_by_xpath("//div[@id='papelist']").text
    texts = driver.find_element_by_xpath("//div[@class='pagelist']").text
    print 'testsss'
    print u'頁碼', texts
    if texts=="":
        print u'頁碼為0 網站錯誤'
        return 0
    m = re.findall(r'(\w*[0-9]+)\w*',texts) #正則表示式尋找數字
    print u'頁數:' + str(m[1])
    return int(m[1])
    error = codecs.open("Blog_Error.txt", 'a', 'utf-8')

    #迴圈獲取每個博主的文章摘資訊
    while n < count:  #這裡爬取2個人部落格資訊,正常情況count個博主資訊
        url = urlfile.readline()
        url = url.strip("\n")
        print url
        driver.get(url+"/article/list/1")
        #print driver.page_source
        #獲取總頁碼
        allPage = getPage()
        print u'頁碼總數為:', allPage
        #返回錯誤,否則程式總截住
        if allPage==0:
            error.write(url + "\r\n")
            print u'錯誤URL'
            continue;   #跳過進入下一個博主
        time.sleep(2)
        #資料庫操作結合
        try:
              .....
最後希望文章對你有所幫助,如果文章中存在錯誤或不足之處,還請海涵~
提高效率,提升科研,認真教學,娜美人生。
(By:Eastmount 2017-03-13 下午1點半 http://blog.csdn.net/eastmount/)

