
MySQL綠色版安裝整套流程
阿新 • • 發佈:2019-01-04
轉載地址:https://www.cnblogs.com/LiuChunfu/p/6426918.html
一、綠色版安裝
1. 下載MySQL 5.7,地址:http://dev.mysql.com/downloads/mysql/ (選擇32位或者64位版本需根據自身PC情況)
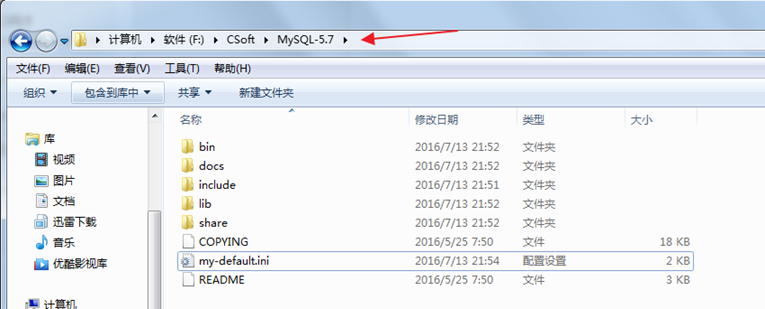
2. 下載後解壓,比如我的目錄結構是:
3. 配置Path路徑:系統屬性 => 高階 => 高階 => 系統變數 => path後新增 F:\CSoft\MySQL-5.7\bin
4. 修改my-default.ini,此檔案是初始化資訊:

# For advice on how to change settings please see
# http://dev.mysql.com/doc/refman/5.7/en/server-configuration-defaults.html
# *** DO NOT EDIT THIS FILE. It's a template which will be copied to the
# *** default location during install, and will be replaced if you
# *** upgrade to a newer version of MySQL.

[mysqld]

# Remove leading # and set to the amount of RAM for the most important data
# cache in MySQL. Start at 70% of total RAM for dedicated server, else 10%.
# innodb_buffer_pool_size = 128M

# Remove leading # to turn on a very important data integrity option: logging
# changes to the binary log between backups.
# log_bin

# These are commonly set, remove the # and set as required.
basedir = F:\CSoft\MySQL-5.7
datadir = F:\CSoft\MySQL-5.7\data
port = 3306
# server_id = .....


# Remove leading # to set options mainly useful for reporting servers.
# The server defaults are faster for transactions and fast SELECTs.
# Adjust sizes as needed, experiment to find the optimal values.
# join_buffer_size = 128M
# sort_buffer_size = 2M
# read_rnd_buffer_size = 2M

sql_mode=NO_ENGINE_SUBSTITUTION,STRICT_TRANS_TABLES
# !o>UZ!e(h6(m  初始化的密碼
5. 系統管理員模式執行cmd 輸入如下命令
C:\Users\LCF>F: //切換到F目錄 F:\>cd CSoft\MySQL-5.7\bin //進入bin目錄 F:\CSoft\MySQL-5.7\bin>mysqld --install //安裝MYSQL服務 Service successfully installed. //提示服務安裝成功 The current server installed: F:\CSoft\MySQL-5.7\bin\mysqld MySQL F:\CSoft\MySQL-5.7\bin>mysqld --initialize --console //根據配置檔案初始化,此時會有一大堆訊息, (注意最後的訊息: 2016-07-13T14:21:39.268917Z 1 [Note] A temporary password is generated for[email protected] localhost: !o>UZ!e(h6(m ) 後面這個是密碼待會兒登入使用的。 F:\CSoft\MySQL-5.7\bin>net start mysql //啟動mysql服務 MySQL 服務正在啟動 . MySQL 服務已經啟動成功。 F:\CSoft\MySQL-5.7\bin>mysql -uroot -p //登入mysql Enter password: ************ //密碼就是輸入的密碼 mysql> set password=password('123456'); //修改密碼 Query OK, 0 rows affected, 1 warning (0.00 sec)
二、中文亂碼修改
1. 從服務端進行修改
show variables like "%char%";
然後可能顯示如下資訊,注意紅色部分,不同的使用者可能實際情況不同,但是需要保證除了 filesystem為binary外,其他都為utf8:
+--------------------------+---------------+
| Variable_name | Value |
+--------------------------+---------------+
| character_set_client | gbk |
| character_set_connection | gbk |
| character_set_database | utf8 |
| character_set_filesystem | binary |
| character_set_results | gbk |
| character_set_server | utf8 |
| character_set_system | utf8 |
+--------------------------+-------------+
2. 通過如下SQL語句進行修改,全部設定為utf8即可:
#設定資料庫編碼資訊
SET character_set_client='utf8';
SET character_set_connection='utf8';
SET character_set_database ='utf8';
SET character_set_results='utf8';
SET character_set_server='utf8';
3、SQL連線字串加上?useUnicode=true&characterEncoding=utf-8
jdbc.url = jdbc:mysql://localhost:3306/bsframe?useUnicode=true&characterEncoding=utf-8
一般按照上述步驟後,就不會出現亂碼了!
三、修改為任意使用者可以連線
GRANT ALL PRIVILEGES ON *.* TO 'root'@'%' IDENTIFIED BY 'yourpassword' WITH GRANT OPTION;
FLUSH PRIVILEGES;
這裡的yourpassword 是你設定的密碼,請自行修改。