樹莓派應用:攝像頭條形碼掃描
阿新 • • 發佈:2019-01-04
樹莓派小而強大,有非常多的應用場景。這裡分享下使用樹莓派,攝像頭,以及C和Python程式碼來實現一個條形碼掃描工具。之前分享過如何把OpenCV Python獲取的影象傳遞到C層處理,會用到裡面的程式碼。
測試環境
- 裝置: Raspberry Pi 3
- 系統: RASPBIAN JESSIE WITH PIXEL
準備工作
- Dynamsoft Barcode Reader for Raspberry Pi
- Python 2.7.0
- OpenCV 3.0.0
- Raspberry Pi 2 or 3
- USB webcam
編譯和安裝
如何在樹莓派上編譯安裝OpenCV
1. 下載原始碼。
2. 安裝依賴庫:
sudo apt-get install cmake
sudo apt-get install libjpeg-dev libtiff5-dev libjasper-dev libpng12-dev
sudo apt-get install libavcodec-dev libavformat-dev libswscale-dev libv4l-dev
sudo apt-get install libxvidcore-dev libx264-dev
sudo apt-get install python-dev
3. 設定編譯環境:
cd ~/opencv-3.0.0/
mkdir build
cd 4. 編譯安裝OpenCV:
make -j4
sudo make install生成的動態連結庫會被安裝到/usr/local/lib/python2.7/dist-packages/cv2.so。
使用Dynamsoft Barcode SDK建立Python擴充套件
1. 下載SDK。
2. 建立符號連結:
sudo ln –s <Your dbr path>/lib/libDynamsoftBarcodeReader.so /usr/lib/libDynamsoftBarcodeReader.so3. 編輯setup.py。設定標頭檔案和庫檔案路徑:
include_dirs=["/usr/lib/python2.7/dist-packages/numpy/core/include/numpy", "<Your dbr path>/include"],
library_dirs=['<Your dbr path>/lib'],
4. 編譯安裝Python擴充套件:
sudo python setup.py build install
實現decodeBuffer介面
底層的C程式碼是從windows版本上移植過來的。需要新增一些定義:
typedef unsigned long DWORD;
typedef long LONG;
typedef unsigned short WORD;

typedef struct tagBITMAPINFOHEADER {
  DWORD biSize;
  LONG biWidth;
  LONG biHeight;
  WORD biPlanes;
  WORD biBitCount;
  DWORD biCompression;
  DWORD biSizeImage;
  LONG biXPelsPerMeter;
  LONG biYPelsPerMeter;
  DWORD biClrUsed;
  DWORD biClrImportant;
} BITMAPINFOHEADER;
把Python的numpy資料轉換成C。然後通過底層的介面檢測識別條形碼:
#include<ndarraytypes.h>
static PyObject *
decodeBuffer(PyObject *self, PyObject *args){
PyObject *o;
if (!PyArg_ParseTuple(args, "O", &o))
return NULL;
PyObject *ao = PyObject_GetAttrString(o, "__array_struct__");
PyObject *retval;
if ((ao == NULL) || !PyCObject_Check(ao)) {
PyErr_SetString(PyExc_TypeError, "object does not have array interface");
return NULL;
}
PyArrayInterface *pai = (PyArrayInterface*)PyCObject_AsVoidPtr(ao);
if (pai->two != 2) {
PyErr_SetString(PyExc_TypeError, "object does not have array interface");
Py_DECREF(ao);
return NULL;
}
// Construct data with header info and image data
char *buffer = (char*)pai->data; // The address of image data
int width = pai->shape[1]; // image width
int height = pai->shape[0]; // image height
int size = pai->strides[0] * pai->shape[0]; // image size = stride * height
char *total = (char *)malloc(size + 40); // buffer size = image size + header size
memset(total, 0, size + 40);
BITMAPINFOHEADER bitmap_info = {40, width, height, 0, 24, 0, size, 0, 0, 0, 0};
memcpy(total, &bitmap_info, 40);
// Copy image data to buffer from bottom to top
char *data = total + 40;
int stride = pai->strides[0];
int i = 1;
for (; i <= height; i++) {
memcpy(data, buffer + stride * (height - i), stride);
data += stride;
}
// Dynamsoft Barcode Reader initialization
__int64 llFormat = (OneD | QR_CODE | PDF417 | DATAMATRIX);
int iMaxCount = 0x7FFFFFFF;
ReaderOptions ro = {0};
pBarcodeResultArray pResults = NULL;
ro.llBarcodeFormat = llFormat;
ro.iMaxBarcodesNumPerPage = iMaxCount;
printf("width: %d, height: %d, size:%d\n", width, height, size);
int iRet = DBR_DecodeBuffer((unsigned char *)total, size + 40, &ro, &pResults);
printf("DBR_DecodeBuffer ret: %d\n", iRet);
free(total); // Do not forget to release the constructed buffer
// Get results
int count = pResults->iBarcodeCount;
pBarcodeResult* ppBarcodes = pResults->ppBarcodes;
pBarcodeResult tmp = NULL;
retval = PyList_New(count); // The returned Python object
PyObject* result = NULL;
i = 0;
for (; i < count; i++)
{
tmp = ppBarcodes[i];
result = PyString_FromString(tmp->pBarcodeData);
printf("result: %s\n", tmp->pBarcodeData);
PyList_SetItem(retval, i, Py_BuildValue("iN", (int)tmp->llFormat, result)); // Add results to list
}
// release memory
DBR_FreeBarcodeResults(&pResults);
Py_DECREF(ao);
return retval;
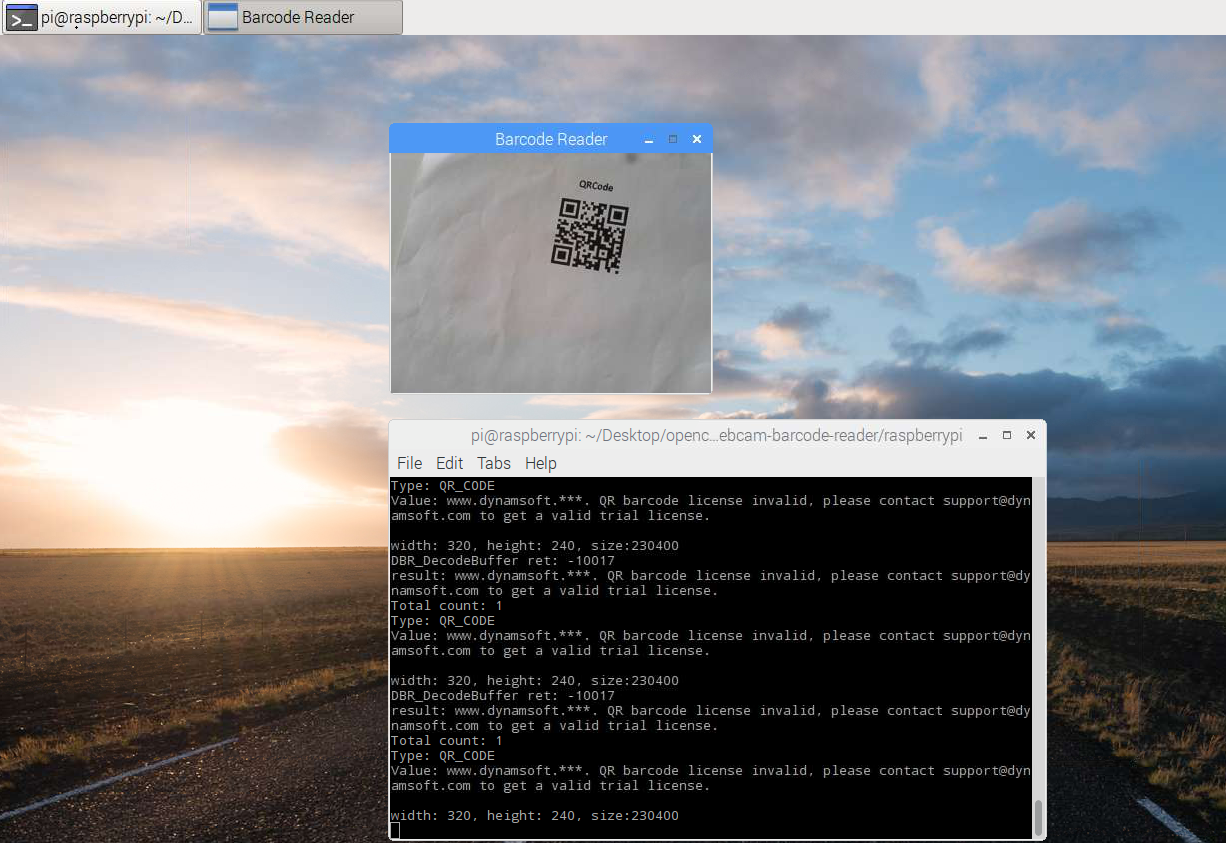
}樹莓派條形碼掃描應用
如何用OpenCV Python設定幀率以及每一幀的寬高
- CV_CAP_PROP_FRAME_WIDTH: Width of the frames in the video stream.
- CV_CAP_PROP_FRAME_HEIGHT: Height of the frames in the video stream.
- CV_CAP_PROP_FPS: Frame rate.
如果設定失敗,顯示這些常量沒有定義,可以直接輸入值:
vc = cv2.VideoCapture(0)
vc.set(5, 30)  #set FPS
vc.set(3, 320) #set width
vc.set(4, 240) #set height
如何在Python應用中使用decodeBuffer():
while True:
        cv2.imshow(windowName, frame)
        rval, frame = vc.read();
        results = decodeBuffer(frame)
        if (len(results) > 0):
            print "Total count: " + str(len(results))
            for result in results:
                print "Type: " + types[result[0]]
                print "Value: " + result[1] + "\n"

        # 'ESC' for quit
        key = cv2.waitKey(20)
        if key == 27:
            break
執行樹莓派條形碼掃描應用
1. 用樹莓派2或者3連線一個USB攝像頭。
2. 執行程式:
python app.py