UnityShader入門精要學習筆記(十五):渲染紋理
阿新 • • 發佈:2019-01-04
一.簡介
現代GPU允許我們把整個三維場景渲染到一箇中間緩衝中,即渲染目標紋理(Render Target Texture,RTT)。與之相關的是多重渲染目標(Multiple Render Target,MRT),這種技術指的是GPU允許我們把場景同時渲染到多個渲染目標紋理中,而不需要為每個渲染目標紋理單獨渲染完整的場景。
二.攝像機渲染目標設定實現鏡子效果
1.建立一個RenderTexture
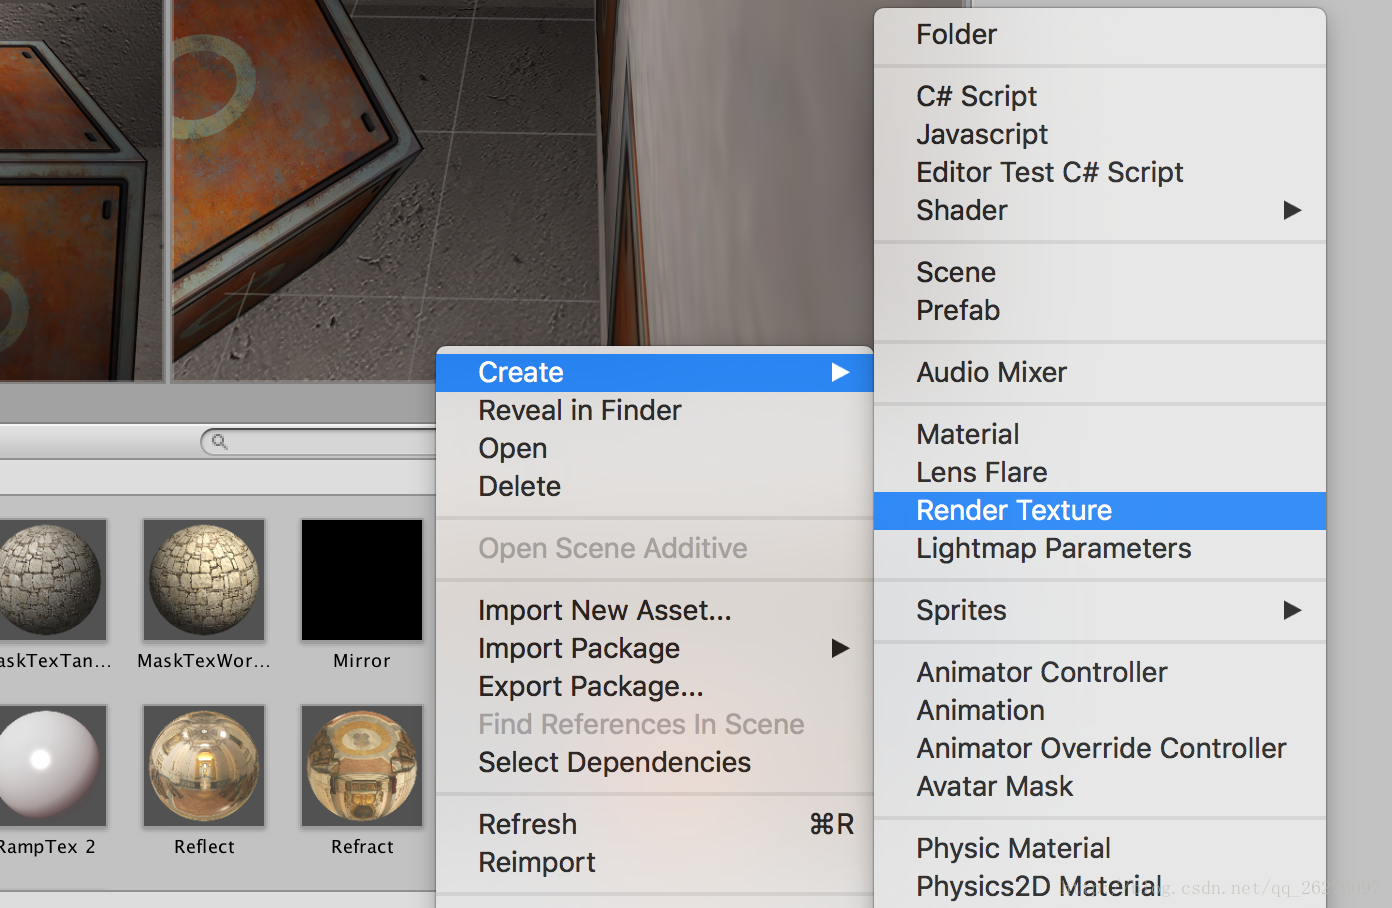
2.將攝像機的渲染目標設定為該RenderTexture

3.建立一個shader,程式碼如下:
Shader "Custom/Edu/Mirror" {
Properties {
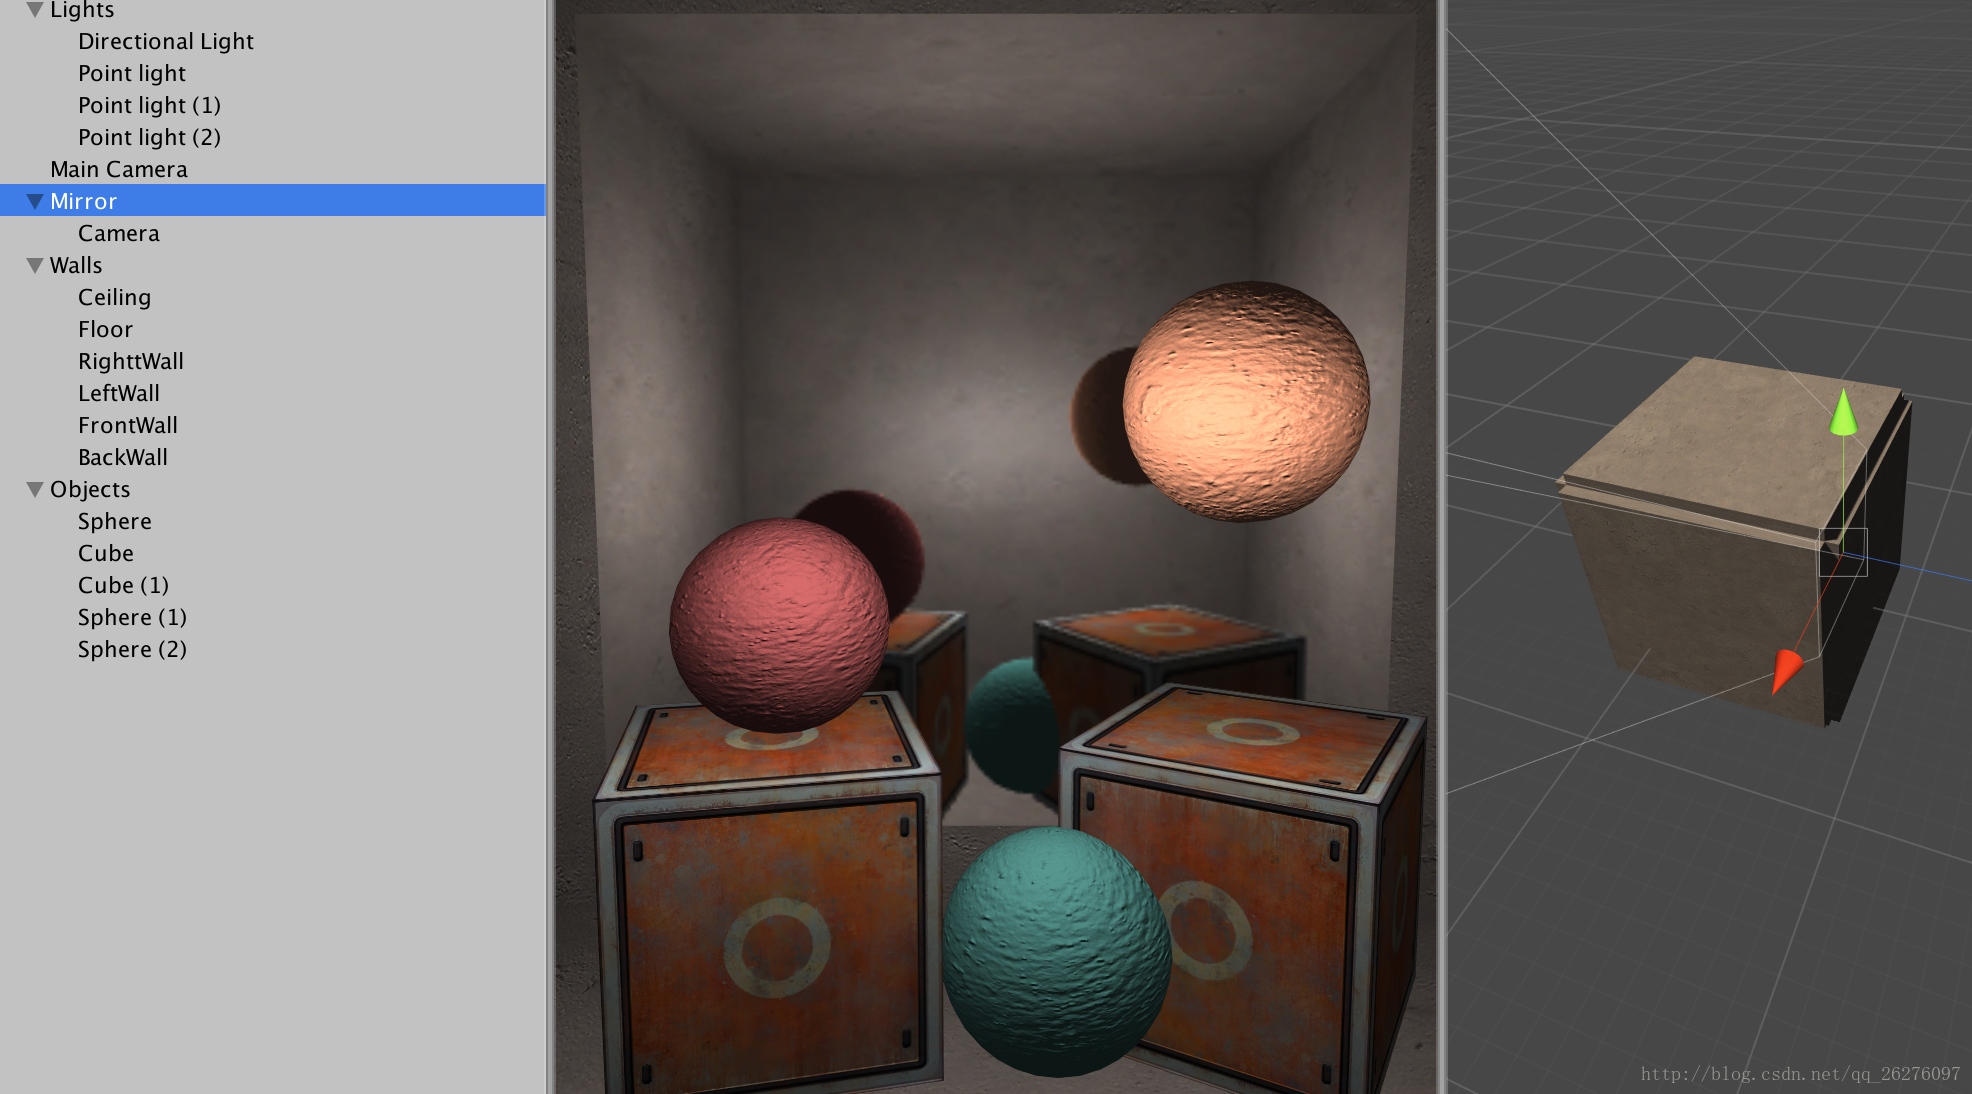
_Color ("Color" 4.建立一個材質,使用剛剛建立的shader,並把RenderTexture賦予該Material
5.場景搭建以及效果:
三.使用GrabPass實現玻璃效果
1.基本思路
在Shader中定義一個GrabPass後,Unity會把當前螢幕的影象繪製在一張紋理中,以便我們在後續Pass中訪問它。
渲染佇列設定成透明佇列,以此保證渲染該物體時,所有的不透明物體都已經被繪製在螢幕上了。
使用一張凹凸紋理(BumpMap來模擬光線的折射效果)
使用該BumpMap對GrabPass中獲得的紋理進行uv偏移,獲得扭曲效果
同時也使用該BumpMap來計算反射方向,來對環境立方體紋理進行取樣
2.程式碼實踐
Shader "Custom/Edu/Glass" {
    Properties {
        //潛意識中錯誤寫法
        //_Cubemap ("Environment CubeMap",texCUBE) = "_Skybox"{}
        _Cubemap ("Environment CubeMap",CUBE) = "_Skybox"{}
        _MainTex ("MainTex", 2D) = "white"{}
        _BumpMap ("BumpMap", 2D) = "bump"{}
        _Distortion ("Distortion",Range(0,100))= 10
        _RefractAmount ("RefractAmount",Range(0.0,1.0)) = 0.5
    }
    SubShader {
        Tags { "RenderType"="Opaque" "Queue" = "Transparent"}
        //注意這裡一定要在名字前面加”_“!!!!!!!!
        GrabPass{"_RefractionTex"}
        Pass
        {
            Tags{"LightMode" = "ForwardBase"}
            CGPROGRAM
            #pragma vertex vert
            #pragma fragment frag
            #include "UnityCG.cginc"
            #include "AutoLight.cginc"
            #include "Lighting.cginc"

            sampler2D _MainTex;
            float4 _MainTex_ST;
            samplerCUBE _Cubemap;
            sampler2D _BumpMap;
            float4 _BumpMap_ST;
            fixed _Distortion;
            fixed _RefractAmount;
            sampler2D _RefractionTex;
            float4 _RefractionTex_TexelSize;

            struct a2v
            {
                float4 vertex:POSITION;
                fixed3 normal:NORMAL;
                fixed4 tangent:TANGENT;
                float2 texcoord:TEXCOORD0;
            };

            struct v2f
            {
                float4 pos:SV_POSITION;
                float4 TtoW0:TEXCOORD0;
                float4 TtoW1:TEXCOORD1;
                float4 TtoW2:TEXCOORD2;
                float4 uv:TEXCOORD3;
                float4 scrPos:TEXCOORD4;
            };

            v2f vert(a2v v)
            {
                v2f o;
                o.pos = mul(UNITY_MATRIX_MVP,v.vertex);
                //輸入齊次剪裁空間下的座標,得到螢幕影象的取樣座標?
                o.scrPos = ComputeGrabScreenPos(o.pos);

                o.uv.xy = TRANSFORM_TEX(v.texcoord,_MainTex);
                o.uv.zw = TRANSFORM_TEX(v.texcoord,_BumpMap);

                float3 worldPos = mul(_Object2World,v.vertex).xyz;

                fixed3 worldNormal = UnityObjectToWorldNormal(v.normal);
                fixed3 worldTangent = UnityObjectToWorldDir(v.tangent);
                fixed3 worldBionormal = cross(worldNormal,worldTangent) * v.tangent.w;

                o.TtoW0 = float4(worldTangent.x,worldBionormal.x,worldNormal.x,worldPos.x);
                o.TtoW1 = float4(worldTangent.y,worldBionormal.y,worldNormal.y,worldPos.y);
                o.TtoW2 = float4(worldTangent.z,worldBionormal.z,worldNormal.z,worldPos.z);

                return o;
            }

            fixed4 frag(v2f i):SV_Target
            {
                float3 worldPos = float3(i.TtoW0.w,i.TtoW1.w,i.TtoW2.w);
                fixed3 worldViewDir = normalize(UnityWorldSpaceViewDir(worldPos));

                //記得要Unpack!!
                fixed3 bump = UnpackNormal(tex2D(_BumpMap,i.uv.zw)).xyz;

                //_Refraction_TexelSize可以讓我們得到該紋理的紋素大小,如一個大小為256X512的紋理
                //它的紋素大小為(1/256,1/512)
                float2 offset = bump.xy * _Distortion * _RefractionTex_TexelSize.xy;
                i.scrPos.xy = offset * i.scrPos.z + i.scrPos.xy;
                //i.scrPos.xy = offset + i.scrPos.xy;
                fixed3 refrCol = tex2D(_RefractionTex,i.scrPos.xy/i.scrPos.w).rgb;

                //將法線轉換到世界空間
                bump = normalize( float3(dot(i.TtoW0.xyz,bump),dot(i.TtoW1.xyz,bump),dot(i.TtoW2.xyz,bump)) );


                fixed3 reflDir = reflect(-worldViewDir,bump);
                fixed3 reflCol = texCUBE(_Cubemap,reflDir).rgb;

                fixed3 finalColor = _RefractAmount * refrCol + (1-_RefractAmount)*reflCol;

                return fixed4(finalColor,1.0);
            }
            ENDCG
        }
    }
    FallBack "Diffuse"
}
3.效果圖