一、ios的通過Xib構建UICollectionView的簡單運用
眾所周知,UICollectionView是ios6才最新引進來的API,用於展示集合檢視,可實現多列布局;
經常聽人說起 UICollectionView怎麼好用,由於之前在趕專案也沒有什麼時間去學習這個,現在閒下來,學習了簡單的使用,感覺功能還是蠻強大的,相對UIScrollView和UITableView它相對而言更靈活了;
UICollectionView有兩種方式,一種是 Xib還有一種是純程式碼,今天暫時是學習的Xib的方式 ;
學習總結如下:
1.建立工程,要實現UICollectionView需要ViewController實現它的三個代理協議UICollectionViewDataSource
2.宣告相關的UICollectionView的類如下:
@property (nonatomic,strong)UICollectionView *collectionView;
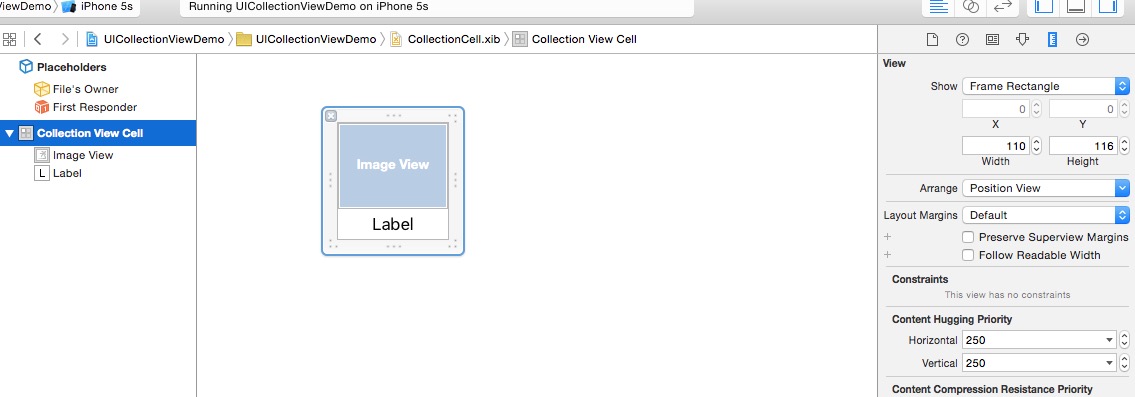
3.建立Xib檔案,命名為CollectionCell,在xib中拖入如下檢視
拖入後如下圖所示,
在這個cell裡面新增相應的控制元件,新增完如下所示:
到這裡xib檔案算是建立完了;
4.在ViewController.m檔案中初始化 UICollectionView如下所示:
<span style="font-size:14px;">    UICollectionViewFlowLayout *flowLayout = [[UICollectionViewFlowLayout alloc] init];
    self.collectionView = [[UICollectionView alloc] initWithFrame:CGRectMake(0, 20, self.view.frame.size.width, self.view.frame.size.height) collectionViewLayout:flowLayout];
    self.collectionView.delegate = self;        //實現代理
    self.collectionView.dataSource = self;      //實現資料來源方法
    self.collectionView.allowsMultipleSelection = YES;      //實現多選,預設是NO
    [self.view addSubview:self.collectionView];</span>
5.在ViewDidLoad中通過Nib生成cell,然後註冊 Nib的view需要繼承 UICollectionViewCell
[self.collectionViewregisterNib:[UINibnibWithNibName:@"CollectionCell"bundle:nil]forCellWithReuseIdentifier:@"collectionCellID"];
6.實現他的代理方法,主要有如下幾個
//有多少個item
-(NSInteger)collectionView:(UICollectionView *)collectionView numberOfItemsInSection:(NSInteger)section{

    return self.dataArray.count;
}


-(UICollectionViewCell *)collectionView:(UICollectionView *)collectionView cellForItemAtIndexPath:(NSIndexPath *)indexPath{

    UICollectionViewCell *cell = [collectionView dequeueReusableCellWithReuseIdentifier:@"collectionCellID" forIndexPath:indexPath];

    UIImageView *imageView = (UIImageView *)[cell viewWithTag:1];   //在建立Xib的時候給了控制元件相應的tag值
    UILabel *label = (UILabel *)[cell viewWithTag:2];

    [imageView setImage:[UIImage imageNamed:[self.dataArray objectAtIndex:indexPath.row]]];
    [label setText:[self.dataArray objectAtIndex:indexPath.row]];

    cell.backgroundColor = [UIColor redColor];

    return cell;

}

//UICollectionViewCell的大小
-(CGSize)collectionView:(UICollectionView *)collectionView layout:(UICollectionViewLayout *)collectionViewLayout sizeForItemAtIndexPath:(NSIndexPath *)indexPath{

    return CGSizeMake(90, 116);
}
//選擇cell時
-(void)collectionView:(UICollectionView *)collectionView didSelectItemAtIndexPath:(NSIndexPath *)indexPath{

    UICollectionViewCell *cell = [collectionView cellForItemAtIndexPath:indexPath];
    cell.backgroundColor =  [UIColor greenColor];
}

//取消cell時
-(void)collectionView:(UICollectionView *)collectionView didDeselectItemAtIndexPath:(NSIndexPath *)indexPath{

    UICollectionViewCell *cell = [collectionView cellForItemAtIndexPath:indexPath];
    cell.backgroundColor =  [UIColor redColor];
}
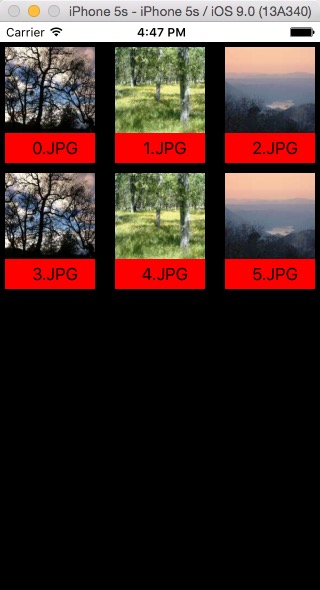
完成以上操作執行 效果圖如下;


