
ES6公用立體輪播元件的封裝及使用
阿新 • • 發佈:2019-01-06
ES6公用立體輪播元件的封裝及使用
原始碼github連結:https://github.com/XieTongXue/how-to/tree/master/carousel-3d
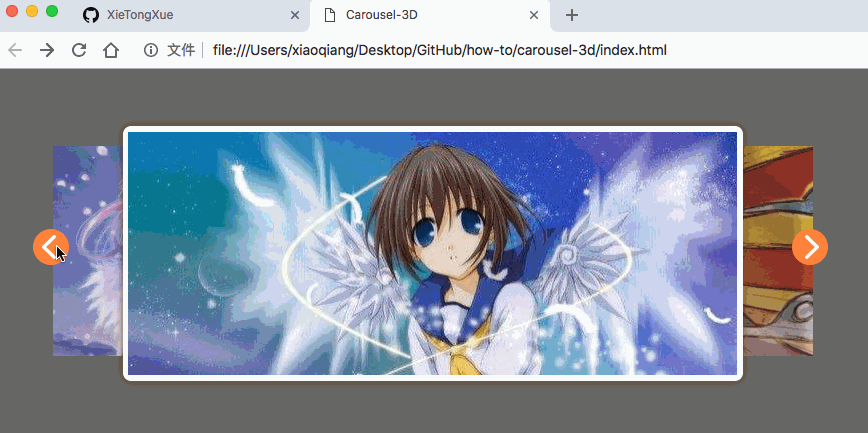
1、效果展示
2、容易產生bug的點
當前圖片需要一個背景框,如上圖所見白色框,白色框為漂浮於當前輪播圖片上方;輪播圖可以點選跳轉到其他網頁,但是由於存在層級關係,白色款會擋住輪播圖,導致無法跳轉
2.1解決思路
將白色框設定為a連結,當圖片滾動的時候設定a連結跳轉連結為當前輪播圖應該跳轉的連結,如圖。

3、公用元件原始碼
命名poster.js
class Poster {
  constructor(Poster) {
    let self = this;
    this.Poster = Poster;
    this.posterList = Poster.find(".poster-list");
    this.posterItems = Poster.find(".poster-item");
    this.firstPosterItem = this.posterItems.first();
    this.lastPosterItem = this.posterItems.last();
    this.prevBtn = this.Poster.find(".poster-prev-btn");
    this.nextBtn = this.Poster.find(".poster-next-btn");
    this.setting = {
        "width":"760", // 輪播圖寬度(比如此例子為三張圖片可視區域寬度)
        "height":"248", // 輪播圖高度(比如此例子為三張圖片可視區域高度)
        "posterWidth":"610", // 當前圖片寬度
        "posterHeight":"248", // 當前圖片高度
        "scale":"0.8", // 非當前圖片縮放比例
        "speed":"1000", // 動畫時長
        "isAutoplay":"true", // 是否自動播放
        "dealy":"1000" // 切換間隔
    }
    $.extend(this.setting,this.getSetting())
    this.setFirstPosition();
    this.setSlicePosition();
    this.rotateFlag = true;
    this.prevBtn.bind("click",function(){
        if(self.rotateFlag){
            self.rotateFlag = false;
            self.rotateAnimate("left")
        }
    });
    this.nextBtn.bind("click",function(){
        if(self.rotateFlag){
            self.rotateFlag = false;
            self.rotateAnimate("right")
        }
    });
    if(this.setting.isAutoplay){
        this.autoPlay();
        this.Poster.hover(function(){clearInterval(self.timer)},function(){self.autoPlay()})
    }
  }
  autoPlay () {
    this.prevBtn.click();
    let that = this;
    this.timer =  window.setInterval(function(){
        that.prevBtn.click();
    },that.setting.dealy)
  }
  rotateAnimate (type) {
      let that = this;
      let zIndexArr = [];
      if(type == "left"){
        this.posterItems.each(function(){
            let self = $(this),
            prev = $(this).next().get(0)?$(this).next():that.firstPosterItem,
            width = prev.css("width"),
            height = prev.css("height"),
            zIndex = prev.css("zIndex"),
            opacity = prev.css("opacity"),
            left = prev.css("left"),
            top = prev.css("top");
            if(top === '0px') { // 切換圖片時記錄當前圖片href設定到固定框href
              $('.j-curr-poster-item').attr('href', self.attr('href'))
            }
            zIndexArr.push(zIndex);
            self.animate({
                "width":width,
                "height":height,
                "left":left,
                "opacity":opacity,
                "top":top,
            },that.setting.speed,function(){
                that.rotateFlag = true;
            });
        });
        this.posterItems.each(function(i){
            $(this).css("zIndex",zIndexArr[i]);
        });
      }
      if(type == "right"){
        this.posterItems.each(function(){
            let self = $(this),
            next = $(this).prev().get(0)?$(this).prev():that.lastPosterItem,
                width = next.css("width"),
                height = next.css("height"),
                zIndex = next.css("zIndex"),
                opacity = next.css("opacity"),
                left = next.css("left"),
                top = next.css("top");
                if(top === '0px') { // 切換圖片時記錄當前圖片href設定到固定框href
                  $('.j-curr-poster-item').attr('href', self.attr('href'))
                }
                zIndexArr.push(zIndex);
            self.animate({
                "width":width,
                "height":height,
                "left":left,
                "opacity":opacity,
                "top":top,
            },that.setting.speed,function(){
                that.rotateFlag = true;
            });
        });
        this.posterItems.each(function(i){
            $(this).css("zIndex",zIndexArr[i]);
        });
      }
  }
  setFirstPosition () {
      this.Poster.css({"width":this.setting.width,"height":this.setting.height});
      this.posterList.css({"width":this.setting.width,"height":this.setting.height});
      let width = (this.setting.width - this.setting.posterWidth) / 2;
      this.firstPosterItem.css({
          "width":this.setting.posterWidth,
          "height":this.setting.posterHeight,
          "left":width,
          "zIndex":Math.ceil(this.posterItems.size()/2),
          "top":this.setVertialType(this.setting.posterHeight)
      });
  }
  setSlicePosition () {
      let _self = this;
      let sliceItems = this.posterItems.slice(1),
          level = Math.floor(this.posterItems.length/2),
          leftItems = sliceItems.slice(0,level),
          rightItems = sliceItems.slice(level),
          posterWidth = this.setting.posterWidth,
          posterHeight = this.setting.posterHeight,
          Btnwidth = (this.setting.width - this.setting.posterWidth) / 2,
          gap = Btnwidth/level,
          containerWidth = this.setting.width;
      let i = 1;
      let leftWidth = posterWidth;
      let leftHeight = posterHeight;
      let zLoop1 = level;
      leftItems.each(function(index,item){
          leftWidth = posterWidth * _self.setting.scale;
          leftHeight = posterHeight*_self.setting.scale;
          $(this).css({
              "width":leftWidth,
              "height":leftHeight,
              "left": Btnwidth - i*gap,
              "zIndex":zLoop1--,
              "opacity": 0.8,
              "top":_self.setVertialType(leftHeight)
          });
          i++;
      });
      let j = level;
      let zLoop2 = 1;
      let rightWidth = posterWidth;
      let rightHeight = posterHeight;
      rightItems.each(function(index,item){
          let rightWidth = posterWidth * _self.setting.scale;
          let rightHeight = posterHeight*_self.setting.scale;
          $(this).css({
              "width":rightWidth,
              "height":rightHeight,
              "left": containerWidth -( Btnwidth - j*gap + rightWidth),
              "zIndex":zLoop2++,
              "opacity": 0.8,
              "top":_self.setVertialType(rightHeight)
          });
          j--;
      });
  }
  getSetting () {
      let settting = this.Poster.attr("data-setting");
      if(settting.length > 0){
          return $.parseJSON(settting);
      }else{
          return {};
      }
  }
  setVertialType (height) {
      let algin = this.setting.algin;
      if(algin == "top") {
          return 0
      }else if(algin == "middle"){
          return (this.setting.posterHeight - height) / 2
      }else if(algin == "bottom"){
          return this.setting.posterHeight - height
      }else {
          return (this.setting.posterHeight - height) / 2
      }
  }
}
4、元件使用
<!DOCTYPE html>
<html lang="en">
<head>
  <meta charset="UTF-8">
  <meta name="viewport" content="width=device-width, initial-scale=1.0">
  <meta http-equiv="X-UA-Compatible" content="ie=edge">
  <title>Carousel-3D</title>
  <link href="./poster.css" rel="stylesheet">
  <script src="https://cdn.staticfile.org/jquery/1.10.2/jquery.min.js"></script>
</head>
<body>
  <div class="poster"> <!--輪播圖最外層容器,命名隨意-->
    <!--輪播圖區域,class名要與例項化時所用的一致-->
    <div class = "poster-main" data-setting = '{"width":760,"height":248,"posterWidth":610,"posterHeight":248,"scale":0.85,"dealy":"3000","algin":"middle"}' >
        <!--當前圖片背景框-->
        <a href="" class="curr-bg j-curr-poster-item" target="_blank"></a>
        <!--圖片列表-->
        <div class = "poster-list">
            <a class = "poster-item" href="https://github.com/xietongxue" title="1" class="ms-slide-pic-img" target="_blank" style="width:100%;height: 100%;">
              <img src="img/1.png" alt="1" width="610" height="248" border="0">
            </a>
            <a class = "poster-item" href="https://blog.csdn.net/fabulous1111" title="2" class="ms-slide-pic-img" target="_blank" style="width:100%;height: 100%;">
              <img src="img/2.png" alt="2" width="610" height="248" border="0">
            </a>
            <a class = "poster-item" href="https://www.baidu.com" title="3" class="ms-slide-pic-img" target="_blank" style="width:100%;height: 100%;">
              <img src="img/3.png" alt="3" width="610" height="248" border="0">
            </a>
        </div>
        <!--按鈕-->
        <button class="btn-left poster-prev-btn"></button>
        <button class="btn-right poster-next-btn"></button>
  </div>
</div>
</body>
<script src="./poster.js"></script>
<script>
// 用於適配一個網頁有多個輪播的情況,只含一個其實只需要new Poster($('.poster-main'));
$('.poster-main').each(function(index,item){
    // 初始化輪播圖
    new Poster($(this));
});
</script>
</html>
5、sass
*{padding:0;margin:0}
html,body {width: 100%;height:100%;background: #666;}

@mixin setBtn($width, $height, $left, $top, $img) {
    position: absolute;
    top: $top;
    left: $left;
    width: $width;
    height: $height;
    background: url('./img/' + $img + '.png') no-repeat;
    border:none;
    outline: none;
    cursor: pointer;
    z-index: 666;
}
.poster {
  position: absolute;
  top: 200px;
  left: 50%;
  transform: translateX(-50%);
  width: 820px;
  height: 280px;
  z-index: 5;
  .poster-main{
    position: absolute;
    top: 0;
    left: 30px;
    width: 100%;
    height:100%;
    .btn-left {
    @include setBtn(36px, 36px, -20.5px, 110px, 'btn-left');
    }
    .btn-right {
    @include setBtn(36px, 36px, 738.5px, 110px, 'btn-right');
    }
    .curr-bg {
        display: block;
        position: absolute;
        top: -2px;
        left: 61px;
        width: 638px;
        height: 273px;
        background:url('./img/curr-bg.png') no-repeat center top;
        z-index: 666;
    }
    .poster-list{
        position: absolute;
        top: 8px;
        left: 0;
        .poster-item {
            position: absolute;
            left: 0px;
            top: 0px;
            img {
                width: 100%;
                height: 100%;
            }
        }
    }
    a, img {
        display: block;
    }
  }
}
需要圖片資源或者編譯後的css請訪問:https://github.com/XieTongXue/how-to/tree/master/carousel-3d