
SpringMVC 整合 百度編輯器UEditor
阿新 • • 發佈:2019-01-06
1、下載UEditor,這裡選擇JSP(UTF8)版本和完整原始碼 。在你的專案中引入JSP(UTF8)版本的檔案和完整原始碼對應的jsp原始碼。
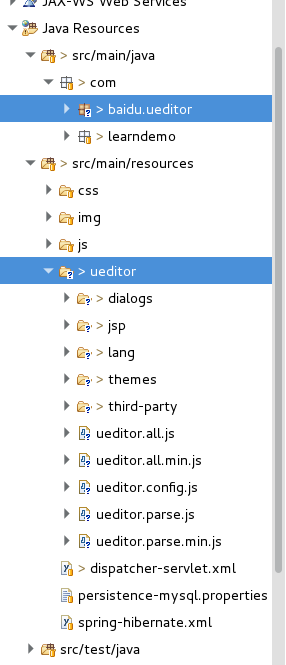
2、使用maven引入對應的jar包(也可以同過直接引用ueditor自帶的包)
<!-- ueditor依賴項 -->
<dependency>
<groupId>commons-fileupload</groupId>
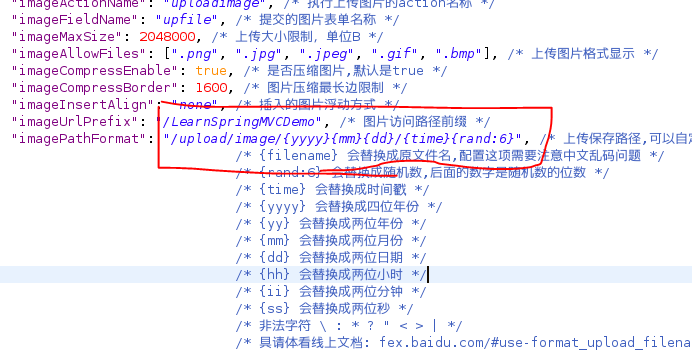
<artifactId>commons-fileupload</artifactId> 3、修改jsp/config.json檔案,
注意:上傳儲存路徑對應的是專案的根目錄(不需要新增專案名)。
但是如果這樣上傳成功之後,返回的地址有問題(同樣也沒有新增專案名稱)。應次同時需要新增訪問路徑字首(加入你的專案名稱)。
如下圖:
上傳的路徑就是 /LearnSpringMVCDemo/upload/…(預設在LearnSpringMVCDemo的根目錄下)
返回的上傳路徑就是 /LearnSpringMVCDemo/upload/…(LearnSpringMVCDemo通過路徑字首加入)
4、新增靜態檔案的訪問配置:
我的檔案在resources目錄下,同時上傳的檔案在根目錄下。
    <mvc:resources location="classpath:js/" mapping="/js/**" />
    <mvc:resources location="classpath:css/" mapping="/css/**" />
    <mvc:resources location="classpath:img/" mapping="/img/**" />
    <mvc:resources location="classpath:ueditor/" mapping="/ueditor/**" />
    <mvc:resources location="/upload/" mapping="/upload/**" />
5、根據springMVC的規則新增對應的controller,替換掉ueditor自帶的controller.jsp檔案(可以刪除該檔案)。同時修改ueditor.config.js對應的程式入口。
    // ueditor.config.js
    // 修改1
    window.UEDITOR_HOME_URL = "/LearnSpringMVCDemo/ueditor/";
    var URL = window.UEDITOR_HOME_URL || getUEBasePath();

    /**
     * 配置項主體。注意,此處所有涉及到路徑的配置別遺漏URL變數。
     */
    window.UEDITOR_CONFIG = {

        // 為編輯器例項新增一個路徑,這個不能被註釋
        UEDITOR_HOME_URL : URL

        // 伺服器統一請求介面路徑
        ,
        // 修改2
        serverUrl : URL + "config.do"
// 對應的伺服器統一請求入口
package com.learndemo.controller;
import java.io.IOException;
import java.io.PrintWriter;
import javax.servlet.http.HttpServletRequest;
import javax.servlet.http.HttpServletResponse;
import org.springframework.stereotype.Controller;
import org.springframework.web.bind.annotation.RequestMapping;
import com.baidu.ueditor.ActionEnter;
@Controller
@RequestMapping(value = "/ueditor")
public class UeditorController {
@RequestMapping(value = "/config.do")
public void config(HttpServletRequest request, HttpServletResponse response) {
response.setContentType("application/json");
String rootPath = request.getSession().getServletContext().getRealPath("/");
try {
String exec = new ActionEnter(request, rootPath).exec();
PrintWriter writer = response.getWriter();
writer.write(exec);
writer.flush();
writer.close();
} catch (IOException e) {
e.printStackTrace();
}
}
}6、修改原始檔使其對應springMVC的規則
    // ConfigManager.java

    /*
     * 通過一個給定的路徑構建一個配置管理器, 該管理器要求地址路徑所在目錄下必須存在config.properties檔案
     */
    private ConfigManager(String rootPath, String contextPath, String uri)
            throws FileNotFoundException, IOException, URISyntaxException {

        rootPath = rootPath.replace("\\", "/");

        this.rootPath = rootPath;
        this.contextPath = contextPath;
        // 第一處修改
        // 因此這裡我們需要求出配置檔案的物理路徑
        // 我這裡是 /我的專案/WEB-INF/classes/ueditor/jsp/config.json
        this.parentPath = this.rootPath + "WEB-INF" + File.separator + "classes" + File.separator + "ueditor"
                + File.separator + "jsp";
        this.initEnv();

    }

    // 第二處修改
    private void initEnv() throws FileNotFoundException, IOException {
        String configContent = this.readFile(this.getConfigPath());
        try {
            JSONObject jsonConfig = new JSONObject(configContent);
            this.jsonConfig = jsonConfig;
        } catch (Exception e) {
            this.jsonConfig = null;
        }
    }
注:上述的配置檔案物理路徑指的是我釋出在tomcat的路徑。可以通過這裡配置。
修改的目的是,這裡需要獲取配置檔案config.json的配置。但是使用了springMVC之後,得到的url地址就會出問題。因此需要在這裡手動更改寫入你對應檔案的物理路徑。

至此UEditor便可以正常使用了