菜雞的redis之路(三)-redis啟動3個警告資訊解決
Redis伺服器啟動3個警告資訊的解決方案
##################################################################################
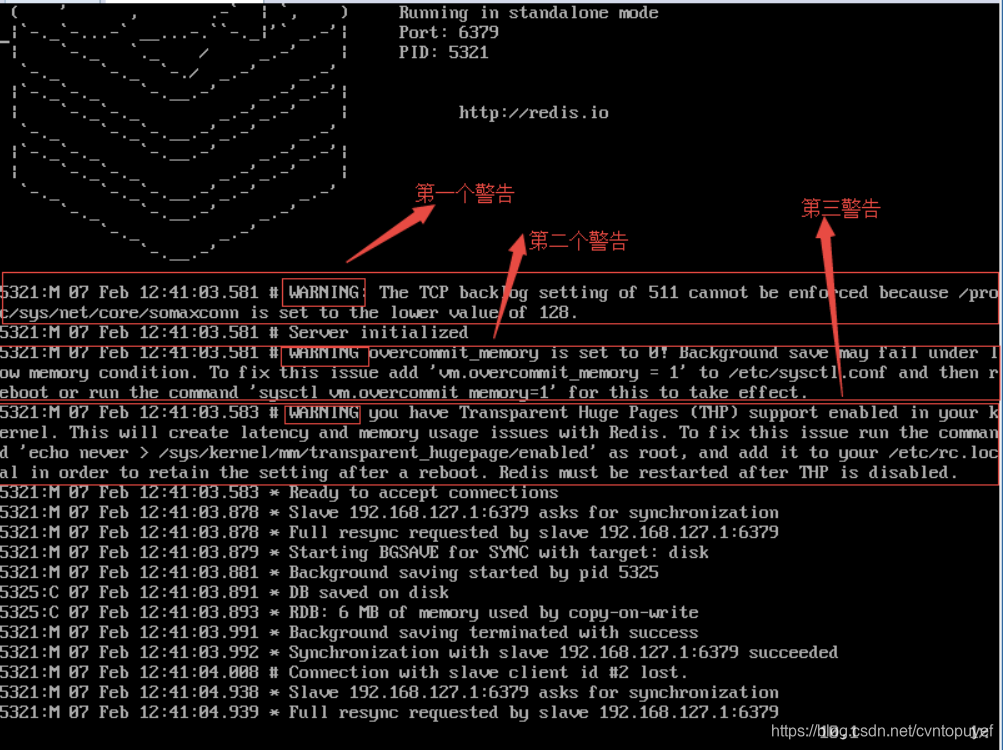
第一個警告資訊:The TCP backlog setting of 511 cannot be enforced because /proc/sys/net/core/somaxconn is set to the lower value of 128.
第二個警告資訊:WARNING overcommit_memory is set to 0! Background save may fail under low memory condition. To fix this issue add ‘vm.overcommit_memory = 1’ to /etc/sysctl.conf and then reboot or run the command ‘sysctl vm.overcommit_memory=1’ for this to take effect.
解決方案:
針對這兩個問題,都要修改/etc/sysctl.conf檔案,在檔案末尾加入以下兩句
net.core.somaxconn=1024
vm.overcommit_memory=1
第三個警告資訊:you have Transparent Huge Pages (THP) support enabled in your kernel. This will create latency and memory usage issues with Redis. To fix this issue run the command ‘echo never > /sys/kernel/mm/transparent_hugepage/enabled’ as root, and add it to your /etc/rc.local in order to retain the setting after a reboot. Redis must be restarted after THP is disabled.
方式一:
        1.編輯 /etc/default/grub,在GRUB_CMDLINE_LINUX加入選項 transparent_hugepage=never
        2.
          GRUB_TIMEOUT=5
          GRUB_DISTRIBUTOR="$(sed 's, release .*$,,g' /etc/system-release)"
          GRUB_DEFAULT=saved
          GRUB_DISABLE_SUBMENU=true
          GRUB_TERMINAL_OUTPUT="console"
          GRUB_DISABLE_RECOVERY="true"
          GRUB_CMDLINE_LINUX="rd.lvm.lv=fedora/swap rd.lvm.lv=fedora/root rhgb quiet transparent_hugepage=never"
        3.重新生成grub配置檔案
        4.如果你使用的是grub,請把選項寫入grub.conf檔案就好了,然後重啟系統
        5. 查詢hugepage狀態

方式二