
訊息佇列系列之ActiveMQ(JMS、叢集配置)
1、ActiveMQ的下載與啟動
到http://activemq.apache.org/activemq-5152-release.html下載ActiveMQ
windows版本的啟動:
執行bin資料夾中的win32(32位系統)/win64(64位系統)下的:
activemq.bat(直接啟動,不能關閉命令列視窗,否則會關閉)
InstallService.bat(以服務方式啟動,可以在windows的服務中找到並設定開機自啟動)
啟動成功後,在瀏覽器中訪問localhost:8161可以進入如下介面,點選進入管理介面,輸入預設使用者名稱admin密碼admin進入
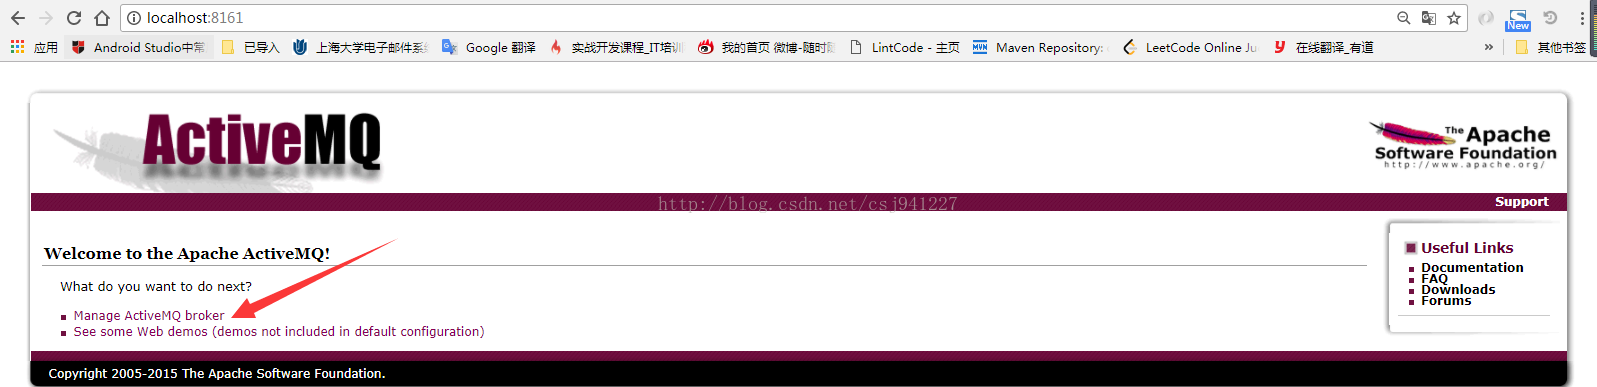
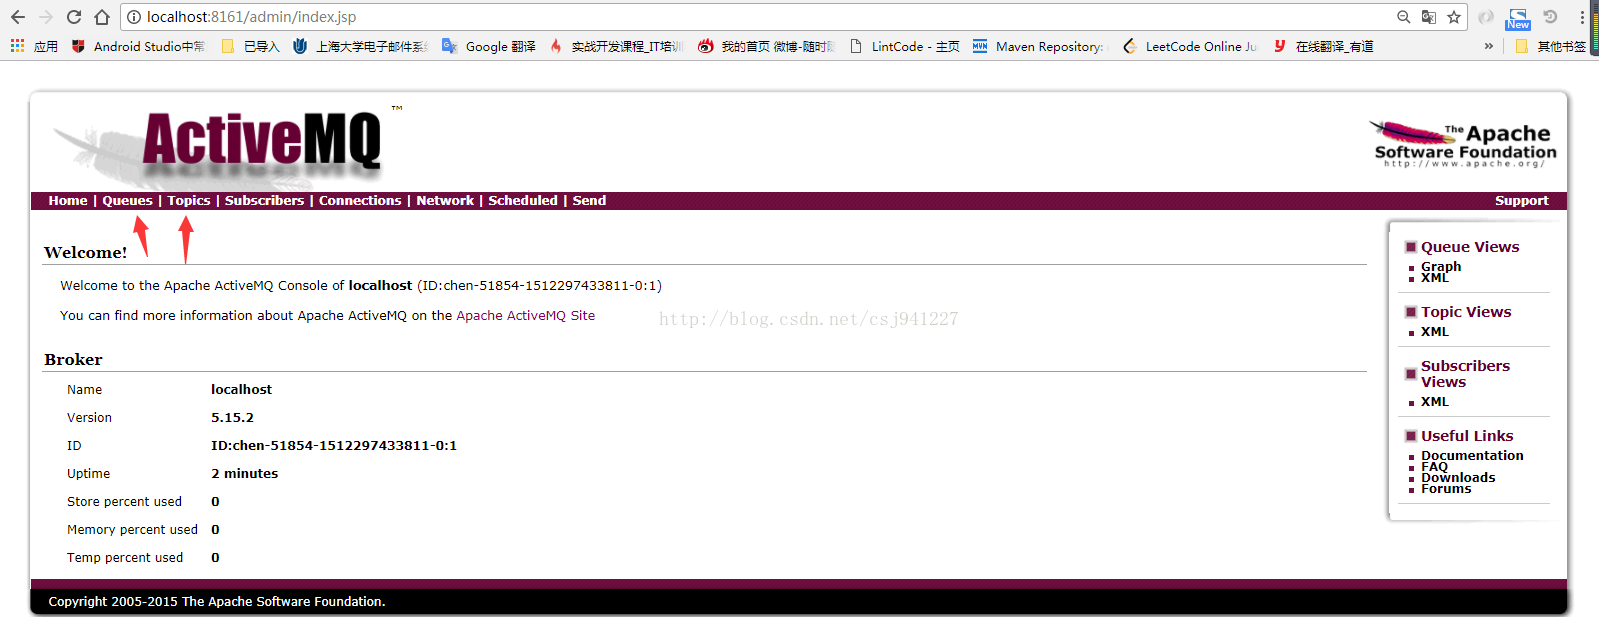
今後常用的Queue(訊息佇列)和Topics(話題)將在此處檢視。
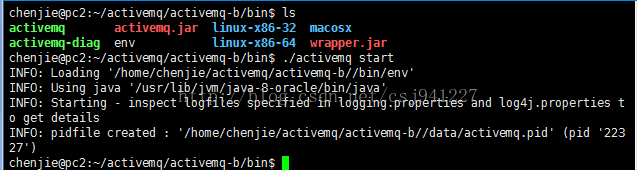
linux版本的啟動
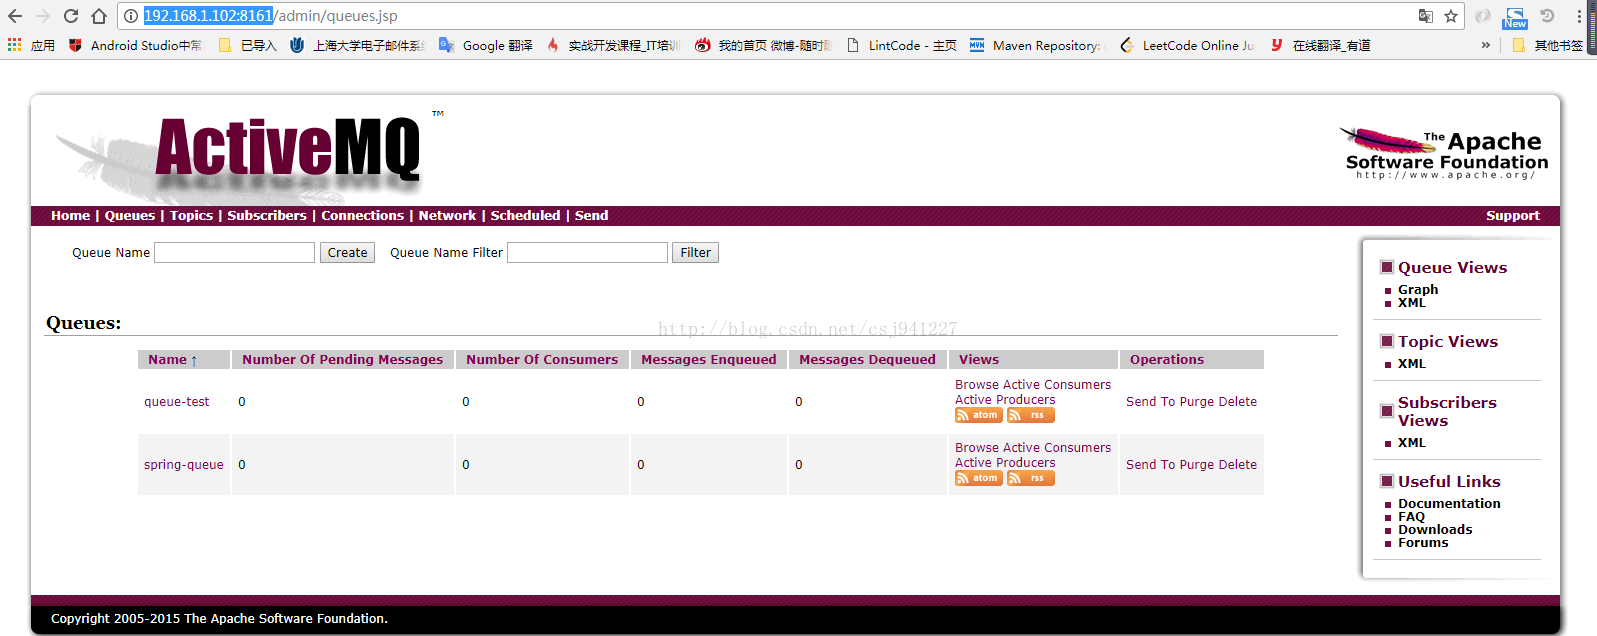
進入安裝目錄的bin目錄下,使用./activemq start 啟動,啟動成功後可以遠端訪問activemq管理頁面。例如,此linux機器的IP為192.169.1.102,則訪問http://192.168.1.102:8161即可
2、訊息中介軟體的相關概念
ActiveMQ兩種基本模式
訊息佇列模式中,訊息生產者生產的訊息存在訊息佇列中,訊息消費者從訊息佇列中消費訊息,一條訊息被一個消費者消費後,其餘消費者將消費不到該訊息;
釋出訂閱模式中,訊息生產者生產的訊息存在話題中,訊息消費者從話題中訂閱訊息,一條訊息可以被多個消費者消費。
使用訊息中介軟體的好處:通過訊息中介軟體解耦服務呼叫
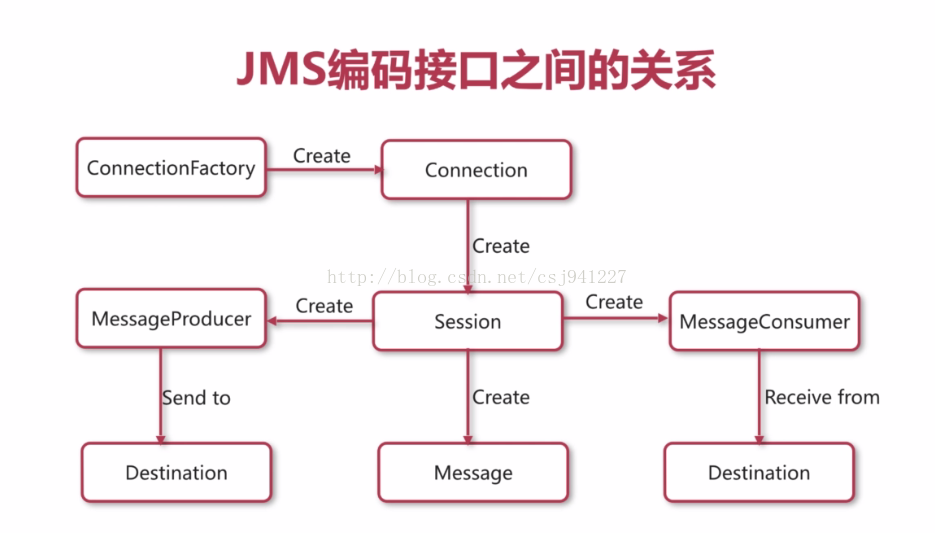
3、JMS規範
4、普通Java程式使用JMS整合ActiveMQ
記得新增jar包:
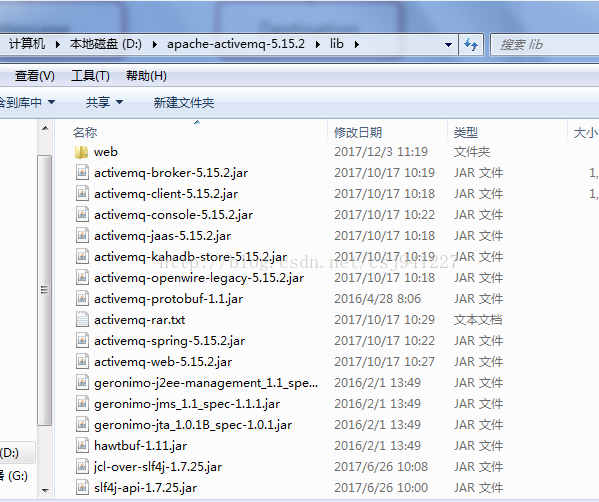
如果使用maven記得在pom.xml中新增相應依賴:
 <dependency>
            <groupId>org.apache.activemq</groupId>
            <artifactId>activemq-core</artifactId>
            <version>5.15.2</version>
 </dependency>
4.1訊息佇列模式
生產者
package cn.edu.shu.ces.chenjie.jms.queue;

import org.apache.activemq.ActiveMQConnectionFactory;
import org.slf4j.Logger;
import org.slf4j.LoggerFactory;

import javax.jms.*;

public class AppProducer {
    private static final String url = "tcp://192.168.1.102:61616";
    private static final String queueName = "queue-test";
    private static Logger Log = LoggerFactory.getLogger(AppProducer.class);
    public static void main(String[] args) throws JMSException {
        //1、建立ConnectionFactory
        ConnectionFactory connectionFactory = new ActiveMQConnectionFactory(url);
        //2、建立Connection
        Connection connection = connectionFactory.createConnection();
        //3、啟動連線
        connection.start();
        //4、建立會話
        //b:使用事物    應答模式
        Session session = connection.createSession(false, Session.AUTO_ACKNOWLEDGE);
        //5、建立一個目標
        Destination destination = session.createQueue(queueName);
       //6、建立一個生產者
        MessageProducer producer = session.createProducer(destination);
        for(int i = 0; i < 100; i++){
            //7、建立訊息
            TextMessage textMessage = session.createTextMessage("test :" + i);
            //8、傳送訊息
            producer.send(textMessage);
            Log.info("傳送訊息" + textMessage + "");
        }
        //9、關閉連線
        connection.close();
    }
}
消費者
package cn.edu.shu.ces.chenjie.jms.queue;

import org.apache.activemq.ActiveMQConnectionFactory;
import org.slf4j.Logger;
import org.slf4j.LoggerFactory;

import javax.jms.*;

public class AppConsumer {
    private static final String url = "tcp://192.168.1.102:61616";
    private static final String queueName = "queue-test";
    private static Logger Log = LoggerFactory.getLogger(AppProducer.class);
    public static void main(String[] args) throws JMSException {
        //1、建立ConnectionFactory
        ConnectionFactory connectionFactory = new ActiveMQConnectionFactory(url);
        //2、建立Connection
        Connection connection = connectionFactory.createConnection();
        //3、啟動連線
        connection.start();
        //4、建立會話
        //b:使用事物    應答模式
        Session session = connection.createSession(false, Session.AUTO_ACKNOWLEDGE);
        //5、建立一個目標
        Destination destination = session.createQueue(queueName);
        //6、建立一個生產者
        MessageConsumer consumer = session.createConsumer(destination);

        //7、建立一個監聽器
        consumer.setMessageListener(new MessageListener() {
            public void onMessage(Message message) {
                TextMessage textMessage = (TextMessage) message;
                Log.info("接收到訊息:" + textMessage);
            }
        });
        //8、關閉連線
        //connection.close();
    }
}
啟動生產者

啟動消費者

4.2 話題-訂閱模式
生產者
package cn.edu.shu.ces.chenjie.jms.topic;

import org.apache.activemq.ActiveMQConnectionFactory;
import org.slf4j.Logger;
import org.slf4j.LoggerFactory;

import javax.jms.*;

public class AppProducer {
    private static final String url = "tcp://192.168.1.102:61616";
    private static final String topicName = "topic-test";
    private static Logger Log = LoggerFactory.getLogger(AppProducer.class);
    public static void main(String[] args) throws JMSException {
        //1、建立ConnectionFactory
        ConnectionFactory connectionFactory = new ActiveMQConnectionFactory(url);
        //2、建立Connection
        Connection connection = connectionFactory.createConnection();
        //3、啟動連線
        connection.start();
        //4、建立會話
        //b:使用事物    應答模式
        Session session = connection.createSession(false, Session.AUTO_ACKNOWLEDGE);
        //5、建立一個目標
        Destination destination = session.createTopic(topicName);
       //6、建立一個生產者
        MessageProducer producer = session.createProducer(destination);
        for(int i = 0; i < 100; i++){
            //7、建立訊息
            TextMessage textMessage = session.createTextMessage("test :" + i);
            //8、傳送訊息
            producer.send(textMessage);
            Log.info("傳送訊息" + textMessage + "");
        }
        //9、關閉連線
        connection.close();
    }
}
消費者
package cn.edu.shu.ces.chenjie.jms.topic;

import org.apache.activemq.ActiveMQConnectionFactory;
import org.slf4j.Logger;
import org.slf4j.LoggerFactory;

import javax.jms.*;

public class AppConsumer {
    private static final String url = "tcp://192.168.1.102:61616";
    private static final String topicName = "topic-test";
    private static Logger Log = LoggerFactory.getLogger(AppProducer.class);
    public static void main(String[] args) throws JMSException {
        //1、建立ConnectionFactory
        ConnectionFactory connectionFactory = new ActiveMQConnectionFactory(url);
        //2、建立Connection
        Connection connection = connectionFactory.createConnection();
        //3、啟動連線
        connection.start();
        //4、建立會話
        //b:使用事物    應答模式
        Session session = connection.createSession(false, Session.AUTO_ACKNOWLEDGE);
        //5、建立一個目標
        Destination destination = session.createTopic(topicName);
        //6、建立一個生產者
        MessageConsumer consumer = session.createConsumer(destination);

        //7、建立一個監聽器
        consumer.setMessageListener(new MessageListener() {
            public void onMessage(Message message) {
                TextMessage textMessage = (TextMessage) message;
                Log.info("接收到訊息:" + textMessage);
            }
        });
        //8、關閉連線
        //connection.close();
    }
}
【先】啟動消費者訂閱話題,【再】啟動生產者產生訊息

5、JavaEE(SpringJMS)中整合ActiveMQ
依賴:
<?xml version="1.0" encoding="UTF-8"?>
<project xmlns="http://maven.apache.org/POM/4.0.0"
         xmlns:xsi="http://www.w3.org/2001/XMLSchema-instance"
         xsi:schemaLocation="http://maven.apache.org/POM/4.0.0 http://maven.apache.org/xsd/maven-4.0.0.xsd">
    <modelVersion>4.0.0</modelVersion>

    <groupId>cn.edu.shu.ces.chenjie</groupId>
    <artifactId>ActiveMQ-Test</artifactId>
    <version>1.0-SNAPSHOT</version>

    <properties>
        <spring.version>4.2.5.RELEASE</spring.version>
    </properties>

    <dependencies>
        <!-- https://mvnrepository.com/artifact/org.apache.activemq/activemq-all -->
        <dependency>
            <groupId>org.apache.activemq</groupId>
            <artifactId>activemq-core</artifactId>
            <version>5.15.2</version>
            <exclusions>
                <exclusion>
                    <artifactId>spring-context</artifactId>
                    <groupId>org.springframework</groupId>
                </exclusion>
            </exclusions>
        </dependency>

        <dependency>
            <groupId>org.springframework</groupId>
            <artifactId>spring-context</artifactId>
            <version>${spring.version}</version>
        </dependency>

        <dependency>
            <groupId>org.springframework</groupId>
            <artifactId>spring-jms</artifactId>
            <version>${spring.version}</version>
        </dependency>


    </dependencies>

</project>
專案結構:
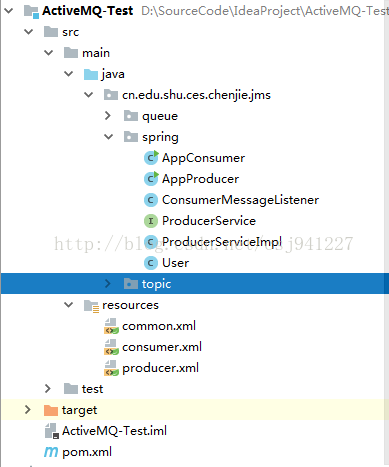
在resources中新增三個配置檔案:
common.xml
<?xml version="1.0" encoding="UTF-8"?>
<beans xmlns="http://www.springframework.org/schema/beans"
       xmlns:xsi="http://www.w3.org/2001/XMLSchema-instance"
       xsi:schemaLocation="http://www.springframework.org/schema/beans http://www.springframework.org/schema/beans/spring-beans.xsd">
    <!-- ActiveMQ 提供的ConnectionFactory-->
    <bean id="targetConnectionFactory" class="org.apache.activemq.ActiveMQConnectionFactory">
        <property name="brokerURL" value="tcp://192.168.1.102:61616" />
        <!--最新版的ActiveMQ想要傳遞物件訊息,需要指定可以序列話的類所在的包-->
        <property name="trustedPackages">
            <list>
                <value>java.lang</value>
                <value>javax.security</value>
                <value>java.util</value>
                <value>org.apache.activemq</value>
                <value>cn.edu.shu.ces.chenjie</value>
            </list>
        </property>
    </bean>

    <!--Spring JMS 提供的ConnectionFactory-->
    <bean id="connectionFactory" class="org.springframework.jms.connection.SingleConnectionFactory">
        <property name="targetConnectionFactory" ref="targetConnectionFactory">
        </property>
    </bean>

    <!--一個佇列目的地,點對點的-->
    <bean id="queueDestination" class="org.apache.activemq.command.ActiveMQQueue">
        <constructor-arg value="spring-queue"/>
    </bean>

    <!--一個主題目的地,釋出訂閱模式-->
    <bean id="topicDestination" class="org.apache.activemq.command.ActiveMQTopic">
        <constructor-arg value="spring-topic"/>
    </bean>
</beans>
producer.xml
<?xml version="1.0" encoding="UTF-8"?>
<beans xmlns="http://www.springframework.org/schema/beans"
       xmlns:xsi="http://www.w3.org/2001/XMLSchema-instance"
       xmlns:context="http://www.springframework.org/schema/context"
       xsi:schemaLocation="http://www.springframework.org/schema/beans http://www.springframework.org/schema/beans/spring-beans.xsd http://www.springframework.org/schema/context http://www.springframework.org/schema/context/spring-context.xsd">
    <context:annotation-config/>

    <import resource="common.xml"/>

    <bean id="jmsTemplate" class="org.springframework.jms.core.JmsTemplate">
        <property name="connectionFactory" ref="connectionFactory"/>
    </bean>

    <bean id="producerService" class="cn.edu.shu.ces.chenjie.jms.spring.ProducerServiceImpl"/>
</beans>
consumer.xml
<?xml version="1.0" encoding="UTF-8"?>
<beans xmlns="http://www.springframework.org/schema/beans"
       xmlns:xsi="http://www.w3.org/2001/XMLSchema-instance"
       xsi:schemaLocation="http://www.springframework.org/schema/beans http://www.springframework.org/schema/beans/spring-beans.xsd">
    <!--匯入公共配置-->
    <import resource="common.xml"/>

    <!--配置訊息監聽器-->
    <bean id="consumerMessageListener" class="cn.edu.shu.ces.chenjie.jms.spring.ConsumerMessageListener"/>

    <!--配置訊息容器-->
    <bean id="jmsContainer" class="org.springframework.jms.listener.DefaultMessageListenerContainer">
        <property name="connectionFactory" ref="connectionFactory"/>
        <!--<property name="destination" ref="queueDestination"/>-->
        <property name="destination" ref="topicDestination"/>
        <property name="messageListener" ref="consumerMessageListener"/>
    </bean>

</beans>
ProducerService
package cn.edu.shu.ces.chenjie.jms.spring;

public interface ProducerService {
    void sendMessage(String message);
    void sendLoginMessage(User user);
}
ProducerServiceImpl
package cn.edu.shu.ces.chenjie.jms.spring;

import org.springframework.beans.factory.annotation.Autowired;
import org.springframework.jms.core.JmsTemplate;
import org.springframework.jms.core.MessageCreator;

import javax.annotation.Resource;
import javax.jms.*;


public class ProducerServiceImpl implements ProducerService{
    @Autowired
    JmsTemplate jmsTemplate;

    @Resource(name="topicDestination")//queueDestination
    Destination destination;

    public void sendMessage(final String message) {
        jmsTemplate.send(destination, new MessageCreator() {
            public Message createMessage(Session session) throws JMSException {
                TextMessage textMessage = session.createTextMessage(message);
                return textMessage;
            }
        });
        System.out.println("傳送訊息:" + message);
    }

    public void sendLoginMessage(final User user) {
        jmsTemplate.send(destination, new MessageCreator() {
            public Message createMessage(Session session) throws JMSException {
                Message loginMessage = session.createObjectMessage(user);
                return loginMessage;
            }
        });
        System.out.println("傳送使用者登入訊息:" + user);
    }
}
ConsumerMessageListener
package cn.edu.shu.ces.chenjie.jms.spring;

import javax.jms.JMSException;
import javax.jms.Message;
import javax.jms.MessageListener;
import javax.jms.ObjectMessage;

public class ConsumerMessageListener implements MessageListener{
    public void onMessage(Message message) {
        System.out.println("received:" + message);
        if(message instanceof ObjectMessage){
            try {
                User user = (User) ((ObjectMessage) message).getObject();
                System.out.println("received:" + user);
            } catch (JMSException e) {
                e.printStackTrace();
            }
        }
    }
}
User
package cn.edu.shu.ces.chenjie.jms.spring;

import java.io.Serializable;

public class User implements Serializable {
    private String username;
    private String password;

    public String getUsername() {
        return username;
    }

    public void setUsername(String username) {
        this.username = username;
    }

    public String getPassword() {
        return password;
    }

    public void setPassword(String password) {
        this.password = password;
    }

    @Override
    public String toString() {
        return "User{" +
                "username='" + username + '\'' +
                ", password='" + password + '\'' +
                '}';
    }
}
AppProducer
package cn.edu.shu.ces.chenjie.jms.spring;

import org.apache.xbean.spring.context.ClassPathXmlApplicationContext;

public class AppProducer {
    public static void main(String[] args) {
        ClassPathXmlApplicationContext context = new ClassPathXmlApplicationContext("producer.xml");
        ProducerService service = context.getBean(ProducerService.class);
        for(int i = 0; i < 100; i ++){
            service.sendMessage("test " + i);
        }
        User user = new User();
        user.setUsername("chenjie");
        user.setPassword("chenjie123");
        service.sendLoginMessage(user);
        context.close();
    }
}
AppConsumer
package cn.edu.shu.ces.chenjie.jms.spring;

import org.apache.xbean.spring.context.ClassPathXmlApplicationContext;

public class AppConsumer {
    public static void main(String[] args) {
        ClassPathXmlApplicationContext context = new ClassPathXmlApplicationContext("consumer.xml");
    }
}
啟動生產者、消費者


JMS規範規定的和ActiveMQ支援的訊息型別有很多,例子中使用到了文字訊息和物件訊息。
兩種訊息模式需要更改相應的配置檔案(配置檔案中的註釋)
6、ActiveMQ叢集的搭建與測試
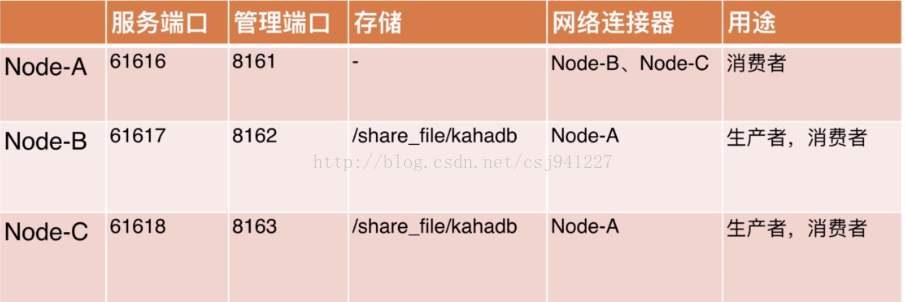
叢集結構:
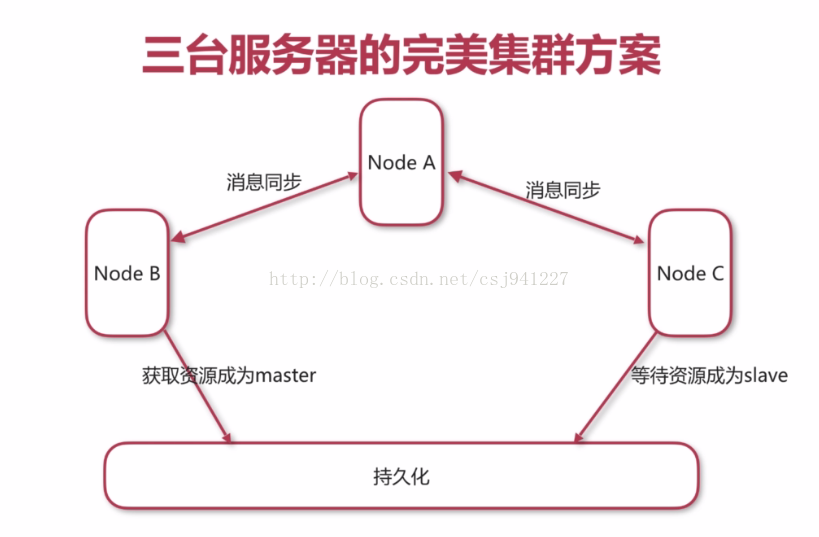
NodeA不儲存訊息,NodeB和NodeC互斥共享訊息儲存,當一方佔有訊息儲存時成為master,另一方成為slave。成為master的一方跟A同步訊息,做到了負載均衡。當B/C中的master宕機時,釋放訊息儲存,此時的slave得到訊息儲存成為master,做到了安全。
配置安排:
由於是示例,因此在用一臺機器上的不同埠部署3個結點充當3臺機器,並使用本地磁碟資料夾充當共享資料夾。
實際應該是3臺機器,使用分散式檔案系統當共享資料夾。
將activemq的資料夾拷貝3份,
分別取名為a b c,同時新建一個share資料夾用於訊息儲存共享資料夾

依次編輯各個資料夾中conf下的actvmq.xml 和jetty.xml
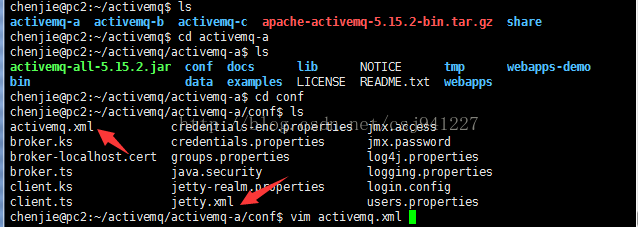
[email protected]:~/activemq/activemq-a/conf$ vim activemq.xml
註釋掉了transportConnectors標籤下的後面幾個配置,新增了一個networkConnectors配置,使A連線到B和C
 <transportConnector name="openwire" uri="tcp://0.0.0.0:61616?maximumConnections=1000&wireFormat.maxFrameSize=104857600"/>
<!--
<transportConnector name="amqp" uri="amqp://0.0.0.0:5672?maximumConnections=1000&wireFormat.maxFrameSize=104857600"/>
            <transportConnector name="stomp" uri="stomp://0.0.0.0:61613?maximumConnections=1000&wireFormat.maxFrameSize=104857600"/>
            <transportConnector name="mqtt" uri="mqtt://0.0.0.0:1883?maximumConnections=1000&wireFormat.maxFrameSize=104857600"/>
            <transportConnector name="ws" uri="ws://0.0.0.0:61614?maximumConnections=1000&wireFormat.maxFrameSize=104857600"/>
-->
    </transportConnectors>
<networkConnectors>
        <networkConnector name="local_network" uri="static:(tcp://127.0.0.1:61617,tcp://127.0.0.1:61618)" />

</networkConnectors>
[email protected]:~/activemq/activemq-b/conf$ vim activemq.xml
修改持久化目錄
<persistenceAdapter> <kahaDB directory="/home/chenjie/activemq/share"/> </persistenceAdapter>
 <transportConnector name="openwire" uri="tcp://0.0.0.0:61617?maximumConnections=1000&wireFormat.maxFrameSize=104857600"/>
       <!--     <transportConnector name="amqp" uri="amqp://0.0.0.0:5672?maximumConnections=1000&wireFormat.maxFrameSize=104857600"/>
            <transportConnector name="stomp" uri="stomp://0.0.0.0:61613?maximumConnections=1000&wireFormat.maxFrameSize=104857600"/>
            <transportConnector name="mqtt" uri="mqtt://0.0.0.0:1883?maximumConnections=1000&wireFormat.maxFrameSize=104857600"/>
            <transportConnector name="ws" uri="ws://0.0.0.0:61614?maximumConnections=1000&wireFormat.maxFrameSize=104857600"/>
       -->
         </transportConnectors>

        <networkConnectors>
                <networkConnector name="network_a" uri="static:(tcp://127.0.0.1:61616)" />
        </networkConnectors>
註釋掉transportConnector 的後面幾個配置,並增加一個networkConnectors,建立跟a的靜態連線
c的activemq.xml配置與b一樣
[email protected]:~/activemq/activemq-a/conf$ vim jetty.xml,在此修改埠號,將a b c的埠修改為8061 8062 8062
 <bean id="jettyPort" class="org.apache.activemq.web.WebConsolePort" init-method="start">
             <!-- the default port number for the web console -->
        <property name="host" value="0.0.0.0"/>
        <property name="port" value="8161"/>
    </bean>
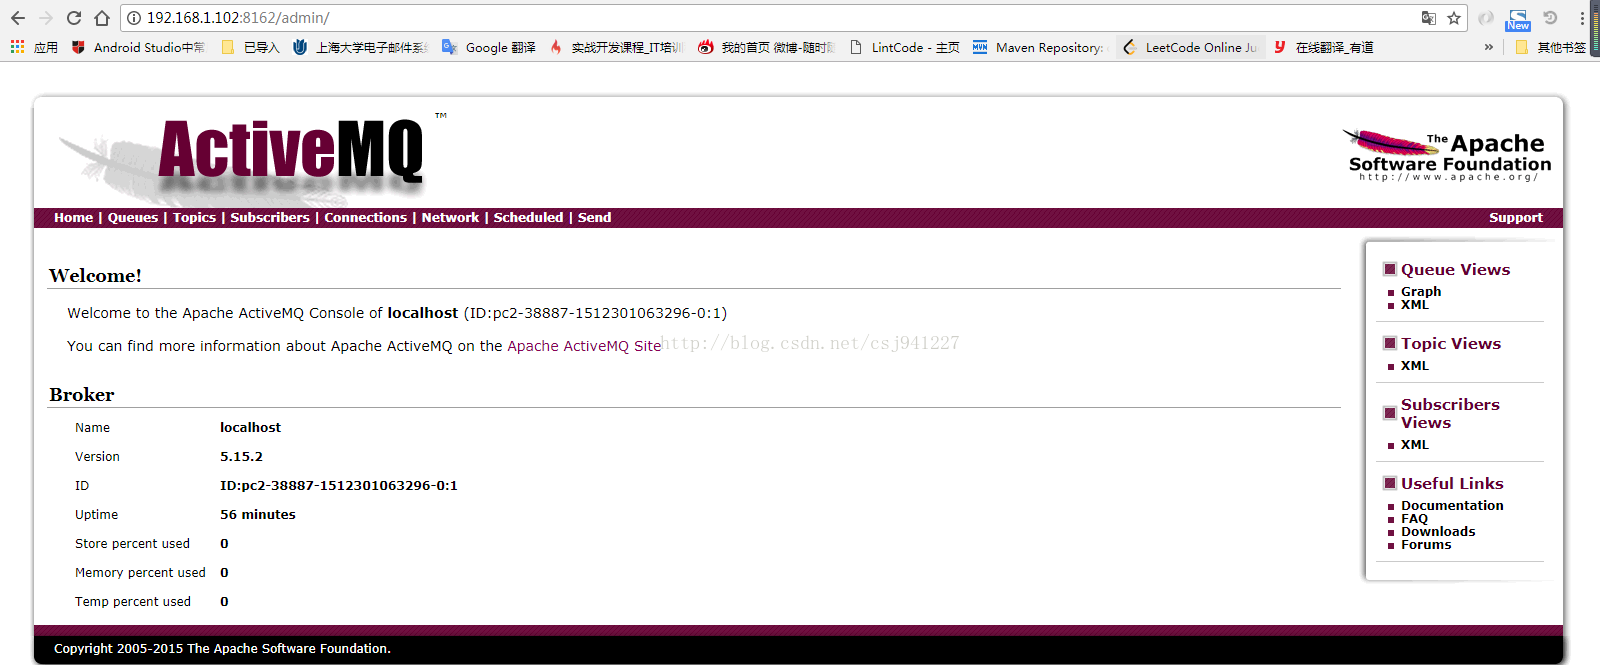
依次訪問:http://192.168.1.102:8161/admin http://192.168.1.102:8162/admin http://192.168.1.102:8163/admin

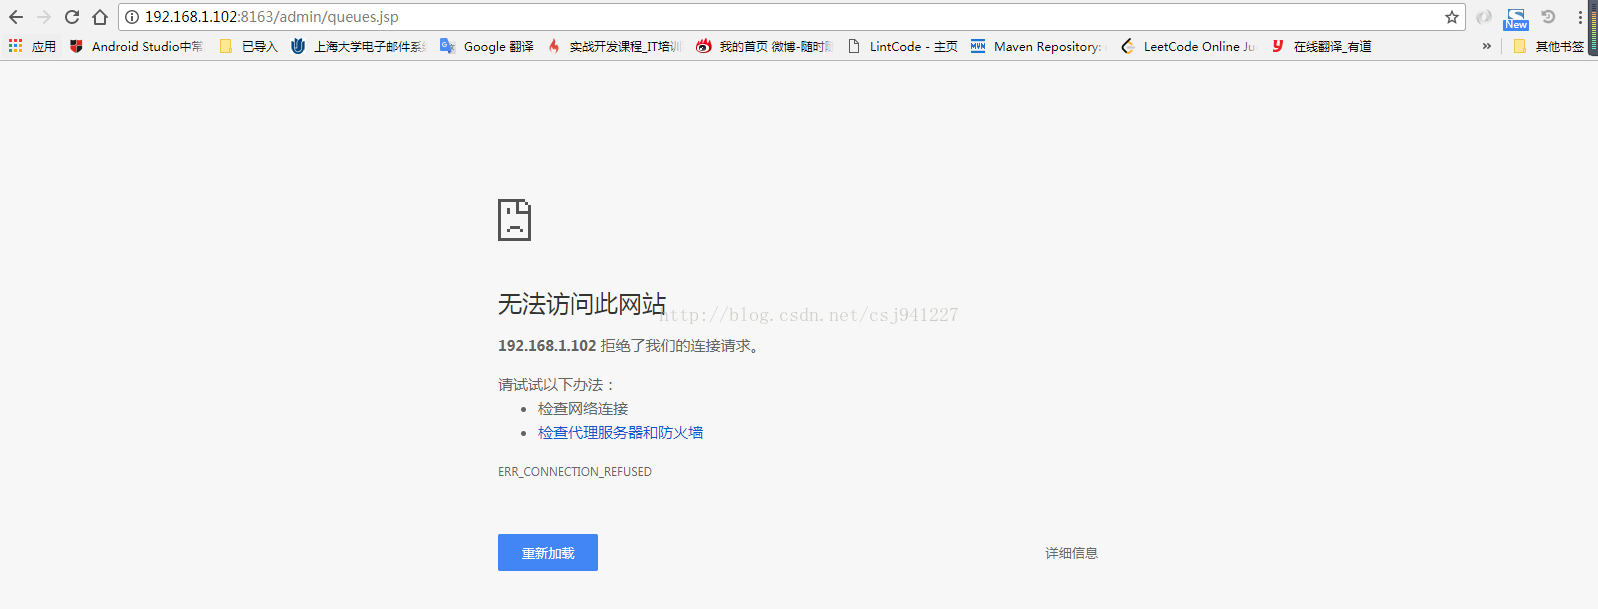
可以看到6183對應的c無法訪問,這是因為6182對應的b搶佔了共享訊息儲存,所以c沒有提供服務。
將b殺掉:
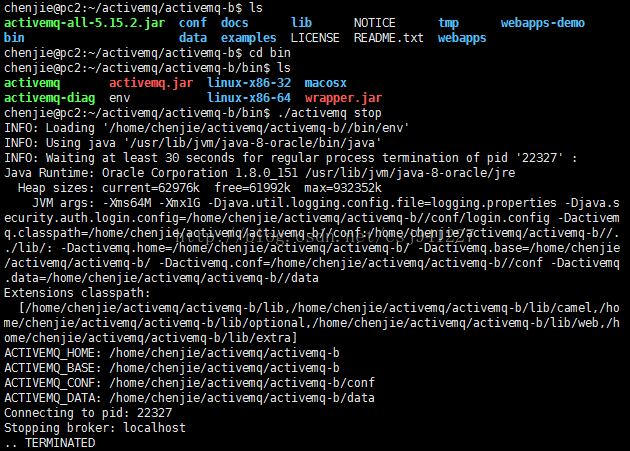
再次訪問c對應的http://192.168.1.102:8163/admin
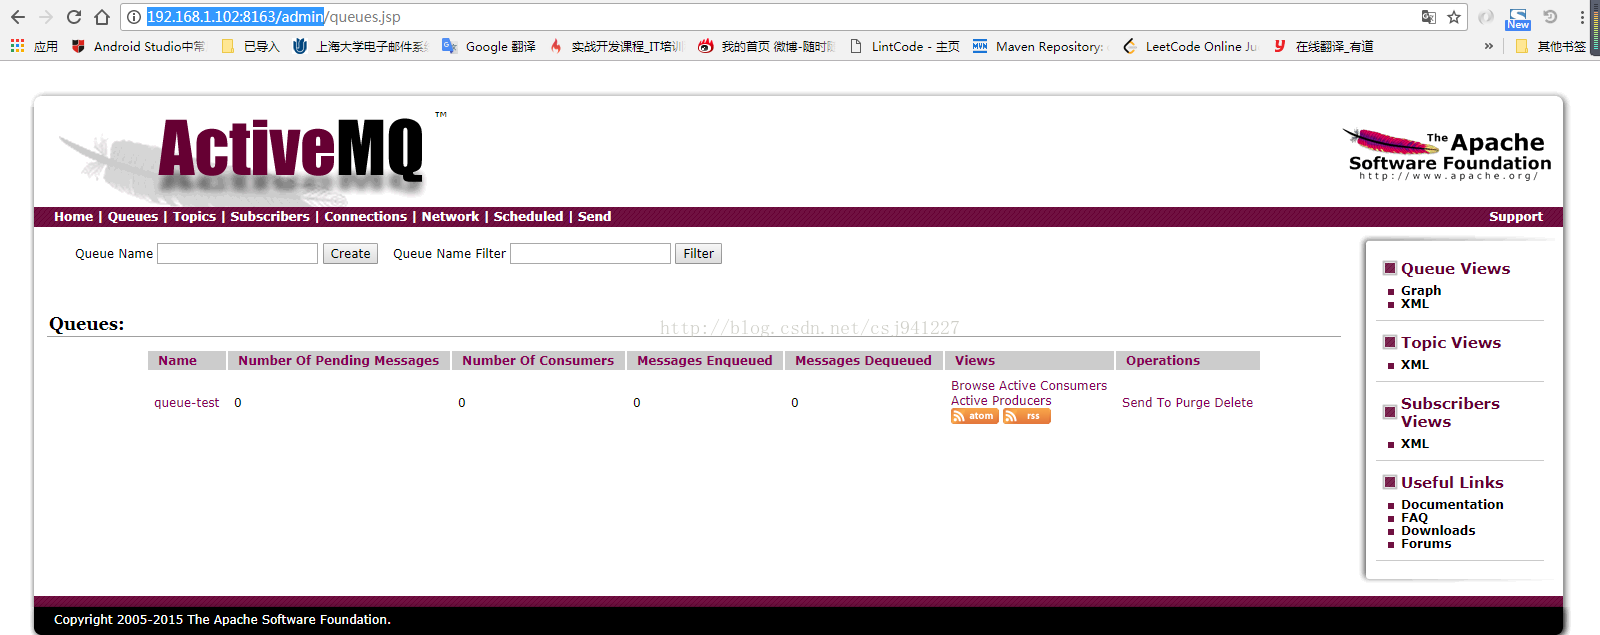
因為b已經殺掉了所以b對應的8062顯然不能顯示了。這也證實了b和c能夠起到保障可用性的作用。
使用叢集模式時程式碼中需修改的地方:
生產者:
private static final String url = "failover:(tcp://192.168.1.102:61617,tcp://192.168.1.102:61618)?randomize=true";
消費者:
private static final String url = "failover:(tcp://192.168.1.61616,tcp://192.168.1.102:61617,tcp://192.168.1.102:61618)?randomize=true";