
Android Butterknife在library模組中的使用問題
當專案中有多module時,在使用Butterknife的時候會發現在library模組中使用會出問題。當library模組中的頁面通過butterknife找id的時候,就會報錯。
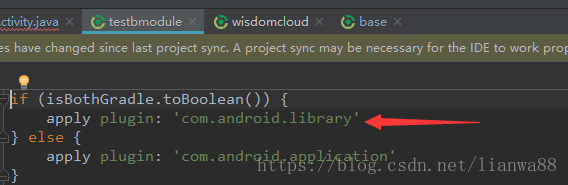
如圖,testbmodule模組plugin為library,也就是一個library的模組,然後看模組中的一個頁面。

當使用butterknife外掛找控制元件的時候就會報紅線。

意思是@BindView的屬性必須是一個常數,也就是說library module編譯的時候,R檔案中所有的資料並沒有被加上final,也就是R檔案中的資料並非常量。
@BindView
/**
 * Bind a field to the view for the specified ID. The view will automatically be cast to the field
 * type.
 * <pre><code>
 * {@literal @}BindView(R.id.title) TextView title;
 * </code></pre>
 */
@Retention(CLASS) @Target(FIELD)
public @interface BindView {
  /** View ID to which the field will be bound. */
  @IdRes int value();
}
@IdRes
/**
 * Bind a field to the view for the specified ID. The view will automatically be cast to the field
 * type.
 * <pre><code>
 * {@literal @}BindView(R.id.title) TextView title;
 * </code></pre>
 */
@Retention(CLASS) @Target(FIELD)
public @interface BindView {
  /** View ID to which the field will be bound. */
  @IdRes int value();
}
那麼如何解決這個問題呢?我們可以利用一個butterknife的外掛。下面來看看如何配置。
首先在專案的總build.gradle中新增classpath。
buildscript {
    repositories {
        jcenter()
        mavenCentral()
//        maven {
//            url 'https://maven.google.com/'
//            name 'Google'
//        }
        google()
    }
    dependencies {
        classpath 'com.android.tools.build:gradle:3.0.1'
        classpath 'com.jakewharton:butterknife-gradle-plugin:8.2.1'//新增butterknife外掛的引用
}
在對應library模組的build.gradle中做如下配置。
apply plugin: 'com.android.library'
apply plugin: 'com.jakewharton.butterknife'  //再次新增butterknife外掛的應用
android {
    compileSdkVersion rootProject.ext.compileSdkVersion
    buildToolsVersion rootProject.ext.buildToolsVersion


    defaultConfig {
        minSdkVersion rootProject.ext.minSdkVersion
        targetSdkVersion rootProject.ext.compileSdkVersion
        multiDexEnabled true
        versionCode 1
        versionName "1.0"
        testInstrumentationRunner "android.support.test.runner.AndroidJUnitRunner"
    }
    signingConfigs {
        release {
            。。。。。。。。
        }
    }

    buildTypes {
        debug {
            signingConfig signingConfigs.release
        }
        release {
            minifyEnabled false
            proguardFiles getDefaultProguardFile('proguard-android.txt'), 'proguard-rules.pro'
            signingConfig signingConfigs.release
        }
    }

    lintOptions {
        abortOnError false
    }
    resourcePrefix "testbmodule_"

}


dependencies {
    compile fileTree(dir: 'libs', include: ['*.jar'])
    compile 'com.android.support.constraint:constraint-layout:1.0.2'
    testCompile 'junit:junit:4.12'
    androidTestCompile('com.android.support.test.espresso:espresso-core:3.0.1', {
        exclude group: 'com.android.support', module: 'support-annotations'
    })
    compile "com.jakewharton:butterknife:$rootProject.butterknifeVersion"                         //新增butterknife的依賴
    annotationProcessor "com.jakewharton:butterknife-compiler:$rootProject.butterknifeVersion"    //新增butterknife相關依賴

}
這樣基本就配置好了。來看看頁面中如何使用吧。TestAActivity頁面中。我們使用butterknife外掛找到所有控制元件之後,把R改成R2,然後重新編譯一下就可以了。
@Route(path = "/testa/testa")
public class TestAActivity extends BaseActivity {

    @BindView(R2.id.check_login_button)
    QMUIAlphaButton checkLoginButton;
    @BindView(R2.id.check_camera_permission_button)
    QMUIAlphaButton checkCameraPermissionButton;
    @BindView(R2.id.arouter_jump_activity)
    QMUIAlphaButton arouterJumpActivity;
    @BindView(R2.id.arouter_iump_activity_with_data)
    QMUIAlphaButton arouterIumpActivityWithData;
    @BindView(R2.id.arouter_find_fragment)
    QMUIAlphaButton arouterFindFragment;
    @BindView(R2.id.arouter_find_service_button)
    QMUIAlphaButton arouterFindServiceButton;
    @BindView(R2.id.between_modules_button)
    QMUIAlphaButton betweenModulesButton;
    @BindView(R2.id.vc_button)
    QMUIAlphaButton vcButton;
    @BindView(R2.id.other_utils_and_widget_button)
    QMUIAlphaButton otherUtilsAndWidgetButton;
    @BindView(R2.id.single_click)
    QMUIAlphaButton singleClickButton;

    @Autowired(name = "testStr")
    public String testStr;

    @Override
    public void onCreate(Bundle savedInstanceState) {
        super.onCreate(savedInstanceState);
        StatusBarUtils.translucent(this);
        StatusBarUtils.setStatusBarLightMode(this);
但是,在使用的過程中還會有問題。
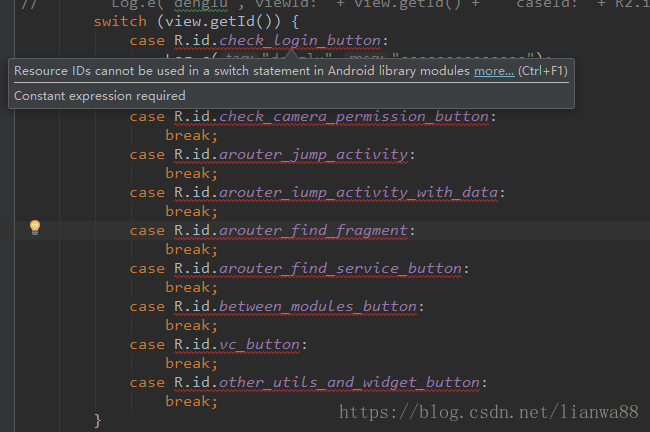
在使用switch的時候就會出問題。Resource IDs cannot be used in a switch statement in Android library modules......
那麼解決方法就是,不使用switch case了唄,使用 if else 唄。
@OnClick({R2.id.single_click,R2.id.check_login_button, R2.id.check_camera_permission_button, R2.id.arouter_jump_activity, R2.id.arouter_iump_activity_with_data, R2.id.arouter_find_fragment, R2.id.arouter_find_service_button, R2.id.between_modules_button, R2.id.vc_button, R2.id.other_utils_and_widget_button, R2.id.data_base_example})
    public void onViewClicked(View view) {
        int i = view.getId();
        if (i == R.id.check_login_button) {
            checkLogin();
        } else if (i == R.id.check_camera_permission_button) {
            cameraPermission();
        } else if (i == R.id.arouter_jump_activity) {
            ARouter.getInstance().build("/testb/testb").navigation(this);
        } else if (i == R.id.arouter_iump_activity_with_data) {
            ARouter.getInstance().build("/testb/testb").withString("name", "這是一條資料").navigation(this);
        } else if (i == R.id.arouter_find_fragment) {
            ARouter.getInstance().build("/testb/tabsegment").navigation(this);
        } else if (i == R.id.vc_button) {
            ARouter.getInstance().build("/testa/testhttp").navigation(this);
        } else if (i == R.id.data_base_example) {