geoServer 釋出geoTiff格式的DEM資料
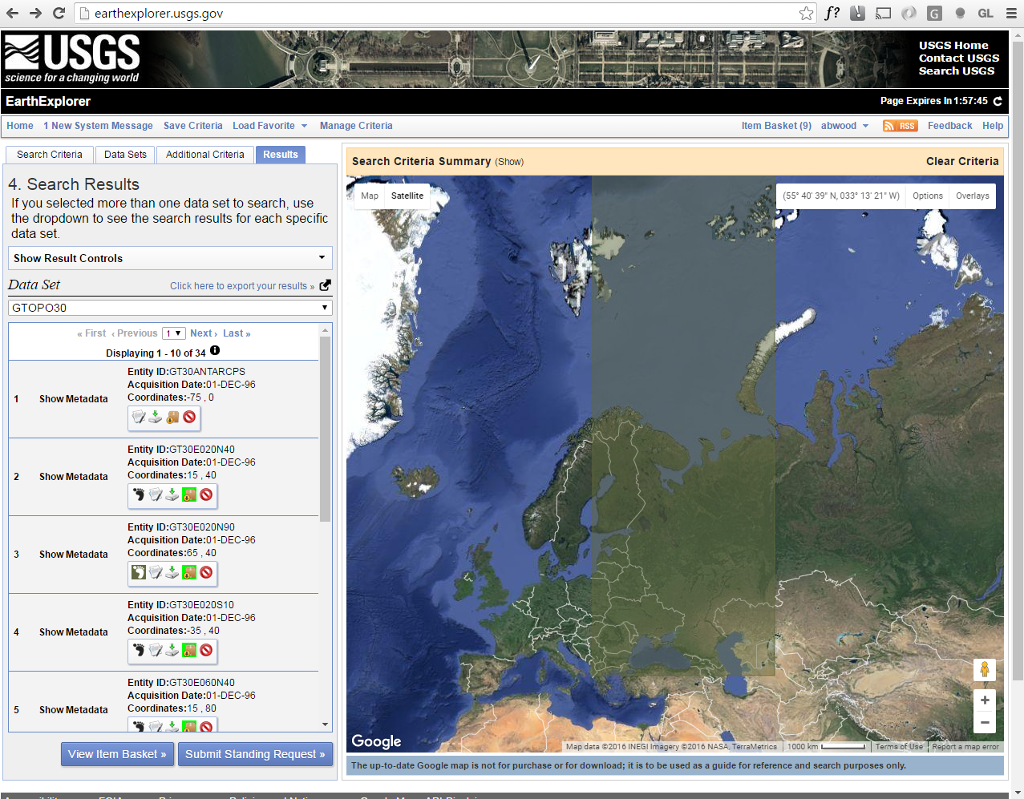
再點選Data Set 這個tab,然後在Data Set Search:中輸入GTOPO30進行搜尋,在最下方點選result按鈕。就會進入以下介面:

這裡就可以下載全球範圍的DEM資料。
2、geoserver釋出前準備
因為從上面所指示的地址下載的資料型別是16 byte的geoTiff影象,而我們這次使用的geoServer中的 image pyramid plug-in這個外掛,此外掛需要的geoTiff的格式是
8 or 12 byte型別的geotiff,所以我們需要格式轉化。我這裡有一個java編寫的工具可以把16位的geotiff轉化為8位的geotiff。下載地址: https://github.com/kaktus40/Cesium-GeoserverTerrainProvider
此地址下載的zip檔案中包含GeotiffTranslate.jar工具,就是我們需要的,(具體使用方法請閱讀.me檔案)。
3、geoserver釋出
以下英文地址( http://docs.geoserver.org/latest/en/user/tutorials/imagepyramid/imagepyramid.html )
For this tutorial we have prepared a sample BlueMarble TNG subset in GeoTIFF form. The image is tiled and JPEG compressed, without overviews. Not exactly what you’d want to use for high performance data serving, but good for redistribution and as a starting point to build a pyramid.
In order to build the pyramid we’ll use the gdal_retile.py utility, part of the GDAL command line utilities and available for various operating systems (if you’re using Microsoft Windows look for FWTools).
The following commands will build a pyramid on disk:
mkdir bmpyramid
gdal_retile.py -v -r bilinear -levels 4 -ps 2048 2048 -co "TILED=YES" -co "COMPRESS=JPEG" -targetDir bmpyramid bmreduced.tiff
The gdal_retile.py user guide provides a detailed explanation for all the possible parameters, here is a description of the ones used in the command line above:
- -v: verbose output, allows the user to see each file creation scroll by, thus knowing progress is being made (a big pyramid construction can take hours)
- -r bilinear: use bilinear interpolation when building the lower resolution levels. This is key to get good image quality without asking GeoServer to perform expensive interpolations in memory
- -levels 4: the number of levels in the pyramid
- -ps 2048 2048: each tile in the pyramid will be a 2048x2048 GeoTIFF
- -co “TILED=YES”: each GeoTIFF tile in the pyramid will be inner tiled
- -co “COMPRESS=JPEG”: each GeoTIFF tile in the pyramid will be JPEG compressed (trades small size for higher performance, try out it without this parameter too)
- -targetDir bmpyramid: build the pyramid in the bmpyramid directory. The target directory must exist and be empty
- bmreduced.tiff: the source file
This will produce a number of TIFF files in bmpyramid along with the sub-directories 1, 2, 3, and 4.
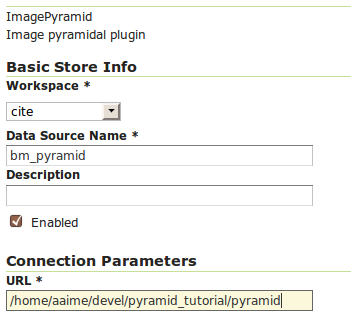
Once that is done, and assuming the GeoServer image pyramid plug-in is already installed, it’s possible to create the coverage store by pointing at the directory containing the pyramid and clicking save:

Configuring a image pyramid store
When clicking save the store will look into the directory, recognize a gdal_retile generated structure and perform some background operations:
- move all tiff files in the root to a newly create directory 0
- create an image mosaic in all sub-directories (shapefile index plus property file)
- create the root property file describing the whole pyramid structure
Once that is done the user will be asked to choose a coverage, which will be named after the pyramid root directory:

Choosing the coverage for publishing
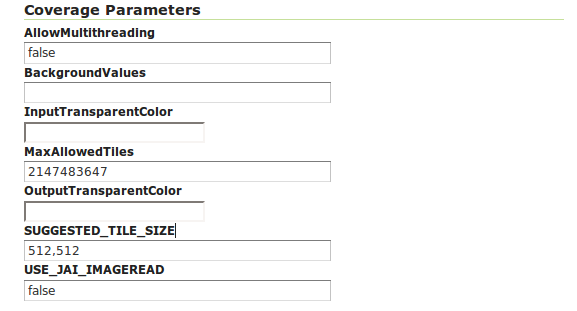
Publish the layer, and then setup the layer parameter USE_JAI_IMAGEREAD to false to get better scalability:

Tuning the pyramid parameters
Submit and go to the preview, the pyramid should be ready to use:

Previewing the pyramid
Notes on big pyramids
The code that is auto-creating the pyramid indexes and metadata files might take time to run, especially if:
- the pyramid zero level is composed of many thousands of files
- the system is busy with the disk already and that results in higher times to move all the files to the 0directory
If the delay is too high the request to create the store will time out and might break the pyramid creation. So, in case of very big pyramids consider loosing some of the comfort and creating the 0 directory and moving the files by hand:
cd bmpyramid
mkdir 0
mv *.tiff 0
