Android Studio 打包成jar檔案並混淆程式碼
阿新 • • 發佈:2019-01-09
參考博文:http://www.jianshu.com/p/0a3ce6e9ab85
開展專案合作時,基於模組化思想,對方要用到你的程式,而你又不想將原始碼給對方,通常會將程式進行打包生成jar,並作混淆處理。
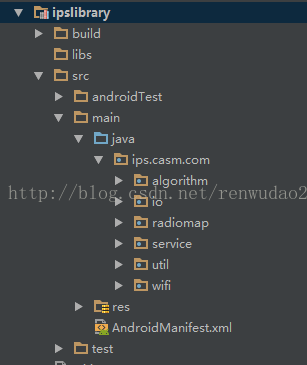
1、建立專案
【File】——【New Module】——【Android Library】,命名,然後編輯程式碼。
二、編輯library路徑下的build.gradle
AS中進行程式碼混淆需要在build.gradle檔案和proguard-rules.pro檔案中進行設定(可以通過jd-gui工具對比混淆前後效果):
1、配置build.gradle檔案
你的library庫下開啟build.gradle檔案,在末尾加上下述程式碼。
task makeJar(type: proguard.gradle.ProGuardTask, dependsOn: "build") {
    //刪除已有的jar包
    delete 'build/outputs/ips.jar'
    // 未混淆的jar路徑
    injars 'build/intermediates/bundles/release/classes.jar'
// 混淆後的jar輸出路徑
    outjars 'build/outputs/ips.jar'
    // 混淆協議
    configuration 'proguard-rules.pro'
}(2)在delete和injars中的ips.jar是你要打包的jar包名字。
2、配置proguard-rules.pro檔案

(1)把AS自帶的協議配置進來
# This is a configuration file for ProGuard.
# http://proguard.sourceforge.net/index.html#manual/usage.html
#
# Starting with version 2.2 of the Android plugin for Gradle, these files are no longer used. Newer
# versions are distributed with the plugin and unpacked at build time. Files in this directory are
# no longer maintained.

#表示混淆時不使用大小寫混合類名
-dontusemixedcaseclassnames
#表示不跳過library中的非public的類
-dontskipnonpubliclibraryclasses
#列印混淆的詳細資訊
-verbose

# Optimization is turned off by default. Dex does not like code run
# through the ProGuard optimize and preverify steps (and performs some
# of these optimizations on its own).
-dontoptimize
##表示不進行校驗,這個校驗作用 在java平臺上的
-dontpreverify
# Note that if you want to enable optimization, you cannot just
# include optimization flags in your own project configuration file;
# instead you will need to point to the
# "proguard-android-optimize.txt" file instead of this one from your
# project.properties file.

-keepattributes *Annotation*
-keep public class com.google.vending.licensing.ILicensingService
-keep public class com.android.vending.licensing.ILicensingService

# For native methods, see http://proguard.sourceforge.net/manual/examples.html#native
-keepclasseswithmembernames class * {
    native <methods>;
}

# keep setters in Views so that animations can still work.
# see http://proguard.sourceforge.net/manual/examples.html#beans
-keepclassmembers public class * extends android.view.View {
   void set*(***);
   *** get*();
}

# We want to keep methods in Activity that could be used in the XML attribute onClick
-keepclassmembers class * extends android.app.Activity {
   public void *(android.view.View);
}

# For enumeration classes, see http://proguard.sourceforge.net/manual/examples.html#enumerations
-keepclassmembers enum * {
    public static **[] values();
    public static ** valueOf(java.lang.String);
}

-keepclassmembers class * implements android.os.Parcelable {
  public static final android.os.Parcelable$Creator CREATOR;
}

-keepclassmembers class **.R$* {
    public static <fields>;
}

# The support library contains references to newer platform versions.
# Don't warn about those in case this app is linking against an older
# platform version.  We know about them, and they are safe.
-dontwarn android.support.**

# Understand the @Keep support annotation.
-keep class android.support.annotation.Keep

-keep @android.support.annotation.Keep class * {*;}

-keepclasseswithmembers class * {
    @android.support.annotation.Keep <methods>;
}

-keepclasseswithmembers class * {
    @android.support.annotation.Keep <fields>;
}

-keepclasseswithmembers class * {
    @android.support.annotation.Keep <init>(...);
}
參考http://www.jianshu.com/p/0a3ce6e9ab85。
(2)引入依賴包路徑
#引入依賴包rt.jar(jdk路徑)
-libraryjars 'D:\Android_Studio\Android_Studio_Install\jre\jre\lib\rt.jar'
#引入依賴包android.jar(android SDK路徑)
-libraryjars 'D:\Android_Studio\Android_SDK\platforms\android-25\android.jar'
#如果用到其他包,需要引入

#忽略警告
-ignorewarnings
#保證是獨立的jar,沒有任何專案引用,如果不寫就會認為我們所有的程式碼是無用的,從而把所有的程式碼壓縮掉,匯出一個空的jar
-dontshrink
#保護泛型
-keepattributes Signature這個根據實際情況選擇性配置
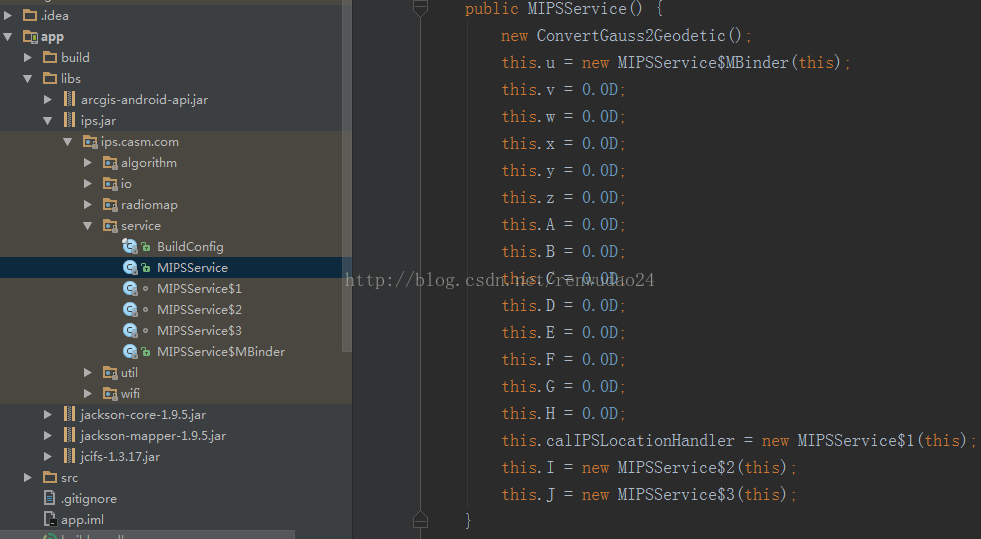
#自己不想混淆的配置,保證com下的類名不被混淆
-keep class ips.casm.com.**{public *;}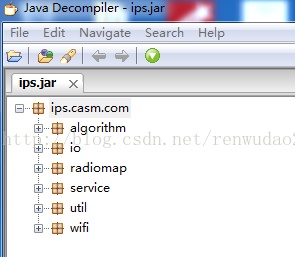
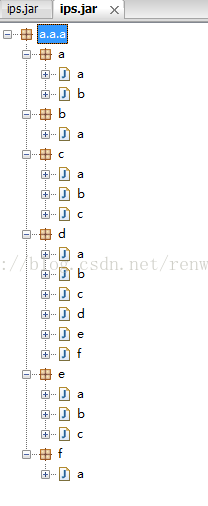
不混淆 混淆
3、執行打包命令
在Terminal 視窗輸入下面程式碼:
gradlew makeJar說明:上面的命令是在windows下,而在mac下則需要輸入
./gradlew makeJar
4、jar包路徑
ipslibrary(你的library)/build/outputs/ips.jar(你的jar包名稱)
三、用jd_gui或匯入到AS檢視jar打包效果