
SpringBoot實現簡訊驗證碼校驗
阿新 • • 發佈:2019-01-09
本文歡迎轉載,轉載請註明出處,謝謝~(作者:喝酒不騎馬 Colton_Null)
from CSDN
思路
使用者輸入手機號後,點選按鈕獲取驗證碼。並設定冷卻時間,防止使用者頻繁點選。
後臺生成驗證碼併發送到使用者手機上,根據驗證碼、時間及一串自定義祕鑰生成MD5值,並將時間也傳回到前端。
使用者輸入驗證碼後,將驗證碼和時間傳到後臺。後臺先用當前時間減去前臺傳過來的時間驗證是否超時。如果沒有超時,就用使用者輸入的驗證碼 + 時間 + 自定義祕鑰生成MD5值與之前的MD5值比較,如果相等則驗證碼校驗通過,如果不等則說明驗證碼輸入錯誤校驗失敗。
原理有點像解方程:
xyz經過一種不可逆運算得到A,將y和A傳給使用者,z後臺保留,使用者填寫x1後,將x1 y A傳回後臺,後臺再用x1 y z經過不可逆運算得到A1,如果A1和A相等,則驗證碼校驗通過。
前端的實現
本例基於BootStrap,html程式碼中有BootStrap樣式。如果你不想用BootStrap,可以將class樣式去掉。效果如圖所示。
html程式碼如下:
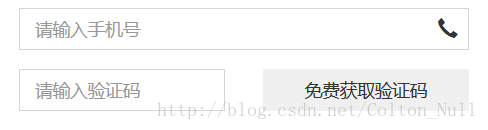
<div class="form-group has-feedback">
    <input type="tel" class="form-control"  id="phone" placeholder="請輸入手機號" maxlength=11>
    <span class="glyphicon glyphicon-earphone form-control-feedback"></span>
</div>
<div class="row">
    <div class="col-xs-6 pull_left">
        <div class="form-group">
            <input class="form-control" id="msg_num" placeholder="請輸入驗證碼">
        </div>
    </div>
    <div class="col-xs-6 pull_center">
        <div class="form-group">
            <input type="button" class="btn btn-block btn-flat" id="verify_refresh" onclick="getMsgNum(this)" value="免費獲取驗證碼">
        </div>
    </div>
</div>

<div class="col-xs-12 pull_center">
    <button type="button" class="btn btn-block btn-flat" onclick="validateNum()">驗證</button>
</div>
js程式碼(基於jQuery)
var messageData;
var wait = 120; // 簡訊驗證碼120秒後才可獲取下一個

/**
 * 獲取驗證碼
 * @param that
 */
function getMsgNum(that) {
    var phoneNumber = $('#phone').val();
    setButtonStatus(that); // 設定按鈕倒計時
    var obj = {
        phoneNumber: phoneNumber
    };

    $.ajax({
        url: httpurl + '/sendMsg', // 後臺簡訊傳送介面
        type: 'POST',
        dataType: 'json',
        contentType: "application/json",
        async: false, //false 同步
        data: JSON.stringify(obj),
        xhrFields: {
            withCredentials: true
        },
        success: function (result) {
            if(result.code == '200') {
                messageData = result.data;
            }else {
                alert("錯誤碼:" + data.code + "  錯誤資訊:" + data.message);
            }
        },
        error: function (XMLHttpRequest, textStatus, errorThrown) {
            console.log(XMLHttpRequest.status);
            console.log(XMLHttpRequest.readyState);
            console.log(textStatus);
        }
    });
}
/**
 * 設定按鈕狀態
 */
function setButtonStatus(that) {
    if (wait == 0) {
        that.removeAttribute("disabled");
        that.value="免費獲取驗證碼";
        wait = 60;
    } else {
        that.setAttribute("disabled", true);
        that.value=wait+"秒後可以重新發送";
        wait--;
        setTimeout(function() {
            setButtonStatus(that)
        }, 1000)
    }
}

/**
* 註冊按鈕
*/
function validateNum() {
    var data = {
        msgNum: inputMsgNum,
        tamp: messageData.tamp,
        hash: messageData.hash
    };

    $.ajax({
        url: httpurl + '/validateNum', // 驗證介面
        type: 'POST',
        dataType: 'json',
        contentType: "application/json",
        data: JSON.stringify(data),
        async: false, //false 同步
        success: function (data) {
           //業務處理
        },
        error: function (XMLHttpRequest, textStatus, errorThrown) {
            console.log(XMLHttpRequest.status);
            console.log(XMLHttpRequest.readyState);
            console.log(textStatus);
        }
    });
}
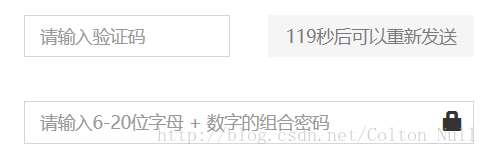
其中setButtonStatus()方法用於設定按鈕冷卻狀態。效果如下圖
後臺的實現
private static final String KEY = "abc123"; // KEY為自定義祕鑰

    @RequestMapping(value = "/sendMsg", method = RequestMethod.POST, headers = "Accept=application/json")
    public Map<String, Object> sendMsg(@RequestBody Map<String,Object> requestMap) {
        String phoneNumber = requestMap.get("phoneNumber").toString();
        String randomNum = CommonUtils.createRandomNum(6);// 生成隨機數
        SimpleDateFormat sf = new SimpleDateFormat("yyyyMMddHHmmss");
        Calendar c = Calendar.getInstance();
        c.add(Calendar.MINUTE, 5);
        String currentTime = sf.format(c.getTime());// 生成5分鐘後時間,使用者校驗是否過期
        sengMsg(); //此處執行傳送簡訊驗證碼方法
        String hash =  MD5Utils.getMD5Code(KEY + "@" + currentTime + "@" + randomNum);//生成MD5值
        Map<String, Object> resultMap = new HashMap<>();
        resultMap.put("hash", hash);
        resultMap.put("tamp", currentTime);
        return resultMap; //將hash值和tamp時間返回給前端
    }

    @RequestMapping(value = "/validateNum", method = RequestMethod.POST, headers = "Accept=application/json")
    public Map<String, Object> validateNum(@RequestBody Map<String,Object> requestMap) {
        String requestHash = requestMap.get("hash").toString();
        String tamp = requestMap.get("tamp").toString();
        String msgNum = requestMap.get("msgNum").toString();
        String hash = MD5Utils.getMD5Code(KEY + "@" + tamp + "@" + msgNum);
        if (tamp.compareTo(currentTime) > 0) {
            if (hash.equalsIgnoreCase(requestHash)){
                //校驗成功
            }else {
                //驗證碼不正確,校驗失敗
            }
        } else {
                // 超時
        }
    }
========= 2018-10-26更新 =========
添加了MD5Utils工具類原始碼
public class MD5Utils {

    public static String getMD5Code(String content) {
        return Hashing.md5().newHasher().putString(content, Charsets.UTF_8).hash().toString();
    }
}
總結
以上就是基於SpringBoot的驗證碼校驗方法。希望本文能對你有所幫助。