Centos 7 搭建 Zimbra 郵件伺服器
Zimbra協作套件(ZCS)是一個由Zimbra群件產品,在世界各地廣泛使用。使用者可以使用一個非常豐富的網路介面來共享資料夾、聯絡人、日程安排和其他的東西。目前協作套件的最新版本是Zimbra 8.6.0。它帶來了新的功能,改進的郵件伺服器,它提供了一個更好的網路客戶端體驗。
下面我通過 Centos 7 來搭建 webmail -> zimbra 郵件伺服器,並且驗證向外網傳送郵件是否正常,順便記錄一下,方便日後檢視~
1、配置 /etc/hosts 和 /etc/hostname
我在這邊設定FQDN為www.hongxue.com,主機名也是www.hongxue.com
2、關閉selinux和在防火牆中允許zimbra埠
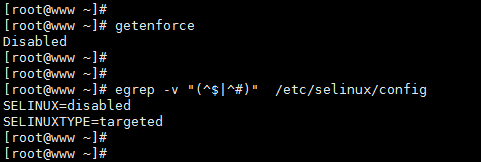
由於是測試環境,所以防火牆已經關閉,selinux也要關閉
3、停止任何安裝在該Centos7 Server上面的 MTA服務
systemctl stop postfix
systemctl disable postfix
systemctl stop sendmail
systemctl disable sendmail
4、更新作業系統
yum update -y
5、安裝所需的依賴包和庫檔案
yum install perl perl-core ntpl nmap sudo libidn gmp libaio libstdc++ unzip sysstat sqlite nc -y
6、下載 ZCS 6.0 安裝包,解壓,安裝。
好,下面是最重要的一部分了,安裝!
[[email protected] zcs-8.6.0_GA_1153.RHEL7_64.20141215151110]# ./install.sh --platform-override
Operations logged to /tmp/install.log.31333
Checking for existing installation...
zimbra-ldap...NOT FOUND
zimbra-logger...NOT FOUND
zimbra-mta...NOT FOUND
zimbra-dnscache...NOT FOUND
zimbra-snmp...NOT FOUND
zimbra-store...NOT FOUND
zimbra-apache...NOT FOUND
zimbra-spell...NOT FOUND
zimbra-convertd...NOT FOUND
zimbra-memcached...NOT FOUND
zimbra-proxy...NOT FOUND
zimbra-archiving...NOT FOUND
zimbra-core...NOT FOUND
PLEASE READ THIS AGREEMENT CAREFULLY BEFORE USING THE SOFTWARE.
ZIMBRA, INC. ("ZIMBRA") WILL ONLY LICENSE THIS SOFTWARE TO YOU IF YOU
FIRST ACCEPT THE TERMS OF THIS AGREEMENT. BY DOWNLOADING OR INSTALLING
THE SOFTWARE, OR USING THE PRODUCT, YOU ARE CONSENTING TO BE BOUND BY
THIS AGREEMENT. IF YOU DO NOT AGREE TO ALL OF THE TERMS OF THIS
AGREEMENT, THEN DO NOT DOWNLOAD, INSTALL OR USE THE PRODUCT.
License Terms for the Zimbra Collaboration Suite:
http://www.zimbra.com/license/zimbra-public-eula-2-5.html
# 輸入y同意安裝
Do you agree with the terms of the software license agreement? [N] y
Checking for prerequisites...
FOUND: NPTL
FOUND: nmap-ncat-6.40-7
FOUND: sudo-1.8.6p7-16
FOUND: libidn-1.28-4
FOUND: gmp-6.0.0-12
FOUND: libaio-0.3.109-13
FOUND: libstdc++-4.8.5-4
FOUND: unzip-6.0-15
FOUND: perl-core-5.16.3-286
Checking for suggested prerequisites...
FOUND: perl-5.16.3
FOUND: sysstat
FOUND: sqlite
Prerequisite check complete.
Checking for installable packages
Found zimbra-core
Found zimbra-ldap
Found zimbra-logger
Found zimbra-mta
Found zimbra-dnscache
Found zimbra-snmp
Found zimbra-store
Found zimbra-apache
Found zimbra-spell
Found zimbra-memcached
Found zimbra-proxy
#輸入Y安裝zimbra所需元件
Select the packages to install
Install zimbra-ldap [Y]
Install zimbra-logger [Y] Y
Install zimbra-mta [Y] Y
Install zimbra-dnscache [Y] Y
Install zimbra-snmp [Y] Y
Install zimbra-store [Y] Y
Install zimbra-apache [Y] Y
Install zimbra-spell [Y] Y
Install zimbra-memcached [Y] Y
Install zimbra-proxy [Y] Y
Checking required space for zimbra-core
Checking space for zimbra-store
Checking required packages for zimbra-store
zimbra-store package check complete.
Installing:
zimbra-core
zimbra-ldap
zimbra-logger
zimbra-mta
zimbra-dnscache
zimbra-snmp
zimbra-store
zimbra-apache
zimbra-spell
zimbra-memcached
zimbra-proxy
# 輸入Y確認操作修改
The system will be modified. Continue? [N] Y
Removing /opt/zimbra
Removing zimbra crontab entry...done.
Cleaning up zimbra init scripts...done.
Cleaning up /etc/ld.so.conf...done.
Cleaning up /etc/security/limits.conf...done.
Finished removing Zimbra Collaboration Server.
Installing packages
zimbra-core......zimbra-core-8.6.0_GA_1153.RHEL7_64-20141215151110.x86_64.rpm...done
zimbra-ldap......zimbra-ldap-8.6.0_GA_1153.RHEL7_64-20141215151110.x86_64.rpm...done
zimbra-logger......zimbra-logger-8.6.0_GA_1153.RHEL7_64-20141215151110.x86_64.rpm...done
zimbra-mta......zimbra-mta-8.6.0_GA_1153.RHEL7_64-20141215151110.x86_64.rpm...done
zimbra-dnscache......zimbra-dnscache-8.6.0_GA_1153.RHEL7_64-20141215151110.x86_64.rpm...done
zimbra-snmp......zimbra-snmp-8.6.0_GA_1153.RHEL7_64-20141215151110.x86_64.rpm...done
zimbra-store......zimbra-store-8.6.0_GA_1153.RHEL7_64-20141215151110.x86_64.rpm...done
zimbra-apache......zimbra-apache-8.6.0_GA_1153.RHEL7_64-20141215151110.x86_64.rpm...done
zimbra-spell......zimbra-spell-8.6.0_GA_1153.RHEL7_64-20141215151110.x86_64.rpm...done
zimbra-memcached......zimbra-memcached-8.6.0_GA_1153.RHEL7_64-20141215151110.x86_64.rpm...done
zimbra-proxy......zimbra-proxy-8.6.0_GA_1153.RHEL7_64-20141215151110.x86_64.rpm...done
Operations logged to /tmp/zmsetup02252016-105150.log
Installing LDAP configuration database...done.
Setting defaults... MX: smtp.asia.secureserver.net (182.50.144.66)
MX: mailstore1.asia.secureserver.net (182.50.144.67)
Interface: 127.0.0.1
Interface: ::1
Interface: 10.1.0.100
182.50.144.66
182.50.144.66
182.50.144.66
182.50.144.67
182.50.144.67
182.50.144.67
# 這邊會有一個報錯,由於是測試環境,我們並沒有新增MX郵件主機記錄,所以不用理它,選擇no
DNS ERROR - none of the MX records for hongxue.com
resolve to this host
Change domain name? [Yes]
done.
Checking for port conflicts
Main menu
1) Common Configuration:
2) zimbra-ldap: Enabled
3) zimbra-logger: Enabled
4) zimbra-mta: Enabled
5) zimbra-dnscache: Enabled
6) zimbra-snmp: Enabled
7) zimbra-store: Enabled
+Create Admin User: yes
+Admin user to create: [email protected].com
******* +Admin Password UNSET
+Anti-virus quarantine user: virus-quarantine.92[email protected].com
+Enable automated spam training: yes
+Spam training user: spam.4[email protected].com
+Non-spam(Ham) training user: ham.bhxkaz[email protected].com
+SMTP host: hongxue.com
+Web server HTTP port: 8080
+Web server HTTPS port: 8443
+Web server mode: https
+IMAP server port: 7143
+IMAP server SSL port: 7993
+POP server port: 7110
+POP server SSL port: 7995
+Use spell check server: yes
+Spell server URL: http://hongxue.com:7780/aspell.php
+Enable version update checks: TRUE
+Enable version update notifications: TRUE
+Version update notification email: [email protected].com
+Version update source email: [email protected].com
+Install mailstore (service webapp): yes
+Install UI (zimbra,zimbraAdmin webapps): yes
8) zimbra-spell: Enabled
9) zimbra-proxy: Enabled
10) Default Class of Service Configuration:
s) Save config to file
x) Expand menu
q) Quit
# 這邊我們先選擇7
Address unconfigured (**) items (? - help) 7
Store configuration
1) Status: Enabled
2) Create Admin User: yes
3) Admin user to create: [email protected].com
** 4) Admin Password UNSET
5) Anti-virus quarantine user: virus-quarantine.92[email protected].com
6) Enable automated spam training: yes
7) Spam training user: spam.4[email protected].com
8) Non-spam(Ham) training user: ham.bhxkaz[email protected].com
9) SMTP host: hongxue.com
10) Web server HTTP port: 8080
11) Web server HTTPS port: 8443
12) Web server mode: https
13) IMAP server port: 7143
14) IMAP server SSL port: 7993
15) POP server port: 7110
16) POP server SSL port: 7995
17) Use spell check server: yes
18) Spell server URL: http://hongxue.com:7780/aspell.php
19) Enable version update checks: TRUE
20) Enable version update notifications: TRUE
21) Version update notification email: [email protected].com
22) Version update source email: [email protected].com
23) Install mailstore (service webapp): yes
24) Install UI (zimbra,zimbraAdmin webapps): yes
# 接著選擇4,設定 admin password
Select, or 'r' for previous menu [r] 4
Password for [email protected].com (min 6 characters): [1ewBUZwGo] hongxuepassword
Store configuration
1) Status: Enabled
2) Create Admin User: yes
3) Admin user to create: [email protected].com
4) Admin Password set
5) Anti-virus quarantine user: virus-quarantine.92[email protected].com
6) Enable automated spam training: yes
7) Spam training user: spam.4[email protected].com
8) Non-spam(Ham) training user: ham.bhxkaz[email protected].com
9) SMTP host: hongxue.com
10) Web server HTTP port: 8080
11) Web server HTTPS port: 8443
12) Web server mode: https
13) IMAP server port: 7143
14) IMAP server SSL port: 7993
15) POP server port: 7110
16) POP server SSL port: 7995
17) Use spell check server: yes
18) Spell server URL: http://hongxue.com:7780/aspell.php
19) Enable version update checks: TRUE
20) Enable version update notifications: TRUE
21) Version update notification email: [email protected].com
22) Version update source email: [email protected].com
23) Install mailstore (service webapp): yes
24) Install UI (zimbra,zimbraAdmin webapps): yes
# 按r回到上一級選單
Select, or 'r' for previous menu [r] r
Main menu
1) Common Configuration:
2) zimbra-ldap: Enabled
3) zimbra-logger: Enabled
4) zimbra-mta: Enabled
5) zimbra-dnscache: Enabled
6) zimbra-snmp: Enabled
7) zimbra-store: Enabled
8) zimbra-spell: Enabled
9) zimbra-proxy: Enabled
10) Default Class of Service Configuration:
s) Save config to file
x) Expand menu
q) Quit
# 下面按a以完成配置,並且yes下去,繼續修改即可。之後就是zimbra自動一系列的配置了~
*** CONFIGURATION COMPLETE - press 'a' to apply
Select from menu, or press 'a' to apply config (? - help) a
Save configuration data to a file? [Yes] yes
Save config in file: [/opt/zimbra/config.41215]
Saving config in /opt/zimbra/config.41215...done.
The system will be modified - continue? [No] yes
Operations logged to /tmp/zmsetup02252016-105150.log
Setting local config values...done.
Initializing core config...Setting up CA...done.
Deploying CA to /opt/zimbra/conf/ca ...done.
Creating SSL zimbra-store certificate...done.
Creating new zimbra-ldap SSL certificate...done.
Creating new zimbra-mta SSL certificate...done.
Creating new zimbra-proxy SSL certificate...done.
Installing mailboxd SSL certificates...done.
Installing MTA SSL certificates...done.
Installing LDAP SSL certificate...done.
Installing Proxy SSL certificate...done.
Initializing ldap...done.
Setting replication password...done.
Setting Postfix password...done.
Setting amavis password...done.
Setting nginx password...done.
Setting BES searcher password...done.
Creating server entry for hongxue.com...done.
Setting Zimbra IP Mode...done.
Saving CA in ldap ...done.
Saving SSL Certificate in ldap ...done.
Setting spell check URL...done.
Setting service ports on hongxue.com...done.
Setting zimbraFeatureTasksEnabled=TRUE...done.
Setting zimbraFeatureBriefcasesEnabled=TRUE...done.
Setting Master DNS IP address(es)...done.
Setting DNS cache tcp lookup preference...done.
Setting DNS cache udp lookup preference...done.
Setting DNS tcp upstream preference...done.
Setting TimeZone Preference...done.
Initializing mta config...done.
Setting services on hongxue.com...done.
Adding hongxue.com to zimbraMailHostPool in default COS...done.
Creating domain hongxue.com...done.
Setting default domain name...done.
Creating domain hongxue.com...already exists.
Creating admin account [email protected].com...done.
Creating root alias...done.
Creating postmaster alias...done.
Creating user spam.4[email protected].com...done.
Creating user ham.bhxkaz[email protected].com...done.
Creating user virus-quarantine.92[email protected].com...done.
Setting spam training and Anti-virus quarantine accounts...done.
Initializing store sql database...done.
Setting zimbraSmtpHostname for hongxue.com...done.
Configuring SNMP...done.
Setting up syslog.conf...done.
Starting servers...done.
Installing common zimlets...
com_zimbra_adminversioncheck...done.
com_zimbra_attachcontacts...done.
com_zimbra_attachmail...done.
com_zimbra_bulkprovision...done.
com_zimbra_cert_manager...done.
com_zimbra_clientuploader...done.
com_zimbra_date...done.
com_zimbra_email...done.
com_zimbra_mailarchive...done.
com_zimbra_phone...done.
com_zimbra_proxy_config...done.
com_zimbra_srchhighlighter...done.
com_zimbra_tooltip...done.
com_zimbra_url...done.
com_zimbra_viewmail...done.
com_zimbra_webex...done.
com_zimbra_ymemoticons...done.
Finished installing common zimlets.
Restarting mailboxd...done.
Creating galsync account for default domain...done.
You have the option of notifying Zimbra of your installation.
This helps us to track the uptake of the Zimbra Collaboration Server.
The only information that will be transmitted is:
The VERSION of zcs installed (8.6.0_GA_1153_RHEL7_64)
The ADMIN EMAIL ADDRESS created ([email protected].com)
# 跳過通知zimbra
Notify Zimbra of your installation? [Yes] no
Notification skipped
Setting up zimbra crontab...done.
Moving /tmp/zmsetup02252016-105150.log to /opt/zimbra/log
Configuration complete - press return to exit
- 1
- 2
- 3
- 4
- 5
- 6
- 7
- 8
- 9
- 10
- 11
- 12
- 13
- 14
- 15
- 16
- 17
- 18
- 19
- 20
- 21
- 22
- 23
- 24
- 25
- 26
- 27
- 28
- 29
- 30
- 31
- 32
- 33
- 34
- 35
- 36
- 37
- 38
- 39
- 40
- 41
- 42
- 43
- 44
- 45
- 46
- 47
- 48
- 49
- 50
- 51
- 52
- 53
- 54
- 55
- 56
- 57
- 58
- 59
- 60
- 61
- 62
- 63
- 64
- 65
- 66
- 67
- 68
- 69
- 70
- 71
- 72
- 73
- 74
- 75
- 76
- 77
- 78
- 79
- 80
- 81
- 82
- 83
- 84
- 85
- 86
- 87
- 88
- 89
- 90
- 91
- 92
- 93
- 94
- 95
- 96
- 97
- 98
- 99
- 100
- 101
- 102
- 103
- 104
- 105
- 106
- 107
- 108
- 109
- 110
- 111
- 112
- 113
- 114
- 115
- 116
- 117
- 118
- 119
- 120
- 121
- 122
- 123
- 124
- 125
- 126
- 127
- 128
- 129
- 130
- 131
- 132
- 133
- 134
- 135
- 136
- 137
- 138
- 139
- 140
- 141
- 142
- 143
- 144
- 145
- 146
- 147
- 148
- 149
- 150
- 151
- 152
- 153
- 154
- 155
- 156
- 157
- 158
- 159
- 160
- 161
- 162
- 163
- 164
- 165
- 166
- 167
- 168
- 169
- 170
- 171
- 172
- 173
- 174
- 175
- 176
- 177
- 178
- 179
- 180
- 181
- 182
- 183
- 184
- 185
- 186
- 187
- 188
- 189
- 190
- 191
- 192
- 193
- 194
- 195
- 196
- 197
- 198
- 199
- 200
- 201
- 202
- 203
- 204
- 205
- 206
- 207
- 208
- 209
- 210
- 211
- 212
- 213
- 214
- 215
- 216
- 217
- 218
- 219
- 220
- 221
- 222
- 223
- 224
- 225
- 226
- 227
- 228
- 229
- 230
- 231
- 232
- 233
- 234
- 235
- 236
- 237
- 238
- 239
- 240
- 241
- 242
- 243
- 244
- 245
- 246
- 247
- 248
- 249
- 250
- 251
- 252
- 253
- 254
- 255
- 256
- 257
- 258
- 259
- 260
- 261
- 262
- 263
- 264
- 265
- 266
- 267
- 268
- 269
- 270
- 271
- 272
- 273
- 274
- 275
- 276
- 277
- 278
- 279
- 280
- 281
- 282
- 283
- 284
- 285
- 286
- 287
- 288
- 289
- 290
- 291
- 292
- 293
- 294
- 295
- 296
- 297
- 298
- 299
- 300
- 301
- 302
- 303
- 304
- 305
- 306
- 307
- 308
- 309
- 310
- 311
- 312
- 313
- 314
- 315
- 316
- 317
- 318
- 319
- 320
- 321
- 322
- 323
- 324
- 325
- 326
- 327
- 328
- 329
- 330
- 331
- 332
- 333
- 334
- 335
- 336
- 337
- 338
- 339
- 340
- 341
- 342
- 343
- 344
- 345
- 346
- 347
- 348
- 349
- 350
- 351
- 352
- 353
- 354
- 355
- 356
- 357
- 358
- 359
- 360
- 361
- 362
- 363
- 364
- 365
- 366
- 367
- 368
- 369
- 370
- 371
- 372
- 373
- 374
- 375
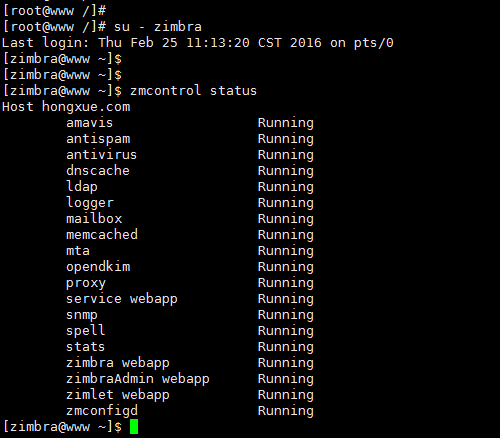
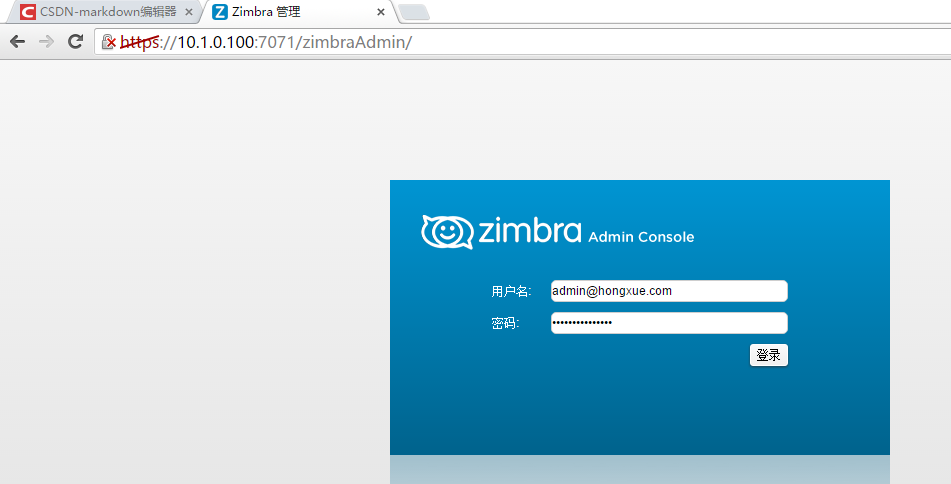
7、ok,上一步已經完成安裝,下面我們來檢視服務啟動狀態,服務已經啟動~
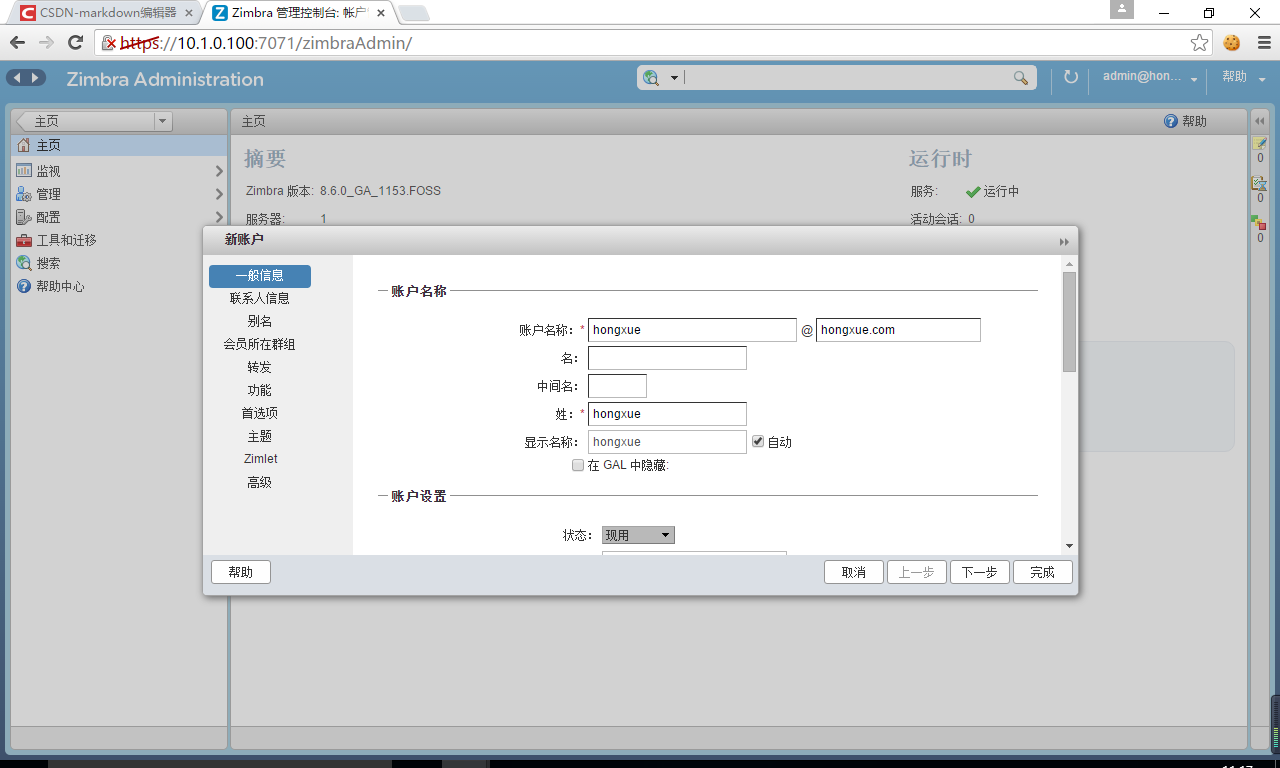
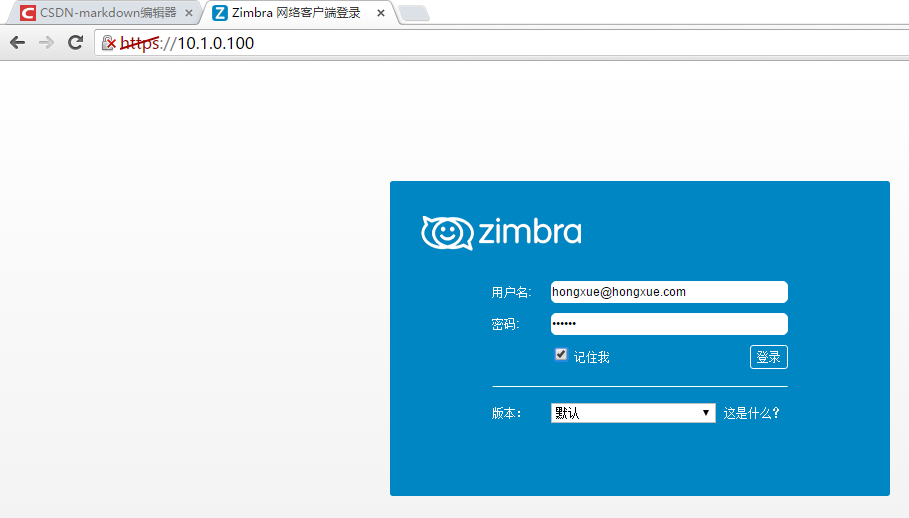
建立一個普通使用者
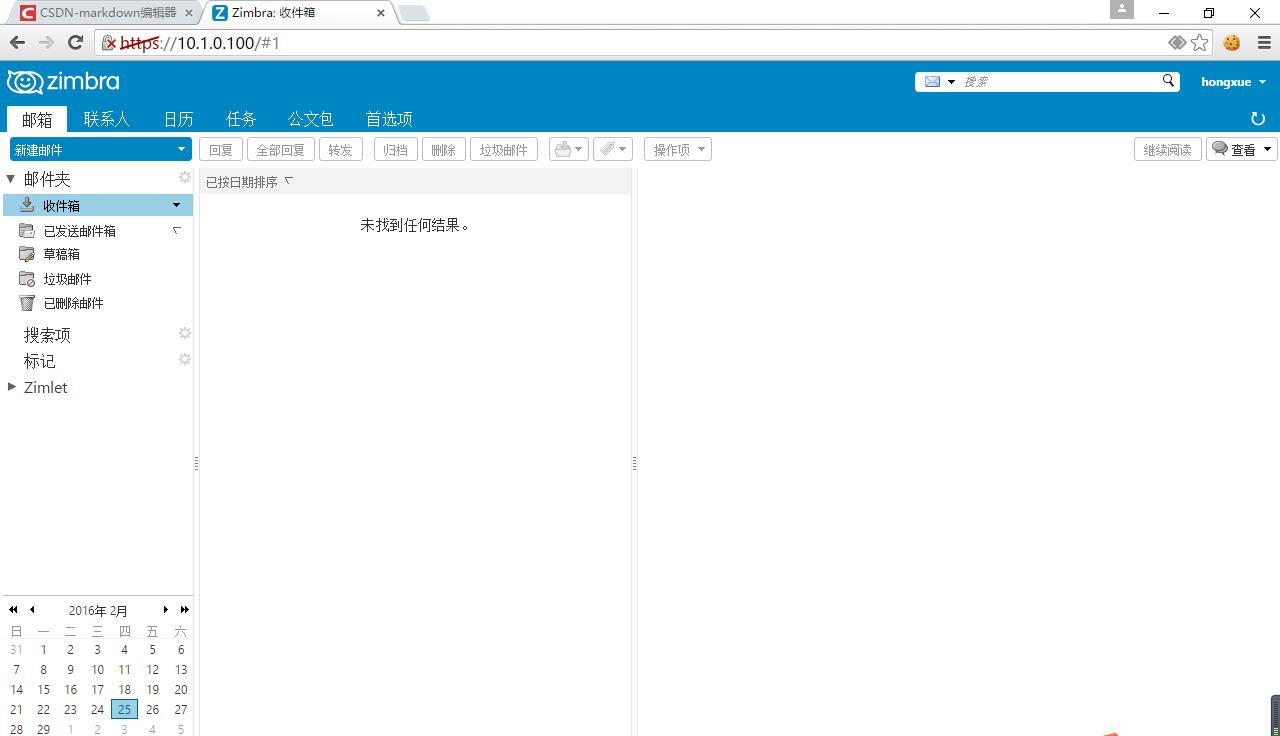
9、向外網傳送郵件,驗證是否成功
新建郵件並且傳送:
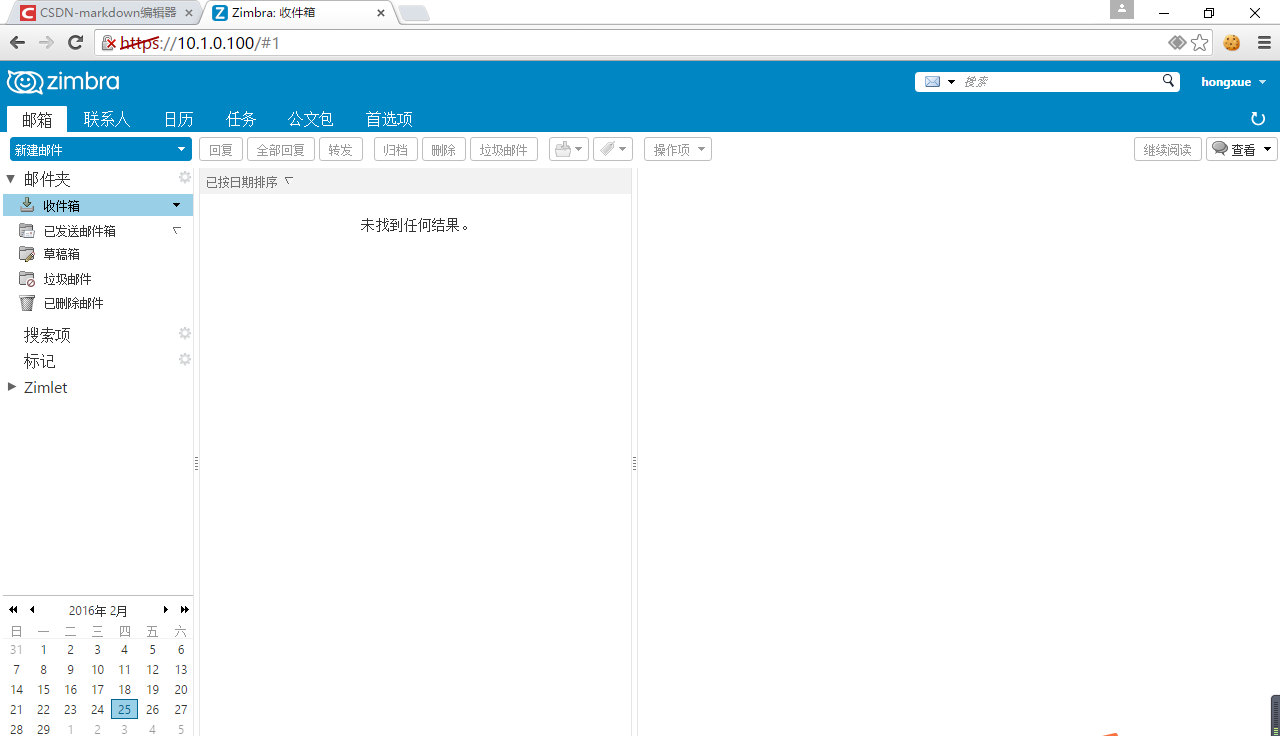
郵件接受成功~ 實驗環境至此結束,如果需要接收外網郵件,那麼需要DNS解析MX記錄,並且需要有一個外網ip供 zimbra使用,可以是通過NAT模式,但是需要對映zimbra的所需埠。