
TextInputLayout使用以及EditText自己實現監聽
阿新 • • 發佈:2019-01-10
- TextInputLayout介紹:
首先呢,TextInputLayout是什麼?
TextInputLayout是一個能夠把EditText包裹在當中的一個佈局,當輸入文字時,它可以把Hint文字飄到EditText的上方,它裡面只能包裹一個佈局,且只能是EditText,我們可以對其進行判斷,當發生錯誤時,提示錯誤資訊,在文字的下方。
實戰:
1.新增依賴

dependencies {
  compile 'com.android.support:appcompat-v7:22.2.0'
  compile 'com.android.support:design:22.2.0'
}
然後呢
2.xml中宣告一個TextInputLayout(裡面套一個EditText)

<android.support.design.widget.TextInputLayout
    android:id="@+id/input_layout"
    android:layout_width="match_parent"
    android:layout_height="wrap_content">
    <EditText
        android:layout_width="match_parent"
        android:layout_height="wrap_content" />
</android.support.design.widget.TextInputLayout>
下一步:
3.實現監聽和一些邏輯判斷

inputLayout.setHint("請輸入姓名");

    EditText text=inputLayout.getEditText();
    inputLayout.setErrorEnabled(true);
    text.addTextChangedListener(new TextWatcher() {
        @Override
        public void beforeTextChanged(CharSequence s, int start, int count, int after) {

        }

        @Override
        public void onTextChanged(CharSequence s, int start, int before, int count) {
            if(s.length()>6){
                inputLayout.setError("姓名長度不能大於6");
            }else{
                inputLayout.setError(null);
            }
        }

        @Override
        public void afterTextChanged(Editable s) {

        }
下一步:
4.注意上面幾個方法的作用:

通過TextInputLayout.getEditText()獲取輸入框
顯示錯誤資訊;
    textInputLayout.setErrorEnable(true);
    textInputLayout.setError(msg);
隱藏錯誤資訊:
    textInputLayout.setErrorEnable(false);
    textInputLayout.setError(null);
上面是對TextInputLayout的一些理解。
只用EditText實現原理是一樣的————————————-
-
1.我們需要去實現TextWatcher這個介面,裡面會有三個方法讓我們操作
    1.文字改變前:beforeTextChanged
    2.文字改變:onTextChanged
    3.文字變化之後 afterTexhChanged
2.裡面的一個方法設定
1. 設定游標到指定位置
EditText et = (EditText) findViewById(R.id.etTest);
et.setSelection(2);
PS:當內容過多時,可通過設定游標位置來讓該位置的內容顯示在螢幕上。

2. 隱藏游標
EditText et = (EditText) findViewById(R.id.etTest);
//設定游標不顯示,但不能設定游標顏色
et.setCursorVisible(false);
3 android EditText獲取游標位置並插入字元刪除字元
1.獲取游標位置

int index = editText.getSelectionStart();

2.在游標處插入字元
int index = editText.getSelectionStart();
Editable editable = editText.getText();
editable.insert(index, "aaaa");

3.刪除游標前字元
int index = editText.getSelectionStart();
Editable editable = editText.getText();
editable.delete(index-1, index);

4.
android:textCursorDrawable   這個屬性是用來控制游標顏色的
"@null"   是作用是讓游標顏色和text color一樣
android:textCursorDrawable="@null"
4—順便介紹一下xml的inputtype的值。
android:inputType=”none”
android:inputType=”text”
android:inputType=”textCapCharacters” 字母大寫
android:inputType=”textCapWords” 首字母大寫
android:inputType=”textCapSentences” 僅第一個字母大寫
android:inputType=”textAutoCorrect” 自動完成
android:inputType=”textAutoComplete” 自動完成
android:inputType=”textMultiLine” 多行輸入
android:inputType=”textImeMultiLine” 輸入法多行(如果支援)
android:inputType=”textNoSuggestions” 不提示
android:inputType=”textUri” 網址
android:inputType=”textEmailAddress” 電子郵件地址
android:inputType=”textEmailSubject” 郵件主題
android:inputType=”textShortMessage” 短訊
android:inputType=”textLongMessage” 長資訊
android:inputType=”textPersonName” 人名
android:inputType=”textPostalAddress” 地址
android:inputType=”textPassword” 密碼
android:inputType=”textVisiblePassword” 可見密碼
android:inputType=”textWebEditText” 作為網頁表單的文字
android:inputType=”textFilter” 文字篩選過濾
android:inputType=”textPhonetic” 拼音輸入
//數值型別
android:inputType=”number” 數字
android:inputType=”numberSigned” 帶符號數字格式
android:inputType=”numberDecimal” 帶小數點的浮點格式
android:inputType=”phone” 撥號鍵盤
android:inputType=”datetime” 時間日期
android:inputType=”date” 日期鍵盤
android:inputType=”time” 時間鍵盤
5.在程式碼裡的應用
    EditText testEditText = (EditText) findViewById(R.id.edittext);
    int inputType = InputType.TYPE_CLASS_NUMBER | InputType.TYPE_NUMBER_VARIATION_NORMAL;
    testEditText.setInputType(inputType);
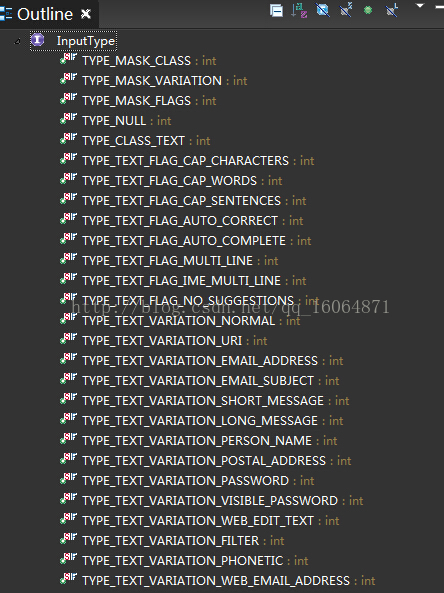
那我貼圖看一下原始碼中InputType屬性類吧。如下圖,
6.關於EdiitText的其他屬性
android:layout_gravity="center_vertical" 設定控制元件顯示的位置:預設top,這裡居中顯示,還有bottom android:hint="請輸入數字!"設定顯示在空間上的提示資訊

android:numeric="integer" 設定只能輸入整數,如果是小數則是:decimal
android:singleLine="true" 設定單行輸入,一旦設定為true,則文字不會自動換行。
android:password="true" 設定只能輸入密碼
android:textColor = "#ff8c00" 字型顏色
android:textStyle="bold" 字型,bold, italic, bolditalic
android:textSize="20dip" 大小
android:capitalize = "characters" 以大寫字母寫
android:textAlign="center" EditText沒有這個屬性,但TextView有 android:textColorHighlight="#cccccc" 被選中文字的底色,預設為藍色
android:textColorHint="#ffff00" 設定提示資訊文字的顏色,預設為灰色
android:textScaleX="1.5" 控制字與字之間的間距
android:typeface="monospace" 字型,normal, sans, serif, monospace
android:background="@null" 空間背景,這裡沒有,指透明
android:layout_weight="1" 權重,控制控制元件之間的地位,在控制控制元件顯示的大小時蠻有用的。


 通過EditText的layout xml檔案中的相關屬性來實現:
1. 密碼框屬性 android:password="true" 這條可以讓EditText顯示的內容自動為星號,輸入時內容會在1秒內變成*字樣。
2. 純數字 android:numeric="true" 這條可以讓輸入法自動變為數字輸入鍵盤,同時僅允許0-9的數字輸入
3. 僅允許 android:capitalize="cwj1987" 這樣僅允許接受輸入cwj1987,一般用於密碼驗證 下面是一些擴充套件的風格屬性
android:editable="false" 設定EditText不可編輯
android:singleLine="true" 強制輸入的內容在單行
android:ellipsize="end" 自動隱藏尾部溢位資料,一般用於文字內容過長一行無法全部顯示時
7.實現EditText為空時的抖動效果
如果開啟抖動效果的話et.setAnimation(am);這個需要用到父類的requestLayout()方法

ViewParent parent = et.parent();
((ViewGroup)parent).requestLayout();

Animation am = AnimationUtils.loadAnimation(this,R.anim.shake);
公司中一般用et.startAnimation(am);

在程式碼中直接實現動畫效果(這樣最方便)
Animation translateAnimation = new TranslateAnimation(0, 10, 0, 0);
translateAnimation.setInterpolator(new CycleInterpolator(7));
translateAnimation.setDuration(1000);
et_01.startAnimation(translateAnimation);


在xml中實現
anim-->
<translate xmlns:android="http://schemas.android.com/apk/res/android"
    android:duration="1000"
    android:fromXDelta="0"
    android:interpolator="@anim/cycle_7"
    android:toXDelta="10" />

anim-->cycle_7
<cycleInterpolator xmlns:android="http://schemas.android.com/apk/res/android"
    android:cycles="7" />