搭建rsync實時同步
1、本實驗基於centos6.5伺服器做的
cat cat /etc/redhat-release

2、在配置環境之前需要先將伺服器自帶的rsync卸除
yum -y remove rsync*

3、清除以後,安裝wget服務

因為之前安裝過所以顯示已經安裝
4、使用命令下載rsync和inotify
wget --no-check-certificate https://jaist.dl.sourceforge.net/project/inotify-tools/inotify-tools/3.13/inotify-tools-3.13.tar.gz
wget http://rpmfind.net/linux/dag/redhat/el6/en/x86_64/extras/RPMS/rsync-3.0.9-2.el6.rfx.x86_64.rpm
5、在master上新增兩個檔案
新增密碼認證檔案
(1)、在/etc/slave.pass
echo "123465" > /etc/slave.pass
給檔案是給inotify指令碼認證用的
(2)、在 /usr/local/inotify/
echo "123465" >/usr/local/inotify/slave.pass
將兩個檔案加上許可權
chmod 600 /etc/slave.pass
chmod 600 /usr/local/inotify/slave.pass


6、在slave服務區上配置如下:
在客戶端設定使用者和密碼:

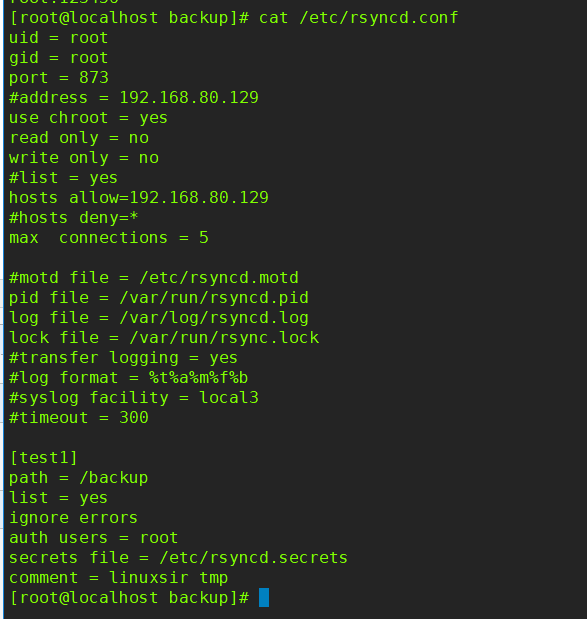
配置檔案修改如下:

uid = root  #守護程序的使用者許可權
gid = root
port = 873  #設定埠
#address = 192.168.80.129 #本機IP地址
use chroot = yes
read only = no    #no允許客戶端上傳檔案 #yes只讀
write only = no  #允許寫許可權  no/yes  #yes是禁止
#list = yes  #是否提供資源列表
hosts allow=192.168.80.129  #允許IP地址登入
#hosts deny=*   #禁止IP地址登入
max  connections = 5   #開啟最大連線數

#motd file = /etc/rsyncd.motd #模組
pid file = /var/run/rsyncd.pid  #服務的程序號存放位置
log file = /var/log/rsyncd.log   #服務的日誌存放位置
lock file = /var/run/rsync.lock  #服務鎖的存放位置
#transfer logging = yes
#log format = %t%a%m%f%b
#syslog facility = local3
#timeout = 300

[test1]  #要同步的模組名
path = /backup  要同步的目錄
list = yes
ignore errors
auth users = web  #認證使用者
secrets file = /etc/rsyncd.secrets   #存放使用者和密碼的配置檔案
#comment = linux  #隨意定義的一個
7、在master上配置inotify服務
tar xf inotify-tools-3.13.tar.gz

cd inotify-tools-3.13
檢測,編譯,安裝

安裝成功後截圖

8、檢視目錄是否存在!!!

9、編寫指令碼inotify指令碼!!

 1 #!/bin/bash
 2 client=192.168.80.130
 3 src=/backup/
 4 dest=test1
 5 user=root
 6 /usr/local/inotify/bin/inotifywait -mrq --timefmt '%d%m%y%H:%M' --format '%T%w%f%e' -e modify,delete,create,move,attrib $src | while read files
 7 do
 8     /usr/bin/rsync -vzrtopgq --delete --progress --password-file=/usr/local/inotify/slave.pass  $src [email protected]$client::$dest
 9     echo "${files} web is ok" >> /tmp/rsyncd.log 2>&1
 10 done
10、對指令碼授執行許可權;
chmod +x rsync.sh
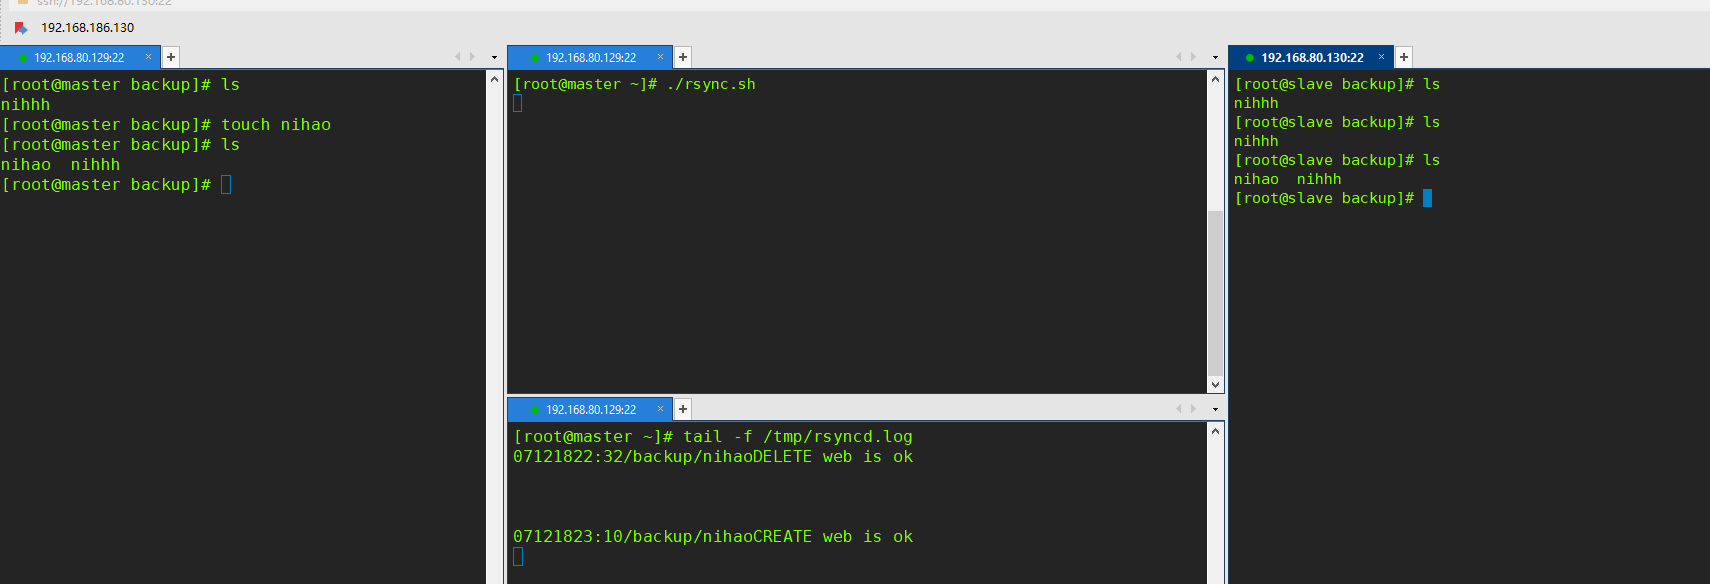
11、最後執行結果

