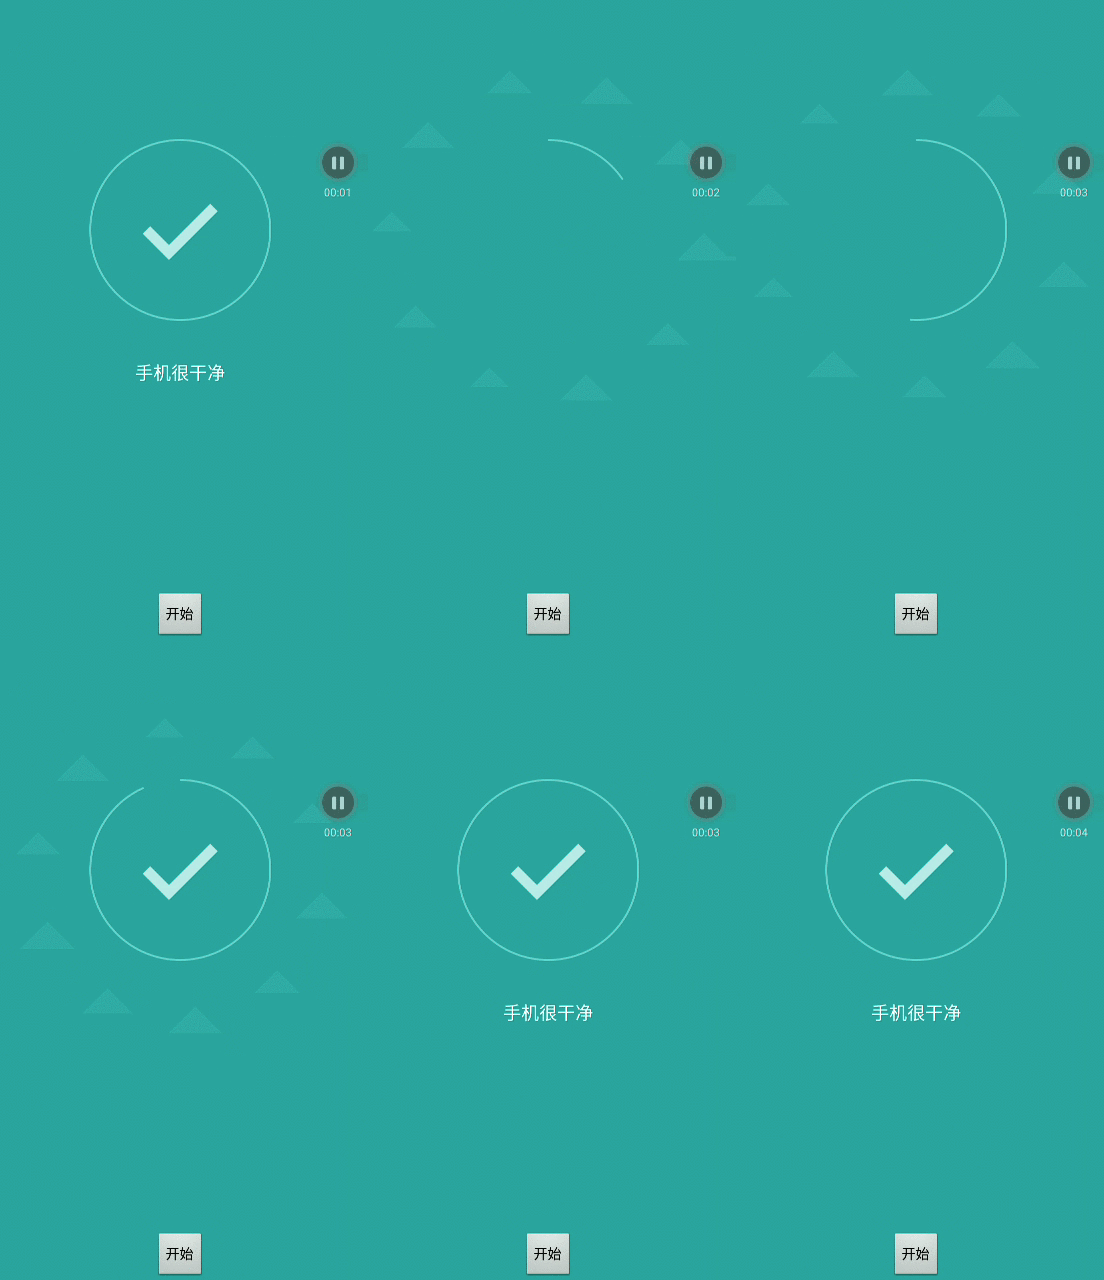
高仿小米"安全中心"中垃圾清理成功後的顯示介面
阿新 • • 發佈:2019-01-11
前言
好久沒分享,把自己簡書上面的文章挪到這裡,增加點曝光量。為什麼首先選擇自定義控制元件這個知識點,因為是我薄弱地方,所以我要重新認識,再加深理解。本人用的小米手機,所以就直接在小米手機上面尋找模仿的UI介面咯。
效果預覽
為了做這個gif動畫,還是花了點心思,第一次弄。
第一步:先用手機錄屏軟體或者其他方式(自行搜尋)先錄製好mp4檔案。
第二步:我用的是mac,推薦在AppStore下載VideoGIF Free這款軟體製作,將mp4轉成gif。
實現思路
1、自定義view,首先利用canvas.drawArc不斷的畫圓弧,通過改變角度值達到從0到有的圓圈。
2、等角度達到一定值的時候,開始顯示繪製正確完成的鉤子。
3、開始繪製圓弧的時候,一併繪製周圍的三角形,這個是隨機生成,然後慢慢想最新靠攏。
4、整體繪製完成,顯示提示文字。
1、畫圓弧,並且不斷加角度,讓其最後繪製成一個圓。通過postInvalidateDelayed方法讓圓弧不停的自我繪製,直到角度的值等於360°算繪製完畢。繪製完畢後,回撥呼叫完成的介面。
/**
* 畫圓弧
*/
private void drawArc(Canvas canvas) {
RectF rectF = new RectF();
rectF.left = (getWidth() - arcWidth) / 2;
rectF.top = (getHeight() - arcWidth) / 2;
rectF.right = (getWidth() - arcWidth) / 2 2、繪製鉤子。當角度大於330°的時候,繪製鉤子,鉤子是根據圓弧的相對角度繪製而成的,利用path就可以做到。
    /**
     * 畫正確的鉤子
     *
     * @param canvas\
     */
    private void drawRight(Canvas canvas) {
        Path path = new Path();
        path.moveTo((getWidth() - arcWidth) / 2 + arcWidth / 4 + arcWidth / 16, (getHeight() - arcWidth) / 2 + arcWidth / 2);
        path.lineTo((getWidth() - arcWidth) / 2 + arcWidth / 4 + arcWidth / 8 + arcWidth / 16, (getHeight() - arcWidth) / 2 + (arcWidth / 4) * 3 - arcWidth / 8);
        path.lineTo((getWidth() - arcWidth) / 2 + arcWidth / 2 + arcWidth / 4 - arcWidth / 8 + arcWidth / 16, (getHeight() - arcWidth) / 2 + arcWidth / 4 + arcWidth / 8);
        canvas.drawPath(path, mRightPaint);
    }
3、圓弧轉動的動的時候,周圍生成若干個隨機的三角形,這裡我生成的是十個。三角形的所處的位置以及運動的軌跡由ValueAnimator動畫生成。
    /**
     * 座標點的位置,使用者傳遞到屬性動畫當中
     */
    public class Point implements Serializable {
        public int x;
        public int y;

        public Point(int x, int y) {
            this.x = x;
            this.y = y;
        }

        public Point(Point src) {
            this.x = src.x;
            this.y = src.y;
        }

        public void set(int x, int y) {
            this.x = x;
            this.y = y;
        }
    }

    /**
     * 用於屬性動畫的回掉,根據返回的引數t來計算相關資料,t是從0~1變化。
     */
    public class BezierEvaluators implements TypeEvaluator<List<Point>> {

        private Point controllPoint;

        public BezierEvaluators(Point controllPoint) {
            this.controllPoint = controllPoint;
        }

        @Override
        public List<Point> evaluate(float t, List<Point> startValue, List<Point> endValue) {
            List<Point> list = new ArrayList<>();
            if (startValue.size() > 0 && endValue.size() > 0 && startValue.size() == endValue.size()) {
                for (int i = 0; i < startValue.size(); i++) {
                    //增加角度,讓每個碎片三角形所處位置不一樣
                    double sum = t + ((double) i / (double) 10);
                    if (sum >= 1) {
                        sum = sum - 1;
                    }
                    // 200 - (80 * t) 旋轉越來越靠近圓
                    double x = controllPoint.x + (arcWidth / 2 + 200 - (80 * t)) * Math.cos(360 * sum * Math.PI / 180);
                    double y = controllPoint.y + (arcWidth / 2 + 200 - (80 * t)) * Math.sin(360 * sum * Math.PI / 180);
                    list.add(new Point((int) x, (int) y));
                }
            }
            return list;
        }
    }

    /**
     * 開始運動三角形
     */
    private void startBezierAnimotion() {
        if(isShowTriAngle == 1) {
            float circleX = (getWidth() - arcWidth) / 2 + arcWidth / 2;
            float circleY = (getHeight() - arcWidth) / 2 + arcWidth / 2;
            float x = ((getWidth() - arcWidth) / 2) / 2;
            Point controllPoint = new Point((int) circleX, (int) circleY);
            BezierEvaluators bezierEvaluator = new BezierEvaluators(controllPoint);
            //初始化開始座標和結束座標,在這裡這個座標並使用,只是為了能夠得屬性動畫產生的變化值
            List<Point> startPoint = new ArrayList<>();
            List<Point> endPoint = new ArrayList<>();
            triAngle.clear();
            for (int i = 0; i < 10; i++) {
                startPoint.add(new Point(i, i));    //隨意生成
                endPoint.add(new Point(i, i));      //隨意生成

                //半徑之外的範圍 150 - 200之間
                double r = Math.random() * 30 + 20;
                triAngle.add((int) r);
            }
            ValueAnimator anim = ValueAnimator.ofObject(bezierEvaluator, startPoint, endPoint);
            anim.addUpdateListener(this);
            anim.setDuration(1500);
            anim.setInterpolator(new AccelerateDecelerateInterpolator());   //動畫運動的速率,開始和結束慢,中間快,還有其他方式可設定。
            anim.start();
        }
    }

    /**
     * 回撥過來的資料,開始更新,畫三角形,這樣子就形成了三角形圍著圓弧轉,並且越靠越近,最後消失。
     */
    @Override
    public void onAnimationUpdate(ValueAnimator animation) {
        List<Point> valuePoints = (List<Point>) animation.getAnimatedValue();
        this.valuePoints = valuePoints;
        invalidate();
    }
4、動畫執行完畢之後,通知介面已完成。
            canvas.drawArc(rectF, -90, 360, false, mArcPaint);
            drawRight(canvas);
            isDrawing = false;
            if(listener != null) {
                listener.onAnimotionFinished();
            }
#結語#
到這裡,大致流程就介紹完了。有什麼不足的,歡迎指出。
歡迎在下方評論和喜歡,謝謝,轉載請說明出處。

