vue2.X基礎知識四之元件及父子元件通訊
一、元件註冊
1、在Vue中全域性註冊
//my-component就是註冊的元件自定義標籤名,推薦使用小寫加減號分割的形式命名
//template的DOM結構必須被一個元素包含(這裡是div),否則無法渲染
Vue.component('my-component', {template: '<div>我是元件</div>'});
var app = new Vue({
//選擇元素
el: "#app"
});在html中使用元件:
<div id="app">
    <my-component></my-component>
</div>
使用全域性註冊的時候,元件必須先註冊,然後再例項化Vue;全域性註冊的元件,任何Vue例項都可以使用。
2、在Vue例項中,註冊區域性元件
註冊的區域性元件只有在該例項作用域下有效。元件也可以使用components選項來註冊元件,使元件可以巢狀。
<div id="app">
    <my-component></my-component>
</div>
var child = { template: '<div>區域性註冊元件的內容</div>' } var app = new Vue({ el: '#app', components: { 'my-component': child } });
3、元件中的data
元件中的配置選項與Vue例項很類似,在元件中使用data時,data必須是函式,然後將資料return出去,例如:
<div id="app">
    <my-component></my-component>
</div>
Vue.component('my-component', { template: '<div @click="handleClick($event)">{{ name }}</div>', /* 子元件的data必須是一個函式 */ data: function() { return { name: '子元件的資料' } }, methods: { handleClick($event){ $event.target.style.color = 'red'; alert('子元件的click事件'); } } }); var app = new Vue({ el: "#app" });
二、元件通訊
元件不僅僅是要把模板的內容進行復用,更重要的是元件間要進行通訊。通常父元件的模板中包含子元件,父元件要正向地向子元件傳遞資料或引數,子元件接收到後根據引數的不同來渲染不同的內容或執行操作。props的值可以是兩種,一種是字串陣列,一種是物件。
1、父元件向子元件傳遞資料,使用props來實現
在元件中,使用選項props來宣告需要從父級接收的資料。我們來看一個最簡單的例子,直接給子元件傳遞一個字串:
<div id="app">
    <my-component message="來自父元件的資料"></my-component>
</div>
Vue.component('my-component', {
props: ['message'],
template: '<div>{{ message }}</div>'
});
var app = new Vue({
el: "#app"
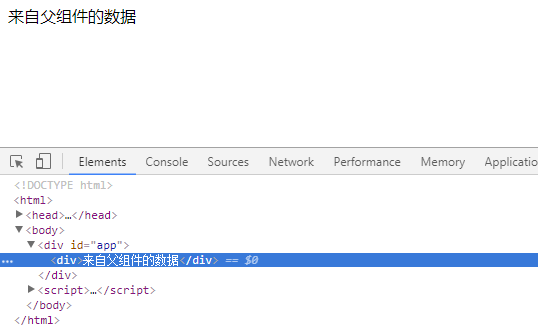
});上面程式碼中,我們給子元件設定了一個自定義的屬性message,它的值是父元件想要傳遞給子元件my-component的值,這裡是固定的一個字串。執行結果如下:
說明:由於html特性不區分大小寫,當使用DOM模板時,駝峰命名的props名稱要轉為短橫分隔命名,比如props:['warningText'],在元件定義這個屬性時候應該這樣寫:warning-text="來自父元件的資訊" (如果使用的是字串模板(單個vue檔案),可忽略這些限制)
props中宣告的資料與元件data函式return的資料主要區別就是props的來自父級,而data中的是元件自己的資料,作用域是元件本身,這兩種資料都可以在模板template及計算屬性computed和方法methods中使用。
有時候,傳遞的資料並不是直接寫死的,而是來自父級的動態資料,這時可以使用指令v-bind來動態繫結props的值,當父元件的資料變化時,也會傳遞給子元件。
<!--這裡用v-model綁定了父級的資料parentMessage,當通過輸入框任意輸入時,
子元件接收到的props "message"也會實時響應,並更新元件模板。 -->
<div id="app">
    <input type="text" v-model="parentMessage" />
    <my-component :message="parentMessage"></my-component>
</div>
Vue.component('my-component', {
props: ['message'],
template: `<div>
<p>子元件自身的資料:{{ name }},</p>
<p>來自父元件的資料:<b style="color: red;">{{ message }}</b></p>
</div>`,
data: function() {
return {
name: '我是子元件自帶的資料'
}
}
});
var app = new Vue({
el: "#app",
data: {
parentMessage: '我是父元件的message',
}
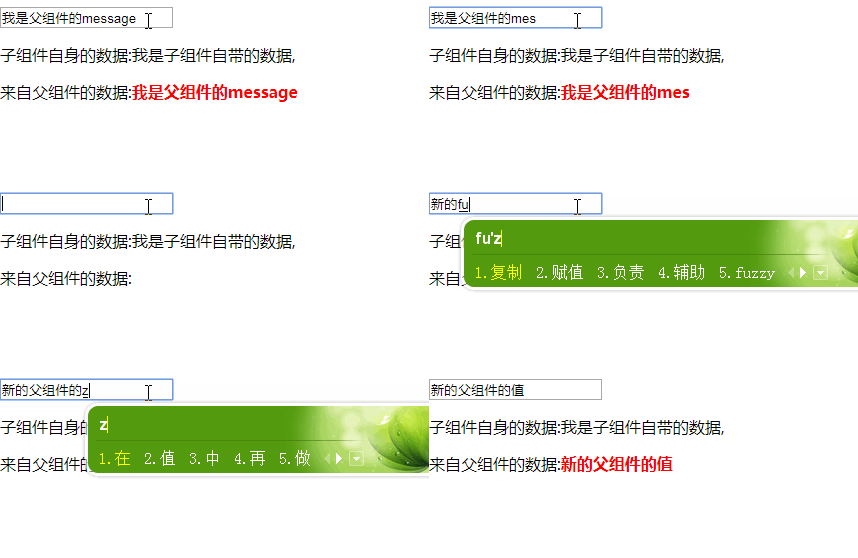
});可以看到,這個例子與上一個例子有個很明顯的區別,這裡使用v-bind綁定了自定義的屬性message的值,message儲存了父元件parentMessage的值;子元件通過props接收message儲存的值,同時template可以像訪問data一樣,訪問props裡面的message;輸出效果如下:
注意、如果直接傳遞數字,布林值、陣列、物件,而且不使用v-bind,傳遞的僅僅是字串;例如:
    <div id="app">
        <!-- 第一個元件沒有使用v-bind,所以傳遞給子元件的是字串"[1,2,3]",所以,輸出的length是7 -->
        <my-component message="[1,2,3]"></my-component>
        <!-- 這裡是正常輸出,length為3 -->
        <my-component :message="[1,2,3]"></my-component>
    </div>
    <script>
    	Vue.component('my-component', {
    		template: `<div>
    			      <p>來自父元件的資料:{{ message.length }}</p>
    		          </div>`,
    		props: ['message'],
    		/* 子元件的data必須是一個函式  */
    		data: function() {
    			return {
    			    name: '我是子元件自帶的資料'
    			}
    		}
    	});
        var app = new Vue({
            //選擇元素
            el: "#app",
            data: {
            	parentMessage: '我是父元件的message',
            }
        });
    </script>
props單向資料流
Vue2.X通過props傳遞資料是單向的,也就是父元件資料變化時會傳遞給子元件,但是反過來不行。通常在業務中經常會遇到兩種需要改變prop的情況,程式碼如下:
<div id="app">
    <my-component :init-count="parentData"></my-component>

    <!-- 在子元件中自定義屬性最好不要與html元素已有的屬性名一樣 -->
    <my-component-2 :styles="style"></my-component-2>
</div>
<script>
/*
需要改變prop的情況一:
父元件傳遞初始值過來,子元件將它作為初始值儲存起來,在自己的作用域下
可以隨意使用和修改。這種情況可以在元件data內再宣告一個數據,引用父元件的prop;
*
* */
Vue.component('my-component', {
props: ['initCount'],
template: '<div>{{ count }} <input type="text" v-model="count" /></div>',
data: function () {
return {
count: this.initCount
}
}
});
/*
另一種情況就是prop作為需要被轉變的原始值傳入。這種情況用計算屬性就可以了;
用css傳遞寬度要帶單位(px),但是每次都寫太麻煩,而且數值計算一般是不帶單位的,
所以統一在元件內使用計算屬性就可以了。
* */
Vue.component('my-component-2', {
props: ['styles'],
template: '<div :style="style">元件內容</div>',
computed: {
style: function () {
return {
width: this.styles.width + 'px',
color: this.styles.color,
border: this.styles.border
}
}
}
});
var app = new Vue({
el: '#app',
data: {
parentData: 1,
style: {
color: '#e6b5a7',
width: 600,
border: '1px solid #e7e8e9'
}
}
});
</script>以上兩種情況,子元件獲取父元件的資料之後隨意修改,都不會再影響父元件的資料。
props資料驗證
一般當你的元件需要提供給別人使用時,推薦都進行資料驗證;如果傳入的值型別不對,就會在控制檯彈出警告。例如:
<div id="app">
    <my-component :prop-a="parentData" :prop-d="count"></my-component>
</div>
Vue.component('my-component', {
template: '<div>props的值為陣列時,接收父元件資料:{{ propA }},接收數值型別:{{ propD }}</div>',
props: {
// 必須是數字型別
propA: Number,
// 必須是字串或數字型別
propB: [String, Number],
// 布林值,如果沒有定義,預設值就是true
propC: {
type: Boolean,
default: true
},
//數字,而且是必傳
propD: {
type: Number,
required: true
},
//如果是陣列或物件,預設值必須是一個函式來返回
propE: {
type: Array,
default: function () {
return [];
}
},
//自定義一個驗證函式
propF: {
validator: function (value) {
return value > 10;
}
}
}
});
var app = new Vue({
el: '#app',
data: {
parentData: 123,
count: 456
}
});以上程式碼如果我們在子元件裡不傳入prop-d,就會在控制檯報錯,因為propD是必傳項;驗證的type型別可以是:String,Number,Boolean,Object,Array,Function;type也可以是一個自定義構造器,使用instanceof檢測。
2、子元件向父元件傳遞資料,使用自定義事件
子元件需要向父元件傳遞資料時,就要用到自定義事件;v-on除了監聽DOM事件外, 還可以用於元件之間的自定義事件。
子元件用$emit來觸發事件,父元件用$on()來監聽子元件的事件。 父元件可以直接在子元件的自定義標籤上使用v-on(語法糖@)來監聽子元件觸發的自定義事件
<div id="app">
    <p>總數:{{ total }}</p>
    <my-component
		@increase="handleGetTotal"
		@reduce="handleGetTotal"></my-component>
</div>
以上程式碼使用@(v-on)監聽子元件的increase和reduce自定義事件,一旦子元件觸發了這兩個事件,父元件就會立即執行handleGetTotal方法,同時接收子元件傳遞過來的引數(資料);
		Vue.component('my-component', {
			template: `
				<div>
					<button @click="handleIncrease">+1</button>
					<button @click="handleReduce">-1</button>
				</div>
			`,
			data: function () {
				return {
					counter: 0
				};
			},
			methods: {
				handleIncrease: function () {
					this.counter++;
					// 觸發自定義的increase事件,同時將自身的counter資料傳遞過去
					this.$emit('increase', this.counter);
				},
				handleReduce: function () {
					this.counter--;
					// 觸發自定義的reduce事件
					this.$emit('reduce', this.counter);
				}
			}
		});

		var app = new Vue({
			el: '#app',
			data: {
				total: 0
			},
			methods: {
				handleGetTotal: function (total) {
					this.total = total;
				}
			}
});除了用v-on在元件上監聽自定義事件外,也可以監聽DOM事件,這時可以用.native修飾符表示監聽的是一個原生事件,監聽的是該元件的根元素。例如:
<div id="app">
    <!-- 監聽原生事件 -->
    <my-component v-on:click.native="handleClick"></my-component>
</div>
var app = new Vue({
el: '#app',
data: {
total: 0
},
methods: {
handleGetTotal: function (total) {
this.total = total;
},
handleClick: function () {
alert('監聽子元件的原生click事件的處理函式要寫在父元件上');
}
}
});Vue 2.X可以在自定義元件上使用v-model指令,示例如下:
<div id="app">
		<p>總數:{{ total }}</p>
        <my-component v-model="total"></my-component>

        <my-component-2 @input="getParentData"></my-component-2>
    </div>
    <script>
    	Vue.component('my-component', {
    		template: '<button @click="handleClick">+1</button>',
    		data: function () {
    			return {
    				counter: 0
    			}
    		},
    		methods: {
    			handleClick: function () {
    				this.counter++;
    				this.$emit('input', this.counter);
    			}
    		}
    	});

    	Vue.component('my-component-2', {
    		template: '<button @click="handleIncrease">+1</button>',
    		data: function () {
    			return {
    				counter: 0
    			}
    		},
    		methods: {
    			handleIncrease: function () {
    				this.counter++;
    				this.$emit('input', this.counter);
    			}
    		}
    	});

    	//以上兩種寫法,效果是一樣的;只是v-model更簡潔,方便,不需要使用自定義屬性

        var app = new Vue({
            el: "#app",
            data: {
            	total: 0
            },
            methods: {
            	getParentData: function (total) {
            		this.total = total;
            	}
            }
        });
    </script>
使用v-model指令建立自定義的表單輸入元件:
<div id="app">
		<p>總數:{{ total }}</p>
        <my-component v-model="total"></my-component><br/>
        <button @click="handleReduce">-1</button>
</div>
Vue.component('my-component', {
props: ['value'],
template: '<input :value="value" @input="updateValue" />',
methods: {
updateValue: function (event) {
this.$emit('input', event.target.value);
}
}
});
var app = new Vue({
el: "#app",
data: {
total: 0
},
methods: {
handleReduce: function () {
this.total--;
}
}
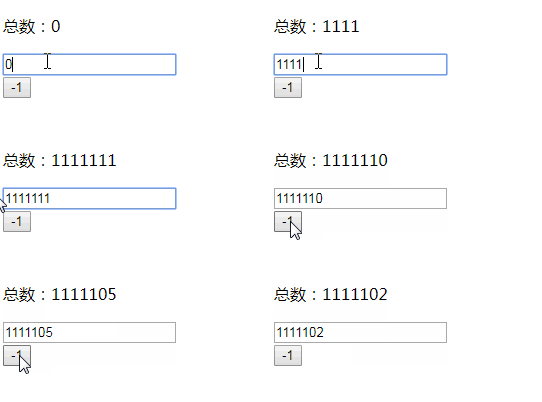
});以上程式碼執行過程個人理解:
通過v-model和props將父元件的total值傳遞給了input;
input使用v-bind綁定了父元件傳遞過來的值;同時綁定了input事件,當輸入新的input值時,通過updateValue處理函式執行$emit('input', event.target.value)將輸入的新值傳回給父元件的total;(這裡面發生了父元件向子元件傳值以及子元件給父元件傳值的過程,都得益於v-model)
顯示效果如下:


