
在滴滴雲上搭建 API-Gateway Kong 實踐
1. 什麼是 API-Gateway ?什麼是 Kong ?
API-Gateway 是微服務架構體系中一個比較重要的元件,它通常構成所有微服務的入口,它的職責比較多,其較為通用的一些功能是:
- 路由:路由是 API-Gateway 最重要的功能,基於路由 API-Gateway 通常能根據請求的特徵,將流量導向不同的服務,或是不同服務的不同版本;或是同一服務的不同單元。
- 協議轉換:在 API-Gateway 層可完成基本的協議轉換,比如簡單的 HTTPS 至 HTTP。
- 聚合資料:資料聚合的功能通常是指將不同 API-Gateway 後的服務返回後,統一返回。
- 認證:不同的服務之間常常有一些共有的邏輯需要處理,比如許可權認證,由於 API-Gateway 恰巧在各個微服務的前端,可以在 API-Gateway 實現許可權的認證,比如可以在 API-Gateway 層實現 Cookie 或 Token 的認證。
- 限流:可以做針對請求,針對服務的流量控制。
- 熔斷:可以在後端服務異常時或者被限流保護時,進行統一的錯誤返回。
常見的 API-Gateway 的方案比較多,比較常見的有:TyK,Kong,Netflix zuul,api-umbrella 等。其中 Kong 是本文要介紹的主題。
Kong 是在客戶端和(微)服務間轉發 API 通訊的 API 閘道器,通過外掛擴充套件功能。Kong 有兩個主要元件:
- Kong Server :基於 Nginx 的伺服器,用來接收 API 請求。
- PostgreSQL:用來儲存操作資料。
可以通過增加更多 Kong Server 機器對 Kong 服務進行水平擴充套件,通過前置的負載均衡器向這些機器分發請求。
Kong 比較突出的一個特性是可以通過外掛擴充套件已有功能,這些外掛在請求響應迴圈的生命週期中被執行。外掛使用 Lua 編寫,而且 Kong 還有如下幾個基礎功能:HTTP 基本認證、金鑰認證、CORS( Cross-origin Resource Sharing,跨域資源共享)、TCP、UDP、檔案日誌、限流、路由, 監控。
Kong 是一個在 Nginx 執行的 Lua 應用程式,由 lua-nginx-module 實現。 Kong 和 OpenResty 一起打包發行,其中已經包含了 lua-nginx-module。 OpenResty 不是 Nginx 的分支,而是一組擴充套件其功能的模組。
下面介紹 Kong 的部署過程。
2. 環境準備
- OS: CentOS 7.4
- 虛擬機器:2CPU 4G記憶體 40G SSD本地儲存
購買完成後,可通過下面的命令登入伺服器,並用 sudo -i 命令切換到 root 賬戶:
✗ ssh [email protected]
The authenticity of host '116.85.13.208 (116.85.13.208)' can't be established.
ECDSA key fingerprint is SHA256:wXuuSeD9X/Zh4r5AXlkippP021oJKJnuDzShfK4vIRA.
Are you sure you want to continue connecting (yes/no)? yes
Warning: Permanently added '116.85.13.208' (ECDSA) to the list of known hosts.
[email protected]'s password:
[[email protected] ~]$ sudo -i
[[email protected] ~]#
下面的操作步驟,均會基於此會話進行,按步驟做應該會得到同樣的效果。
3. Kong 部署
Kong 的部署需要完成下面三個元件的部署:
- PostgreSQL 的安裝及配置
- Kong Server 的安裝
- Kong Dashboard 的安裝
3.1 PostgreSql 安裝及配置
3.1.1 安裝
使用下面的命令,完成 postgresql-10 的安裝:
# yum install https://download.postgresql.org/pub/repos/yum/10/redhat/rhel-7-x86_64/pgdg-centos10-10-2.noarch.rpm
已載入外掛:fastestmirror
pgdg-centos10-10-2.noarch.rpm
...
...
完畢!
# yum install postgresql10
已載入外掛:fastestmirror
...
...
完畢!
# yum install postgresql10-server
已載入外掛:fastestmirror
pgdg-centos10-10-2.noarch.rpm
...
...
完畢!
# sudo /usr/pgsql-10/bin/postgresql-10-setup initdb
Initializing database ... OK

# systemctl enable postgresql-10
Created symlink from /etc/systemd/system/multi-user.target.wants/postgresql-10.service to /usr/lib/systemd/system/postgresql-10.service.
# systemctl start postgresql-10
至此 postgresql-10 完成,下面開始配置過程。
3.1.2 配置
配置 PostgreSQL 資料庫,並建立 Kong 相關的資料庫資訊,首先修改資料庫的可訪問配置:
# vim /var/lib/pgsql/10/data/postgresql.conf
將檔案中的對應配置項,改為下面的內容:
listen_addresses = '*'
再修改下面的檔案:
# vim /var/lib/pgsql/10/data/pg_hba.conf
同樣將檔案中的對應項,改成對應的配置:
host all all 127.0.0.1/32 trust
然後再重啟服務,命令如下:
# systemctl restart postgresql-10
服務重啟後,上面的配置應該會生效,下面建立相關的 Kong 相關的資料庫資訊:
# su - postgres
-bash-4.2$ psql
psql (10.6)
Type "help" for help.

postgres=# CREATE USER kong; CREATE DATABASE kong OWNER kong;
CREATE ROLE
CREATE DATABASE
postgres=# \q
-bash-4.2$ exit
logout
#
至此, postgresql-10 的安裝及配置完成, Kong 相關的資料庫資訊也完成錄入,可以用下面的命令簡單測試:
[[email protected] ~]# psql -h 127.0.0.1 -p 5432 -U kong -W kong
使用者 kong 的口令:
psql (10.6)
輸入 "help" 來獲取幫助資訊.

kong=>
如果配置成功,會與如上的輸出一致,接著進行 Kong Server 的安裝。
3.2 Kong Server 的安裝
首先通過下面的命令,獲取 Kong 的安裝包:
# wget https://bintray.com/kong/kong-community-edition-rpm/download_file?file_path=centos/7/kong-community-edition-1.0.0.el7.noarch.rpm -O kong-community-edition-1.0.0.el7.noarch.rpm
然後再通過下面的命令進行安裝:
# yum install kong-community-edition-1.0.0.el7.noarch.rpm
# export PATH=$PATH:/usr/local/bin/
# kong migrations up
# kong start
通過上面的命令,Kong 應該會被正常安裝成功,可以用下面的命令完成測試:
# curl -i http://localhost:8001/
HTTP/1.1 200 OK
Date: Mon, 24 Dec 2018 12:15:59 GMT
Content-Type: application/json; charset=utf-8
Connection: keep-alive
Access-Control-Allow-Origin: *
Server: kong/0.14.1
Content-Length: 5591

{"plugins":{"enabled_in_cluster":[],"available_on_server":{"response-transformer":true,"oauth2":true,"acl":true,"correlation-id":true,"pre-function":true,"jwt":true,"cors":true,"ip-restriction":true,"basic-auth":true,"key-auth":true,"rate-limiting":true,"request-transformer":true,"http-log":true,"file-log":true,"hmac-auth":true,"ldap-auth":true,"datadog":true,"tcp-log":true,"zipkin":true,"post-function":true,"request-size-limiting":true,"bot-detection":true,"syslog":true,"loggly":true,"azure-functions":true,"udp-log":true,"response-ratelimiting":true,"aws-lambda":true,"statsd":true,"prometheus":true,"request-termination":true}},"tagline":"Welcome to kong","configuration":{"plugins":["bundled"],"admin_ssl_enabled":true,"lua_ssl_verify_depth":1,"trusted_ips":{},"prefix":"\/usr\/local\/kong","loaded_plugins":{"response-transformer":true,"request-termination":true,"prometheus":true,"ip-restriction":true,"pre-function":true,"jwt":true,"cors":true,"statsd":true,"basic-auth":true,"key-auth":true,"ldap-auth":true,"aws-lambda":true,"http-log":true,"response-ratelimiting":true,"hmac-auth":true,"request-size-limiting":true,"datadog":true,"tcp-log":true,"zipkin":true,"post-function":true,"bot-detection":true,"acl":true,"loggly":true,"syslog":true,"azure-functions":true,"udp-log":true,"file-log":true,"request-transformer":true,"correlation-id":true,"rate-limiting":true,"oauth2":true},"cassandra_username":"kong","admin_ssl_cert_csr_default":"\/usr\/local\/kong\/ssl\/admin-kong-default.csr","ssl_cert_key":"\/usr\/local\/kong\/ssl\/kong-default.key","admin_ssl_cert_key":"\/usr\/local\/kong\/ssl\/admin-kong-default.key","dns_resolver":{},"pg_user":"kong","mem_cache_size":"128m","cassandra_data_centers":["dc1:2","dc2:3"],"nginx_admin_directives":{},"custom_plugins":{},"pg_host":"127.0.0.1","nginx_acc_logs":"\/usr\/local\/kong\/logs\/access.log","proxy_listen":["0.0.0.0:8000","0.0.0.0:8443 ssl"],"client_ssl_cert_default":"\/usr\/local\/kong\/ssl\/kong-default.crt","ssl_cert_key_default":"\/usr\/local\/kong\/ssl\/kong-default.key","dns_no_sync":false,"db_update_propagation":0,"nginx_err_logs":"\/usr\/local\/kong\/logs\/error.log","cassandra_port":9042,"dns_order":["LAST","SRV","A","CNAME"],"dns_error_ttl":1,"headers":["server_tokens","latency_tokens"],"dns_stale_ttl":4,"nginx_optimizations":true,"database":"postgres","pg_database":"kong","nginx_worker_processes":"auto","lua_package_cpath":"","admin_acc_logs":"\/usr\/local\/kong\/logs\/admin_access.log","lua_package_path":".\/?.lua;.\/?\/init.lua;","nginx_pid":"\/usr\/local\/kong\/pids\/nginx.pid","upstream_keepalive":60,"cassandra_contact_points":["127.0.0.1"],"client_ssl_cert_csr_default":"\/usr\/local\/kong\/ssl\/kong-default.csr","proxy_listeners":[{"ssl":false,"ip":"0.0.0.0","proxy_protocol":false,"port":8000,"http2":false,"listener":"0.0.0.0:8000"},{"ssl":true,"ip":"0.0.0.0","proxy_protocol":false,"port":8443,"http2":false,"listener":"0.0.0.0:8443 ssl"}],"proxy_ssl_enabled":true,"admin_access_log":"logs\/admin_access.log","ssl_ciphers":"ECDHE-ECDSA-AES256-GCM-SHA384:ECDHE-RSA-AES256-GCM-SHA384:ECDHE-ECDSA-CHACHA20-POLY1305:ECDHE-RSA-CHACHA20-POLY1305:ECDHE-ECDSA-AES128-GCM-SHA256:ECDHE-RSA-AES128-GCM-SHA256:ECDHE-ECDSA-AES256-SHA384:ECDHE-RSA-AES256-SHA384:ECDHE-ECDSA-AES128-SHA256:ECDHE-RSA-AES128-SHA256","enabled_headers":{"latency_tokens":true,"X-Kong-Proxy-Latency":true,"Via":true,"server_tokens":true,"Server":true,"X-Kong-Upstream-Latency":true,"X-Kong-Upstream-Status":false},"cassandra_ssl":false,"ssl_cert_csr_default":"\/usr\/local\/kong\/ssl\/kong-default.csr","db_resurrect_ttl":30,"client_max_body_size":"0","cassandra_consistency":"ONE","db_cache_ttl":0,"admin_error_log":"logs\/error.log","pg_ssl_verify":false,"dns_not_found_ttl":30,"pg_ssl":false,"client_ssl":false,"db_update_frequency":5,"cassandra_repl_strategy":"SimpleStrategy","nginx_kong_conf":"\/usr\/local\/kong\/nginx-kong.conf","cassandra_repl_factor":1,"nginx_http_directives":[{"value":"prometheus_metrics 5m","name":"lua_shared_dict"}],"error_default_type":"text\/plain","kong_env":"\/usr\/local\/kong\/.kong_env","real_ip_header":"X-Real-IP","dns_hostsfile":"\/etc\/hosts","admin_listeners":[{"ssl":false,"ip":"127.0.0.1","proxy_protocol":false,"port":8001,"http2":false,"listener":"127.0.0.1:8001"},{"ssl":true,"ip":"127.0.0.1","proxy_protocol":false,"port":8444,"http2":false,"listener":"127.0.0.1:8444 ssl"}],"admin_ssl_cert":"\/usr\/local\/kong\/ssl\/admin-kong-default.crt","ssl_cert":"\/usr\/local\/kong\/ssl\/kong-default.crt","proxy_access_log":"logs\/access.log","admin_ssl_cert_key_default":"\/usr\/local\/kong\/ssl\/admin-kong-default.key","cassandra_ssl_verify":false,"cassandra_lb_policy":"RoundRobin","ssl_cipher_suite":"modern","real_ip_recursive":"off","proxy_error_log":"logs\/error.log","client_ssl_cert_key_default":"\/usr\/local\/kong\/ssl\/kong-default.key","nginx_daemon":"on","anonymous_reports":true,"cassandra_timeout":5000,"nginx_proxy_directives":{},"pg_port":5432,"log_level":"notice","client_body_buffer_size":"8k","cassandra_schema_consensus_timeout":10000,"lua_socket_pool_size":30,"admin_ssl_cert_default":"\/usr\/local\/kong\/ssl\/admin-kong-default.crt","cassandra_keyspace":"kong","ssl_cert_default":"\/usr\/local\/kong\/ssl\/kong-default.crt","nginx_conf":"\/usr\/local\/kong\/nginx.conf","admin_listen":["127.0.0.1:8001","127.0.0.1:8444 ssl"]},"version":"0.14.1","node_id":"df033a39-c624-493d-b4d1-5bc1e0b7fa92","lua_version":"LuaJIT 2.1.0-beta3","prng_seeds":{"pid: 2160":135374124217,"pid: 2159":163100902462},"timers":{"pending":5,"running":0},"hostname":"10-254-108-83"}
至此,Kong 安裝完成。下面安裝 Kong Dashboard 。
3.3 Kong Dashboard 的安裝
Kong Dashboard,可方便對 Kong 進行配置。 安裝過程如下:
# curl --silent --location https://rpm.nodesource.com/setup_10.x | sudo bash -
...
...
     sudo yum install yarn

# yum install -y nodejs
已載入外掛:fastestmirror
...
...
完畢!
# npm install -g kong-dashboard
/usr/bin/kong-dashboard -> /usr/lib/node_modules/kong-dashboard/bin/kong-dashboard.js
+ [email protected]
added 186 packages from 115 contributors in 32.932s

# kong-dashboard start --kong-url http://127.0.0.1:8001
Connecting to Kong on http://127.0.0.1:8001 ...
Connected to Kong on http://127.0.0.1:8001.
Kong version is 0.14.1
Starting Kong Dashboard on port 8080
Kong Dashboard has started on port 8080
從上面的資訊中,可看出 Kong Dashboard 在 8080 埠上提供服務,可以在瀏覽器中,通過 IP:8080 的方式訪問。
但是在訪問前,由於滴滴雲預設的安全組配置是不開啟 8080 埠的,因此,需要先到滴滴雲的控制檯對應的 DC2 雲伺服器上,新增對 8080 埠訪問兩條安全組的規則。
滴滴雲預設為每個雲伺服器綁定了一個 default 的安全組,因此這裡選擇直接在此安全組上編輯,效果如下:
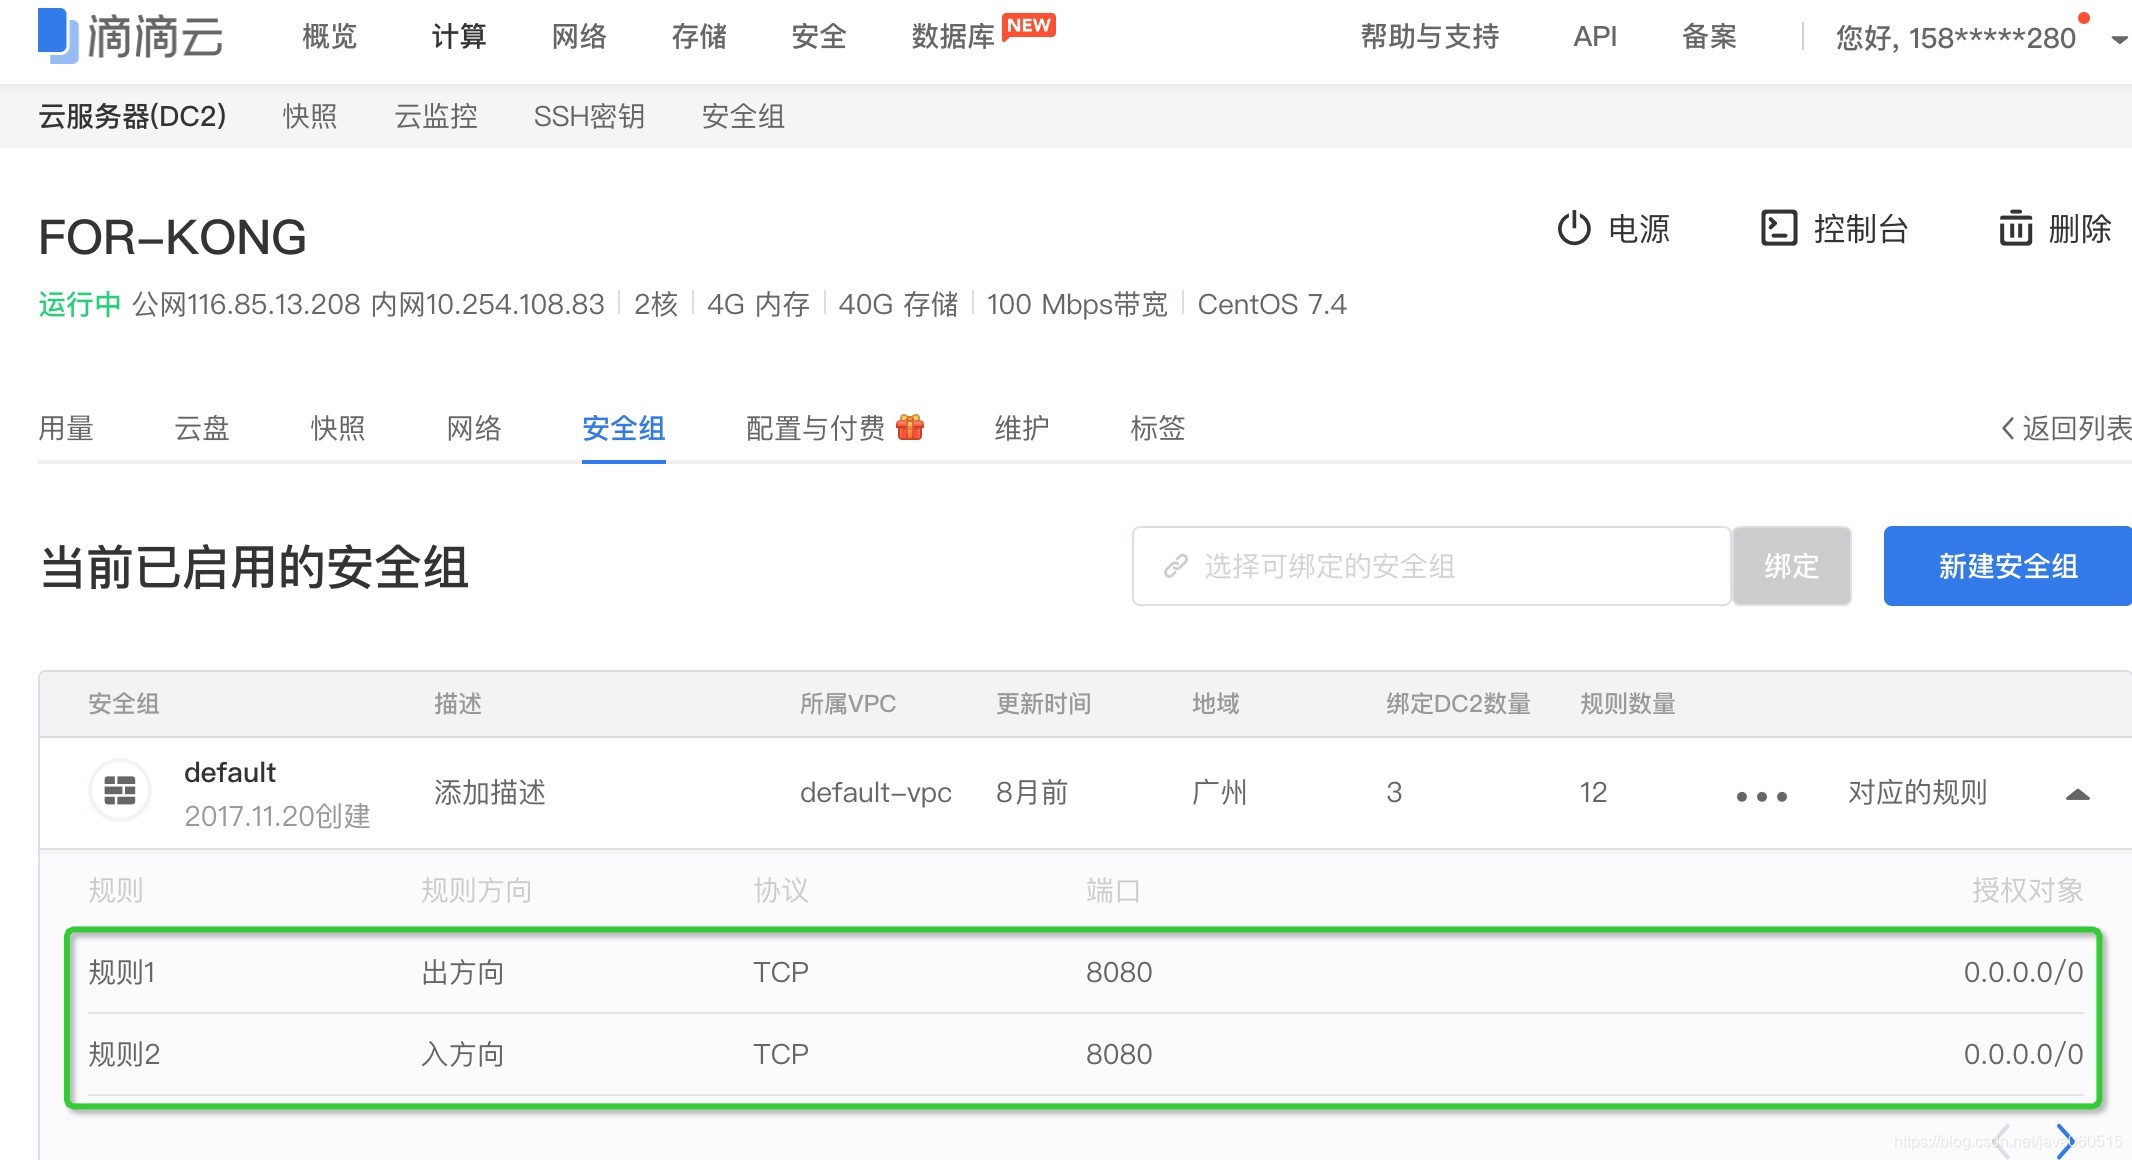
新增上面的安全組配置後,既可以在瀏覽器中開啟 IP:8080 訪問 Kong Dashboard,效果如下:
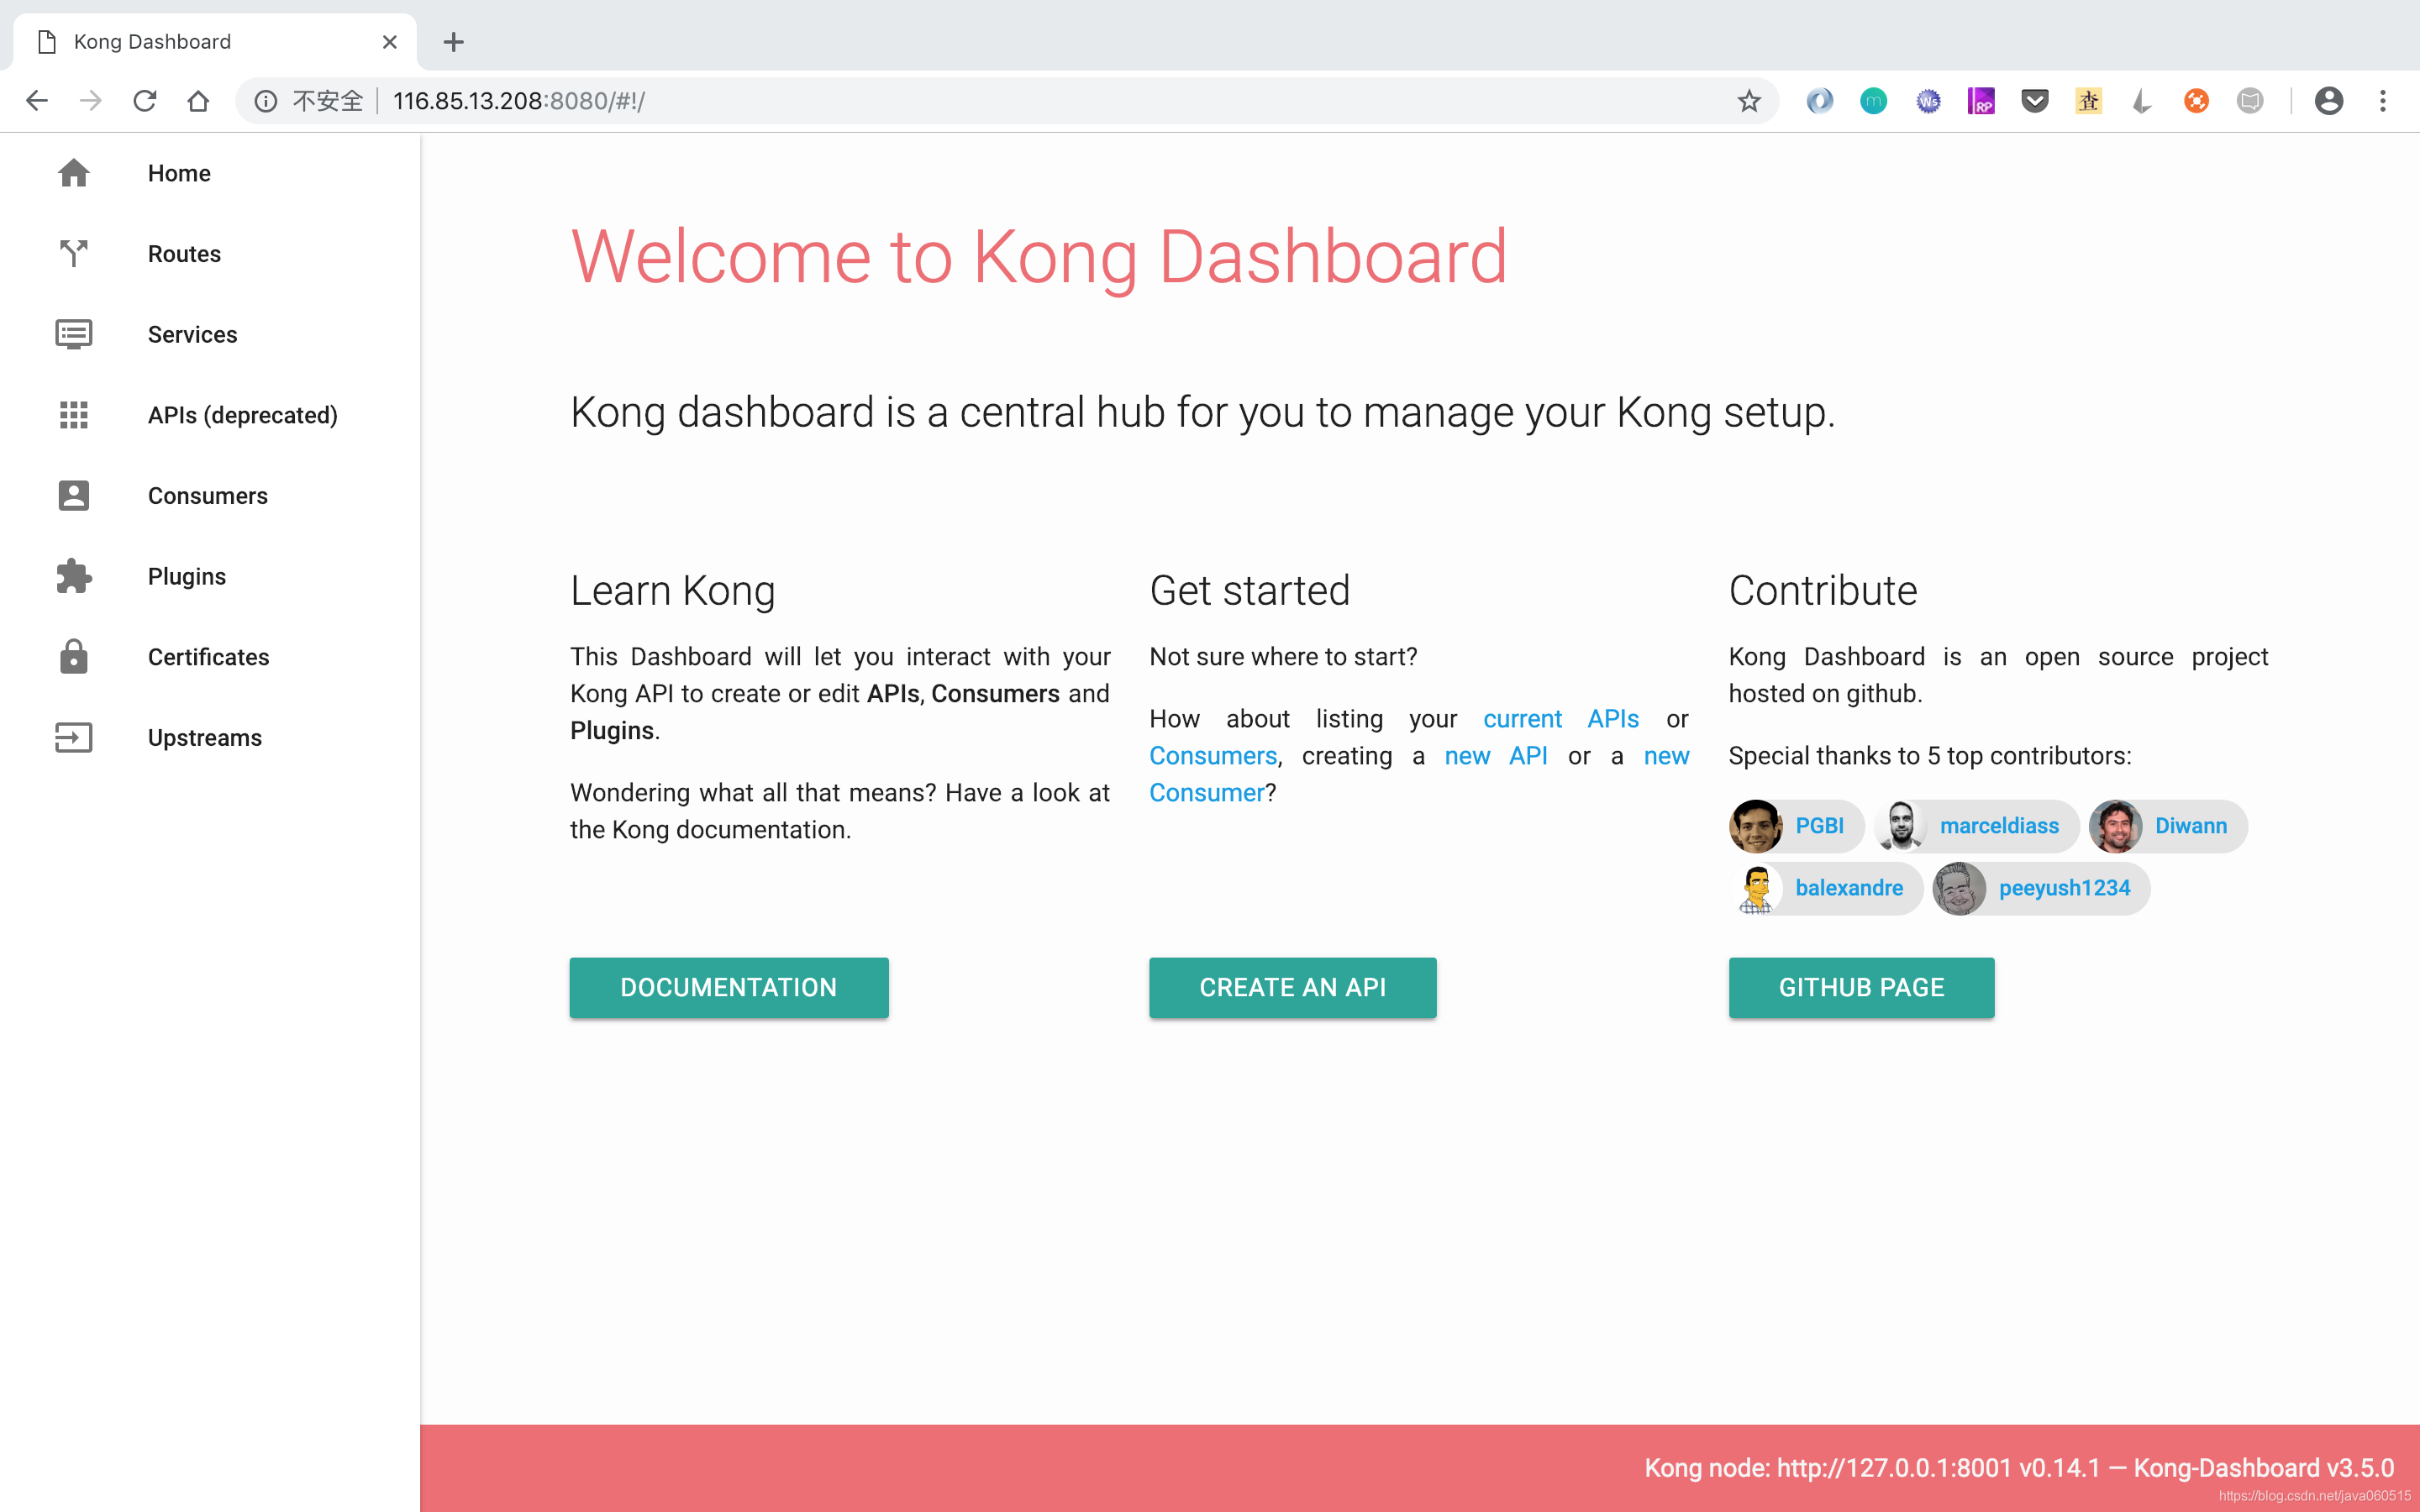
Kong Dashboard 可完成 Servies,Routes 的管理,功能就不具體介紹,推薦按教程,安成搭建,再自己體驗。
到此,整個安裝過程完成。