
[Alibaba-ARouter] 簡單好用的Android頁面路由框架
轉自:https://www.jianshu.com/p/7cb2cc9b726a?from=groupmessage
開發一款App,總會遇到各種各樣的需求和業務,這時候選擇一個簡單好用的輪子,就可以事半功倍
前言
        Intent intent = new Intent(mContext, XxxActivity.class);
        intent.putExtra("key","value");
        startActivity(intent);

        Intent intent = new Intent(mContext, XxxActivity.class);
        intent.putExtra("key","value");
        startActivityForResult(intent, 666);
上面一段程式碼,在Android開發中,最常見也是最常用的功能就是頁面的跳轉,我們經常需要面對從瀏覽器或者其他App跳轉到自己App中頁面的需求,不過就算是簡簡單單的頁面跳轉,隨著時間的推移,也會遇到一些問題:
- 集中式的URL管理:談到集中式的管理,總是比較蛋疼,多人協同開發的時候,大家都去
AndroidManifest.xml中定義各種IntentFilter,使用隱式Intent,最終發現AndroidManifest.xml中充斥著各種Schame,各種Path,需要經常解決Path重疊覆蓋、過多的Activity被匯出,引發安全風險等問題 - 可配置性較差:Manifest限制於xml格式,書寫麻煩,配置複雜,可以自定義的東西也較少
- 跳轉過程中無法插手:直接通過Intent的方式跳轉,跳轉過程開發者無法干預,一些面向切面的事情難以實施,比方說登入、埋點這種非常通用的邏輯,在每個子頁面中判斷又很不合理,畢竟activity已經例項化了
- 跨模組無法顯式依賴:在App小有規模的時候,我們會對App做水平拆分,按照業務拆分成多個子模組,之間完全解耦,通過打包流程控制App功能,這樣方便應對大團隊多人協作,互相邏輯不干擾,這時候只能依賴隱式Intent跳轉,書寫麻煩,成功與否難以控制。
另一個輪子
為了解決以上問題,我們需要一款能夠解耦、簡單、功能多、定製性較強、支援攔截邏輯的路由元件:我們選擇了Alibaba的ARouter,偷個懶,直接貼ARouter的中文介紹文件:
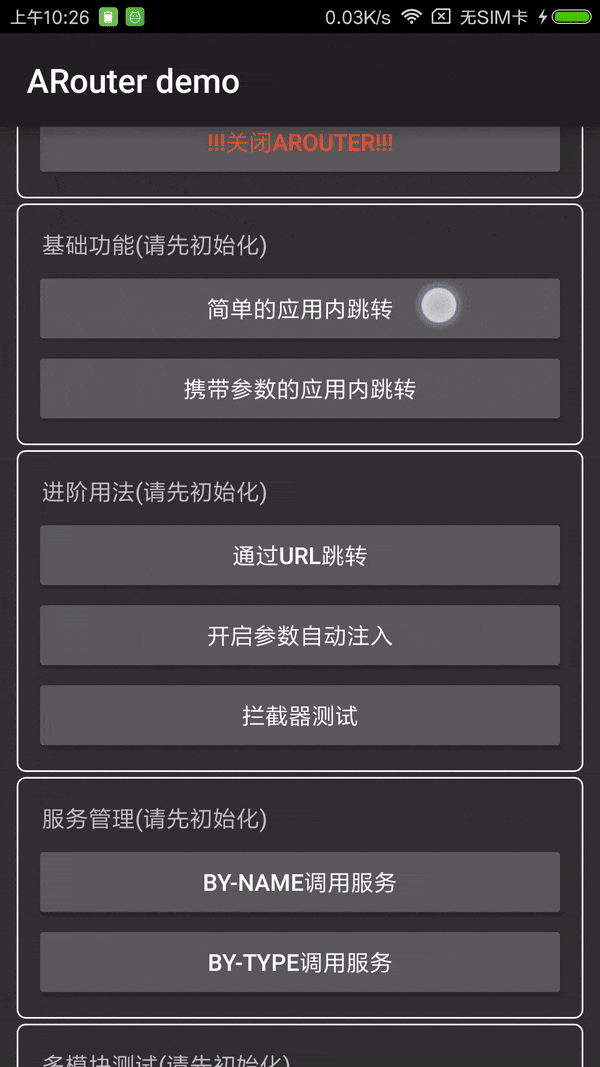
Demo gif
一、功能介紹
- 支援直接解析URL進行跳轉、引數按型別解析到Bundle,支援Java基本型別(*)
- 支援應用內的標準頁面跳轉,API接近Android原生介面
- 支援多模組工程中使用,允許分別打包,包結構符合Android包規範即可(*)
- 支援跳轉過程中插入自定義攔截邏輯,自定義攔截順序(*)
- 支援服務託管,通過ByName,ByType兩種方式獲取服務例項,方便麵向介面開發與跨模組呼叫解耦(*)
- 對映關係按組分類、多級管理,按需初始化,減少記憶體佔用提高查詢效率(*)
- 支援使用者指定全域性降級策略
- 支援獲取單次跳轉結果
- 豐富的API和可定製性
- 被ARouter管理的頁面、攔截器、服務均無需主動註冊到ARouter,被動發現
- 支援Android N推出的Jack編譯鏈
二、不支援的功能
- 自定義URL解析規則(考慮支援)
- 不能動態載入程式碼模組和新增路由規則(考慮支援)
- 多路徑支援(不想支援,貌似是導致各種混亂的起因)
- 生成對映關係文件(考慮支援)
三、典型應用場景
- 從外部URL對映到內部頁面,以及引數傳遞與解析
- 跨模組頁面跳轉,模組間解耦
- 攔截跳轉過程,處理登陸、埋點等邏輯
- 跨模組API呼叫,模組間解耦(註冊ARouter服務的形式,通過介面互相呼叫)
四、基礎功能
-
新增依賴和配置
apply plugin: 'com.neenbedankt.android-apt'
buildscript { repositories { jcenter() } dependencies { classpath 'com.neenbedankt.gradle.plugins:android-apt:1.4' } } apt { arguments { moduleName project.getName(); } } dependencies { apt 'com.alibaba:arouter-compiler:x.x.x' compile 'com.alibaba:arouter-api:x.x.x' ... } -
添加註解
// 在支援路由的頁面、服務上添加註解(必選) // 這是最小化配置,後面有詳細配置 @Route(path = "/test/1") public class YourActivity extend Activity { ... } -
初始化SDK
ARouter.init(mApplication); // 儘可能早,推薦在Application中初始化 -
發起路由操作
// 1. 應用內簡單的跳轉(通過URL跳轉在'中階使用'中)
ARouter.getInstance().build("/test/1").navigation();// 2. 跳轉並攜帶引數 ARouter.getInstance().build("/test/1") .withLong("key1", 666L) .withString("key3", "888") .navigation(); -
新增混淆規則(如果使用了Proguard)
-keep public class com.alibaba.android.arouter.routes.**{*;}
五、進階用法
-
通過URL跳轉
// 新建一個Activity用於監聽Schame事件 // 監聽到Schame事件之後直接傳遞給ARouter即可 // 也可以做一些自定義玩法,比方說改改URL之類的 // http://www.example.com/test/1 public class SchameFilterActivity extends Activity { @Override protected void onCreate(Bundle savedInstanceState) { super.onCreate(savedInstanceState); // 外面使用者點選的URL Uri uri = getIntent().getData(); // 直接傳遞給ARouter即可 ARouter.getInstance().build(uri).navigation(); finish(); } } // AndroidManifest.xml 中 的參考配置 <activity android:name=".activity.SchameFilterActivity"> <!-- Schame --> <intent-filter> <data android:host="m.aliyun.com" android:scheme="arouter"/> <action android:name="android.intent.action.VIEW"/> <category android:name="android.intent.category.DEFAULT"/> <category android:name="android.intent.category.BROWSABLE"/> </intent-filter> <!-- App Links --> <intent-filter android:autoVerify="true"> <action android:name="android.intent.action.VIEW"/> <category android:name="android.intent.category.DEFAULT"/> <category android:name="android.intent.category.BROWSABLE"/> <data android:host="m.aliyun.com" android:scheme="http"/> <data android:host="m.aliyun.com" android:scheme="https"/> </intent-filter> </activity> -
使用ARouter協助解析引數型別
// URL中的引數會預設以String的形式儲存在Bundle中 // 如果希望ARouter協助解析引數(按照不同型別儲存進Bundle中) // 只需要在需要解析的引數上新增 @Param 註解 @Route(path = "/test/1") public class Test1Activity extends Activity { @Param // 宣告之後,ARouter會從URL中解析對應名字的引數,並按照型別存入Bundle public String name; @Param private int age; @Param(name = "girl") // 可以通過name來對映URL中的不同引數 private boolean boy; @Override protected void onCreate(Bundle savedInstanceState) { super.onCreate(savedInstanceState); name = getIntent().getStringExtra("name"); age = getIntent().getIntExtra("age", -1); boy = getIntent().getBooleanExtra("girl", false); // 注意:使用對映之後,要從Girl中獲取,而不是boy } } -
開啟ARouter引數自動注入(實驗性功能,不建議使用,正在開發保護策略)
// 首先在Application中重寫 attachBaseContext方法,並加入ARouter.attachBaseContext(); @Override protected void attachBaseContext(Context base) { super.attachBaseContext(base); ARouter.attachBaseContext(); } // 設定ARouter的時候,開啟自動注入 ARouter.enableAutoInject(); // 至此,Activity中的屬性,將會由ARouter自動注入,無需 getIntent().getStringExtra("xxx")等等 -
宣告攔截器(攔截跳轉過程,面向切面搞事情)
// 比較經典的應用就是在跳轉過程中處理登陸事件,這樣就不需要在目標頁重複做登陸檢查 // 攔截器會在跳轉之間執行,多個攔截器會按優先順序順序依次執行 @Interceptor(priority = 666, name = "測試用攔截器") public class TestInterceptor implements IInterceptor { /** * The operation of this interceptor. * * @param postcard meta * @param callback cb */ @Override public void process(Postcard postcard, InterceptorCallback callback) { ... callback.onContinue(postcard); // 處理完成,交還控制權 // callback.onInterrupt(new RuntimeException("我覺得有點異常")); // 覺得有問題,中斷路由流程 // 以上兩種至少需要呼叫其中一種,否則會超時跳過 } /** * Do your init work in this method, it well be call when processor has been load. * * @param context ctx */ @Override public void init(Context context) { } } -
處理跳轉結果
// 通過兩個引數的navigation方法,可以獲取單次跳轉的結果 ARouter.getInstance().build("/test/1").navigation(this, new NavigationCallback() { @Override public void onFound(Postcard postcard) { ... } @Override public void onLost(Postcard postcard) { ... } }); -
自定義全域性降級策略
// 實現DegradeService介面,並加上一個Path內容任意的註解即可 @Route(path = "/xxx/xxx") // 必須標明註解 public class DegradeServiceImpl implements DegradeService { /** * Router has lost. * * @param postcard meta */ @Override public void onLost(Context context, Postcard postcard) { // do something. } /** * Do your init work in this method, it well be call when processor has been load. * * @param context ctx */ @Override public void init(Context context) { } } -
為目標頁面宣告更多資訊
// 我們經常需要在目標頁面中配置一些屬性,比方說"是否需要登陸"之類的 // 可以通過 Route 註解中的 extras 屬性進行擴充套件,這個屬性是一個 int值,換句話說,單個int有4位元組,也就是32位,可以配置32個開關 // 剩下的可以自行發揮,通過位元組操作可以標識32個開關 @Route(path = "/test/1", extras = Consts.XXXX) -
使用ARouter管理服務(一) 暴露服務
/** * 宣告介面 */ public interface IService extends IProvider { String hello(String name); } /** * 實現介面 */ @Route(path = "/service/1", name = "測試服務") public class ServiceImpl implements IService { @Override public String hello(String name) { return "hello, " + name; } /** * Do your init work in this method, it well be call when processor has been load. * * @param context ctx */ @Override public void init(Context context) { } } -
使用ARouter管理服務(二) 發現服務
1. 可以通過兩種API來獲取Service,分別是ByName、ByType IService service = ARouter.getInstance().navigation(IService.class); // ByType IService service = (IService) ARouter.getInstance().build("/service/1").navigation(); // ByName service.hello("zz"); 2. 注意:推薦使用ByName方式獲取Service,ByType這種方式寫起來比較方便,但如果存在多實現的情況時,SDK不保證能獲取到你想要的實現 -
使用ARouter管理服務(三) 管理依賴
    可以通過ARouter service包裝您的業務邏輯或者sdk,在service的init方法中初始化您的sdk,不同的sdk使用ARouter的service進行呼叫,
每一個service在第一次使用的時候會被初始化,即呼叫init方法。
    這樣就可以告別各種亂七八糟的依賴關係的梳理,只要能呼叫到這個service,那麼這個service中所包含的sdk等就已經被初始化過了,完全不需要
關心各個sdk的初始化順序。
六、更多功能
-
初始化中的其他設定
ARouter.openLog(); // 開啟日誌 ARouter.printStackTrace(); // 列印日誌的時候列印執行緒堆疊 -
詳細的API說明
 // 構建標準的路由請求
 ARouter.getInstance().build("/home/main").navigation();

 // 構建標準的路由請求,並指定分組
 ARouter.getInstance().build("/home/main", "ap").navigation();

 // 構建標準的路由請求,通過Uri直接解析
 Uri uri;
 ARouter.getInstance().build(uri).navigation();

 // 構建標準的路由請求,startActivityForResult
 // navigation的第一個引數必須是Activity,第二個引數則是RequestCode
 ARouter.getInstance().build("/home/main", "ap").navigation(this, 5);

 // 直接傳遞Bundle
 Bundle params = new Bundle();
 ARouter.getInstance()
             .build("/home/main")
             .with(params)
             .navigation();

 // 指定Flag
 ARouter.getInstance()
             .build("/home/main")
             .withFlags();
             .navigation();

 // 覺得介面不夠多,可以直接拿出Bundle賦值
 ARouter.getInstance()
             .build("/home/main")
             .getExtra();

 // 使用綠色通道(跳過所有的攔截器)
 ARouter.getInstance().build("/home/main").greenChannal().navigation();
附錄
-
最新版本
arouter-annotation : 1.0.0
arouter-compiler : 1.0.1
arouter-api : 1.0.2 -
Gradle依賴
dependencies {
    apt 'com.alibaba:arouter-compiler:1.0.1'
    compile 'com.alibaba:arouter-api:1.0.2'
}
作者:Yaezakura
連結:https://www.jianshu.com/p/7cb2cc9b726a
來源:簡書
簡書著作權歸作者所有,任何形式的轉載都請聯絡作者獲得授權並註明出處。