Datastage9.1 Linux環境安裝配置文件
Datastage9.1安裝配置文件
1.系統需求
The following packages are required to install and operate Version 9.1 on 64-bit SUSE Linux Enterprise Server 11.
1. audit-libs-1.7.7-5.16-x86_64
2. expat-2.0.1-88.26.1-x86_64
3. glibc-2.9-13.3.1-x86_64
4. glibc-32bit-2.9-13.3.1-x86_64
5. libaio-0.3.104-140.22-x86_64
6. libgcc43-4.3.3_20081022-11.18-x86_64
7. libstdc++43-devel-4.3.3_20081022-11.18-x86_64
8. libstdc++43-4.3.3_20081022-11.18-x86_64
9. pam-1.0.2-20.1-x86_64
10. xorg-x11-7.4-9.18.1-x86_64
2. 安裝步驟
2.1安裝檔案說明
1)安裝檔案
is-suite.is_91.linux64.RC3_2.121205.part1.tar.gz
is-suite.is_91.linux64.RC3_2.121205.part2.tar.gz
分步解壓,先解壓gz,再解壓tar
gzip –d is-suite.is_91.linux64.RC3_2.121205.part1.tar.gz
tar –xvf /bbs.tar.zip
直接解壓, 解壓到當前路徑
tar -zxvf is-suite.is_91.linux64.RC3_2.121205.part1.tar.gz
tar -zxvf is-suite.is_91.linux64.RC3_2.121205.part2.tar.gz 2)許可檔案
Bundle.suite.full.zip,解壓到與安裝檔案同一目錄下
unzip Bundle.suite.full.zip -d /tmp/is_suite/
2.2安裝步驟說明
1) 建立組、使用者
groupadd dba
useradd –G dba –m datastage
passwd datastage
2) 修改核心引數
編輯檔案:/etc/sysctl.conf,新增一行
kernel.sem = 250 128000 32 1024
檢視:
vi /etc/sysctl.conf 儲存後
sysctl -p使修改生效。 3) 關閉防火牆
即時生效,重啟後復原:
service iptables stop 永久性生效,重啟後不會復原:
chkconfig iptables off 4) 關閉SELinux
編輯檔案:/etc/selinux/config
This file controls the state of SELinux on the system.

 SELINUX= can take one of these three values:

 enforcing - SELinux security policy is enforced.

 permissive - SELinux prints warnings instead of enforcing.

 disabled - No SELinux policy is loaded.

SELINUX=enforcing

SELINUX=disabled

 SELINUXTYPE= can take one of these two values:

 targeted - Targeted processes are protected,

 mls - Multi Level Security protection.

 SELINUXTYPE=targeted
5) 啟動安裝嚮導
執行setup.exe
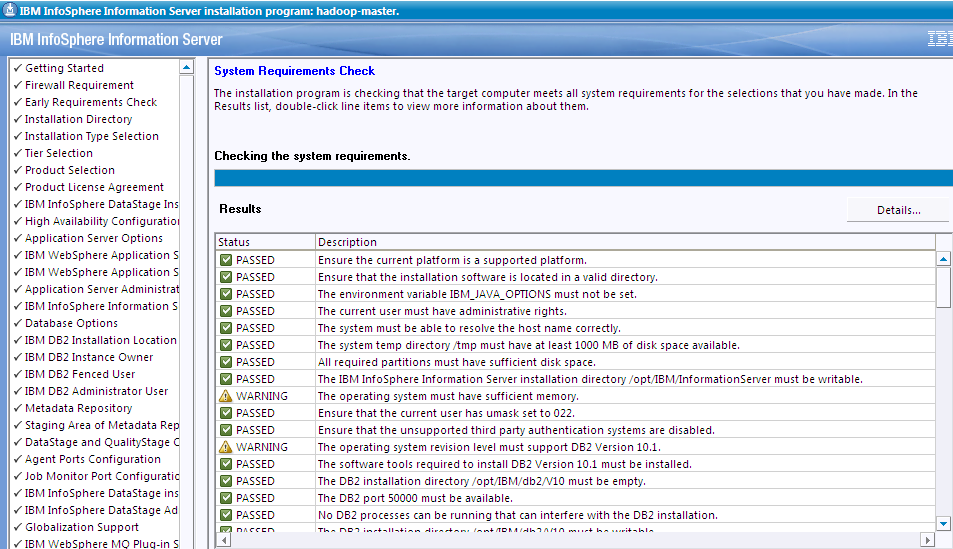
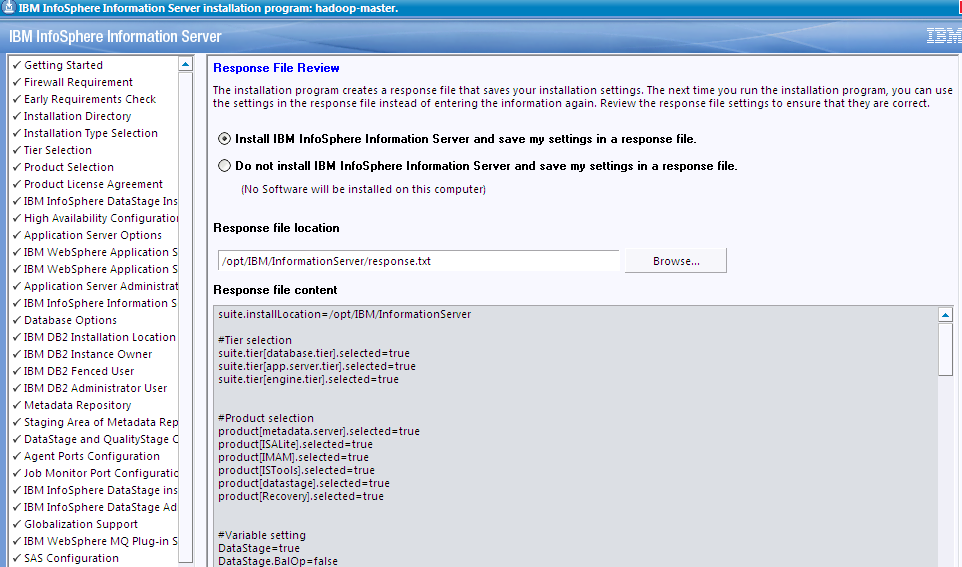
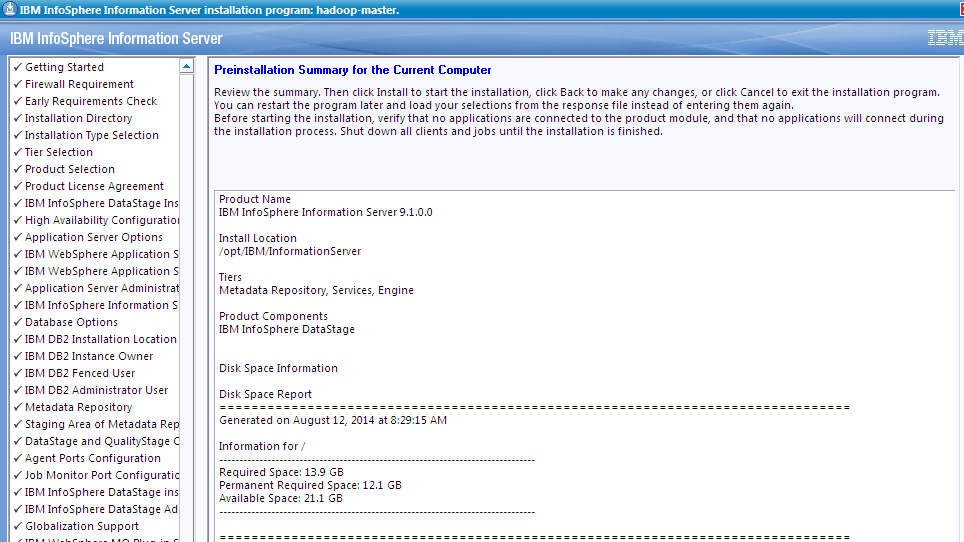
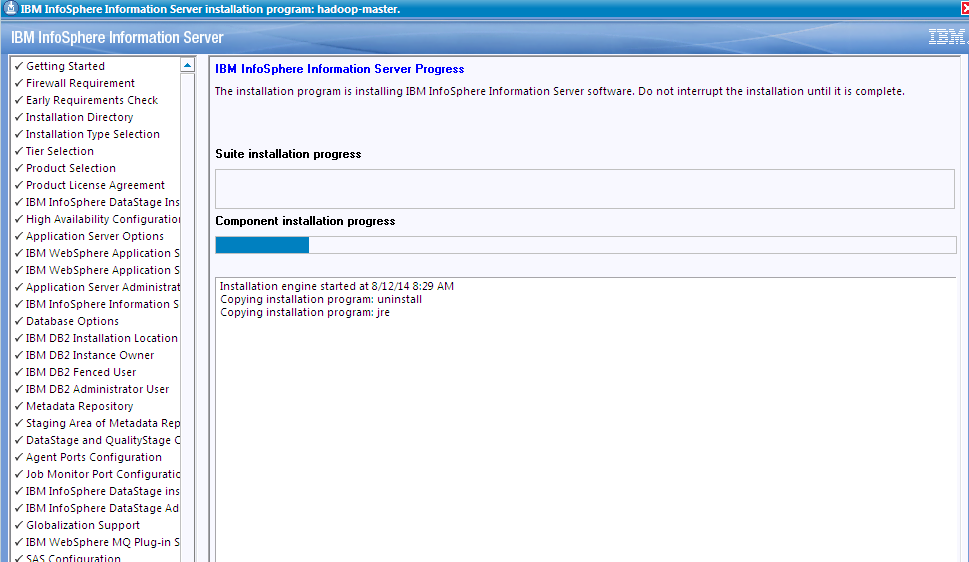
2.3安裝過程
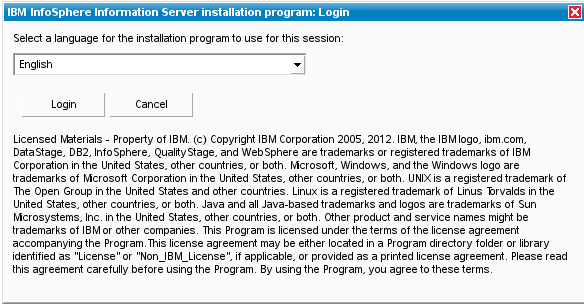
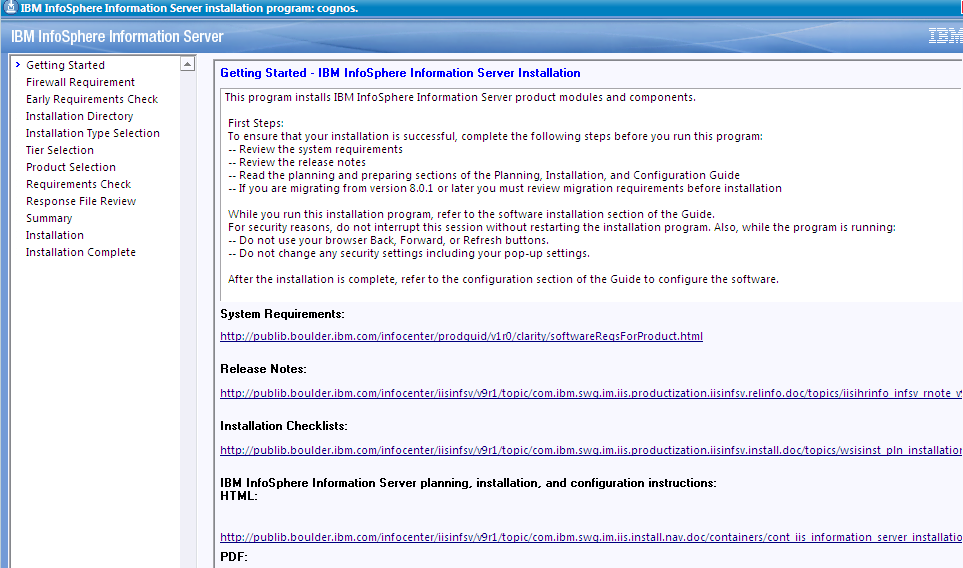
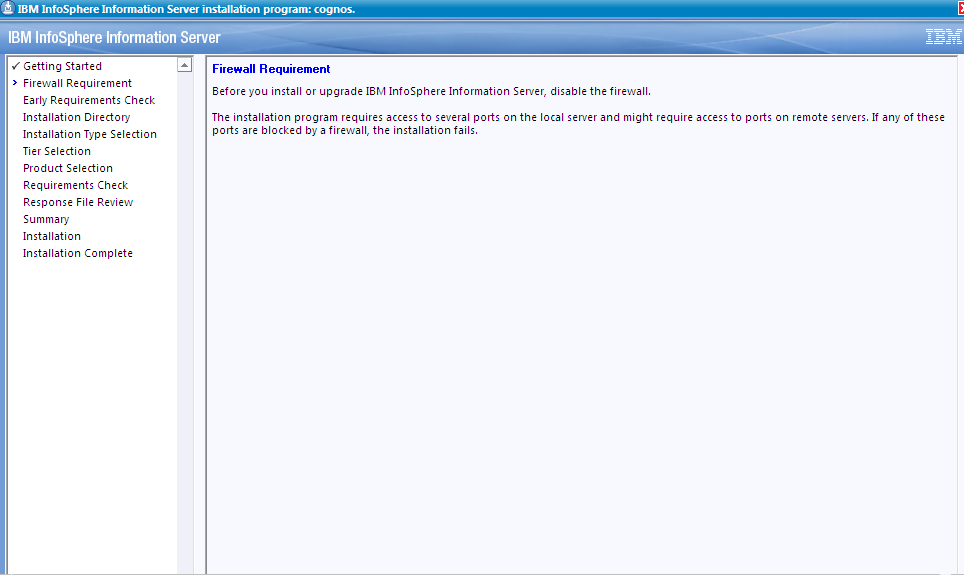
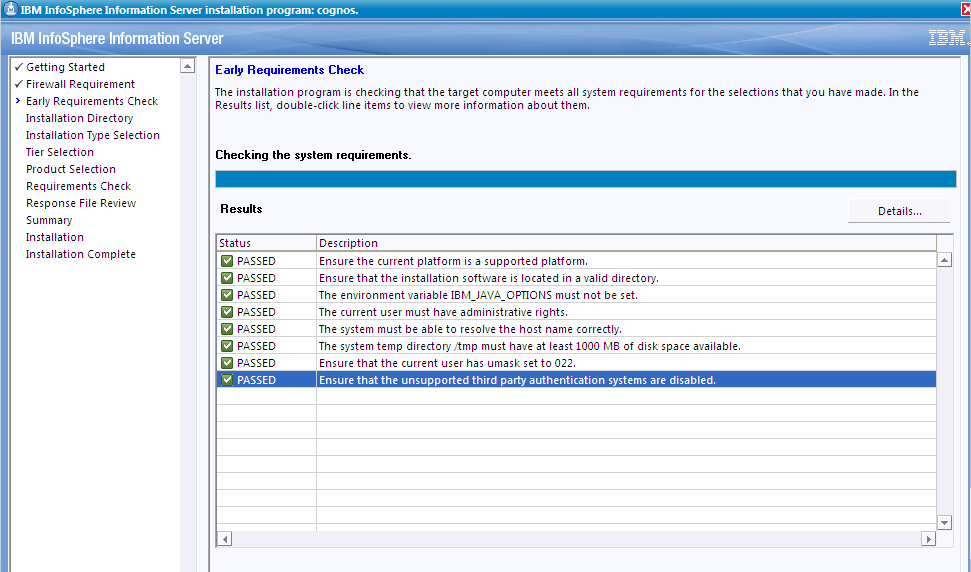
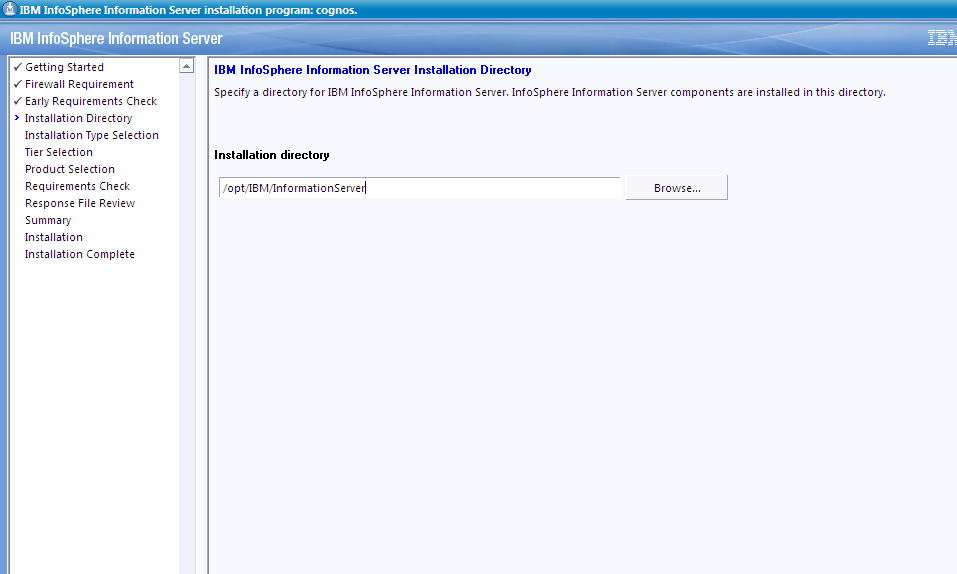
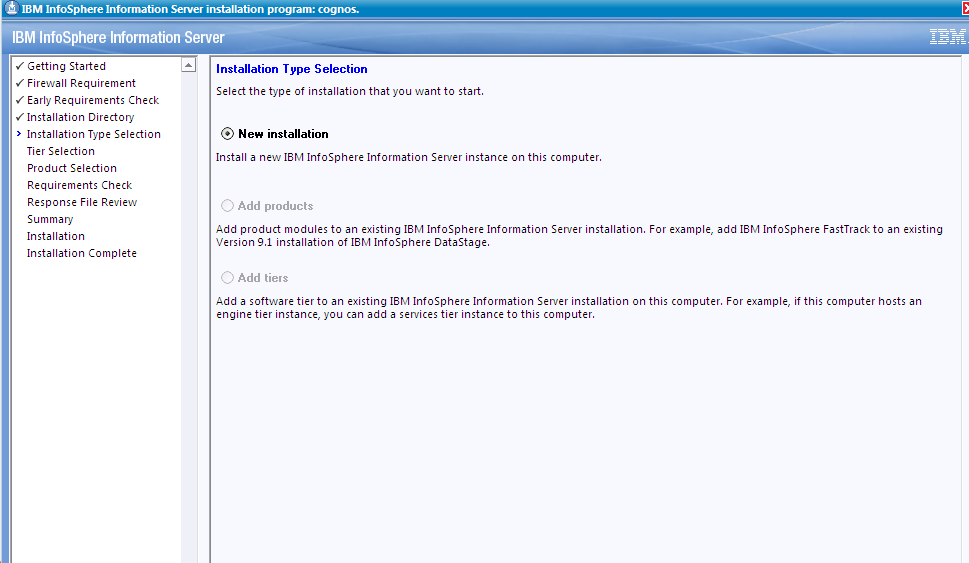
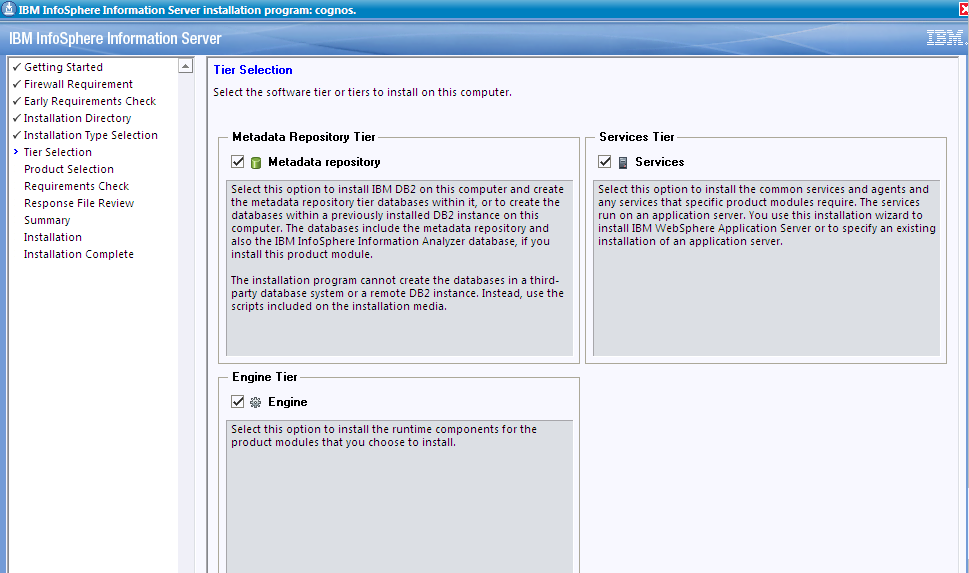
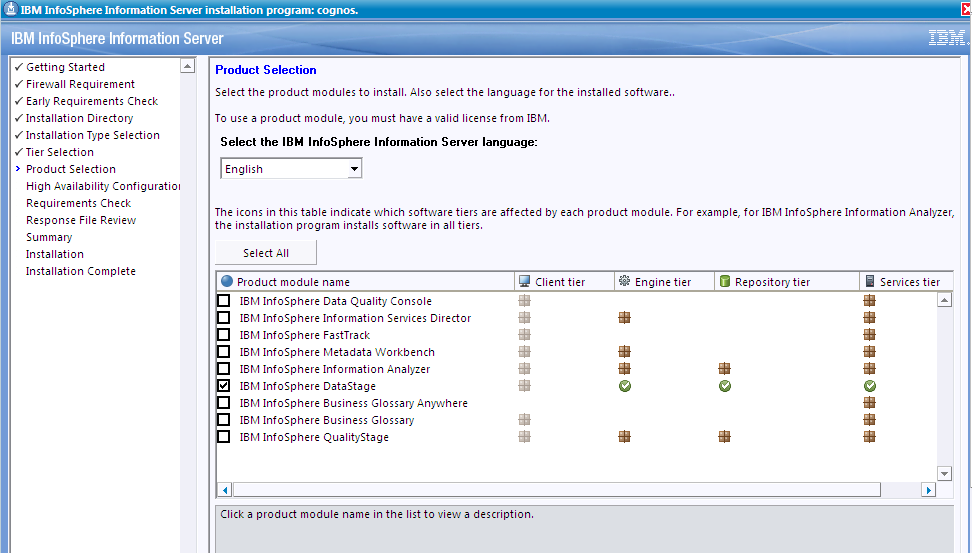
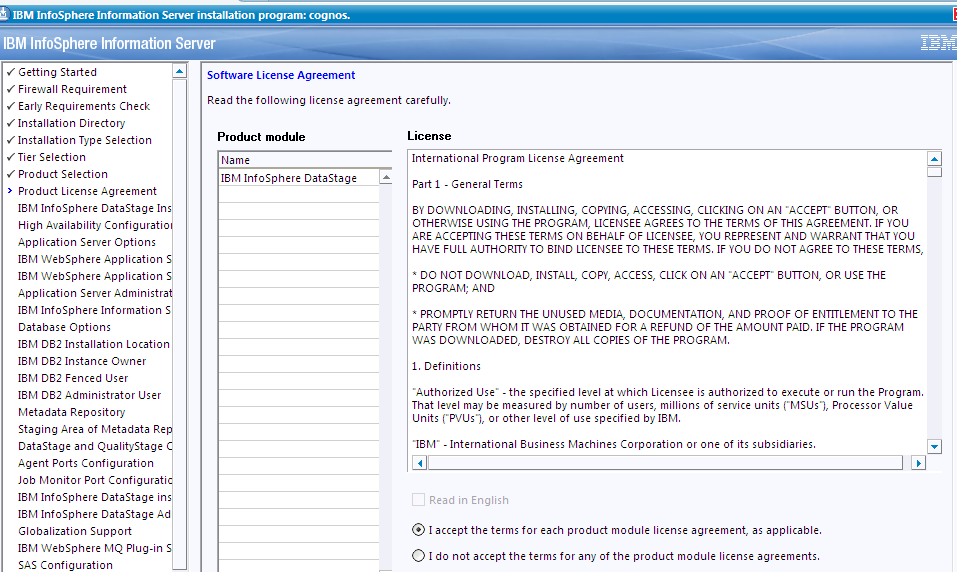
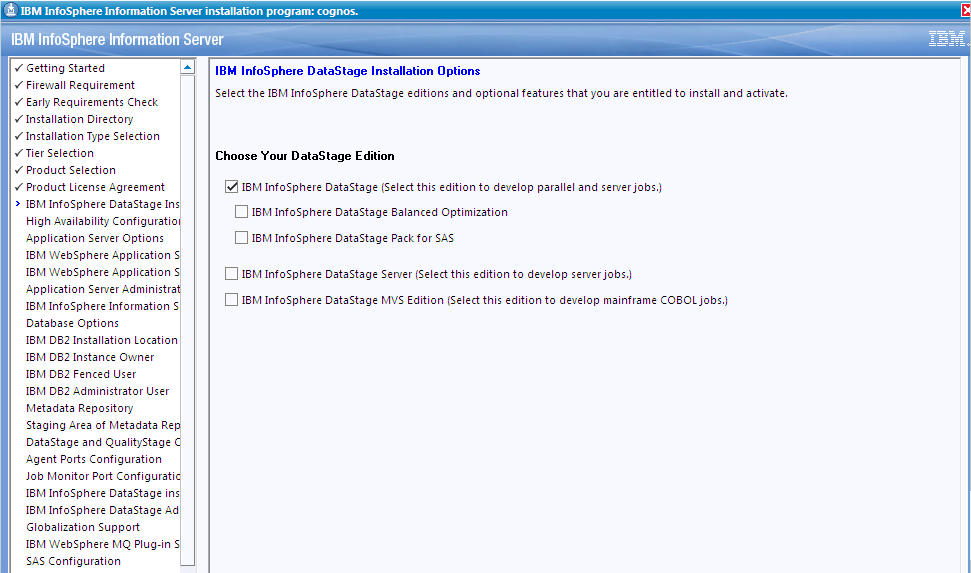
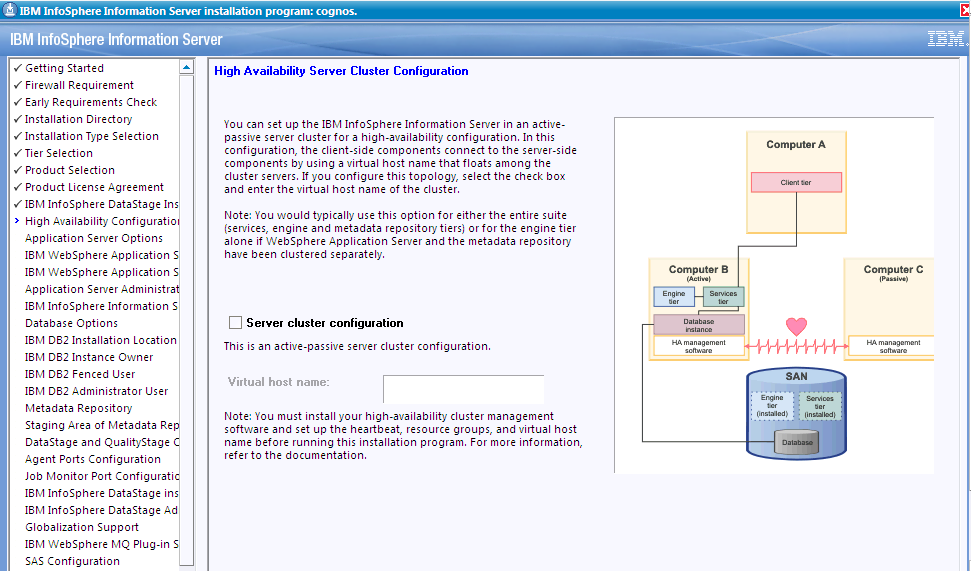
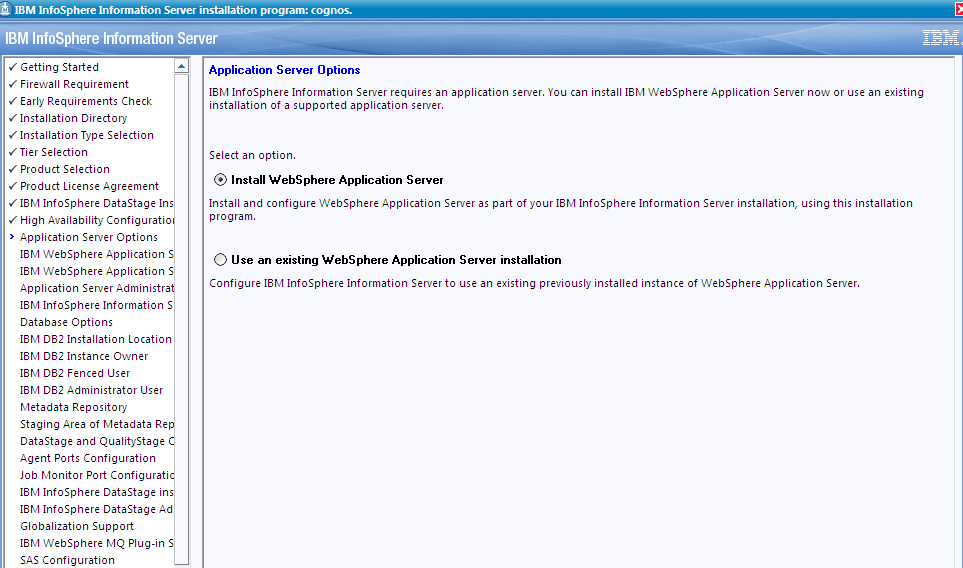
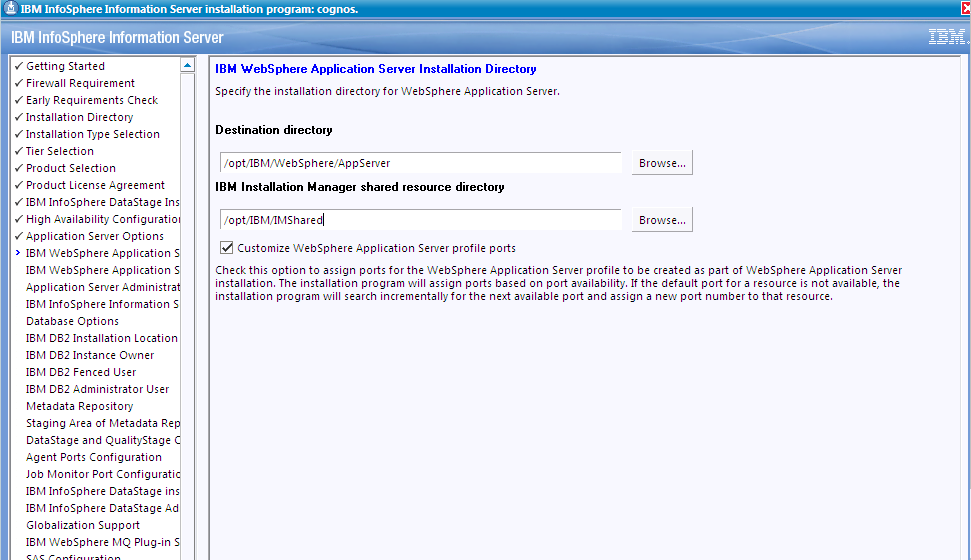
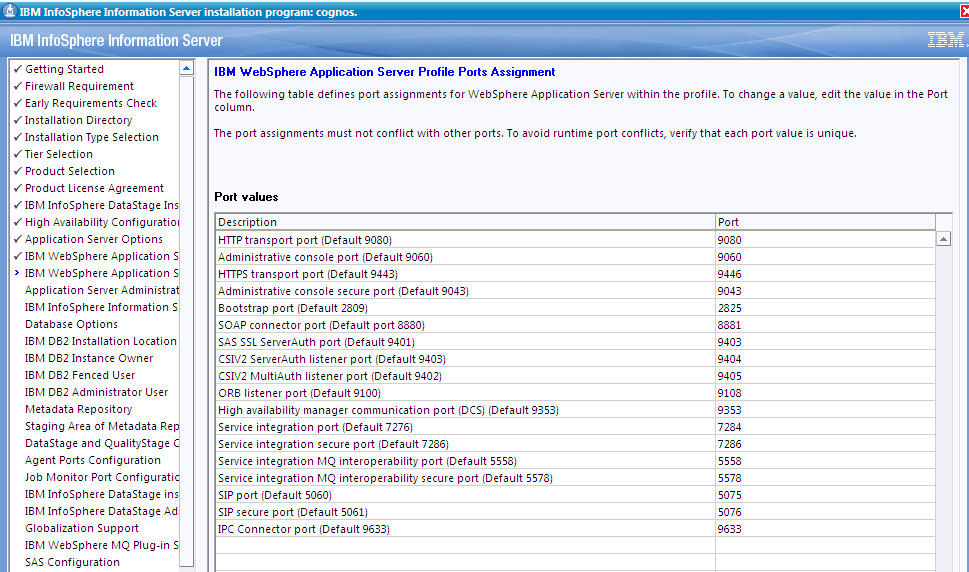
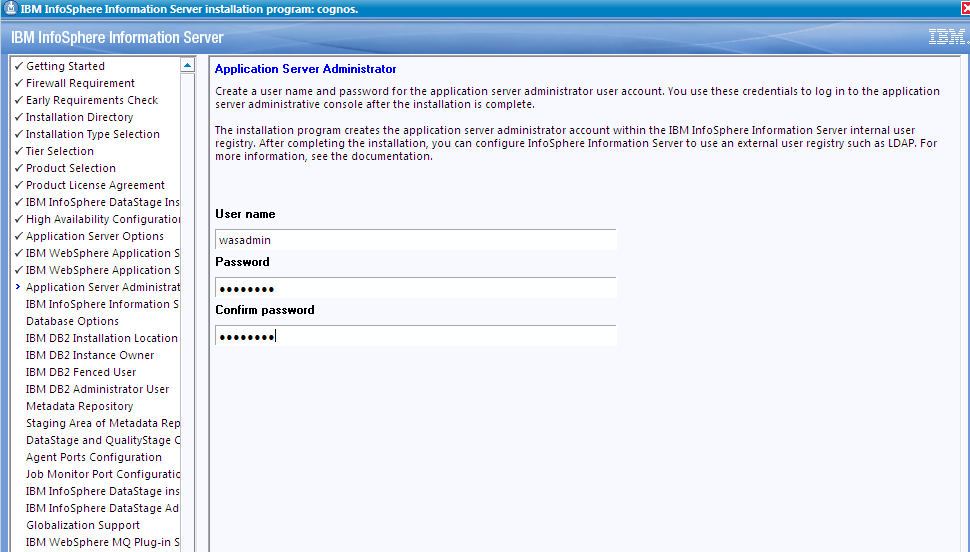
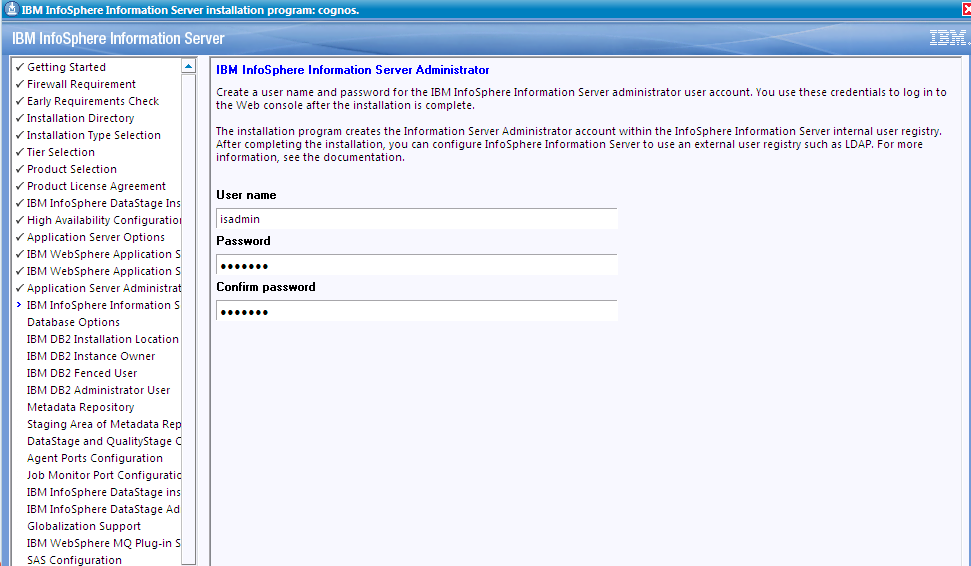
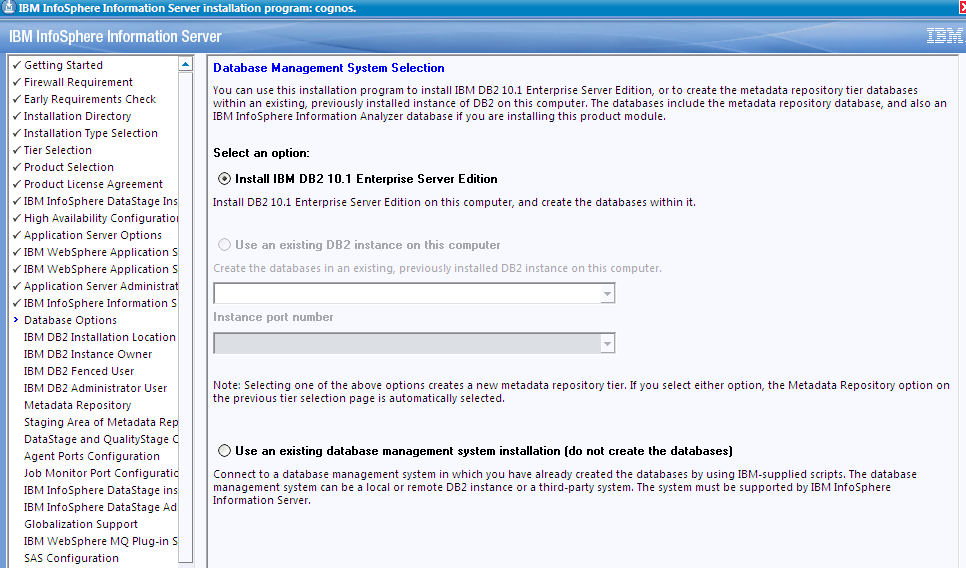
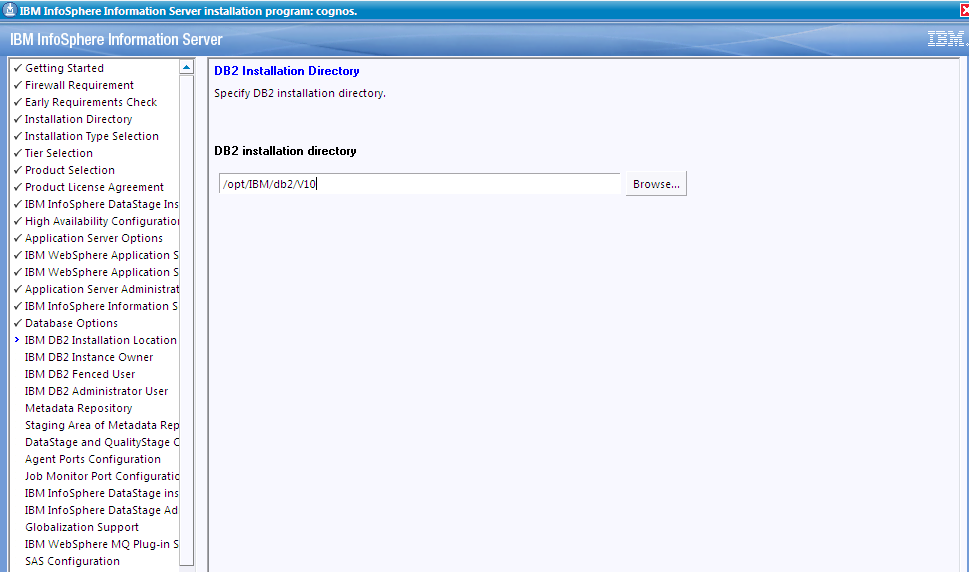
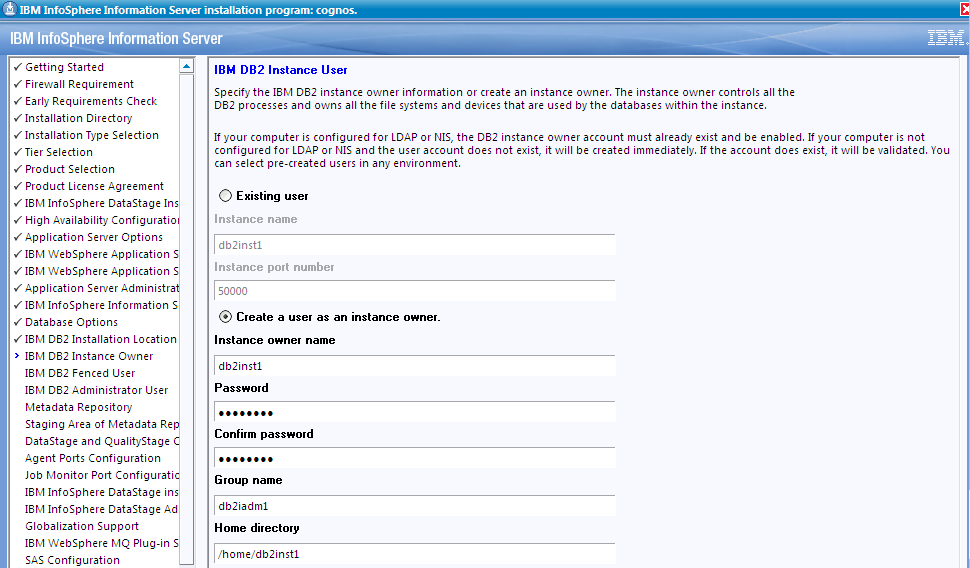
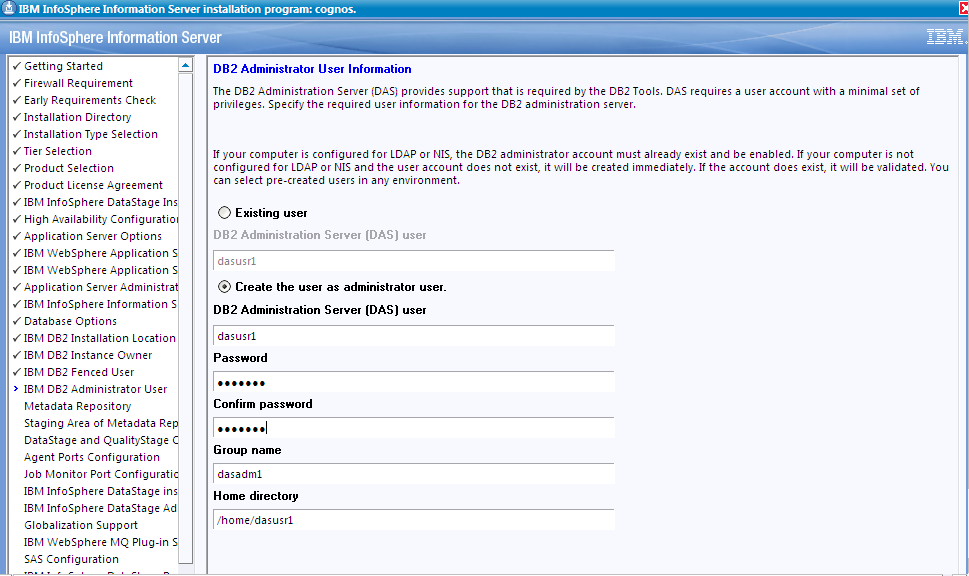
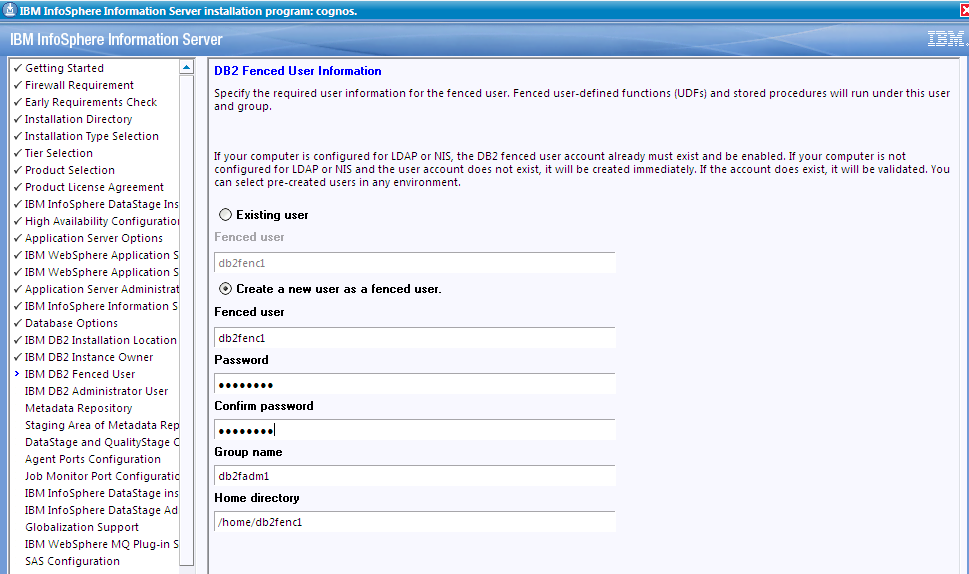
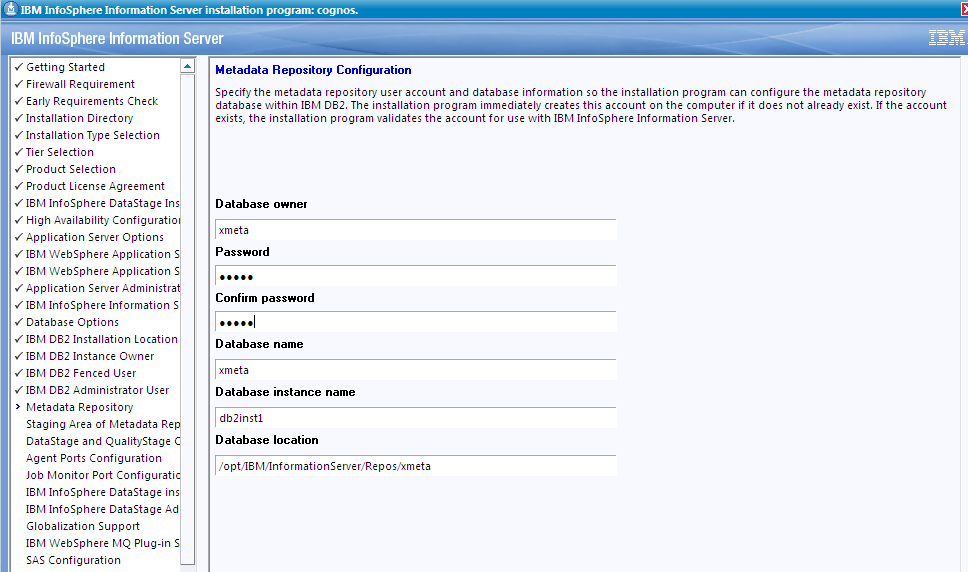
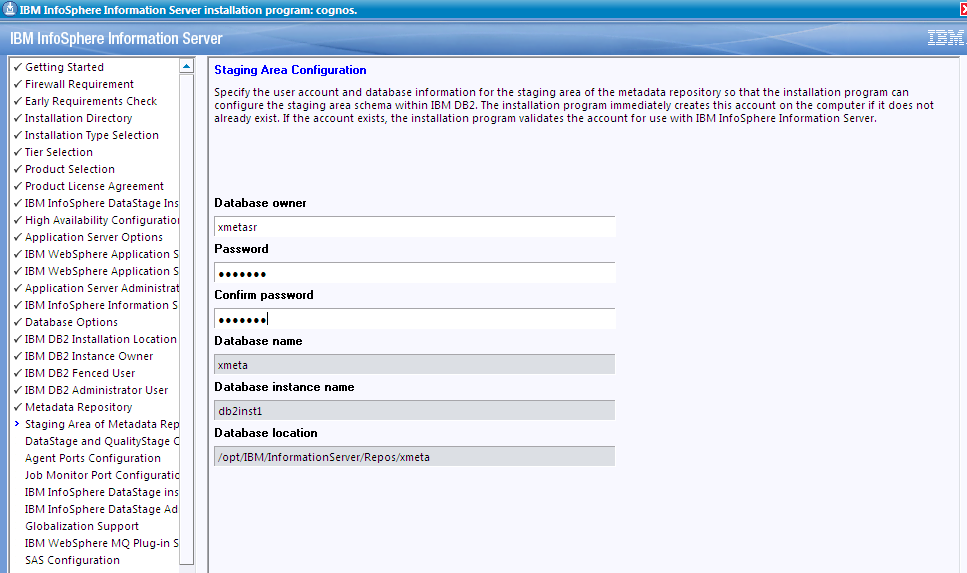
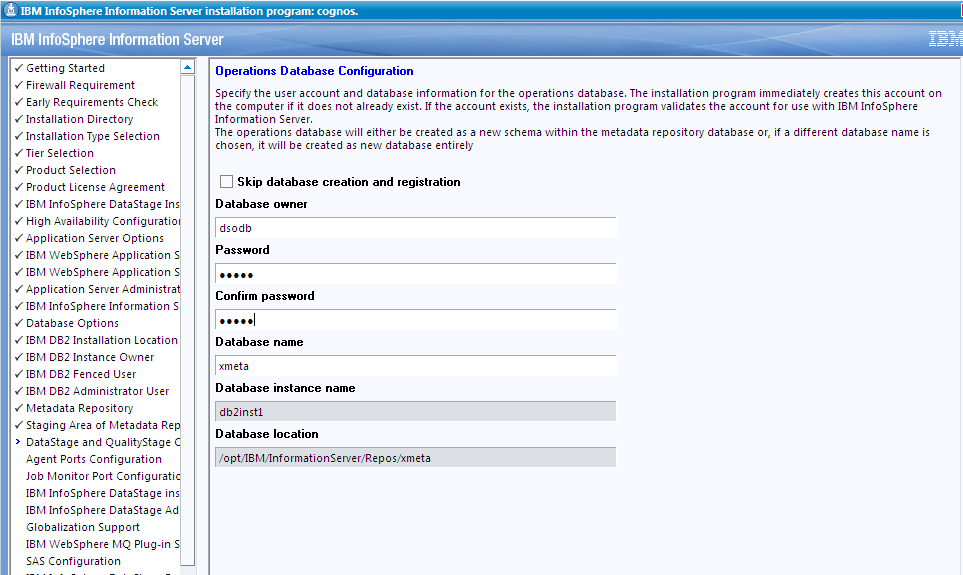
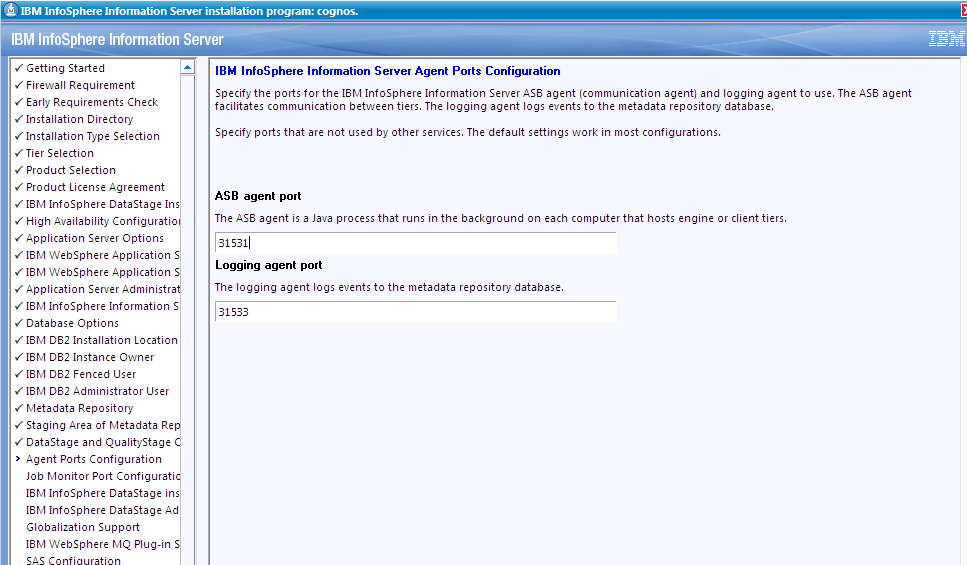
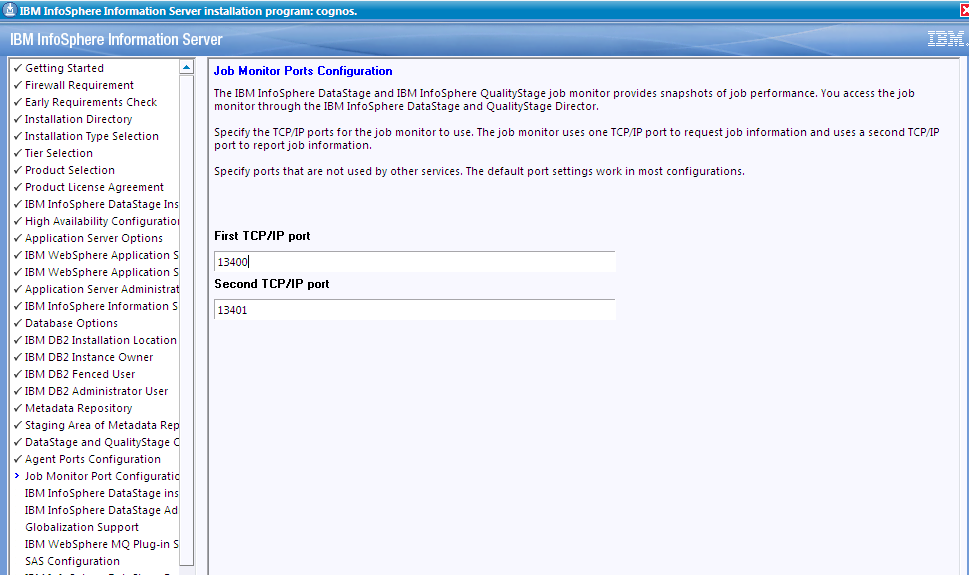
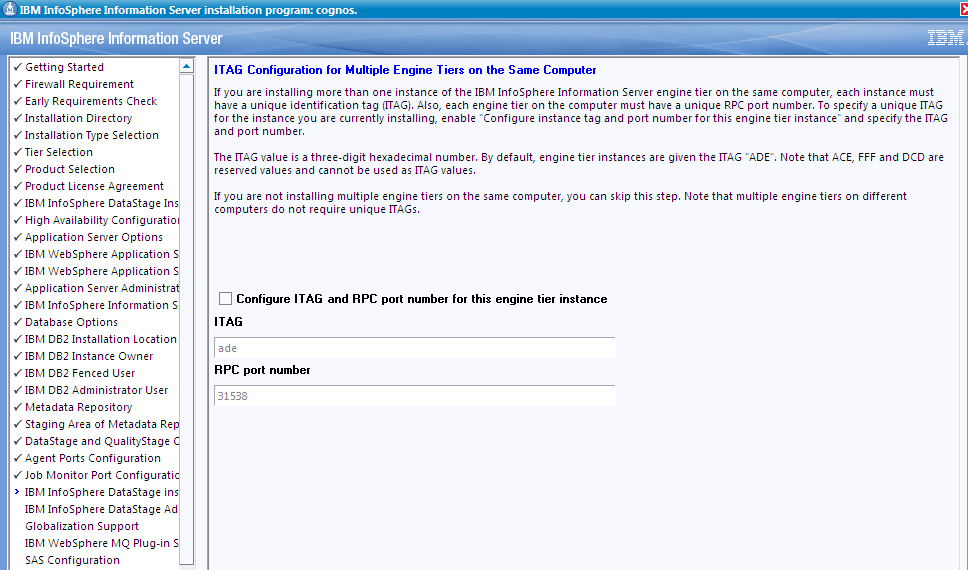
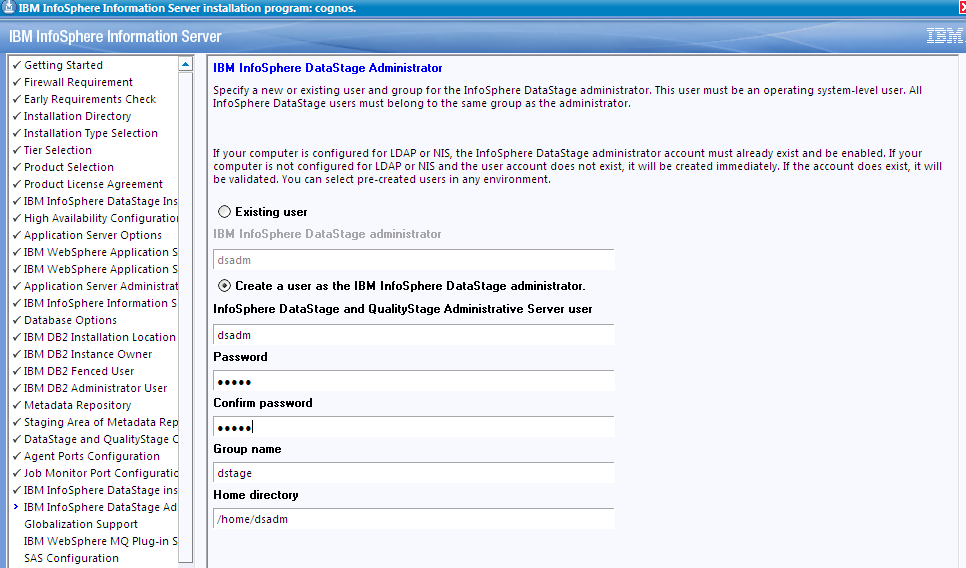
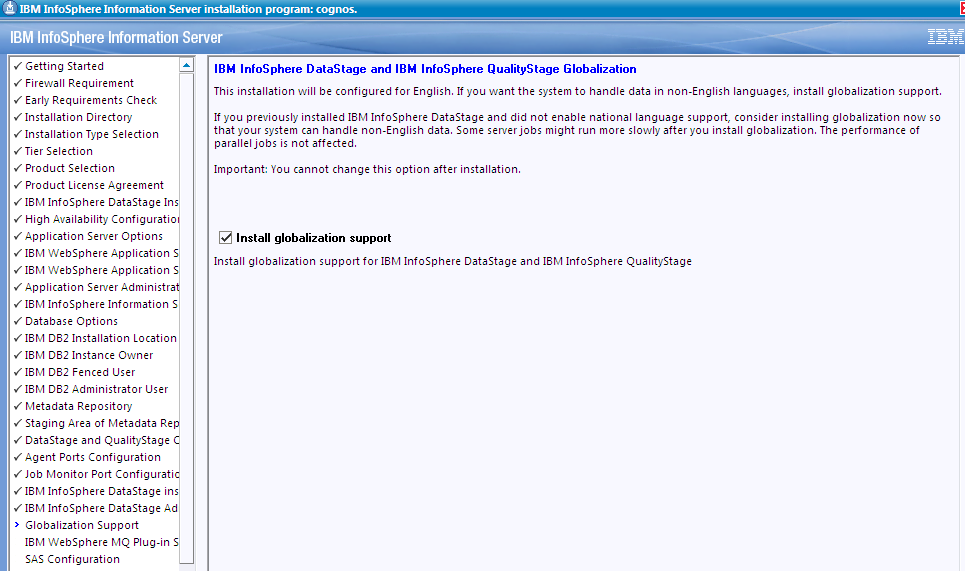
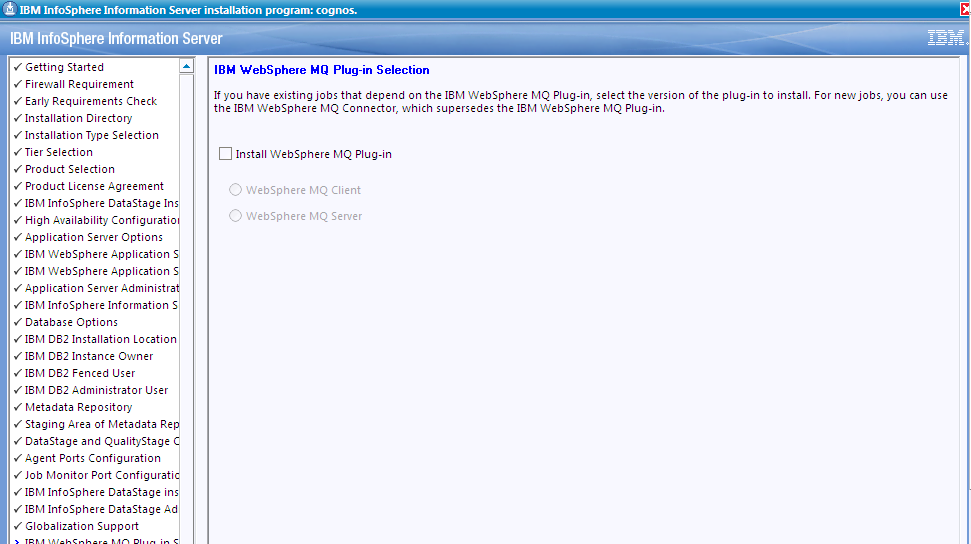
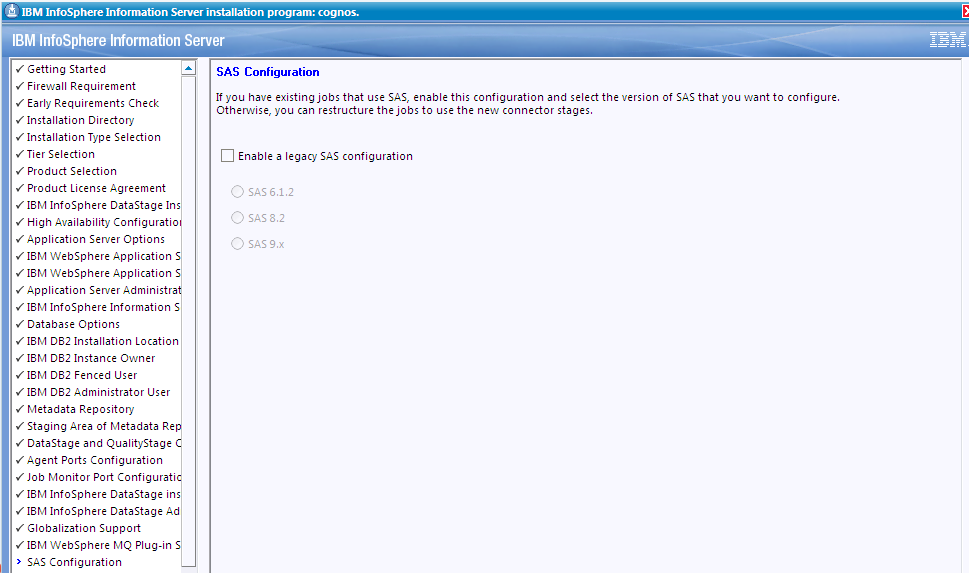


FAILED: CDIIN3218E: There is insufficient free disk space for the installation. Partition / does not have sufficient space available. It has 13,696MB free and 14,196MB is required.
磁碟空間不足
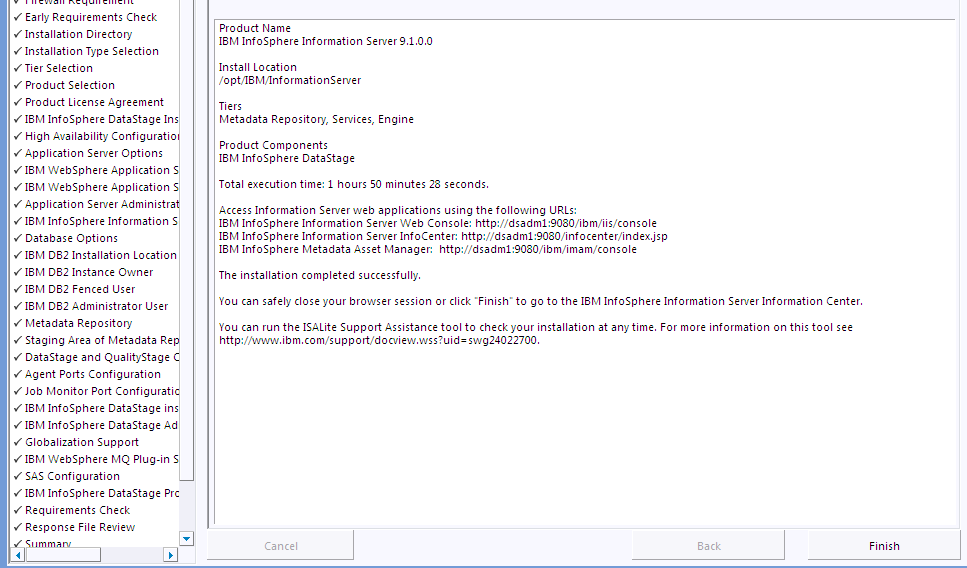
2.4驗證安裝
執行以下命令:
ps –ef|grep was 共有3個程序
ps –ef|grep dsrpcd ds 一個守護程序
如果以上四個程序存在,證明已安裝成功。
3. 配置
3.1安裝oracle客戶端
略。
3.2新增使用者、組及憑證
安裝結束後需要在服務端做相應使用者、組及登陸憑證配置,客戶端才可以登入。
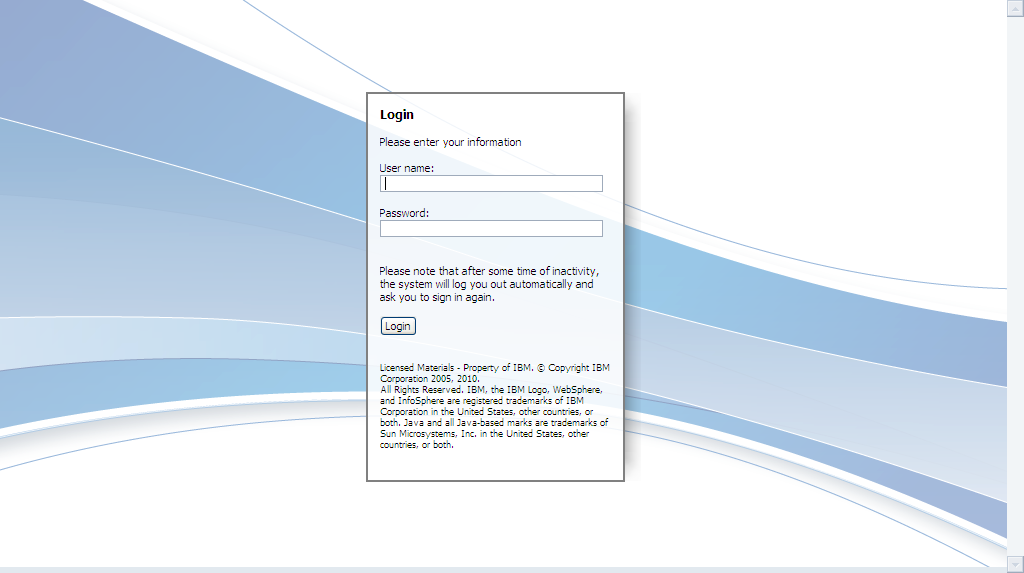
1)登陸IBMInformation Server Web 控制檯
開啟IBMInformation Server Web 控制檯,輸入IBM Information Server服務管理員使用者名稱wasadmin及密碼wasadmin登陸。
http://192.168.90.169:9080/ibm/iis/console
2) 新增管理使用者和組
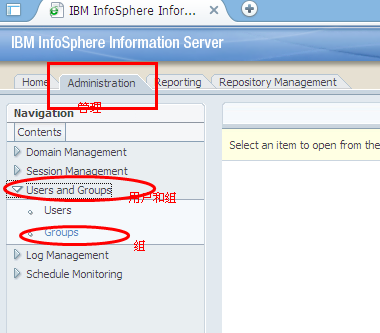
單擊“管理”按鈕,展開管理介面。
單擊“使用者和組”-“組”展開組管理介面。
單擊右側的“新建組”,輸入新建組資訊,分配許可權(這裡我們建立一個管理組admin,分配所有的許可權),記得單擊頁面右下角的儲存並關閉,重新開啟組頁面,則可以看到我們新建的組已經存在了。
單擊“使用者和組”-“使用者”展開使用者管理介面。安裝過程中我們已經預設添加了IBM Information Server使用者和websphere兩個使用者。選中admin賬戶,點選右側開啟使用者,這裡可以檢視admin賬戶資訊、分配的許可權,我們將admin賬戶新增到admin組中去。單據“組”框下方的瀏覽按鈕,選中我們剛才建立 的組admin。記得點選視窗下方的“確定”按鈕,還有“使用者”視窗下方的“儲存並關閉”按鈕。
3) 配置憑證
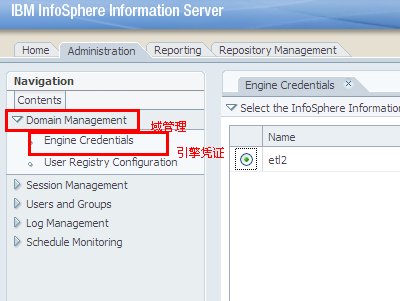
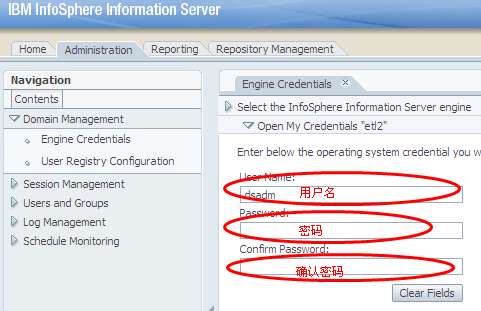
輸入要用來連線 IBM Information Server 引擎的使用者名稱和密碼。您提供的使用者名稱和密碼必須是安裝引擎層的作業系統的有效使用者名稱和密碼。
單擊“域管理”-“DataStage憑證”,選中安裝了IBM Information Server服務的計算機名“central-zzp”,單擊“開啟我的憑證”。

然後在DataStage憑證頁面輸入作業系統的使用者名稱和密碼,儲存並關閉。
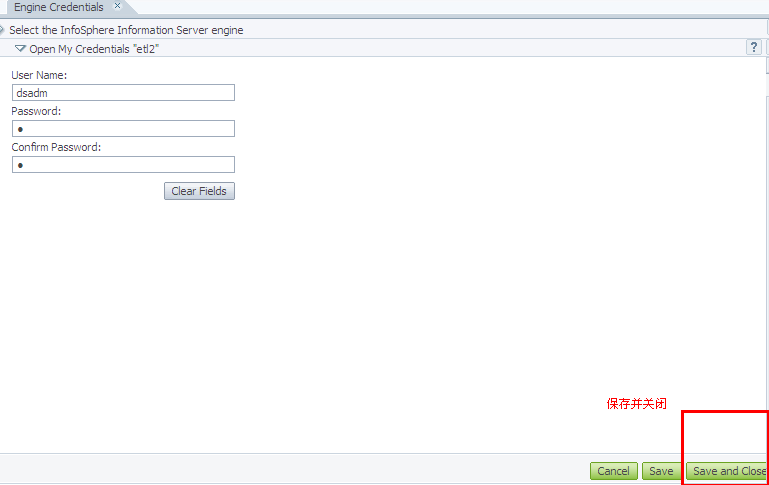
“開啟使用者憑證”裡面就添加了admin的憑證,如果除了admin以外還需要配置有多個使用者的,每個使用者都要在這裡面新增憑證。
3.3配置對Oracle資料庫的訪問
1)在/opt/IBM/InformationServer/Server/DSEngine/dsenv檔案中新增如下配置
export ORACLE_BASE=/oracle/app
export ORACLE_HOME=$ORACLE_BASE/product/11.2.0/db_1
export umask=022
export NLS_LANG=AMERICAN_AMERICA.ZHS16GBK
export PATH=$ORACLE_HOME/bin:$PATH:/usr/bin:/usr/sbin/:/bin
export LD_LIBRARY_PATH=/lib:/usr/lib:$LD_LIBRARY_PATH:$ORACLE_HOME/lib
export LANG=us_en
export TNS_ADMIN=/oracle/app/product/11.2.0/db_1/network/admin
export DSHOME=/opt/IBM/InformationServer/Server/DSEngine
export APT_ORCHHOME=/opt/IBM/InformationServer/Server/PXEngine
2)為使配置生效,重啟datastage服務
3)驗證配置
為驗證相關資料庫配置是否成功,需使用客戶端Designer中的plug-in匯入方式來驗證。
4. 啟停服務
4.1服務啟動
說明:
如果發現was、datastage已經自啟動,但db2沒有自啟動,應先將它們停止,在按順序啟動;
1)db2
su - db2inst1
cd /home/db2inst1/sqllib/adm
./db2start
2)was
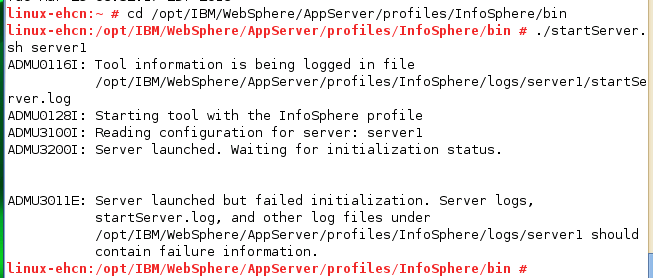
cd /opt/IBM/WebSphere/AppServer/profiles/InfoSphere/bin
./startServer.sh server1
ps -ef | grep websphere
3)datastage
cd /opt/IBM/InformationServer/Server/DSEngine/bin
./uv -admin -start
cd /opt/IBM/InformationServer/ASBNode/bin/
./NodeAgents.sh restart
4.2服務停止
1)datastage
cd /opt/IBM/InformationServer/Server/DSEngine/bin
./uv -admin -stop
2)wasadmin/wasadmin
cd /opt/IBM/WebSphere/AppServer/profiles/InfoSphere/bin
./stopServer.sh server1
3)db2
su - db2inst1
cd /home/db2inst1/sqllib/adm
./db2stop
5. 安裝常見問題
5.1無法執行安裝程式
問題現象:
The IP address cannot be resolved
解決辦法:
在/etc/hosts檔案中新增:IP hostname
5.2連線oracle資料庫問題
1)無法匯入表定義
解決辦法:
修改dsenv檔案,oracle儘量不用綠色版,綠色版配置很麻煩,會缺檔案
2)用oracle資料庫元件連線11g資料庫無法連線報錯
解決辦法:
Install Oracle client
Install Oracle client 11g in the DS server with user oracle, my install option is ‘Administrator ‘.
Copy tnsnames.ora file from the Oracle server to $ORACLE_HOME/network/admin. Please pay attention to the HOST, we can use IP or HOSTNAME.
[[email protected] admin]$ cat tnsnames.ora
tnsnames.ora Network Configuration File: C:\app\ligj\product\11.2.0\client_1\network\admin\tnsnames.ora
Generated by Oracle configuration tools.
ORAJERRY =

 (DESCRIPTION =

   (ADDRESS_LIST =

     (ADDRESS = (PROTOCOL = TCP)(HOST = IBM-RS05L7GG9A3)(PORT = 1521))

   )

   (CONNECT_DATA =

     (SERVICE_NAME = ORAJERRY)

   )

 )
Add ORACLE_HOME in .bash_profile under oracle user.
Login oracle server with:
Sqlplus usera/[email protected]
2) Configuration on DS server
Add those parameters in the dsenv under DSHOME, following is my:
DSHOME=/opt/IBM/InformationServer/Server/DSEngine
export ORACLE_HOME=/home/oracle/app/oracle/product/11.2.0/client_1
export TNS_ADMIN=/home/oracle/app/oracle/product/11.2.0/client_1/network/admin
export LD_LIBRARY_PATH=$APT_ORCHHOME/lib:$LD_LIBRARY_PATH:$ORACLE_HOME/lib:$ORAC LE_HOME/rdbms/lib
export PATH=$PATH:$ORACLE_HOME/bin:$APT_ORCHHOME/bin
export ORACLE_BASE=/home/oracle/app
export LIBPATH=$ORACLE_HOME/rdbms/lib:$ORACLE_HOME/lib:$LIBPATH
[[email protected] DSEngine]# find /opt -name install.liborchoracle
/opt/IBM/InformationServer/Server/StagingArea/Installed/PxOracle/install/install.liborchoracle
/opt/IBM/InformationServer/Server/DSComponents/install/install.liborchoracle
[[email protected] DSEngine]# find /opt -name libccora*
/opt/IBM/InformationServer/Server/StagingArea/Installed/OracleConnector/Server/linux/libccora11g.so
/opt/IBM/InformationServer/Server/StagingArea/Installed/OracleConnector/Server/linux/libccora10g.so
/opt/IBM/InformationServer/Server/DSComponents/bin/libccora11g.so
/opt/IBM/InformationServer/Server/DSComponents/bin/libccora10g.so
My error message are ‘Can’t find libccora10g.so’
[[email protected] DSEngine]# cd $ORACLE_HOME/lib
[[email protected] DSEngine]#ln –s /opt/IBM/InformationServer/Server/StagingArea/Installed/OracleConnector/Server/linux/libccora11g.so licccora11g.so
[[email protected] DSEngine]#ln –s /opt/IBM/InformationServer/Server/StagingArea/Installed/OracleConnector/Server/linux/libccora10g.so licccora10g.so
Then execute the ‘/opt/IBM/InformationServer/Server/StagingArea/Installed/PxOracle/install/install.liborchoracle’ with root user.
[[email protected] DSEngine]# export DSHOME=/opt/IBM/InformationServer/Server/DSEngine
[[email protected] DSEngine]# export APT_ORCHHOME=/opt/IBM/InformationServer/Server/PXEngine
[[email protected] DSEngine]# vi /opt/IBM/InformationServer/Server/DSComponents/install/install.liborchoracle
Alter this:
install_driver() {
case $version in
9 ) VER=’9i’;;
10 ) VER=’10g’;;
0 ) return;;
esac
To
install_driver() {
case $version in
9 ) VER=’9i’;;
10|11 ) VER=’10g’;;
0 ) return;;
esac
Then can support Oracle 11g client
Execute it
[[email protected] DSEngine]
/opt/IBM/InformationServer/Server/DSComponents/install/install.liborchoracle
Installing Oracle driver.
Installing driver for Oracle Version 10g
Oracle driver installation is completed.
Test the dynamic library
[[email protected] DSEngine]# cd $ORACLE_HOME/lib
[[email protected] lib]# ls -al libcc*
lrwxrwxrwx 1 oracle dba 65 Apr 24 17:26 libccora10g.so -> /opt/IBM/InformationServer/Server/DSComponents/bin/libccora10g.so
lrwxrwxrwx 1 oracle dba 65 Apr 24 17:25 libccora11g.so -> /opt/IBM/InformationServer/Server/DSComponents/bin/libccora11g.so
[[email protected] lib]# ldd libccora10g.so
linux-vdso.so.1 => (0x00007fff5d960000)
/opt/IBM/InformationServer/Server/DSComponents/lib/libicui18n.so (0x00002af26ea97000)
libicuio.so.32 => /opt/IBM/InformationServer/Server/PXEngine/lib/libicuio.so.32 (0x00002af26ecb5000)
libicuuc.so.32 => /opt/IBM/InformationServer/Server/PXEngine/lib/libicuuc.so.32 (0x00002af26edc1000)
libfcl.so => /opt/IBM/InformationServer/Server/PXEngine/lib/libfcl.so (0x00002af26efaf000)
libclntsh.so.10.1 => /home/oracle/app/oracle/product/11.2.0/client_1/lib/libclntsh.so.10.1 (0x00002af26f2b3000)
libstdc++.so.6 => /opt/IBM/InformationServer/ASBNode/apps/proxy/cpp/linux-all-x86_64/libstdc++.so.6 (0x00002af2718dd000)
libm.so.6 => /lib64/libm.so.6 (0x00002af271af9000)
libc.so.6 => /lib64/libc.so.6 (0x00002af271d7c000)
libgcc_s.so.1 => /lib64/libgcc_s.so.1 (0x00002af2720d3000)
libicudata.so.32 => /opt/IBM/InformationServer/Server/PXEngine/lib/libicudata.so.32 (0x00002af2722e2000)
libpthread.so.0 => /lib64/libpthread.so.0 (0x00002af273071000)
libnsl.so.1 => /lib64/libnsl.so.1 (0x00002af27328d000)
libdl.so.2 => /lib64/libdl.so.2 (0x00002af2734a5000)
libicutu.so.32 => /opt/IBM/InformationServer/Server/PXEngine/lib/libicutu.so.32 (0x00002af2736a9000)
libxml4c.so.56 => /opt/IBM/InformationServer/Server/DSComponents/lib/libxml4c.so.56 (0x00002af2737b8000)
liborchx86_64.so => /opt/IBM/InformationServer/Server/PXEngine/lib/liborchx86_64.so (0x00002af273c56000)
liborchcorex86_64.so => /opt/IBM/InformationServer/Server/PXEngine/lib/liborchcorex86_64.so (0x00002af2747d5000)
libnnz11.so => /home/oracle/app/oracle/product/11.2.0/client_1/lib/libnnz11.so (0x00002af274a23000)
libaio.so.1 => /usr/lib64/libaio.so.1 (0x00002af274deb000)
/lib64/ld-linux-x86-64.so.2 (0x00000032b4a00000)
liborchmonitorx86_64.so => /opt/IBM/InformationServer/Server/PXEngine/lib/liborchmonitorx86_64.so (0x00002af274fed000)
[[email protected] lib]# ldd libccora11g.so
linux-vdso.so.1 => (0x00007fffe5ffd000)
/opt/IBM/InformationServer/Server/DSComponents/lib/libicui18n.so (0x00002b838afc7000)
libicuio.so.32 => /opt/IBM/InformationServer/Server/PXEngine/lib/libicuio.so.32 (0x00002b838b1e5000)
libicuuc.so.32 => /opt/IBM/InformationServer/Server/PXEngine/lib/libicuuc.so.32 (0x00002b838b2f1000)
libfcl.so => /opt/IBM/InformationServer/Server/PXEngine/lib/libfcl.so (0x00002b838b4df000)
libclntsh.so.11.1 => /home/oracle/app/oracle/product/11.2.0/client_1/lib/libclntsh.so.11.1 (0x00002b838b7e3000)
libstdc++.so.6 => /opt/IBM/InformationServer/ASBNode/apps/proxy/cpp/linux-all-x86_64/libstdc++.so.6 (0x00002b838de0d000)
libm.so.6 => /lib64/libm.so.6 (0x00002b838e029000)
libc.so.6 => /lib64/libc.so.6 (0x00002b838e2ac000)
libgcc_s.so.1 => /lib64/libgcc_s.so.1 (0x00002b838e603000)
libicudata.so.32 => /opt/IBM/InformationServer/Server/PXEngine/lib/libicudata.so.32 (0x00002b838e812000)
libpthread.so.0 => /lib64/libpthread.so.0 (0x00002b838f5a1000)
libnsl.so.1 => /lib64/libnsl.so.1 (0x00002b838f7bd000)
libdl.so.2 => /lib64/libdl.so.2 (0x00002b838f9d5000)
libicutu.so.32 => /opt/IBM/InformationServer/Server/PXEngine/lib/libicutu.so.32 (0x00002b838fbd9000)
libxml4c.so.56 => /opt/IBM/InformationServer/Server/DSComponents/lib/libxml4c.so.56 (0x00002b838fce8000)
liborchx86_64.so => /opt/IBM/InformationServer/Server/PXEngine/lib/liborchx86_64.so (0x00002b8390186000)
liborchcorex86_64.so => /opt/IBM/InformationServer/Server/PXEngine/lib/liborchcorex86_64.so (0x00002b8390d05000)
libnnz11.so => /home/oracle/app/oracle/product/11.2.0/client_1/lib/libnnz11.so (0x00002b8390f53000)
libaio.so.1 => /usr/lib64/libaio.so.1 (0x00002b839131b000)
/lib64/ld-linux-x86-64.so.2 (0x00000032b4a00000)
liborchmonitorx86_64.so => /opt/IBM/InformationServer/Server/PXEngine/lib/liborchmonitorx86_64.so (0x00002b839151d000)
[[email protected] lib]#
Open ‘DS Administrator Client’
Click ‘Environment’ , go to
3) Restart DS server and IS agent:
1) stop DS engine
[[email protected] DSEngine]# cd /opt/IBM/InformationServer/Server/DSEngine/bin
[[email protected] DSEngine]#./uv –admin –stop
2) stop IS agent
[[email protected] DSEngine]# cd /opt/IBM/InformationServer/ASBNode/bin
[[email protected] DSEngine]#./NodeAgents.sh stop
3) start IS agent
[[email protected] DSEngine]# cd /opt/IBM/InformationServer/ASBNode/bin
[[email protected] DSEngine]#./NodeAgents.sh start
4) start DS engine
[[email protected] DSEngine]# cd /opt/IBM/InformationServer/Server/DSEngine/bin
[[email protected] DSEngine]#./uv –admin –start
5.3監控問題
問題現象:
Job正常執行,但是Directory中看不到監控資訊
解決辦法:
手工啟停服務
cd /opt/IBM/InformationServer/Server/PXEngine/java
./jobmoninit start
啟動服務失敗
客戶端報錯:
客戶端安裝關閉防火牆
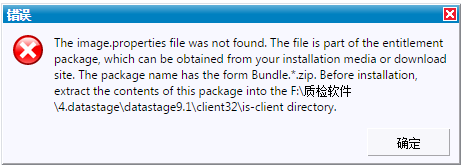
將licence檔案與安裝檔案解壓到相同路徑下
相關推薦
Datastage9.1 Linux環境安裝配置文件
Datastage9.1安裝配置文件 1.系統需求 The following packages are required to install and operate Version 9.1 on 64-bit SUSE Linux Enterpris
linux中mysql配置文件和jdk環境變量
jdk環境變量 ons utf8mb4 linux utf innodb ron mysql datadir mysql配置文件 [client]default-character-set = utf8mb4 [mysql]socket = /var/lib/mysql/m
linux下Nginx配置文件(nginx.conf)配置設置詳解(windows用phpstudy集成)
兩個 response 機制 .so 不用 filename 發送 php文件 code linux備份nginx.conf文件舉例: cp /usr/local/nginx/nginx.conf /usr/local/nginx/nginx.conf-2017111
Linux用戶配置文件及權限
zl---------- 屬主 屬組 其他安全上下文(secure context) 任何時候用戶操作計算機無非就是發起進程,因此,進程是用戶操作計算機的代理,所以進程在運行的時候,一定是以發起它的用戶的身份在運行。所以,這個進程到底能夠訪問哪些文件,取決於這個進程自己的權限和它要訪問的那個資源或文件的
appium+Linux環境安裝配置
全局 很多 -- 應該 下載 lis cnp rmi -a 背景:想要在Jenkins上跑appium的自動化測試,所以想要在Jenkins服務器(Linux遠程)上安裝appium服務,故而研究了一下appium+Linux下安裝。雖然有無數的前輩踩過坑,但自己還是吭
Linux中MySQL配置文件my.cnf參數優化
表空間 高效 內容 服務端 default 最終 效果 程序 變慢 MySQL參數優化這東西不好好研究還是比較難懂的,其實不光是MySQL,大部分程序的參數優化,是很復雜的。MySQL的參數優化也不例外,對於不同的需求,還有硬件的配置,優化不可能又最優選擇,只能慢慢的進行優
2018-1-17Linux系統管理(1)Linux磁盤及文件系統的概念
mas 塊設備 即使 type neu sector 取數據 nod 註意 在本章當中,我們開始對於Linux的系統篇的介紹,我們首先了解一下磁盤的構造以及文件系統的概念,在上一篇的基礎中,主要介紹了Linux的命令的用法等其它的一些概念,知識比較瑣碎,希望將這些基礎知
koa學習筆記(一)環境安裝及文件目錄
項目信息 ack 分享圖片 true ref 使用 tps blank hub koa是Nodejs的一個框架。通過koa的學習,我們可以對node快速上手。 1,環境準備 node v7.6+,可以用nvm或者n安裝指定版本的Node mysql 數據庫準備,
Linux環境設置文件
path 問題 sysconf nbsp 文件的 bashrc etc 隱藏 重啟 一、前言 關於bash的環境設置文件,分為系統設置和個人設置,一般來說建議用戶直接修改個人的設置。 本文測試環境為:centos6.5. 二、系統設置值 1. /etc/sysconfi
《Linux學習並不難》Linux網絡配置文件(3):/etc/hosts文件
Linux /etc/hosts 26.3 《Linux學習並不難》Linux網絡配置文件(3):/etc/hosts文件當計算機啟動時,在可以查詢DNS以前,計算機需要查詢一些主機名到IP地址的匹配。這些匹配信息存放在/etc/hosts文件中。在沒有域名服務器的情況下,系統上的所有網絡程序都通過
《Linux學習並不難》Linux網絡配置文件(4):/etc/networks文件
Linux /etc/networks 26.4 《Linux學習並不難》Linux網絡配置文件(4):/etc/networks文件/etc/networks文件定義了網絡名和網絡地址之間的映射關系,下面是/etc/networks文件內容的示例。default 0.0.0.0 loopback
linux——網絡配置文件
info img sysconfig 圖片 靜態 uid boot 常用 分享圖片 IP/NETMASK/GW/DNS等屬性的配置文件:/etc/sysconfig/network-scripts/ifcfg-IFACE 路由相關配置文件:/etc/sysconfig/ne
生產環境nginx配置文件(帶https安全認證)
tar edi proc method fault res root ash fas #user www www; worker_processes 2; error_log logs/error.log info; pid /usr/local/ng
Linux 命令安裝bin文件
chmod bin文件 可執行 chm nbsp col 文件的 span color Linux 命令安裝bin文件 安裝命令: //1,增加文件的可執行權限 chmod a+x jdk-6u30-linux-x64.bin //2,程序即安裝在執行命令的文件
Linux環境安裝配置Swftools Linux環境安裝配置Swftools
Linux環境安裝配置Swftools 很久之前曾在centos環境下配置過swftools,並 解決了安裝過程中遇到的一些錯誤,今天再次配置的時候,還是遇到了一些問題,不過最後解決了。 這次配置的環境是CentOS6.2的32位版本,配置項包括open
大資料叢集架之——nginx 反向代理的安裝配置文件。
二、Nginx安裝配置 1.安裝gcc 方式1 - yum線上安裝: //yum install gcc
Linux環境安裝配置Swftools
很久之前曾在centos環境下配置過swftools,並解決了安裝過程中遇到的一些錯誤,今天再次配置的時候,還是遇到了一些問題,不過最後解決了。 這次配置的環境是CentOS6.2的32位版本,配置項包括openoffice3、xpdf-chinese-simplified、swftools、memcach
Hadoop基礎教程-第1章 環境安裝配置(1.5 構建叢集)
第1章 環境安裝配置 1.5 構建叢集 1、叢集概念 根據百度的解釋: 叢集是一組相互獨立的、通過高速網路互聯的計算機,它們構成了一個組,並以單一系統的模式加以管理。一個客戶與叢集相互作用時,叢集像是一個獨立的伺服器。叢集配置是用於提高可用性和可
Lustre安裝配置文件
部署環境: centos5.5 _x64 MDS:172.16.19.140 OSS:172.16.19.141 Client:172.16.19.142 一、概述 Lustre是一個以GNUGeneral Public為許可證的,開源的分散式並行檔案系統。其最大可支援1
ceph 物件儲存閘道器rados gateway和S3介面測試詳細安裝配置文件
Create a keyring for the gateway:sudo ceph-authtool --create-keyring /etc/ceph/ceph.client.radosgw.keyring sudo chmod +r /etc/ceph/ceph.client.radosgw.key

