Ubuntu系統下安裝並配置hive-2.1.0
說在前面的話
預設情況下,Hive元資料儲存在內嵌的Derby資料庫中,只能允許一個會話連線,只適合簡單的測試。實際生產環境中不使用,為了支援多使用者會話,
則需要一個獨立的元資料庫,使用MySQL作為元資料庫,Hive內部對MySQL提供了很好的支援。
在Ubuntu系統下安裝並配置hive詳細正確步驟如下!
一、mysql-server和mysql-client的下載
[email protected]:/usr/local# sudo apt-get install mysql-server mysql-client (Ubuntu版本)
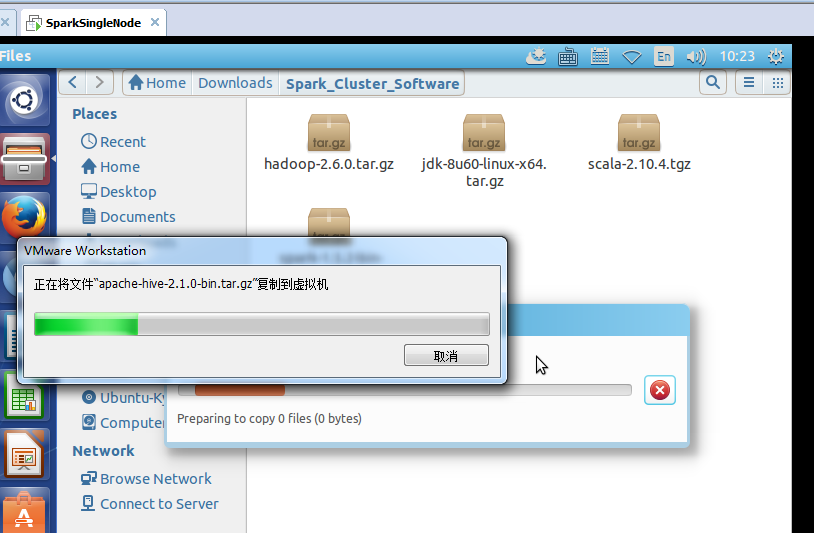
我這裡,root密碼,為rootroot。
二、啟動MySQL服務

[email protected]:/usr/local# sudo /etc/init.d/mysql start (Ubuntu版本)
* Starting MySQL database server mysqld [ OK ]
[email protected]:/usr/local#
附加說明,
sudo /etc/init.d/mysql restart 這是重啟
sudo /etc/init.d/mysql stop 這是停止
三、進入mysql服務
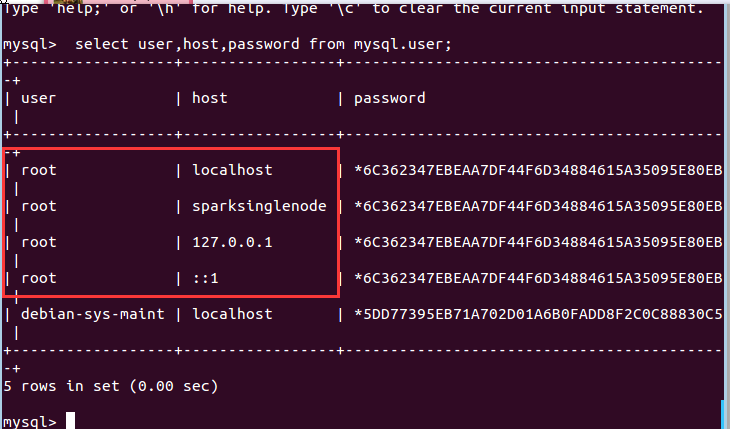
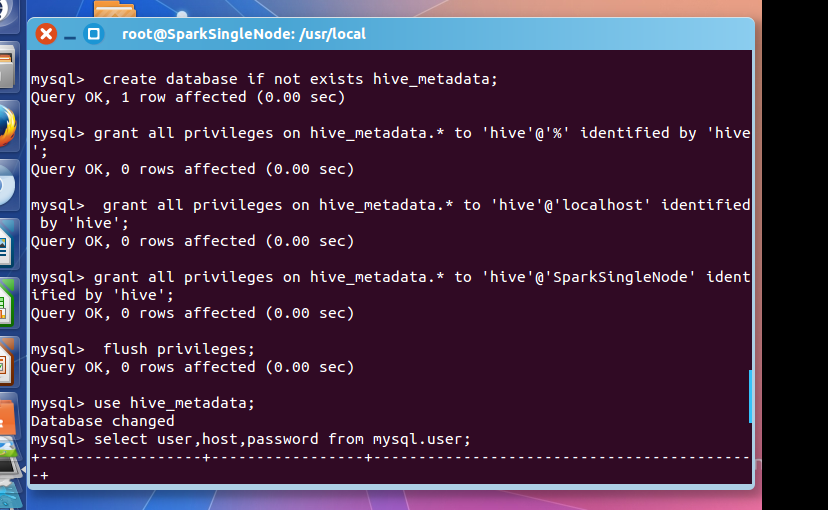
Ubuntu裡 的mysql裡有個好處,直接自己對[email protected]下的所有,自己預設設定好了
[email protected]:/usr/local# mysql -uroot -p
Enter password: //輸入rootroot
Welcome to the MySQL monitor. Commands end with ; or \g.
Your MySQL connection id is 43
Server version: 5.5.53-0ubuntu0.14.04.1 (Ubuntu)
Copyright (c) 2000, 2016, Oracle and/or its affiliates. All rights reserved.
Oracle is a registered trademark of Oracle Corporation and/or its
affiliates. Other names may be trademarks of their respective
owners.
Type 'help;' or '\h' for help. Type '\c' to clear the current input statement.
mysql> CREATE USER 'hive'@'%' IDENTIFIED BY 'hive';
mysql> GRANT ALL PRIVILEGES ON *.* TO 'hive'@'%' WITH GRANT OPTION;
mysql> flush privileges;
Query OK, 0 rows affected (0.00 sec)
mysql> use hive;
Database changed
mysql> select user,host,password from mysql.user;
+------------------+-----------------+-------------------------------------------+
| user | host | password |
+------------------+-----------------+-------------------------------------------+
| root | localhost | *6C362347EBEAA7DF44F6D34884615A35095E80EB |
| root | sparksinglenode | *6C362347EBEAA7DF44F6D34884615A35095E80EB |
| root | 127.0.0.1 | *6C362347EBEAA7DF44F6D34884615A35095E80EB |
| root | ::1 | *6C362347EBEAA7DF44F6D34884615A35095E80EB |
| debian-sys-maint | localhost | *5DD77395EB71A702D01A6B0FADD8F2C0C88830C5 |
| hive | % | *4DF1D66463C18D44E3B001A8FB1BBFBEA13E27FC |
+------------------+-----------------+-------------------------------------------+
8 rows in set (0.00 sec)
mysql> exit;
Bye
[email protected]:/usr/local#
在ubuntu系統裡,預設情況下MySQL只允許本地登入,所以需要修改配置檔案將地址繫結註釋。
sudo gedit /etc/mysql/my.cnf
找到 # bind-address = 127.0.0.1 註釋掉這一行就可以啦
重啟mysql服務
sudo service mysqld restart
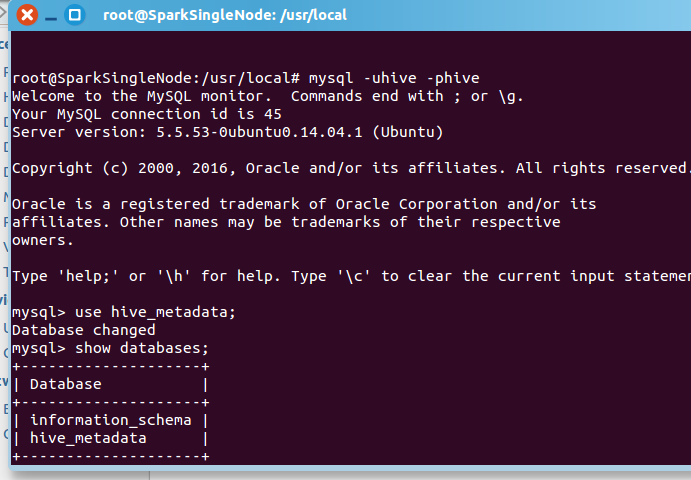
然後,建立Hive專用的元資料庫,記得用我們剛建立的"hive"賬號登入。
mysql -u hive -p hive
CREATE DATABASE hive_metadata
四、安裝hive
這裡,很簡單,不多贅述。
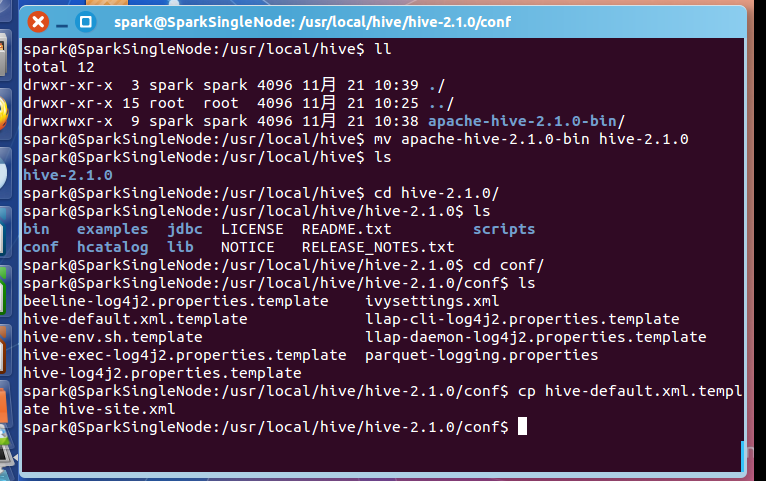
[email protected]:/usr/local/hive$ ll
total 12
drwxr-xr-x 3 spark spark 4096 11月 21 10:39 ./
drwxr-xr-x 15 root root 4096 11月 21 10:25 ../
drwxrwxr-x 9 spark spark 4096 11月 21 10:38 apache-hive-2.1.0-bin/
[email protected]:/usr/local/hive$ mv apache-hive-2.1.0-bin hive-2.1.0
[email protected]:/usr/local/hive$ ls
hive-2.1.0
[email protected]:/usr/local/hive$ cd hive-2.1.0/
[email protected]:/usr/local/hive/hive-2.1.0$ ls
bin examples jdbc LICENSE README.txt scripts
conf hcatalog lib NOTICE RELEASE_NOTES.txt
[email protected]:/usr/local/hive/hive-2.1.0$ cd conf/
[email protected]:/usr/local/hive/hive-2.1.0/conf$ ls
beeline-log4j2.properties.template ivysettings.xml
hive-default.xml.template llap-cli-log4j2.properties.template
hive-env.sh.template llap-daemon-log4j2.properties.template
hive-exec-log4j2.properties.template parquet-logging.properties
hive-log4j2.properties.template
[email protected]:/usr/local/hive/hive-2.1.0/conf$ cp hive-default.xml.template hive-site.xml
[email protected]:/usr/local/hive/hive-2.1.0/conf$
五、配置hive

<property>
<name>javax.jdo.option.ConnectionURL</name>
<value>jdbc:mysql://192.168.80.128:3306/hive_metadata?createDatabaseIfNotExist=true</value>
<description>
JDBC connect string for a JDBC metastore.
To use SSL to encrypt/authenticate the connection, provide database-specific SSL flag in the connection URL.
For example, jdbc:postgresql://myhost/db?ssl=true for postgres database.
</description>

<property>
<name>javax.jdo.option.ConnectionDriverName</name>
<value>com.mysql.jdbc.Driver</value>
<description>Driver class name for a JDBC metastore</description>
</property>

<property>
<name>javax.jdo.option.ConnectionUserName</name>
<value>hive</value>
<description>Username to use against metastore database</description>
</property>

<property>
<name>javax.jdo.option.ConnectionPassword</name>
<value>hive</value>
<description>password to use against metastore database</description>
</property>
[email protected]:/usr/local/hive/hive-2.1.0/conf$ cp hive-env.sh.template hive-env.sh
[email protected]:/usr/local/hive/hive-2.1.0/conf$ vim hive-env.sh

[email protected]:/usr/local/hive/hive-2.1.0/bin$ vim hive-config.sh
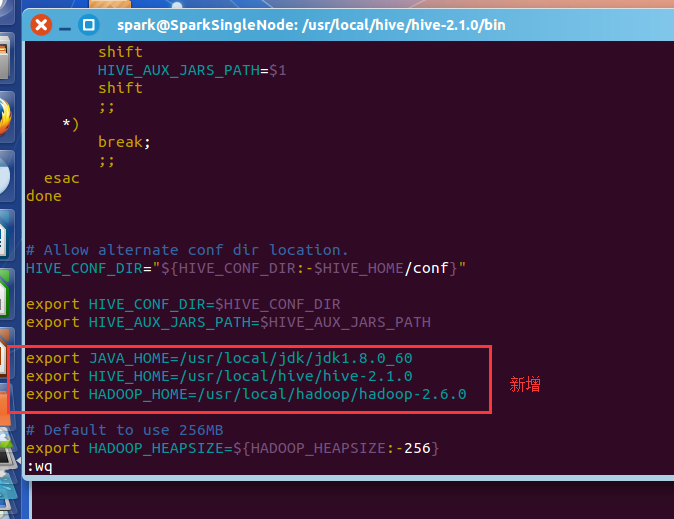
export JAVA_HOME=/usr/local/jdk/jdk1.8.0_60
export HIVE_HOME=/usr/local/hive/hive-2.1.0
export HADOOP_HOME=/usr/local/hadoop/hadoop-2.6.0
vim /etc/profile
#hive
export HIVE_HOME=/usr/local/hive/hive-2.1.0
export PATH=$PATH:$HIVE_HOME/bin
source /etc/profile
將mysql-connector-java-***.jar,複製到hive安裝目錄下的lib下。
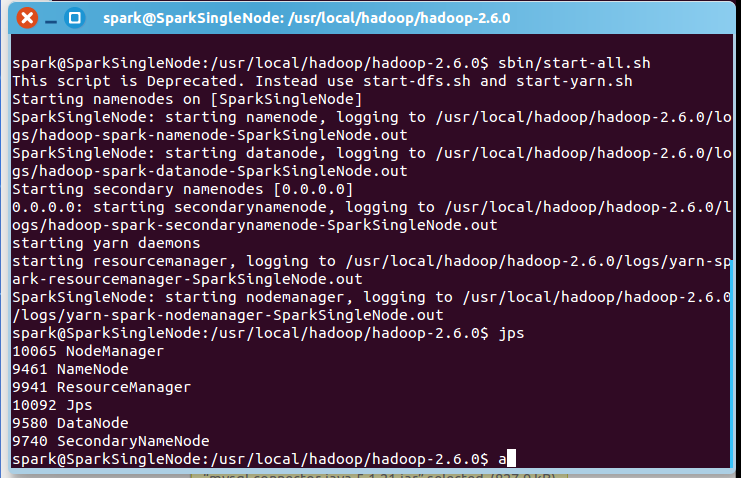
[email protected]:/usr/local/hadoop/hadoop-2.6.0$ sbin/start-all.sh
一般,上面,就可以足夠安裝正確了!
附贈問題
mysql-connector-java-5.1.21-bin.jar換成較高版本的驅動如mysql-connector-java-6.0.3-bin.jar
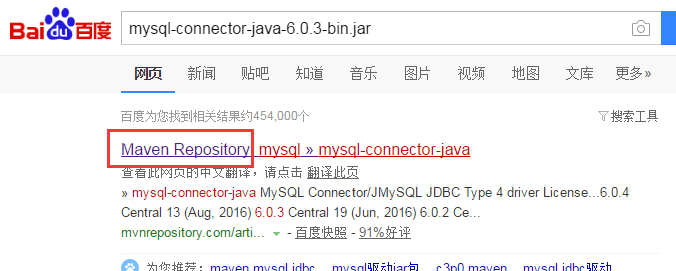
試過了,不是這個問題。

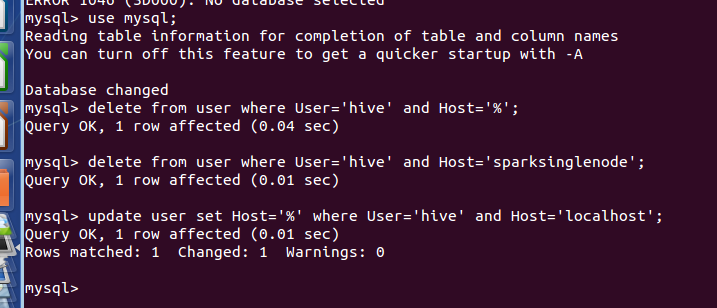
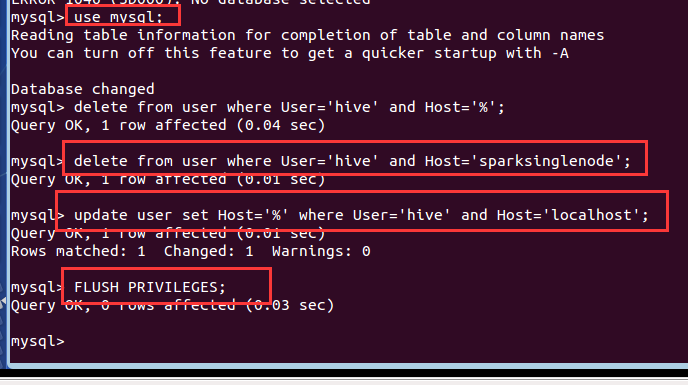
mysql> use mysql;
Reading table information for completion of table and column names
You can turn off this feature to get a quicker startup with -A
Database changed
mysql> delete from user where User='hive' and Host='%';
Query OK, 1 row affected (0.04 sec)
mysql> delete from user where User='hive' and Host='sparksinglenode';
Query OK, 1 row affected (0.01 sec)
mysql> update user set Host='%' where User='hive' and Host='localhost';
Query OK, 1 row affected (0.01 sec)
Rows matched: 1 Changed: 1 Warnings: 0
mysql> FLUSH PRIVILEGES;
Query OK, 0 rows affected (0.03 sec)
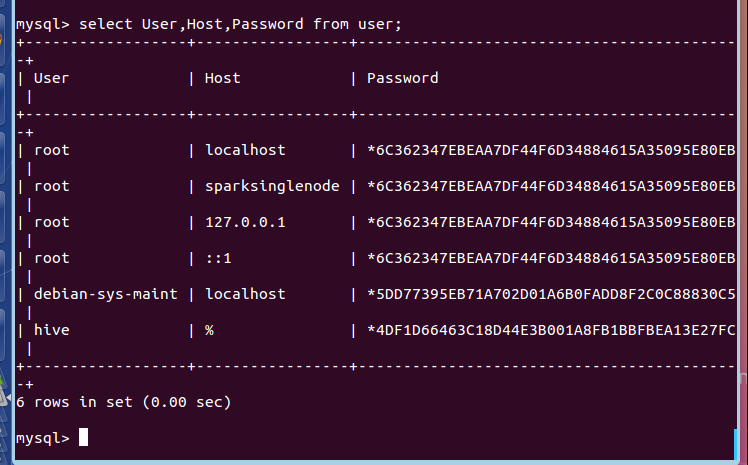
mysql> select User,Host,Password from user;
+------------------+-----------------+-------------------------------------------+
| User | Host | Password |
+------------------+-----------------+-------------------------------------------+
| root | localhost | *6C362347EBEAA7DF44F6D34884615A35095E80EB |
| root | sparksinglenode | *6C362347EBEAA7DF44F6D34884615A35095E80EB |
| root | 127.0.0.1 | *6C362347EBEAA7DF44F6D34884615A35095E80EB |
| root | ::1 | *6C362347EBEAA7DF44F6D34884615A35095E80EB |
| debian-sys-maint | localhost | *5DD77395EB71A702D01A6B0FADD8F2C0C88830C5 |
| hive | % | *4DF1D66463C18D44E3B001A8FB1BBFBEA13E27FC |
+------------------+-----------------+-------------------------------------------+
6 rows in set (0.00 sec)
mysql>

mysql> exit;
Bye
[email protected]:/usr/local#‘’
[email protected]:/usr/local# mysql -uroot -p
Enter password:
Welcome to the MySQL monitor. Commands end with ; or \g.
Your MySQL connection id is 39
Server version: 5.5.53-0ubuntu0.14.04.1 (Ubuntu)
Copyright (c) 2000, 2016, Oracle and/or its affiliates. All rights reserved.
Oracle is a registered trademark of Oracle Corporation and/or its
affiliates. Other names may be trademarks of their respective
owners.
Type 'help;' or '\h' for help. Type '\c' to clear the current input statement.
mysql> select user,host,password from mysql.user;
+------------------+-----------------+-------------------------------------------+
| user | host | password |
+------------------+-----------------+-------------------------------------------+
| root | localhost | *6C362347EBEAA7DF44F6D34884615A35095E80EB |
| root | sparksinglenode | *6C362347EBEAA7DF44F6D34884615A35095E80EB |
| root | 127.0.0.1 | *6C362347EBEAA7DF44F6D34884615A35095E80EB |
| root | ::1 | *6C362347EBEAA7DF44F6D34884615A35095E80EB |
| debian-sys-maint | localhost | *5DD77395EB71A702D01A6B0FADD8F2C0C88830C5 |
| hive | % | *4DF1D66463C18D44E3B001A8FB1BBFBEA13E27FC |
| hive | localhost | *4DF1D66463C18D44E3B001A8FB1BBFBEA13E27FC |
| hive | sparksinglenode | *4DF1D66463C18D44E3B001A8FB1BBFBEA13E27FC |
+------------------+-----------------+-------------------------------------------+
8 rows in set (0.00 sec)
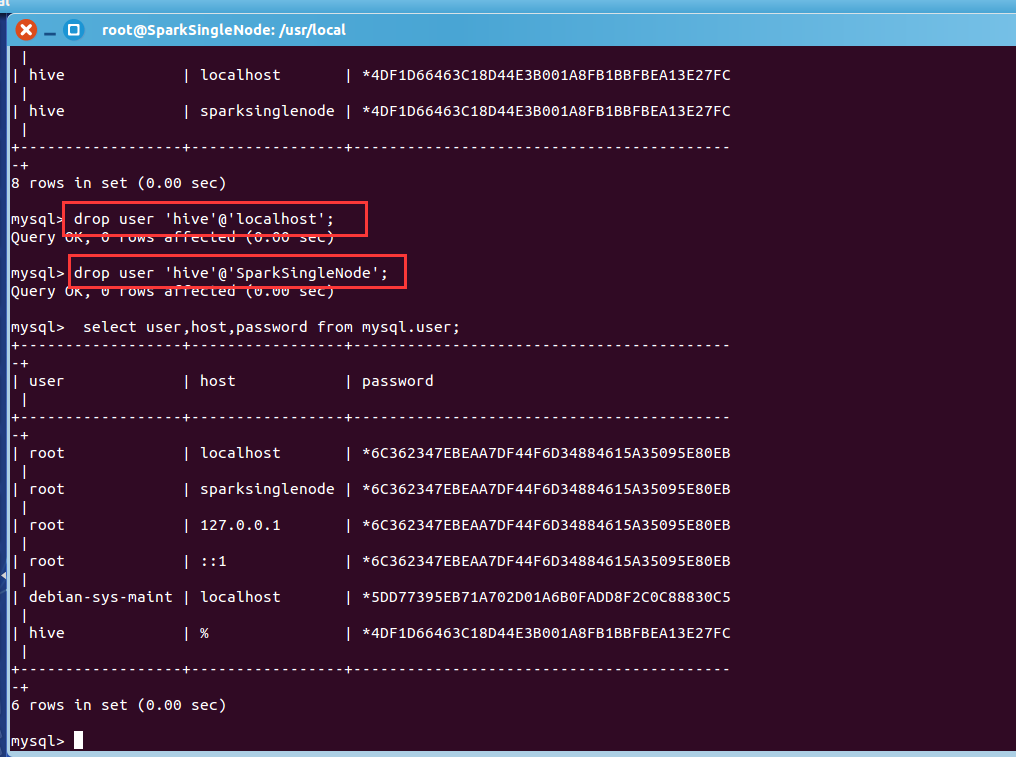
mysql> drop user 'hive'@'localhost';
Query OK, 0 rows affected (0.00 sec)
mysql> drop user 'hive'@'SparkSingleNode';
Query OK, 0 rows affected (0.00 sec)
mysql> select user,host,password from mysql.user;
+------------------+-----------------+-------------------------------------------+
| user | host | password |
+------------------+-----------------+-------------------------------------------+
| root | localhost | *6C362347EBEAA7DF44F6D34884615A35095E80EB |
| root | sparksinglenode | *6C362347EBEAA7DF44F6D34884615A35095E80EB |
| root | 127.0.0.1 | *6C362347EBEAA7DF44F6D34884615A35095E80EB |
| root | ::1 | *6C362347EBEAA7DF44F6D34884615A35095E80EB |
| debian-sys-maint | localhost | *5DD77395EB71A702D01A6B0FADD8F2C0C88830C5 |
| hive | % | *4DF1D66463C18D44E3B001A8FB1BBFBEA13E27FC |
+------------------+-----------------+-------------------------------------------+
6 rows in set (0.00 sec)
mysql>

mysql> flush privileges;
Query OK, 0 rows affected (0.00 sec)
mysql> exit;
Bye
[email protected]:/usr/local#

相關推薦
Ubuntu系統下安裝並配置hive-2.1.0
說在前面的話 預設情況下,Hive元資料儲存在內嵌的Derby資料庫中,只能允許一個會話連線,只適合簡單的測試。實際生產環境中不使用,為了支援多使用者會話, 則需要一個獨立的元資料庫,使用MySQL作為元資料庫,Hive內部對MySQL提供了很好的支援。 在Ubuntu系統下安裝並配置h
FastDFS(2)--Ubuntu下安裝並配置FastDFS
轉載於Ubuntu下安裝並配置FastDFS: FastDFS是一個開源的輕量級分散式檔案系統,它對檔案進行管理,功能包括:檔案儲存、檔案同步、檔案訪問(檔案上傳、檔案下載)等,解決了大容量儲存和負載均衡的問題。特別適合以檔案為載體的線上服務,如相簿網站、視訊網站等等。 FastDF
ubuntu下安裝並配置VIM編輯器
Ubuntu 16.04 下安裝Vim 預設已經安裝了VIM-tiny [email protected]:~$ locate vi | grep 'vi$' |xargs ls -al lrwxrwxrwx 1 root root 17 12
Ubuntu 系統解除安裝並安裝MySQL和基本配置(修改密碼,遠端登入,設定編碼格式)全過程
1. 解除安裝mysql sudo apt-get autoremove --purge mysql-server-5.7 # 根據你的mysql版本 sudo apt-get remove mysql-server sudo apt-get autoremove my
ubuntu系統下安裝windows並引導雙系統
首先,感謝wenbusy,給了我很大的幫助,以下部分內容來自於該博主。 windows系統安裝ubuntu很容易,但在ubuntu下如何安裝windows構成雙系統併成功引導?本文來詳細介紹。 系統環境:ubuntu14.
Ubuntu下安裝並配置FastDFS
FastDFS是一個開源的輕量級分散式檔案系統,它對檔案進行管理,功能包括:檔案儲存、檔案同步、檔案訪問(檔案上傳、檔案下載)等,解決了大容量儲存和負載均衡的問題。特別適合以檔案為載體的線上服務,如相簿網站、視訊網站等等。 本文以Ubuntu 14.04 32位作業系統為
-Ubuntu系統下安裝srilm工具箱
路徑 需要 工具 自己 問題 ima 配置 image 可能 零、環境配置 tcl首先要下載下來c/c++ compiler GNU make,GNU gawk,GNU gzip這些最基本的也要有 環境配置不好會報錯。一開始我在自己的虛擬機上安裝的時候就各種錯誤。估計是tc
Oracle Linux 6.9下安裝並配置多路徑multipath
系統默認 kcon parted mpat multipath src png 圖片 路徑 1、安裝multipath工具# yum –y install device-mapper device-mapper-multipath2、設置開機自啟動# chkconfig m
很簡單的在Ubuntu系統下安裝字體和切換默認字體的方法
拷貝 true 桌面 技術 系統 美麗 des net 加粗 摘要: Ubuntu系統安裝好後,默認字體對於中文的支持看上去不太美麗,於是很多朋友可能需要設置系統的默認字體為自己喜歡的字體。本文主要介紹如何解決這兩個問題。 說明:測試系統是Ubuntu14.04。
Ubuntu系統下安裝MYSQL
成功 libmysql mys ges 51cto rep ibm ins text 操作系統版本:Ubuntu 12.0 LTS 安裝命令:sudo apt-get install mysql-server 檢查MYSQL是否安裝成功:sudo net
【Hadoop】在Ubuntu系統下安裝Hadoop單機/偽分布式安裝
multi .cn 編輯器 重新 偽分布式 sources edit 信息 情況 Ubuntu 14.10 前方有坑: 由於之前的分布式系統電腦帶不動,所以想換一個偽分布式試一試。用的是Virtualbox + Ubuntu 14.10 。結果遇到了 apt-get 源無
如何在Ubuntu系統下安裝使用LaTeX
分享一下我老師大神的人工智慧教程!零基礎,通俗易懂!http://blog.csdn.net/jiangjunshow 也歡迎大家轉載本篇文章。分享知識,造福人民,實現我們中華民族偉大復興!
【Hadoop】在Ubuntu系統下安裝Spark
clas 進行 運行 輸出結果 oca .com 修改 我們 with Spark 版本:spark-2.4.0-bin-without-hadoop.tgz 下載地址:http://spark.apache.org/downloads.html 下載的時候註意一下,需要
Ubuntu系統 Nginx安裝及配置
首先,登入ubuntu系統 首先需安裝nginx依賴庫 1.安裝gcc g++的依賴庫 apt-get install build-essential apt-get install libtool 2.安裝pcre依賴庫 sudo apt-get update sudo apt
VMware下安裝並配置CentOS6.5
目錄 1.安裝空白虛擬機器 2.安裝CentOS 3.配置新的CentoOS 3.1 配置網路 3.2 關閉防火牆 1.安裝空白虛擬機器 進入VMware Workstation點選“建立新的虛擬機器”,彈出新建虛擬機器嚮導,預設選中“典型(推薦)”,點選“下一步。
Windows下安裝和配置PHP7.2
下面來介紹PHP7.2的下載安裝配置和使用。 下載和安裝PHP 到官網地址下載zip包(下載地址),我這裡下的是64位非執行緒安全的7.2.11版。 下載好的zip包直接解壓就可以使用,建議是放到習慣
Mac 下安裝並配置 Tomcat
1,下載 點選 官網 ,進入下載頁面, 2,安裝 解壓出來,即安裝完成。 移動解壓後的檔案,換個檔案目錄(方便集中管理),將它改個名字(畢竟名字太長了)。 我將其改名為 tomcat9 ,移入資源庫目錄下,這也是 Java 安裝的預設位置。 3,驗證 開啟 終端 app ,執行 /
Ubuntu系統下安裝MongoDB資料庫
通過命令列安裝 sudo apt install mongodb-server sudo mkdir -p /data/db/ sudo chmod 777 /data/db/通過原始碼包安裝官方安裝教程地址 https://docs.mongodb.
ubuntu麒麟下安裝並啟用搜狗輸入法
1.首先開啟UK軟體,輸入搜狗尋找搜狗拼音軟體 然後下載搜狗拼音軟體 接著點選啟動該軟體 2.點選搜狗拼音的圖示,進入搜狗拼音的設定視窗 點選高階,並開啟FCITX設定 加入英語輸入法 3.這樣就可以進行中英文切換了
ubuntu系統下安裝windows雙系統及問題處理
雙系統的安裝 準備工作 至少需要兩個U盤,一個製作成ubuntu啟動盤,一個製作成windows 7啟動盤,製作方法可用rufus,網址http://rufus.akeo.ie/,還可用UltraISO,推薦前者。都是把作業系統的映象寫入U盤,
