springboot之整合jsp(springMVC)
阿新 • • 發佈:2019-01-13
1、大體步驟
(1) 建立Maven web project;
(2) 在pom.xml檔案新增依賴;
(3) 配置application.properties支援jsp
(4) 編寫測試Controller
(5) 編寫JSP頁面
(6) 編寫啟動類App.java
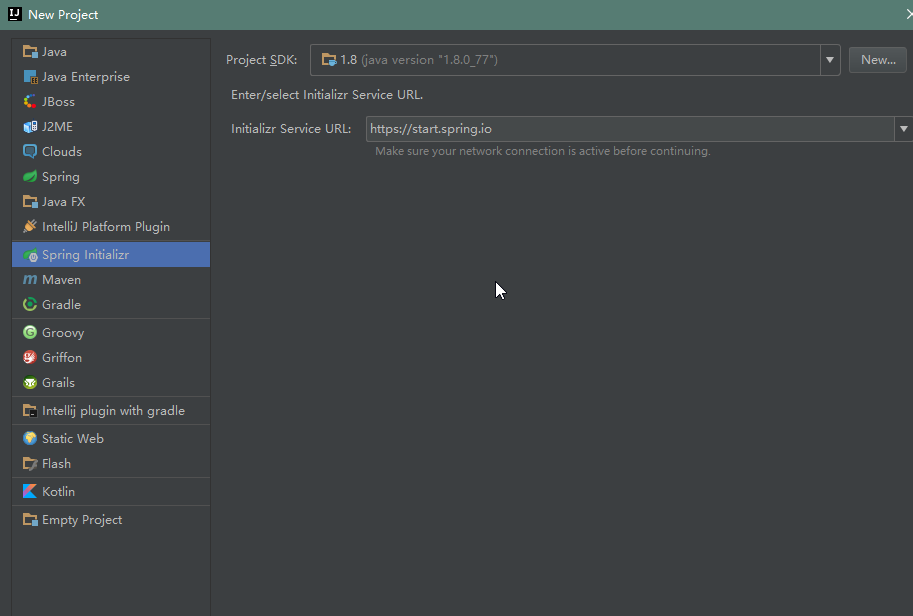
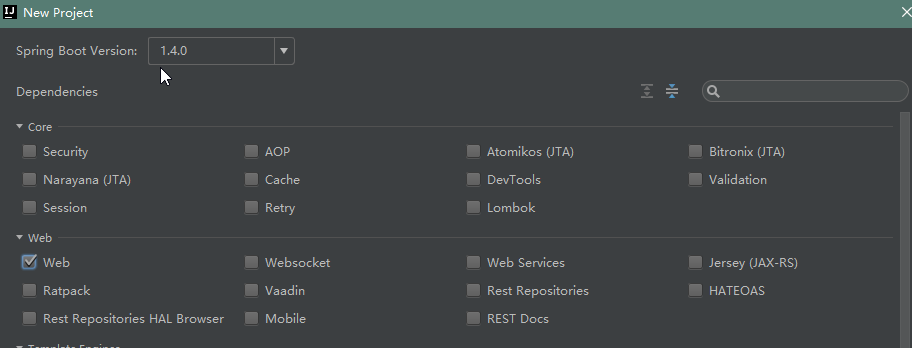
2、新建SpringInitialzr


3、pom檔案
| 1 2 3 4 5 6 7 8 9 10 11 12 13 14 15 16 17 18 19 20 |
<dependencies>
<dependency>
<groupId>org.springframework.boot</groupId>
<artifactId>spring-boot-starter-web</artifactId>
</dependency>
<dependency>
<groupId>org.springframework.boot</groupId>
<artifactId>spring-boot-starter-tomcat</artifactId>
<scope>provided</scope>
</dependency>
<dependency>
<groupId>org.apache.tomcat.embed</groupId>
<artifactId>tomcat-embed-jasper</artifactId>
</dependency>
<dependency>
<groupId>org.springframework.boot</groupId>
<artifactId>spring-boot-starter-test</artifactId>
<scope>test</scope>
</dependency>
</dependencies>
|
4、application.properties檔案
| 1 2 3 4 5 6 7 8 9 10 11 |
# 頁面預設字首目錄
spring.mvc.view.prefix=/WEB-INF/jsp/
# 響應頁面預設字尾
spring.mvc.view.suffix=.jsp
# 自定義屬性,可以在Controller中讀取
application.hello=Hello GOD
|
5、Controller檔案
| 1 2 3 4 5 6 7 8 9 10 11 12 13 14 15 16 17 18 19 20 21 22 23 24 25 26 27 28 29 |
package com.example;
import org.springframework.beans.factory.annotation.Value;
import org.springframework.stereotype.Controller;
import org.springframework.web.bind.annotation.RequestMapping;
import |
