
eclipse +maven +springboot\springcloud打包(含有common、core等依賴包的時候)
在父級專案的pom檔案上面加說以下內容:
<build>
<finalName>${project.artifactId}</finalName>
<pluginManagement>
<plugins>
<plugin>
<groupId>org.springframework.boot</groupId>
<artifactId>spring-boot-maven-plugin</artifactId>
<configuration>
<fork>true</fork>
</configuration>
</plugin>
</plugins>
</pluginManagement>
</build>
然後直接在父級的專案或是pom檔案右擊選擇install進行整個專案的打包即可。
=================轉載內容===============
目錄
一、簡介
二、搭建一個基本的web-mvc 專案
2.1 Configure environment
2.2 Start
official document:http://projects.spring.io/spring-boot/
一、簡介
SpringMVC是非常偉大的框架,開源,發展迅速。優秀的設計必然會劃分、解耦。所以,spring有很多子專案,比如core、context、bean、mvc等。這對知根底的人來說很簡單明瞭,然而springmvc就是為了傻瓜式的操作而發明的。對於初學springmvc的人來說,想要入手就開發需要拷貝一連串的dependency而不知道這個是幹嘛,不知道是不是少了依賴。像我剛接觸springmvc的時候到處百度教程而發現各有不同,於是複製了一個又一個程式碼卻不能自己設定,根本原因是不瞭解各個依賴的包。
Spring-Boot 正是為了解決繁複的程式碼配置而產生的。Spring-Boot 也是基於java-base 開發的程式碼,及不用xml檔案配置,所有程式碼都由java來完成。還可以加入Groovy的動態語言執行。
二、搭建一個基本的web-mvc 專案
2.1 Configure environment
- java 1.8+
- maven 3.3+
- spring-boot 1.3.5
- idea 15
- Thymeleaf 3
2.2 Start
在idea中,選擇new-》maven建立一個空的maven專案,比如名字springboot-test。
2.2.1pom.xml
設定java版本:
|
1 2 3 |
|
新增依賴版本管理dependencyManagement
|
1 2 3 4 5 6 7 8 9 10 11 12 |
|
新增spring-web專案依賴
|
1 2 3 4 5 6 7 8 9 10 11 |
|
新增build-plugin
|
1 2 3 4 5 6 7 8 9 10 11 12 |
|
如此,一個簡單的restful的webservice的專案就搭建好了。如果想要支援檢視渲染,即jsp、freeMark、velocity等,新增對應的依賴即可。比如,我使用Thymeleaf模板:
|
1 2 3 4 |
|
2.2.2 建立java程式碼
如果新建專案的名字是:springboot-test. 則建立包springboot-test/src/main/java/com/test.
com
 +- example
     +- myproject
         +- Application.java
         |
         +- domain
         |   +- Customer.java
         |   +- CustomerRepository.java
         |
         +- service
         |   +- CustomerService.java
         |
         +- web
             +- CustomerController.java
com.test是我們的基本包名。下面建立配置類com.test.AppConfig。
|
1 2 3 4 5 6 7 8 9 10 11 12 13 14 |
|
@SpringBootApplication 標註啟動配置入口,可以發現通過一個main方法啟動。使用這個註解的類必須放置於最外層包中,因為預設掃描這個類以下的包。否則需要自己配置@ComponentScan。
這樣,配置基本完成了。下面開發控制層controller:
建立com.test.controller.HelloController。
|
1 2 3 4 5 6 7 8 9 10 11 12 13 14 15 16 17 18 19 20 21 22 23 24 25 26 27 28 29 30 31 32 33 34 35 |
|
建立檢視程式碼:
檢視預設放在springboot-test\src\main\resources\templates**.
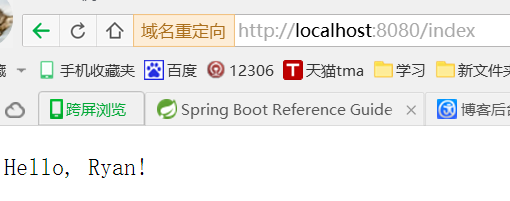
所以建立springboot-test\src\main\resources\templates\index.html
|
1 2 3 4 5 6 7 8 9 10 |
|
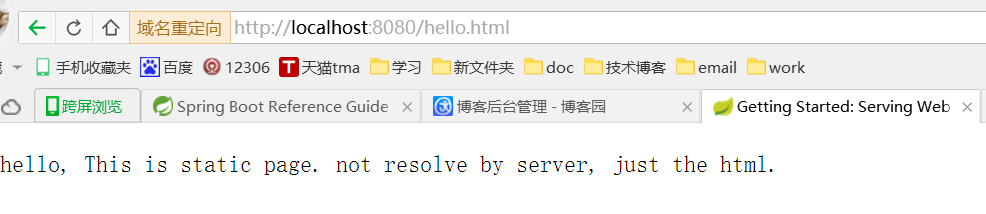
D:\workspace\springboot\springboot-test\src\main\webapp\hello.html
|
1 2 3 4 5 6 7 8 9 10 11 |
|
2.2.3 run
啟動方式多種,可以啟動main方法,也可以通過命令列啟動:
 View Code
瀏覽器訪問:localhost:8080/index

關注我的公眾號
相關推薦
eclipse +maven +springboot\springcloud打包(含有common、core等依賴包的時候)
在父級專案的pom檔案上面加說以下內容: <build> <finalName>${project.artifactId}</finalName> <pluginManagement>
一文帶你快速瞭解最火的數字經濟(大資料、人工智慧等都有)
人工智慧行業應用加速(暴富機會由“網際網路+”轉向AI+) “網際網路+”紅利已開發將盡,未來,新的暴富紅利將由“人工智慧”接棒。從產業演進看,科技巨頭正加速全球化併購,打造AI生態閉環,開源化也將成為全球性趨勢。開源化使得人工智慧的行業運用門檻急遽降低,未來幾年將迎來人工智慧行業應用浪潮。 2
Eclipse 搭建 SpringBoot 開發環境(安裝開發工具STS)
Spring Tool Suite是一個基於Eclipse的開發環境,可以自定義用於開發Spring應用程式。它提供了一個隨時可用的環境來實現,除錯,執行和部署Spring應用程式,包括Pivotal tc Server,Pivotal Cloud Foundry
Eclipse搭建SpringBoot程式入門 (整合mybatis)
目錄 Springboot 理解: spring boot其實不是什麼新的框架,它預設配置了很多框架的使用方式,就像maven整合了所有的jar包,spring boot整合了許多優秀框架,它能夠簡單、快速、方便為我們搭建好框架。 接下來進入搭建環節
Eclipse+Maven搭建Wbe專案(1)
1.新建Maven專案 開啟Eclipse 點選File ---->New ----->Other ---->Maven 選擇Maven Project 點選Next進入下一步進入
android-------- 多渠道打包(借助友盟移動統計分析)
each https get 限制 adl .cn 是我 tle mina 好久沒有發博客了,原因是換工作了,今天端午假期,所以來發一篇博客, 多渠道打包,借助友盟移動統計分析,希望對各位有所幫助 多渠道打包的理解: 渠道包就是要在安裝包中添加渠道信息,也就是chann
SpringBoot頁面跳轉訪問css、js等靜態資源引用無效解決(六)
目錄 一、頁面跳轉 二、情況說明 三、 問題解決方案 1、 引入thymeleaf的依賴包 2、 專案路徑 注意 (1) 頁面引用外部靜態資源的方式 (2) 核心解決方案 一、頁面跳轉 如果你還沒有實現頁面跳轉,推薦閱讀:SpringBoot跳轉渲染頁
【小家java】Java之Apache Commons-Collections4使用精講(含有Bag、Map、List、Set全覆蓋)
相關閱讀 【小家java】java5新特性(簡述十大新特性) 重要一躍 【小家java】java6新特性(簡述十大新特性) 雞肋升級 【小家java】java7新特性(簡述八大新特性) 不溫不火 【小家java】java8新特性(簡述十大新特性) 飽受讚譽 【小家java】java9
LCA-Tarjan,RMQ,倍增演算法超詳細原理講解+python實踐(Lowest Common Ancestor of a Binary Tree)
最近公共祖先演算法: 通常解決這類問題有兩種方法:線上演算法和離線演算法 線上演算法:每次讀入一個查詢,處理這個查詢,給出答案 離線演算法:一次性讀入所有查詢,統一進行處理,給出所有答案 我們接下來介紹一種離線演算法:Tarjan,兩種線上演算法:RMQ,倍增演算法 Tarjan
Selenium-python——異常(selenium.common.exceptions.StaleElementReferenceException: Message: stale eleme)
1、我在第一個頁面獲取到了訪問下一頁的連結一共80條,然後迴圈獲取八十條連結,並迴圈開啟。報了這個錯誤。程式碼如下 from selenium import webdriver import time import random driver = webdriver.Chrome(
Maven映象源彙總(含國內、國外)
國內 http://maven.aliyun.com/nexus/content/groups/public/ http://maven.oschina.net/content/groups/public 國外 http://repo1.maven.org/maven2 http
3springboot:springboot配置檔案(配置檔案、YAML、屬性檔案值注入<@Value、@ConfigurationProperties、@PropertySource,@ImportResource、@Bean>)
1.配置檔案: springboot預設使用一個全域性配置檔案 配置檔名是固定的 配置檔案有兩種(開頭均是application,主要是檔案的字尾): ->application. properties ->application
maven 釋出 web 專案(分別使用 Jetty 和 Tomcat 作為容器)
建立的 maven 專案如果是 web 專案,如果通過 eclipse 的 tomcat 外掛去釋出會遇到各種各樣的問題。這一節,我們介紹分別用 maven 的 jetty 外掛和 tomcat 外掛來發布 maven 的 web 專案。 1、使用
Eclipse 線上安裝SVN的(SVN CONNECTOR按官方指引不成功)
使用的當前最新的Eclipse 4.7 版本安裝 安裝方式是使用線上安裝:在INSTALL NEW SOFTWAR中輸入地址:http://download.eclipse.org/releases/juno,在加載出來的外掛列表中,輸入SUB來過濾出SVN外掛。 接下
IDEA搭建maven專案詳細步驟(解決沒有src及其下面的檔案)
準備工作 Itellij IDEA 17版官網下載maven包 推薦3.3.9版本點選下載 步驟 A. 在maven包中設定本地倉庫位置 1.解壓apache-maven-3.3.9.zip 2.開啟conf資料夾下的settings.xml檔案(最好用程式碼編輯工具開
Android Studio之maven Central,JCenter(build.gradle、gradle-wrapper.properties、gradle.properties)
Android studio 是從哪裡得到庫的? Android Studio是從build.gradle裡面定義的Maven 倉庫伺服器上下載library的。Apache Maven是Apache開發的一個工具,提供了用於貢獻library的檔案伺服器。總的來說,只
eclipse遠端除錯Tomcat方法(測試成功並且說說遇到的坑)
PS:文中容易引起歧義的地方已經做了修改;另外,本人蔘照以下步驟操作,結果無法除錯,後來發現是breakpoints的設定。。,如圖是不跳過斷點,如果點選了就是跳過斷點。。 1、如果要除錯遠端Linux下tomcat應用,配置tomcat在catalina.sh中新增
SpringBoot系列五:SpringBoot錯誤處理(資料驗證、處理錯誤頁、全域性異常)
1、概念: SpringBoot 錯誤處理 2、具體內容 在之前的程式裡面如果一旦出現了錯誤之後就會出現一堆的大白板,這個白板會有一些錯誤資訊(雖然這些錯誤資訊你可能 看不懂,但是這些錯誤資訊依然要告訴給使用者)。在 SpringBoot 裡面針對於錯誤的處理一共提供有
springboot整合mybatis(分頁及generator自動生成程式碼)
generator自動生成程式碼 1:匯入外掛 <!-- mybatis generator 自動生成程式碼外掛 --> <plugin> <groupId>org.mybatis.generator</groupI
這一次搞懂SpringBoot核心原理(自動配置、事件驅動、Condition)
@[TOC] # 前言 SpringBoot是Spring的包裝,通過自動配置使得SpringBoot可以做到開箱即用,上手成本非常低,但是學習其實現原理的成本大大增加,需要先了解熟悉Spring原理。如果還不清楚Spring原理的,可以先檢視博主之前的文章,本篇主要分析SpringBoot的啟動、自動配置、