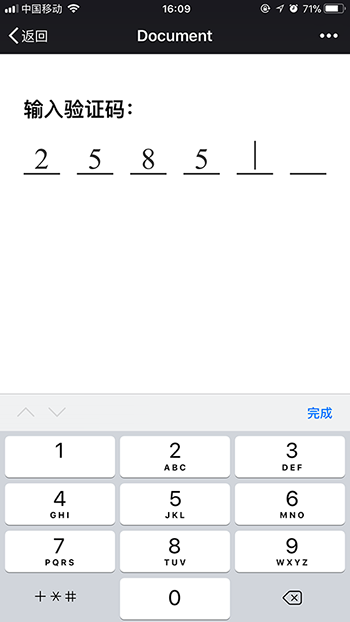
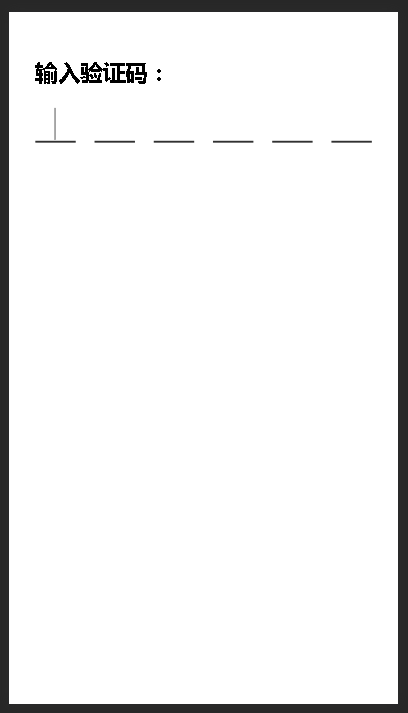
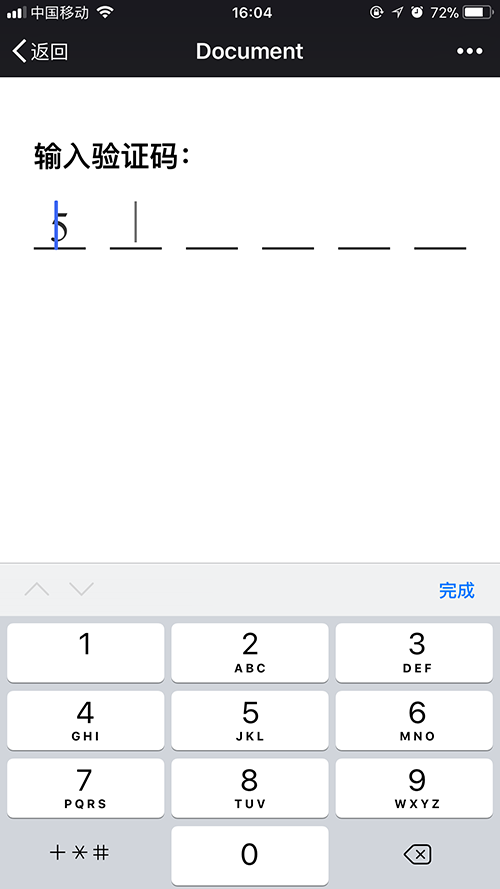
input輸入框模擬驗證碼輸入效果
今天看到一個帖子,說到用input輸入框模擬滴滴、摩拜等app驗證碼輸入效果,提到了一個方案:
1、利用input來獲得焦點,自動呼叫手機的數字鍵盤
2、實際將輸入框用透明度隱藏
3、用label的for屬性與input聯動來顯示輸入的數字
於是照著這個思路實際操作了一番,還是發現了不少問題。
首先頁面佈局:
<div class="container">
    <h2>輸入驗證碼:</h2>
    <div class="vcode" id='vertifycode'>
        <input type="tel" maxlength='6' ref='code' class='code' id='code'>
        <div class="labels">
            <label class='label' for="code"></label>
            <label class='label' for="code"></label>
            <label class='label' for="code"></label>
            <label class='label' for="code"></label>
            <label class='label' for="code"></label>
            <label class='label' for="code"></label>
        </div>
    </div>
</div>
樣式:
@keyframes animate {
            100% {
                opacity: 0;
            }
        }
        .container{
            padding: 5%;
        }
        .vcode{
            position: relative;
            width: 100%;
            overflow: hidden;
        }
        .code{
            width: 100%;
            padding: 0;
            height: 40px;
            font-size: 35px;
            overflow: hidden;
            border: none;
            outline: none;
            opacity: 0;
            margin-left: -100%; // ios上透明度為0時依然有游標
            -webkit-tap-highlight-color: transparent;
        }
        .labels{
            display: flex;
            display: -webkit-flex;
            width: 100%;
            height: 40px;
            justify-content: space-between;
            -webkit-justify-content: space-between;
            margin-top: -40px;
            -webkit-tap-highlight-color: transparent;// 解決ios點選灰色陰影的問題
        }
        .label{
            height: 34px;
            width: 12%;
            border-bottom: solid 2px #313131;
            float: left;
            color: #313131;
            font-size: 35px;
            text-align: center;
            padding-bottom: 4px;
        }
        .active:after{ // 偽類實現游標效果
            content: ' ';
            display: inline-block;
            height: 100%;
            width: 2px;
            background: #313131;
            animation: .8s animate infinite;
        }
注意點:
1、ios手機上input和lable都會出現點選有灰色背景閃動的問題,所以一定要給樣式加上
-webkit-tap-highlight-color: transparent;2、輸入框的預設游標隱藏了後,用偽類實現游標效果:
.active:after{ // 偽類實現游標效果
            content: ' ';
            display: inline-block;
            height: 100%;
            width: 2px;
            background: #313131;
            animation: .8s animate infinite;
        }
3、ios上雖然input透明度已經設定為0了,但是當其獲得焦點時,預設的游標依然存在
可以利用margin將整個input輸入框隱藏來解決:
margin-left: -100%; 樣式寫好了,就改進行邏輯處理了:
引入vue.js(vue確實好用)
<script src='./js/vue.min.js'></script>更改頁面佈局:
<div class="container">
    <h2>輸入驗證碼:</h2>
    <div class="vcode" id='vertifycode'>
        <input type="tel" maxlength='6' ref='code' class='code' id='code'
               @focus='focus=true'
               v-model='code'
               @blur='focus=false'
               :disabled='disabled'
        >
        <div class="labels">
            <label class='label' for="code"
                   :class='{active: focus===true && index===currentIndex}'
                   v-for='item,index in length'
                    v-text='arrCode[index]'>
            </label>
        </div>
    </div>
</div>
邏輯程式碼:
new Vue({
        el: '#vertifycode',
        data: {
            length: 6,
            currentIndex: 0,
            code: '',
            focus: false,
            arrCode: [],
            disabled: false
        },
        computed: {
            arrCode: function () {
                return this.code.split('');
            },
            currentIndex: function () {
                return this.code.length;
            }
        },
        watch: {
            code: function (newV,oldV) {
                var self = this;
                this.code = newV.replace(/[^\d]/g,''); // 限制非數字
                console.log(newV);
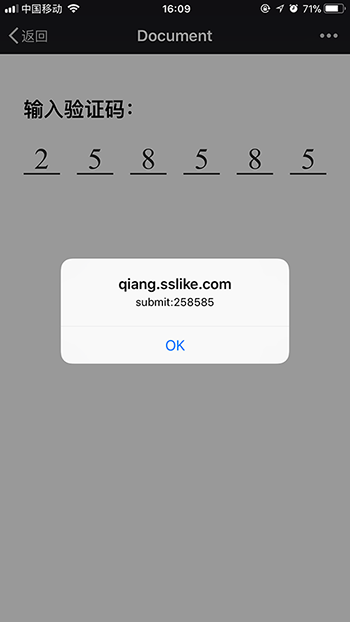
                if(newV.length >= 6) {
                    this.disabled = true;
                    this.$refs.code.blur();
                    setTimeout(function () {
                        alert('submit:'+self.code+'');
                    },500);
                }
            }
        }
資料說明:
length: 密碼長度,根據實際需求設定;
currentIndex: 當前獲得焦點的label的索引;
code: 輸入的內容;
focus: 判斷輸入框的焦點狀況;
arrCode:用於填充label標籤內容;
disabled:控制輸入框是否可用,輸入6位驗證碼後禁用。
當輸入長度等於6時,輸入框失去焦點,自動提交資料,彈出提示框,實際效果:

相關推薦
input輸入框模擬驗證碼輸入效果
今天看到一個帖子,說到用input輸入框模擬滴滴、摩拜等app驗證碼輸入效果,提到了一個方案:1、利用input來獲得焦點,自動呼叫手機的數字鍵盤2、實際將輸入框用透明度隱藏3、用label的for屬性與input聯動來顯示輸入的數字於是照著這個思路實際操作了一番,還是發現了
Android 密碼輸入框、驗證碼輸入框,完整版;
接上篇,優化了一下程式碼,新增一些屬性; "space" //每個輸入框之間的間距; "strokeWidth" //邊框的高度; "checke
自定義 iOS 密碼框或驗證碼輸入框,支援多位驗證碼,4位或6位驗證碼自己選擇。
密碼框 樣式 自定義輸入驗證碼樣式 git地址: https://github.com/HSFGitHub/CodeInputView.git 支援全部自定義 ,幾位驗證碼的變化,輸入樣式,
Android仿滴滴出行驗證碼輸入框效果
1、前言 最近擼碼忙成狗啊,果然從無到有的獨立開發不是一般的累啊。。。。 最近公司專案中有一個類似滴滴出行填寫驗證碼的彈框,下面是我擼出來的效果: 中間的那個輸入密碼的6個框框其實就是用shape畫的背景,通過監聽EditText獲取焦點來改變背景
仿美團簡訊驗證碼輸入框 + 自定義軟鍵盤
KeyboardDemo 自定義簡訊驗證碼輸入框 + 自定義數字字母軟鍵盤 前段時間做了一個需求,類似驗證碼輸入框,但輸入的優惠碼有數字和大小寫字母,所以就需要用到自定義軟鍵盤,不然總是切換數字與字母太麻煩,使用者體驗不佳。 剛開始想著到網上找一些demo得了,可i
Android 自定義方形驗證碼輸入框,仿滴滴、小籃單車
效果圖 GIF圖不是很清晰,下面是截圖 思路 1 . 每一個輸入框其實都是一個EditText,for迴圈建立並插入到LinearLayout中。 private void
Android自定義方形驗證碼輸入框
先來看UI給的效果圖 實現思路 繪製多個TextView控制元件用來顯示數字 繪製隱藏EditText用來接收輸入法內容(防止部分手機或輸入法監聽不到內容) 將EditText的內容顯示到TextView中 程式碼實現 自定義控制元件繼
Android自定義數字驗證碼輸入框
先上效果圖 設計思路 剛開始想過使用EditText來實現,但是具體實施時發現並不是這麼容易,而且還有一堆的坑,不如直接繼承View自定義來的方便,先在onDraw方法中繪製邊框及驗證碼,調整彈出輸入法只能輸入數字,監聽輸入法輸入,每輸入一個字元都需要重
自定義驗證碼輸入框
由於看到滴滴打車的輸入驗證碼的效果挺好的,就想著自己實現一個,先上一個效果圖, 實現了基本的功能,下面的是主要類 package com.example.mengsong.verificationcode; import android.content.Context
一個好看實用的6位驗證碼輸入框
$(() => { var valCodeInput = $('#val-code-input'); var valCodeItems = $("div[name='val-item']");
簡訊驗證碼輸入框 6位
<!DOCTYPE html> <html> <meta charset="utf-8"> <head> <script src="../js/commonJs/jquery-1.8.3.min.js">&l
Android 仿愛奇藝驗證碼輸入框
效果: 因為程式碼量不少,直接放Activity裡面肯定不合適,就抽取成一個自定義控制元件了 這樣以後複用也比較方便,但是我很菜,寫的自定義控制元件也是很菜的那種...湊活湊活吧 public class CodeView extends LinearLayout i
Androoid 驗證碼輸入框控制元件
public class EdtSmsCodeLayout extends GridLayout implements TextWatcher, View.OnKeyListener { private EditText[] edts; private int edt_position =
appium驗證碼輸入筆記
appium驗證碼輸入筆記appium驗證碼輸入筆記 今天自動化驗證碼輸入一個共四個輸入框,直接定位輸入發現問題,就是不能輸入: driver.manage().timeouts().implicitlyWait(20, TimeUnit.SECONDS); driver.findElem
關於豆瓣登錄,並實現驗證碼輸入的方法
保持 學習 gen index token 如果 抓取 with open comment 最近想把模擬登錄的知識學習下,所以就進行了豆瓣賬號的簡單登錄,以下是代碼: # -*- coding:utf-8 -*- ‘‘‘豆瓣模擬登陸,並實現發一條狀態‘‘‘ impor
input輸入框只讓使用者輸入後半部分內容
<label style="position:absolute;"> et_</label> <input plac
input輸入框判斷處理只能輸入數字
<tr> <th width="16%"> <font color="red">*</font>聯絡電話
基於 Vue2.0 的移動端 / PC 端驗證碼輸入元件.
vue-input-code 基於Vue2.0的移動端驗證碼輸入元件. 功能預覽 輸入回撥完成回撥自定義驗證碼個數樣式可控 支援 支援 Vue.js 2.0+. 安裝和使用 npm install vue-input-code --save 作為全域性元件
input輸入框是隻能輸入數字
小白寫部落格的第一天,人醜就要多學習,開始記下點點滴滴,以便以後回顧複習。 input輸入框有type=number這個屬性,<input type="number" id="in1" min="0" max="100"> 但是這個功能裡面是能夠輸+ -符號的,
js的幾種對輸入框的驗證
1.對輸入長度的驗證: function getByteLen(val) { var len = 0; for (var i = 0; i < val.length; i++) { var a = val.charAt(i);


