
Spring+Springmvc+Hibernate框架搭建,簡單例項
最近學習spring框架,學習中總是磕磕絆絆的,出現這樣或者那樣的問題,於是就像寫一篇筆記,將spring,springmvc,hibernate框架整合的過程,以及簡單的實現記錄下來,一來加深印象,二來一遍以後忘記好找資料(...)當然,初學者也可以借鑑一下。廢話不多說,直接上乾貨!
平臺:eclipse
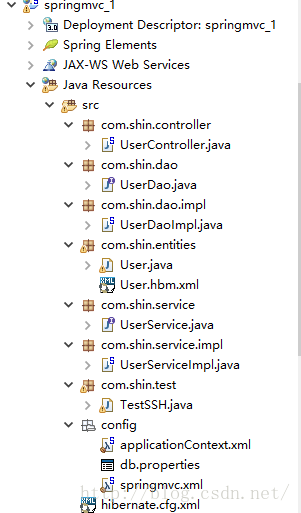
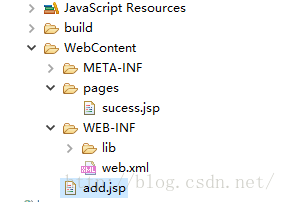
1.首先看看我整個專案的結構
2.專案開始:開始配置配置檔案,主要有web.xml, applicationContext.xml, springmvc這三個檔案
web.xml檔案如下(主要是配置spring IOC容器,springmvc的dispacherServlet, 編碼的格式化:防止出現亂碼,SessionFilter過濾器:防止session異常。這裡主要注意的是路徑問題,由於樓主的配置檔案是放在src下的config包中的,所以配置的時候用classpath:包名/配置檔名.xml的形式;如果放在WebContext下,直接寫檔名就行, WEB-INF下就是/WEB-INF/檔名.xml,以此類推。。
springmvc.xml檔案如下(主要是新增一個註解掃描,然後就是檢視解析器。其中prefix表示的是跳轉後的頁面放置的字首路徑,樓主這裡糾結了一會兒。。suffix表示的是字尾名,這個好理解。)<?xml version="1.0" encoding="UTF-8"?> <web-app xmlns:xsi="http://www.w3.org/2001/XMLSchema-instance" xmlns="http://java.sun.com/xml/ns/javaee" xsi:schemaLocation="http://java.sun.com/xml/ns/javaee http://java.sun.com/xml/ns/javaee/web-app_3_0.xsd" id="WebApp_ID" version="3.0"> <display-name>springmvc_1</display-name> <welcome-file-list> <welcome-file>index.html</welcome-file> <welcome-file>index.htm</welcome-file> <welcome-file>index.jsp</welcome-file> <welcome-file>default.html</welcome-file> <welcome-file>default.htm</welcome-file> <welcome-file>default.jsp</welcome-file> </welcome-file-list> <!-- 配置spring ioc容器 --> <context-param> <param-name>contextConfigLocation</param-name> <param-value>classpath:config/applicationContext.xml</param-value> </context-param> <!-- Bootstraps the root web application context before servlet initialization --> <listener> <listener-class>org.springframework.web.context.ContextLoaderListener</listener-class> </listener> <!-- 配置springmvc 的DispatcherServlet --> <servlet> <servlet-name>dispatcherServlet</servlet-name> <servlet-class>org.springframework.web.servlet.DispatcherServlet</servlet-class> <init-param> <param-name>contextConfigLocation</param-name> <param-value>classpath:config/springmvc.xml</param-value> </init-param> <load-on-startup>1</load-on-startup> </servlet> <!-- Map all requests to the DispatcherServlet for handling --> <servlet-mapping> <servlet-name>dispatcherServlet</servlet-name> <url-pattern>*.do</url-pattern> </servlet-mapping> <filter> <filter-name>CharacterEncodingFilter</filter-name> <filter-class>org.springframework.web.filter.CharacterEncodingFilter</filter-class> <init-param> <param-name>encoding</param-name> <param-value>UTF-8</param-value> </init-param> </filter> <filter-mapping> <filter-name>CharacterEncodingFilter</filter-name> <url-pattern>/*</url-pattern> </filter-mapping> <filter> <filter-name>SessionFilter</filter-name> <filter-class>org.springframework.orm.hibernate4.support.OpenSessionInViewFilter</filter-class> </filter> <filter-mapping> <filter-name>SessionFilter</filter-name> <url-pattern>/*</url-pattern> </filter-mapping> </web-app>
applicationContext.xml配置如下(1.註解掃描 2.載入db.properties檔案:配合資料庫連線池配置實用,這裡的路徑與web.xml中路徑同理 3.配置資料來源:與dp.properties中的各個屬性對應 4.配置sessionFactory:配置hibernate中的一些方言,屬性等,這裡將這些寫在spring配置檔案中,去除了hibernate.cfg.xml檔案,當然也可以將新增這個檔案,只需在sessionFactory中新增對映路徑即可 5.配置事務管理器 )<?xml version="1.0" encoding="UTF-8"?> <beans xmlns="http://www.springframework.org/schema/beans" xmlns:xsi="http://www.w3.org/2001/XMLSchema-instance" xmlns:context="http://www.springframework.org/schema/context" xmlns:mvc="http://www.springframework.org/schema/mvc" xmlns:tx="http://www.springframework.org/schema/tx" xsi:schemaLocation="http://www.springframework.org/schema/mvc http://www.springframework.org/schema/mvc/spring-mvc-4.2.xsd http://www.springframework.org/schema/beans http://www.springframework.org/schema/beans/spring-beans.xsd http://www.springframework.org/schema/context http://www.springframework.org/schema/context/spring-context-4.2.xsd http://www.springframework.org/schema/tx http://www.springframework.org/schema/tx/spring-tx-4.2.xsd"> <!-- 配置自動掃描包 --> <context:component-scan base-package="com.shin"> <!-- <context:include-filter type="annotation" expression="org.springframework.stereotype.Controller"/> --> <!-- <context:include-filter type="annotation" expression="org.springframework.web.bind.annotation.ControllerAdvice"/> --> </context:component-scan> <!-- 配置檢視解析器 --> <bean class="org.springframework.web.servlet.view.InternalResourceViewResolver"> <property name="prefix" value="/pages/"></property> <property name="suffix" value=".jsp"></property> </bean> <mvc:default-servlet-handler/> <mvc:annotation-driven/> </beans>
<?xml version="1.0" encoding="UTF-8"?>
<beans xmlns="http://www.springframework.org/schema/beans"
	xmlns:xsi="http://www.w3.org/2001/XMLSchema-instance"
	xmlns:context="http://www.springframework.org/schema/context"
	xmlns:tx="http://www.springframework.org/schema/tx"
	xsi:schemaLocation="http://www.springframework.org/schema/beans http://www.springframework.org/schema/beans/spring-beans.xsd
		http://www.springframework.org/schema/context http://www.springframework.org/schema/context/spring-context-4.2.xsd
		http://www.springframework.org/schema/tx http://www.springframework.org/schema/tx/spring-tx-4.2.xsd">


	<!-- 配置自動掃描的包 -->
	<context:component-scan base-package="com.shin">
<!-- 		<context:exclude-filter type="annotation" expression="org.springframework.stereotype.Controller"/> -->
<!-- 		<context:exclude-filter type="annotation" expression="org.springframework.web.bind.annotation.ControllerAdvice"/> -->
	</context:component-scan>

	<context:property-placeholder location="classpath:config/db.properties"/>

	<bean id="dataSource" class="com.mchange.v2.c3p0.ComboPooledDataSource" >
		<property name="user" value="${jdbc.user}"></property>
		<property name="password" value="${jdbc.password}"></property>
		<property name="driverClass" value="${jdbc.driverClass}"></property>
		<property name="jdbcUrl" value="${jdbc.jdbcUrl}"></property>
	</bean>

	<bean id="sessionFactory" class="org.springframework.orm.hibernate4.LocalSessionFactoryBean" >
		<property name="dataSource" ref="dataSource"></property>
 		<property name="namingStrategy">
			<bean class="org.hibernate.cfg.ImprovedNamingStrategy"></bean>
		</property>
		<property name="packagesToScan" value="com.shin.entities"></property>

		<property name="hibernateProperties">
			<props>
				<prop key="hibernate.dialect">org.hibernate.dialect.MySQL5InnoDBDialect </prop>
				<prop key="hibernate.show_sql">true</prop>
				<prop key="hibernate.format_sql">true</prop>
				<prop key="hibernate.hbm2ddl.auto">update</prop>
				<prop key="hibernate.temp.use_jdbc_metadata_defaults">false</prop>
			</props>
		</property>
		<property name="mappingResources" >
			<list>
				<value>com/shin/entities/User.hbm.xml</value>
			</list>
		</property>
	</bean>

	<bean id="transactionManager" class="org.springframework.orm.hibernate4.HibernateTransactionManager">
		<property name="sessionFactory" ref="sessionFactory"></property>
	</bean>

</beans>
jdbc.user=root
jdbc.password=123456
jdbc.driverClass=com.mysql.jdbc.Driver
jdbc.jdbcUrl=jdbc:mysql:///test
然後開始java程式碼的編寫:
樓主只是做了一個簡單的使用者新增應用,所以程式碼比較簡單,主要是實現這個基本框架,還有很多東西需要去學習;
先來實體類 User.java 然後我用hibernate外掛自動生成hbm.xml檔案(當然也可以手動配置,挺簡單的)
package com.shin.entities;

public class User {

	private Integer id;
	private String name;
	private String password;

	public Integer getId() {
		return id;
	}

	public void setId(Integer id) {
		this.id = id;
	}

	public String getName() {
		return name;
	}

	public void setName(String name) {
		this.name = name;
	}

	public String getPassword() {
		return password;
	}

	public void setPassword(String password) {
		this.password = password;
	}

}
<?xml version="1.0"?>
<!DOCTYPE hibernate-mapping PUBLIC "-//Hibernate/Hibernate Mapping DTD 3.0//EN"
"http://hibernate.sourceforge.net/hibernate-mapping-3.0.dtd">
<!-- Generated 2016-7-12 10:59:16 by Hibernate Tools 3.5.0.Final -->
<hibernate-mapping>
    <class name="com.shin.entities.User" table="USER">
        <id name="id" type="java.lang.Integer">
            <column name="ID" />
            <generator class="native" />
        </id>
        <property name="name" type="java.lang.String">
            <column name="NAME" />
        </property>
        <property name="password" type="java.lang.String">
            <column name="PASSWORD" />
        </property>
    </class>
</hibernate-mapping>
然後是dao層,分別是UserDao.java介面 和 UserDaoImpl.java實現
package com.shin.dao;

import com.shin.entities.User;

public interface UserDao {

	public void addUser(User user);
}
package com.shin.dao.impl;

import org.hibernate.SessionFactory;
import org.springframework.beans.factory.annotation.Autowired;
import org.springframework.stereotype.Repository;
import org.springframework.transaction.annotation.Transactional;

import com.shin.dao.UserDao;
import com.shin.entities.User;

@Repository("userDao")
public class UserDaoImpl implements UserDao {

	@Autowired
	private SessionFactory sessionFactory;

    public SessionFactory getSessionFactory() {
        return sessionFactory;
    }

	public void addUser(User user) {

		sessionFactory.getCurrentSession().save(user);

	}

}
再就是service層,分別是UserService.java介面和UserServiceImpl,java實現類
package com.shin.service;

import com.shin.entities.User;

public interface UserService {

	public void addUser(User user);
}
package com.shin.service.impl;

import org.springframework.beans.factory.annotation.Autowired;
import org.springframework.stereotype.Service;

import com.shin.dao.UserDao;
import com.shin.entities.User;
import com.shin.service.UserService;

@Service("userService")
public class UserServiceImpl implements UserService {

	@Autowired
	private UserDao userDao;

	public void setUserDao(UserDao userDao) {
		this.userDao = userDao;
	}

	@Override
	public void addUser(User user) {
		// TODO Auto-generated method stub
		userDao.addUser(user);
	}

}
package com.shin.controller;

import javax.servlet.http.HttpServletRequest;

import org.springframework.beans.factory.annotation.Autowired;
import org.springframework.stereotype.Controller;
import org.springframework.web.bind.annotation.RequestMapping;

import com.shin.entities.User;
import com.shin.service.UserService;

@Controller
@RequestMapping("/user")
public class UserController {

	@Autowired
	private UserService userService;

	@RequestMapping(value="sucess.do")
	public String add(HttpServletRequest request){
		String username = request.getParameter("username");
		String password = request.getParameter("password");
		System.out.println(username+" "+password);

		User user = new User();
		user.setName(username);
		user.setPassword(password);

		userService.addUser(user);
		return "sucess";

	}
}
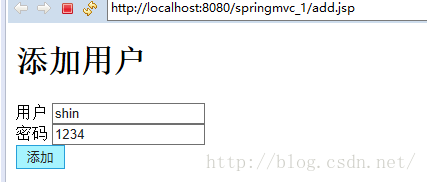
add.jsp
<%@ page language="java" contentType="text/html; charset=utf-8"
pageEncoding="utf-8"%>
<!DOCTYPE html PUBLIC "-//W3C//DTD HTML 4.01 Transitional//EN" "http://www.w3.org/TR/html4/loose.dtd">
<html>
<head>
<meta http-equiv="Content-Type" content="text/html; charset=utf-8">
<title>Insert title here</title>
</head>
<body>
<h1>新增使用者</h1>
<form action="user/sucess.do" method="post">
使用者 <input type="text" name="username"/><br/>
密碼 <input type="text" name="password"/><br/>
<input type="submit" value="新增">
</form>
</body>
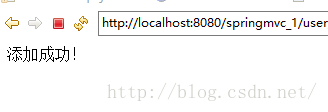
</html>sucess.jsp
<%@ page language="java" contentType="text/html; charset=utf-8"
    pageEncoding="utf-8"%>
<!DOCTYPE html PUBLIC "-//W3C//DTD HTML 4.01 Transitional//EN" "http://www.w3.org/TR/html4/loose.dtd">
<html>
<head>
<meta http-equiv="Content-Type" content="text/html; charset=utf-8">
<title>Insert title here</title>
</head>
<body>
	新增成功!
</body>
</html>
測試:
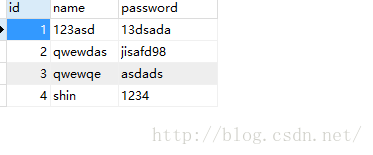
自此,整個專案完成了,當中遇到了很多問題,有大有小,小問題特別多!!!比如配置路徑時,classpath寫成classpth,找了好久,一直以為詩路徑問題,誰知道是簡單的拼寫錯誤。。。總之,學程式設計這玩意兒,得細心,更得有恆心,樓主已經踏上不歸路,堅持走下去,加油!大家也一起加油!
相關推薦
Spring+Springmvc+Hibernate框架搭建,簡單例項
最近學習spring框架,學習中總是磕磕絆絆的,出現這樣或者那樣的問題,於是就像寫一篇筆記,將spring,springmvc,hibernate框架整合的過程,以及簡單的實現記錄下來,一來加深印象,二來一遍以後忘記好找資料(...)當然,初學者也可以借鑑一下。廢話不多說,
Dubbo+SpringBoot+Spring+SpringMVC+MyBatis框架搭建的Demo中遇到的錯誤
遇到的報錯問題: com.alibaba.dubbo.remoting.RemotingException: message can not send, because channel is closed . url:dubbo://192.168.43.177:20880/com.test.s
理解Spring+SpringMVC+Hibernate開發流程,附一定原始碼(一)
本例採用Eclipse實現spring+springMVC+hibernate專案的建立,在專案建立的過程中進行一定講解,方便理解是如何開發使用spring+springMVC+hibernate的思想。 接下來是具體的開發步驟: 一、初步開發環境搭建
框架搭建-Spring+SpringMVC+Hibernate
一、 專案環境 1.1、環境 Intellij Idea+Spring4.0+SpringMVC4.0+Hibernate4.0+Mysql5.1 1.2、包結構 1.3、包功能 1)com.spring.zbt.controller
Spring+struts2+Hibernate框架的搭建
param 配置 tro 會有 net click ast scan amp 1.搭建過程 首先需要引入Spring、Struts2、Hibernate的開發包,已經數據庫的驅動包。 UserAction.java文件 package cn.shop.ac
使用idea搭建Maven+SSM(Spring+SpringMVC+Mybatis)框架(一、使用Maven創建新工程)
post eight 9.png 圖片 tis 本地包 end pen nbsp 一、新建Maven項目 1、如圖創建簡單java web application。 2、如圖填寫組織唯一標識和項目唯一標識 3、如圖照做 4、點擊finish即可完成項目創建,如圖為創建
spring+springMvc+mybatis框架簡單實例
username span tty 添加 localhost name cee rop lns web.xml <?xml version="1.0" encoding="UTF-8"?> <web-app xmlns:xsi="http://
基於spring boot搭建spring+springMVC+hibernate+mysql
版本: spring boot:2.1.0.RELEASE mysql:8.0.12 1、新增起步依賴 pom.xml檔案 <?xml version="1.0" encoding="UTF-8"?> <project xmlns="http://maven.a
spring+springmvc+hibernate製作一個簡單的電商網站(3)購物車
購物車是電商網站重要的模組之一,也是有一定難度的模組。 這裡主要是教大家大概的實現思路,我還是不會把原始碼寫出來讓各位Ctrl CV ,因為專案是保密的而且只會Ctrl CV的不算是開發工程師 一,購物車 購物車這個模組因為需求不同,各個網站的購物車功能也不同,有的網站
spring+springmvc+hibernate製作一個簡單的電商網站(4) 生成訂單
訂單流程很簡單,認真看就明白了。 一,生成訂單 電商網站大多數是在購物車中開始生成訂單的,當然也有一鍵生成訂單,這裡我們就說一下購物車中生成訂單的流程。 第一步:檢視購物車; 第二步:確認收貨地址; 第三步:生成訂單; 雖然看起來像廢話,但這個其實是三個介面。
SSM框架整合Maven工程整合Spring+Springmvc+Mybatis(詳細教程,附程式碼)
一、基本概念 1、Spring Spring是一個開源框架,Spring是於2003 年興起的一個輕量級的Java 開發框架,由Rod Johnson 在其著作Expert One-On-One J2EE Development and Design中闡述的部分
springMVC系列之(四) spring+springMVC+hibernate 三大框架整合
首先我們要知道Hibernate五大物件:,本例項通過深入的使用這五大物件和spring+springMVC相互結合,體會到框架的好處,提高我們的開發效率 Hibernate有五大核心介面,分別是:Session Transaction
使用maven搭建SSH專案(spring+springmvc+Hibernate)
本文介紹使用eclipse+maven搭建Spring+SpringMvc+Hibernate專案,以登陸為例: 1、建立maven專案 2、把maven專案變為動態網站 3、搭建spring+springmvc+Hibernate專案 1 建立maven專案
Spring boot專案搭建及簡單例項
Spring boot專案搭建 Spring Boot 概述 Build Anything with Spring Boot:Spring Boot is the starting point for building all Spring-based applications. Spring Bo
java web,從零開始,一步一步配置ssm(Spring+SpringMVC+MyBatis)框架
1、安裝JDK: 安裝之後要配置環境變數,在系統變數裡: 新建變數名JAVA_HOME,變數值C:\Program Files\Java\jdk1.8.0_77; 新建變數名CLASSPATH,變數值.;%JAVA_HOME%\lib\tools.jar Path後面新增%
SSM框架——Spring+SpringMVC+Mybatis的搭建教程
一:概述SSM框架在專案開發中經常使用到,相比於SSH框架,它在僅幾年的開發中運用的更加廣泛。Spring作為一個輕量級的框架,有很多的拓展功能,最主要的我們一般專案使用的就是IOC和AOP。SpringMVC是Spring實現的一個Web層,相當於Struts的框架,但是比
框架篇:Spring+SpringMVC+hibernate整合開發
前言: 最近沒什麼事做,搭個框架寫成部落格記錄下來,拉通一下之前所學知識. 話不多說,我們直接步入正題。 準備工作: 1/安裝並配置java執行環境 2/資料庫的安裝配置(Mysql) 3/安裝並配置伺服器(Tomcat)
Struts+Spring+Hibernate實現上傳下載(spring的最低框架配置,web.xml等)
引言 檔案的上傳和下載在J2EE程式設計已經是一個非常古老的話題了,也許您馬上就能掰著指頭數出好幾個著名的大件:如SmartUpload、Apache的FileUpload。但如果您的專案是構建在Struts+Spring+Hibernate(以下稱SSH)框架上的,這些大
SSM(Spring+SpringMVC+Mybatis)框架超詳細搭建指南(利用Maven構建專案)
其實這是我實習生涯開始後的第一個任務,但是當時太忙了一直沒有時間記錄,就按照教程走了。剛好現在實習結束了有些時間,把整個搭建的過程還有一些坑記錄下來還是很有必要的。 DEMO https://github.com/mgsky1/aboutSpring/tree/ma
Struts2框架搭建與簡單的登陸例項
一.Struts2 框架搭建 新建工程web project,命名為LoginTest 點選Finish,生成如下圖所示專案 右鍵點選專案名,按下圖所示,新增Struts。 新增之後,選擇Struts2.1 點選next 點選Fi