
dubbo優雅停機原理分析[dubbo2.5.10]
這裡我們使用的是Apache dubbo官方提供的starter[0.1.0版本]。其使用的dubbo版本是2.5.10。我們將通過原始碼分析一下dubbo 的優雅停機是如何實現的。
引入Apache dubbo starter
<!-- 注意這裡要引入zkclient,否則會找不到zkclient jar包 -->
<dependency>
<groupId>com.github.sgroschupf</groupId>
<artifactId>zkclient</artifactId>
<version 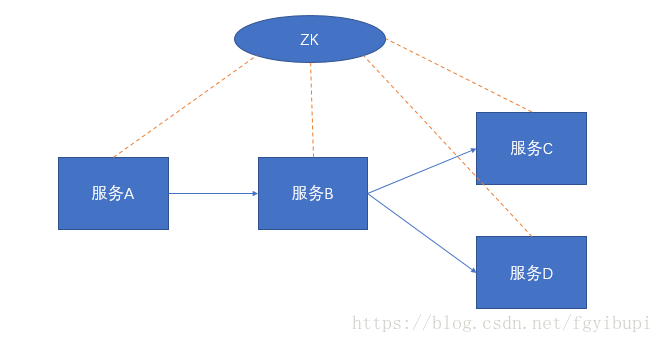
官方優雅停機解釋
Dubbo 是通過 JDK 的 ShutdownHook 來完成優雅停機的,所以如果使用者使用 kill -9 PID 等強制關閉指令,是不會執行優雅停機的,只有通過 kill PID 時,才會執行。具體請參考官方文件:
優雅停機
原始碼分析
註冊shutdownhook
dubbo在com.alibaba.dubbo.config.AbstractConfig中通過靜態初始化塊註冊shutdownhook
static {
Runtime.getRuntime().addShutdownHook(new Thread(new Runnable() {
public void run() {
if (logger.isInfoEnabled()) {
logger.info("Run shutdown hook now." 我們進入到ProtocolConfig.destroyAll():
public static void destroyAll() {
        if (!destroyed.compareAndSet(false, true)) {
            return;
        }
        //1. 關閉註冊中心
        //具體實現見zkClient.close():com.alibaba.dubbo.registry.zookeeper.ZookeeperRegistry#destroy
        AbstractRegistryFactory.destroyAll();

        //2。 Wait for registry notification
        //這一句是新版dubbo的關鍵改動之處。老版本沒有這幾行sleep的程式碼【請讀者自行閱讀老版本的原始碼】。預設10秒,可以通過 [dubbo.service.shutdown.wait] 配置
        //
        try {
            Thread.sleep(ConfigUtils.getServerShutdownTimeout());
        } catch (InterruptedException e) {
            logger.warn("Interrupted unexpectedly when waiting for registry notification during shutdown process!");
        }

        //3. 銷燬所有的protocol
        ExtensionLoader<Protocol> loader = ExtensionLoader.getExtensionLoader(Protocol.class);
        for (String protocolName : loader.getLoadedExtensions()) {
            try {
                Protocol protocol = loader.getLoadedExtension(protocolName);
                if (protocol != null) {
                    protocol.destroy();
                }
            } catch (Throwable t) {
                logger.warn(t.getMessage(), t);
            }
        }
    }
上面第一步通過AbstractRegistryFactory.destroyAll()來“登出”在所有註冊中心註冊的服務,通過呼叫ZkClient客戶端的zkClient.close()關閉ZK長連線。這樣服務消費者就看不到已經被登出的服務了。當然這是理想情況。畢竟從服務提供者登出自己,到消費者發小提供者不可用中間存在一定的時間差。
第二步是等待一定時間。原因後面會講。
步驟三是關閉自己暴露的服務和自己對下游服務的呼叫。假設我們使用的是dubbo協議,protocol.destroy()其實會呼叫com.alibaba.dubbo.rpc.protocol.dubbo.DubboProtocol#destroy方法:
public void destroy() {
        for (String key : new ArrayList<String>(serverMap.keySet())) {
            ExchangeServer server = serverMap.remove(key);
            if (server != null) {
                try {
                    if (logger.isInfoEnabled()) {
                        logger.info("Close dubbo server: " + server.getLocalAddress());
                    }
                    //優雅的關閉提供的服務
                    server.close(ConfigUtils.getServerShutdownTimeout());
                } catch (Throwable t) {
                    logger.warn(t.getMessage(), t);
                }
            }
        }

        for (String key : new ArrayList<String>(referenceClientMap.keySet())) {
            ExchangeClient client = referenceClientMap.remove(key);
            if (client != null) {
                try {
                    if (logger.isInfoEnabled()) {
                        logger.info("Close dubbo connect: " + client.getLocalAddress() + "-->" + client.getRemoteAddress());
                    }
                    //優雅的關閉對下游服務的呼叫
                    client.close(ConfigUtils.getServerShutdownTimeout());
                } catch (Throwable t) {
                    logger.warn(t.getMessage(), t);
                }
            }
        }

        //關閉幽靈連結
        for (String key : new ArrayList<String>(ghostClientMap.keySet())) {
            ExchangeClient client = ghostClientMap.remove(key);
            if (client != null) {
                try {
                    if (logger.isInfoEnabled()) {
                        logger.info("Close dubbo connect: " + client.getLocalAddress() + "-->" + client.getRemoteAddress());
                    }
                    client.close(ConfigUtils.getServerShutdownTimeout());
                } catch (Throwable t) {
                    logger.warn(t.getMessage(), t);
                }
            }
        }
        stubServiceMethodsMap.clear();
        super.destroy();
    }
上面方法中優先關閉自身對外提供的服務,然後關閉外部的引用,最後關閉幽靈連結(ghostClient)。很容易理解,如果先關閉外部的引用連結,而自身的連結沒有關閉,那麼就會出現連結不可用而報錯的情況。
關閉自身dubbo服務,分析一下com.alibaba.dubbo.remoting.exchange.support.header.HeaderExchangeServer#close(int)的程式碼:
public void close(final int timeout) {
        startClose();//標記進入關閉流程
        if (timeout > 0) {
            final long max = (long) timeout;
            final long start = System.currentTimeMillis();
            //將channel標記為只讀
            if (getUrl().getParameter(Constants.CHANNEL_SEND_READONLYEVENT_KEY, true)) {
                sendChannelReadOnlyEvent();
            }
            //等待所有正在進行中的呼叫都執行完成,或者達到了超時時間
            while (HeaderExchangeServer.this.isRunning()
                    && System.currentTimeMillis() - start < max) {
                try {
                    Thread.sleep(10);
                } catch (InterruptedException e) {
                    logger.warn(e.getMessage(), e);
                }
            }
        }
        doClose();//關閉心跳檢測等
        server.close(timeout);//關閉真正的netty的通訊通道,如果你是用的netty的話
}那麼dubbo是如何判斷是否還有呼叫執行中的任何呢?這就要去看com.alibaba.dubbo.remoting.exchange.support.DefaultFuture#CHANNELS中是如何實現的了。當發起一個請求時,會在CHANNELS中記錄當前請求的id和channel的鍵值對;當有獲得返回或者取消請求的時候,將該鍵值對從CHANNELS中刪除。所以只要CHANNELS不為空,則表明有請求還未執行完畢。接下來看doClose方法:
private void doClose() {
//執行緒安全的標記已關閉狀態
        if (!closed.compareAndSet(false, true)) {
            return;
        }
        //停止心跳檢測
        stopHeartbeatTimer();
        try {
        //停止心跳檢測的定時任務
            scheduled.shutdown();
        } catch (Throwable t) {
            logger.warn(t.getMessage(), t);
        }
}上面的程式碼主要是標記closed=true,並且關閉了心跳檢測,這樣一來,就不會處理新的請求了,註冊中心也檢測不到該服務。而server.close(timeout)則主要是關閉netty的通訊通道channel,可以參看AbstractServer#close和NettyServer#doClose方法。
現在看一下當前服務作為客戶端時,referenceClient的關閉過程 :com.alibaba.dubbo.rpc.protocol.dubbo.ReferenceCountExchangeClient#close(int):
public void close(int timeout) {
        if (refenceCount.decrementAndGet() <= 0) {
            if (timeout == 0) {
                client.close();
            } else {
                client.close(timeout);
            }
            client = replaceWithLazyClient();
        }
    }
這裡timeout是伺服器停止的等待時間,用於優雅停機。進入
com.alibaba.dubbo.remoting.exchange.support.header.HeaderExchangeClient#close(int):
public void close(int timeout) {
        // 標記client進入關閉流程.具體程式碼見com.alibaba.dubbo.remoting.transport.AbstractPeer#startClose
        startClose();
        doClose();//停止心跳檢測。具體實現見com.alibaba.dubbo.remoting.exchange.support.header.HeaderExchangeClient#stopHeartbeatTimer
        channel.close(timeout);
}跟進channel.close方法com.alibaba.dubbo.remoting.exchange.support.header.HeaderExchangeChannel#close(int):
 //優雅關閉channel。這裡會一直等待channel的關閉,直到超時強制關閉
    public void close(int timeout) {
        if (closed) {
            return;
        }
        closed = true;
        if (timeout > 0) {
            long start = System.currentTimeMillis();
            while (DefaultFuture.hasFuture(channel)
                    && System.currentTimeMillis() - start < timeout) {
                try {
                    Thread.sleep(10);
                } catch (InterruptedException e) {
                    logger.warn(e.getMessage(), e);
                }
            }
        }
        close();
}那麼什麼是幽靈連結(ghostClient)呢?在獲取連結的時候,如果連結為空或者已經被關閉了,那麼就會建立ghostClientcom.alibaba.dubbo.rpc.protocol.dubbo.DubboProtocol#getSharedClient:
/**
     * Get shared connection
     */
    private ExchangeClient getSharedClient(URL url) {
        String key = url.getAddress();
        ReferenceCountExchangeClient client = referenceClientMap.get(key);
        if (client != null) {
            if (!client.isClosed()) {
                client.incrementAndGetCount();
                return client;
            } else {
                referenceClientMap.remove(key);
            }
        }
        synchronized (key.intern()) {
            ExchangeClient exchangeClient = initClient(url);
            client = new ReferenceCountExchangeClient(exchangeClient, ghostClientMap);
            referenceClientMap.put(key, client);
            ghostClientMap.remove(key);
            return client;
        }
}我們進入ReferenceCountExchangeClient:
public ReferenceCountExchangeClient(ExchangeClient client, ConcurrentMap<String, LazyConnectExchangeClient> ghostClientMap) {
        this.client = client;
        refenceCount.incrementAndGet();
        this.url = client.getUrl();
        if (ghostClientMap == null) {
            throw new IllegalStateException("ghostClientMap can not be null, url: " + url);
        }
        this.ghostClientMap = ghostClientMap;
}去查詢類ReferenceCountExchangeClient中ghostClientMap的賦值程式碼:
//幽靈client,
    private LazyConnectExchangeClient replaceWithLazyClient() {
        //這個操作只為了防止程式bug錯誤關閉client做的防禦措施,初始client必須為false狀態
        URL lazyUrl = url.addParameter(Constants.LAZY_CONNECT_INITIAL_STATE_KEY, Boolean.FALSE)
                .addParameter(Constants.RECONNECT_KEY, Boolean.FALSE)
                .addParameter(Constants.SEND_RECONNECT_KEY, Boolean.TRUE.toString())
                .addParameter("warning", Boolean.TRUE.toString())
                .addParameter(LazyConnectExchangeClient.REQUEST_WITH_WARNING_KEY, true)
                .addParameter("_client_memo", "referencecounthandler.replacewithlazyclient");

        String key = url.getAddress();
        //最差情況下只有一個幽靈連線
        LazyConnectExchangeClient gclient = ghostClientMap.get(key);
        if (gclient == null || gclient.isClosed()) {
            gclient = new LazyConnectExchangeClient(lazyUrl, client.getExchangeHandler());
            ghostClientMap.put(key, gclient);
        }
        return gclient;
}現在來說一下2.5.10版本最新的改動,用於實現更良好的優雅停機,也就是上面最開始ProtocolConfig.destroyAll()種關閉註冊中心後的那一段等待時間。
因為provider從註冊中心撤銷服務和上游consumer將其服務從服務列表中刪除並不是原子操作,可能導致上游consumer的服務列表還未更新完成,我們的provider這時發現當前沒有進行中的呼叫就立馬關閉服務暴露,導致上游consumer呼叫該服務失敗。所以,dubbo預設的這種優雅停機方案,需要建立在上游consumer有重試機制的基礎之上,但由於consumer增加重試特性會增加故障時的雪崩風險,所以大多數分散式服務不願意增加服務內部之間的重試機制。其實dubbo.service.shutdown.wait的值主要是為了防止優雅停機時的無限等待,即限制等待上限,我們也應該用一個引數來設定等待下限,這樣整個分散式系統幾乎不需要通過重試來保證優雅停機,只需要給與上游consumer少許時間,讓他們足夠有機會更新完provider的列表就行,這就是ProtocolConfig.destroyAll()方法中sleep的原因。
總結
從整個微服務的呼叫鏈路的最上層,依次向下停止服務,並且每個步驟都需要有一個停止等待的過程,等待資源的釋放或者依賴服務下線。
其實原理很簡單,所有的優雅停機,包括系統釋出上線時,優雅上線也是同樣的道理。