
IOS 在storyboard中建立按鈕,用程式碼控制按鈕
阿新 • • 發佈:2019-01-22
1.在工程中找到Main.storyboard檔案。

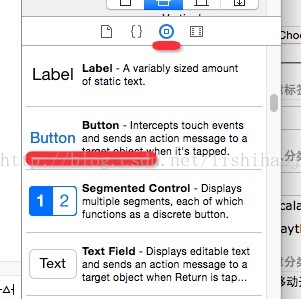
2.在Xcode右下角點選一個圓形的table標籤,並找到Button控制元件。
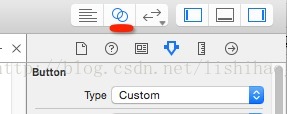
3.點選Xcode右上角,有個雙圓環的按鈕。
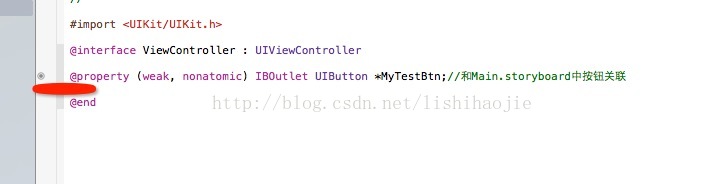
4.按住ctrl建,並用滑鼠左鍵點選按鈕,拖向ViewController.h檔案中,放開手並輸入相應的名稱。
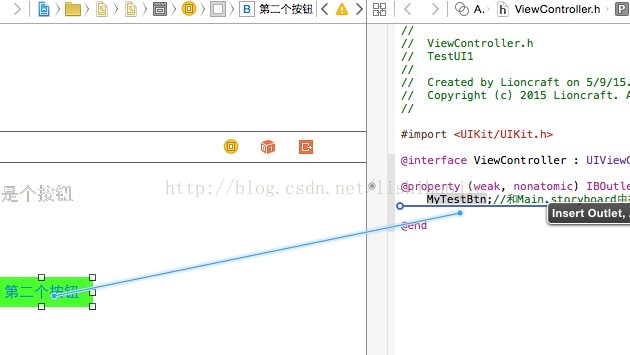
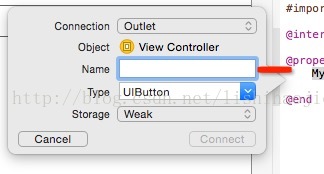
這個時候在ViewController中就會多出來一個,你自己建的按鈕資訊,並和Main.storyboard中的按鈕關聯。
5.我們就可以操作這個按鈕。我在ViewController.m中的viewDidLoad中,可以改變按鈕不同狀態下顯示的內容,
在不同事件下的,操作。設定按鈕的背景色,按鈕上的文字顏色,按鈕上的字型大小,
置按鈕變成圓角,設定按鈕邊框的大小,這個設定按鈕邊框的顏色,設定陰影的顏色,
設定陰影的大小,設定陰影的透明度,等
程式碼如下:
//
//  ViewController.m
//  TestUI1
//
//  Created by Lioncraft on 5/9/15.
//  Copyright (c) 2015 Lioncraft. All rights reserved.
//

#import "ViewController.h"

@interface ViewController ()

@end

@implementation ViewController

- (void)viewDidLoad {
    [super viewDidLoad];
    // Do any additional setup after loading the view, typically from a nib.

    [self.MyTestBtn setTitle:@"可以鬆手~" forState:UIControlStateHighlighted];//對於點選下,改變按鈕的文字內容
    //forState總共有6種狀態
//    UIControlStateNormal       = 0,
//    UIControlStateHighlighted  = 1 << 0,                  // used when UIControl isHighlighted is set
//    UIControlStateDisabled     = 1 << 1,
//    UIControlStateSelected     = 1 << 2,                  // flag usable by app (see below)
//    UIControlStateApplication  = 0x00FF0000,              // additional flags available for application use
//    UIControlStateReserved     = 0xFF000000               // flags reserved for internal framework use


    [self.MyTestBtn addTarget:self action:@selector(myTestBtn:) forControlEvents:UIControlEventTouchUpInside];
    /**
     *action:@selector 後面是要呼叫的函式

     forControlEvents總共有19種事件
     分別是:
     UIControlEventTouchDown           = 1 <<  0,      // on all touch downs
     UIControlEventTouchDownRepeat     = 1 <<  1,      // on multiple touchdowns (tap count > 1)
     UIControlEventTouchDragInside     = 1 <<  2,
     UIControlEventTouchDragOutside    = 1 <<  3,
     UIControlEventTouchDragEnter      = 1 <<  4,
     UIControlEventTouchDragExit       = 1 <<  5,
     UIControlEventTouchUpInside       = 1 <<  6,
     UIControlEventTouchUpOutside      = 1 <<  7,
     UIControlEventTouchCancel         = 1 <<  8,

     UIControlEventValueChanged        = 1 << 12,     // sliders, etc.

     UIControlEventEditingDidBegin     = 1 << 16,     // UITextField
     UIControlEventEditingChanged      = 1 << 17,
     UIControlEventEditingDidEnd       = 1 << 18,
     UIControlEventEditingDidEndOnExit = 1 << 19,     // 'return key' ending editing

     UIControlEventAllTouchEvents      = 0x00000FFF,  // for touch events
     UIControlEventAllEditingEvents    = 0x000F0000,  // for UITextField
     UIControlEventApplicationReserved = 0x0F000000,  // range available for application use
     UIControlEventSystemReserved      = 0xF0000000,  // range reserved for internal framework use
     UIControlEventAllEvents           = 0xFFFFFFFF


     **/

    //這個是設定按鈕的背景色
    self.MyTestBtn.backgroundColor = [UIColor colorWithRed:1.00f green:0.0f blue:0.82f alpha:1.00f];

    //這個是設定按鈕上文字的顏色
    [self.MyTestBtn setTitleColor:[UIColor colorWithRed:0.00f green:1.0f blue:0.02f alpha:1.00f] forState:UIControlStateNormal];
    //這個是設定按鈕上文字的大小
    self.MyTestBtn.font = [UIFont boldSystemFontOfSize:12.0f];

    //這個是設定按鈕變成圓角
    self.MyTestBtn.layer.cornerRadius = 10;
    //這個是設定按鈕邊框的大小
    self.MyTestBtn.layer.borderWidth = 3;
    //這個設定按鈕邊框的顏色
    self.MyTestBtn.layer.borderColor = [UIColor blackColor].CGColor;
    //這個是設定陰影的顏色
    self.MyTestBtn.layer.shadowColor = [UIColor yellowColor].CGColor;
    //這個是設定陰影的大小
    self.MyTestBtn.layer.shadowOffset = CGSizeMake(5, 2);
    //這個是設定陰影的透明度
    self.MyTestBtn.layer.shadowOpacity = 0.6;


    CGRect btnFrame = self.MyTestBtn.frame;
    //btnFrame.origin.y += 100;
    btnFrame.size.width = 100;
    btnFrame.size.height = 100;
    self.MyTestBtn.frame = btnFrame;


}

- (void)didReceiveMemoryWarning {
    [super didReceiveMemoryWarning];
    // Dispose of any resources that can be recreated.
}
//這個是彈出對話方塊的函式
-(void)myTestBtn:(UIButton *)sender{

    UIAlertView *myAlertView = [[UIAlertView alloc] initWithTitle:@"提示" message:@"按鈕點選提示" delegate:self cancelButtonTitle:@"確定" otherButtonTitles: nil];

    [myAlertView show];

}

@end
6.最後,改變按鈕的大小和位置還有問題。