vue配置多頁面應用
第一步:使用vue-cli搭建專案(注:建議安裝淘寶映象,使用cnpm執行下面操作)
1.按住shift按鈕,右鍵點選存放專案的資料夾,點選在此處開啟命令視窗。
2.在命令視窗中輸入 npm install -g vue-cli 安裝vue-cli。
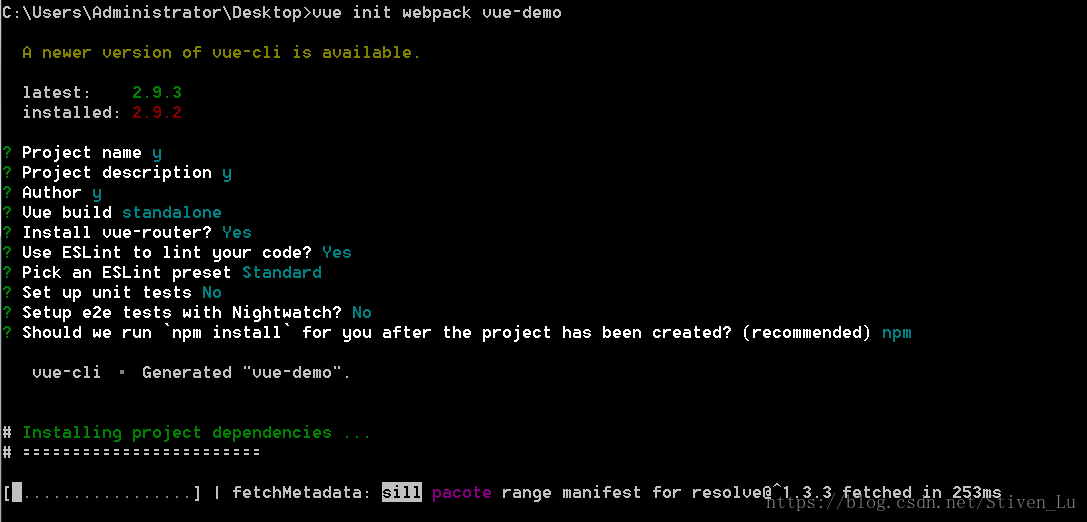
3.輸入 vue init webpack vue-demo 建立一個名為vue-demo的專案。
4.輸入 cd vue-demo 進入專案目錄。
5.輸入 npm install 安裝專案依賴。
6.npm run dev 執行專案。
7.網頁開啟localhost:8080,就可以看到專案頁面,如下圖。

註釋:在執行vue init webpack vue-demo命令時候一直按回車就行,只是因為不需要tests模組,這一部分我選擇了no,如下圖。具體每個
配置的含義後期我會在部落格中更新。
第二步:調整目錄結構
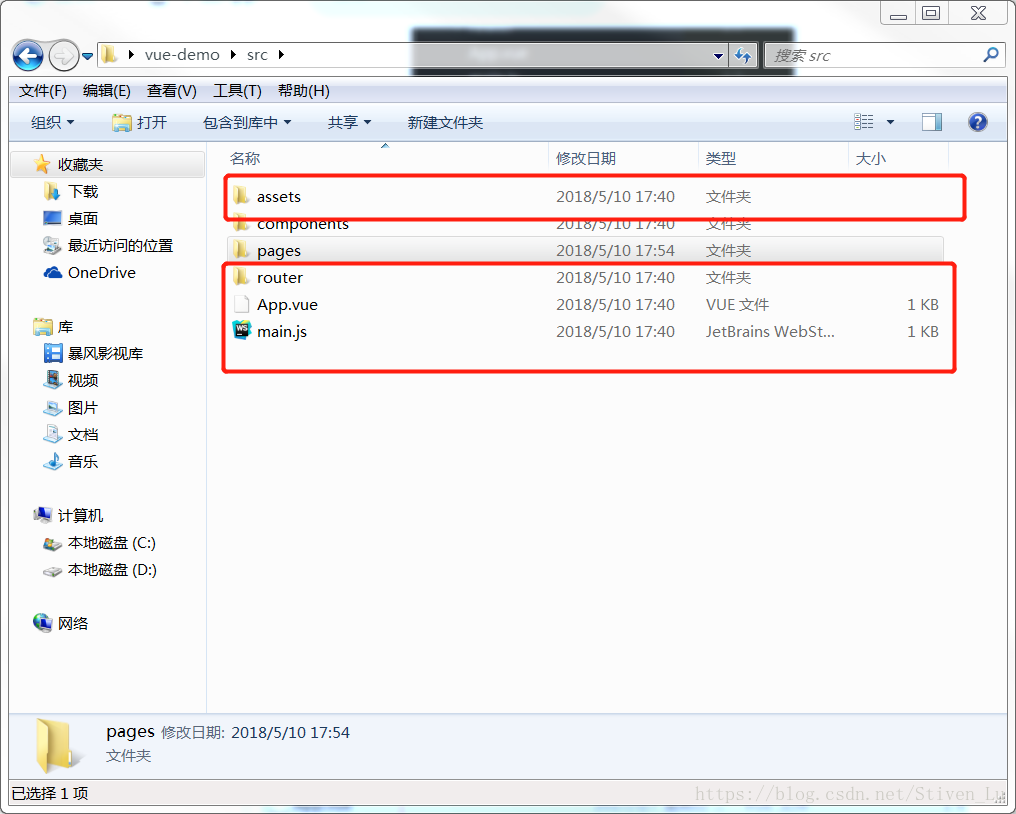
在專案目錄中的src資料夾中新建一個pages資料夾,pages資料夾中新建一個test1資料夾,將src資料夾中的assets資料夾、router資料夾、App.vue檔案及main.js檔案都放到新建的test1資料夾中。如下圖紅框中的檔案時需要移動的。
、
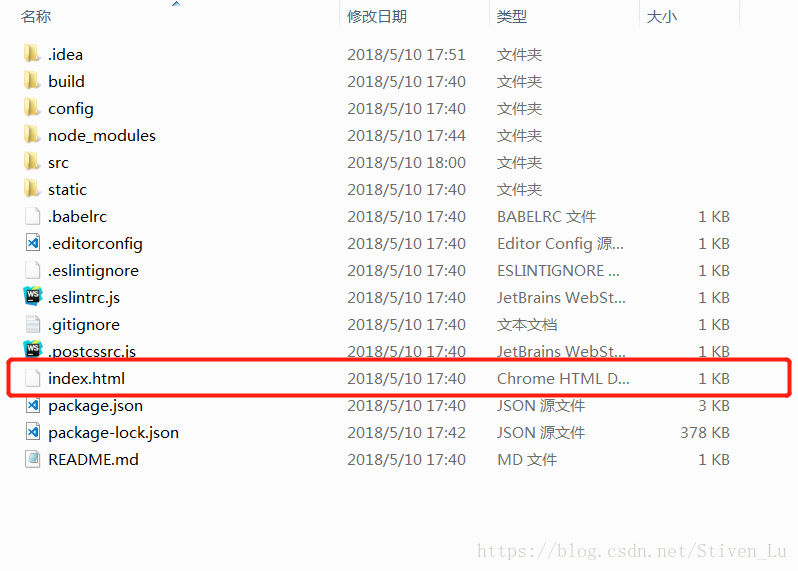
接下來將vue-demo資料夾中的index.html檔案也放入test1檔案中。如下圖。
現在src檔案中的目錄結構如下:

最後將test1檔案中的main.js,改為test1.js,將index.html檔名改為test1.html,保證入口js檔案和模板檔案的名稱是一致的。
第三步:修改build檔案中配置
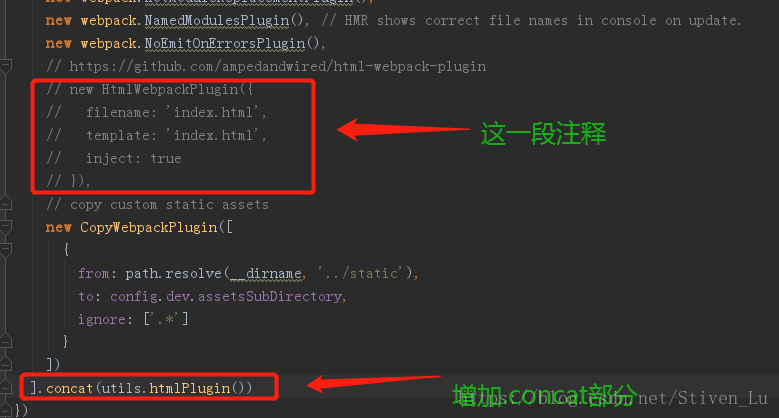
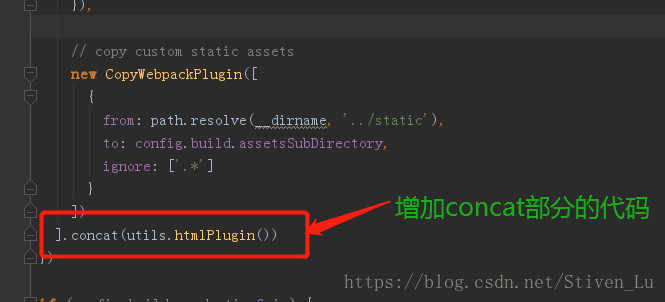
1.修改build檔案中utils檔案,在檔案程式碼的最後面加入下面兩個函式。
// glob是webpack安裝時依賴的一個第三方模組,還模組允許你使用 *等符號, 例如lib/*.js就是獲取lib資料夾下的所有js字尾名的檔案
var glob = require('glob')
// 頁面模板
var HtmlWebpackPlugin = require('html-webpack-plugin')
// 取得相應的頁面路徑,因為之前的配置,所以是src資料夾下的pages資料夾
var PAGE_PATH = path.resolve(__dirname, '../src/pages')
// 用於做相應的merge處理
var merge = require('webpack-merge')


//多入口配置
// 通過glob模組讀取pages資料夾下的所有對應資料夾下的js字尾檔案,如果該檔案存在
// 那麼就作為入口處理
exports.entries = function() {
  var entryFiles = glob.sync(PAGE_PATH + '/*/*.js')
  var map = {}
  entryFiles.forEach((filePath) => {
    var filename = filePath.substring(filePath.lastIndexOf('\/') + 1, filePath.lastIndexOf('.'))
    map[filename] = filePath
  })
  return map
}

//多頁面輸出配置
// 與上面的多頁面入口配置相同,讀取pages資料夾下的對應的html字尾檔案,然後放入陣列中
exports.htmlPlugin = function() {
  let entryHtml = glob.sync(PAGE_PATH + '/*/*.html')
  let arr = []
  entryHtml.forEach((filePath) => {
    let filename = filePath.substring(filePath.lastIndexOf('\/') + 1, filePath.lastIndexOf('.'))
    let conf = {
      // 模板來源
      template: filePath,
      // 檔名稱
      filename: filename + '.html',
      // 頁面模板需要加對應的js指令碼,如果不加這行則每個頁面都會引入所有的js指令碼
      chunks: ['manifest', 'vendor', filename],
      inject: true
    }
    if (process.env.NODE_ENV === 'production') {
      conf = merge(conf, {
        minify: {
          removeComments: true,
          collapseWhitespace: true,
          removeAttributeQuotes: true
        },
        chunksSortMode: 'dependency'
      })
    }
    arr.push(new HtmlWebpackPlugin(conf))
  })
  return arr
}
2.修改build/webpack.base.conf.js的入口配置
找到下面這部分程式碼
entry: {
  app: './src/main.js'
},
改為
entry: utils.entries(),3.修改build資料夾中的webpack.dev.conf.js的配置
4.修改build中的webpack.prod.conf.js檔案

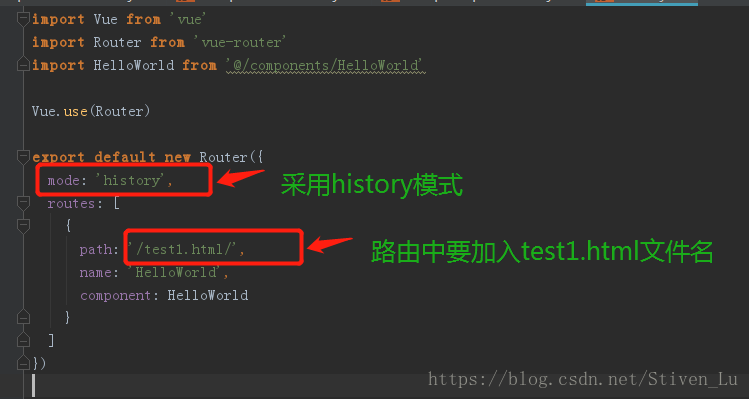
5.將test1檔案中的router檔案中index.js檔案做如下修改。注:因為使用了mode:‘history’,去掉地址中不美觀的#,所以所有路由中必須加入本頁面檔名,如下圖。
第四部:測試專案
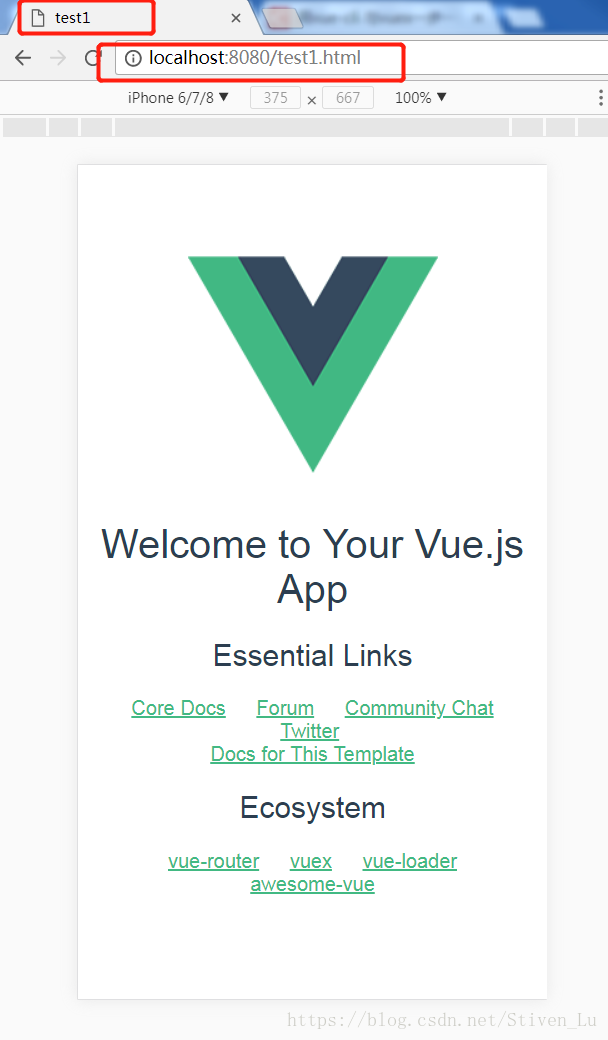
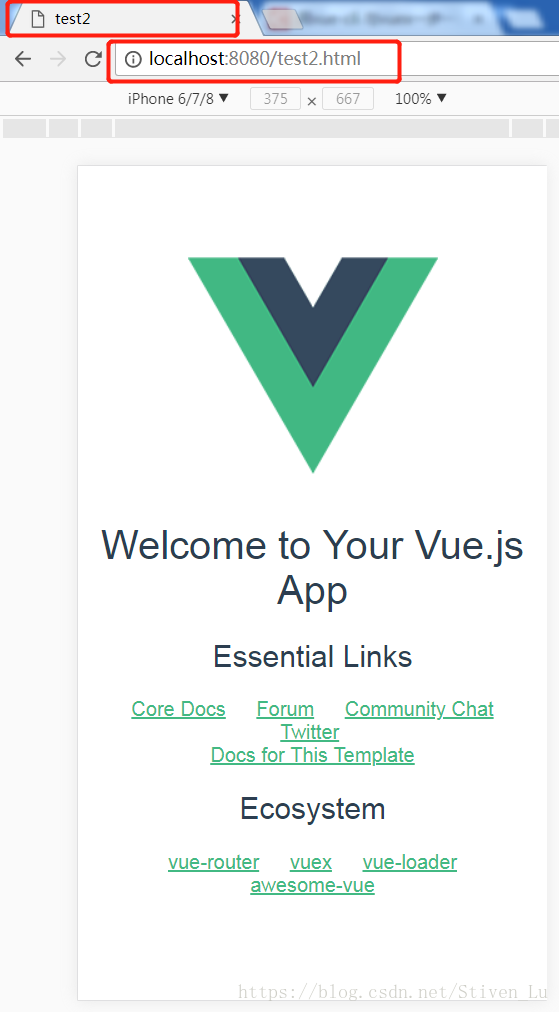
複製test1資料夾命名為test2資料夾,將test2檔案中的所有test1命名的地方全部改為test2,注意路由路徑中的test1.html也要改為test2.html。為了方便區分,可以將test1.html中title改為test1,test2.html中title改為test2。
重新啟動專案,訪問http://localhost:8080/test1.html 和 http://localhost:8080/test2.html。如下圖。