
Spring Boot 讀取配置檔案的幾種方式
Spring Boot 讀取配置檔案的方式可以分為
1. 註解
2. 獲取 Spring Boot 的環境變數
來獲取配置檔案的資訊,其中註解的方式又有集中表現形式。
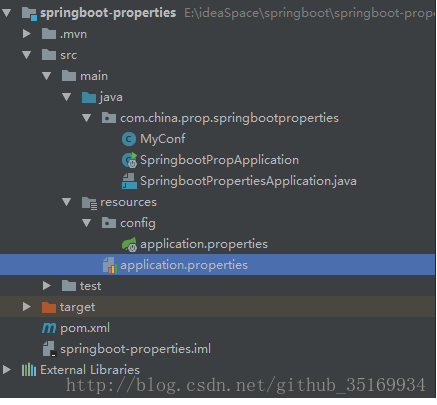
第一步:建立 Spring Boot 工程( Maven 工程新增 Spring Boot 相應的依賴)。
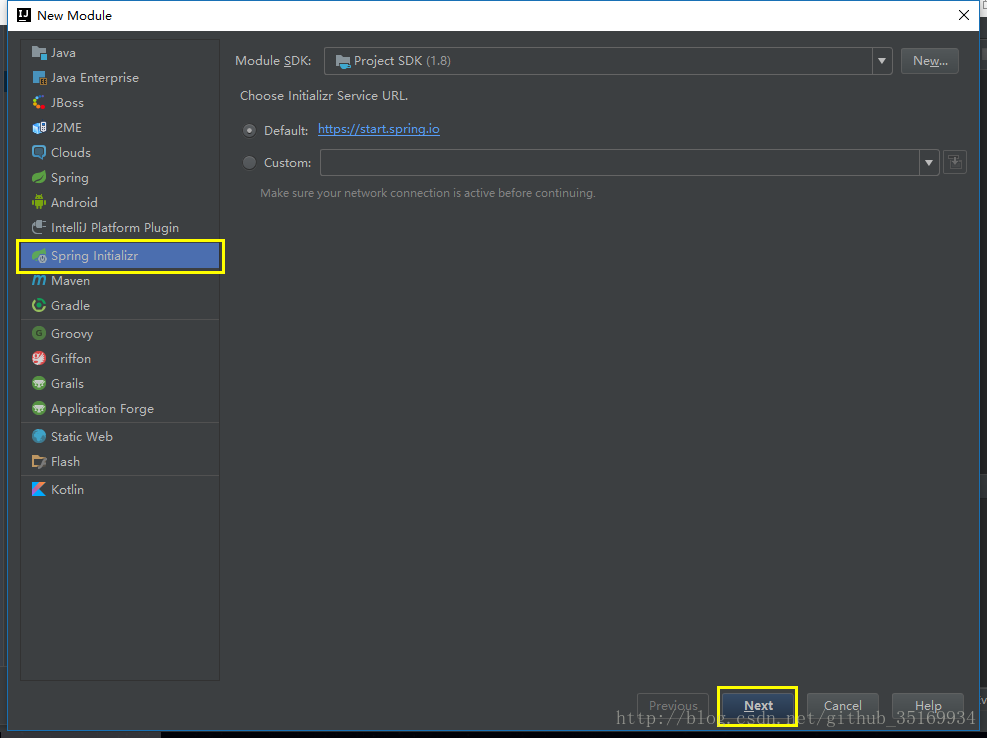
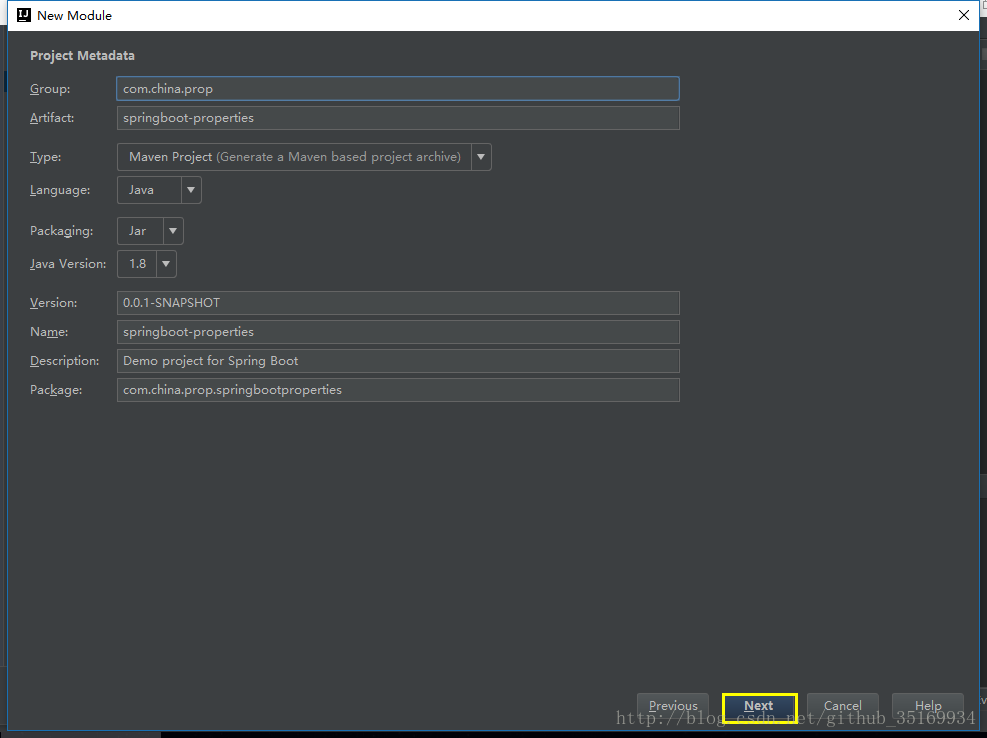
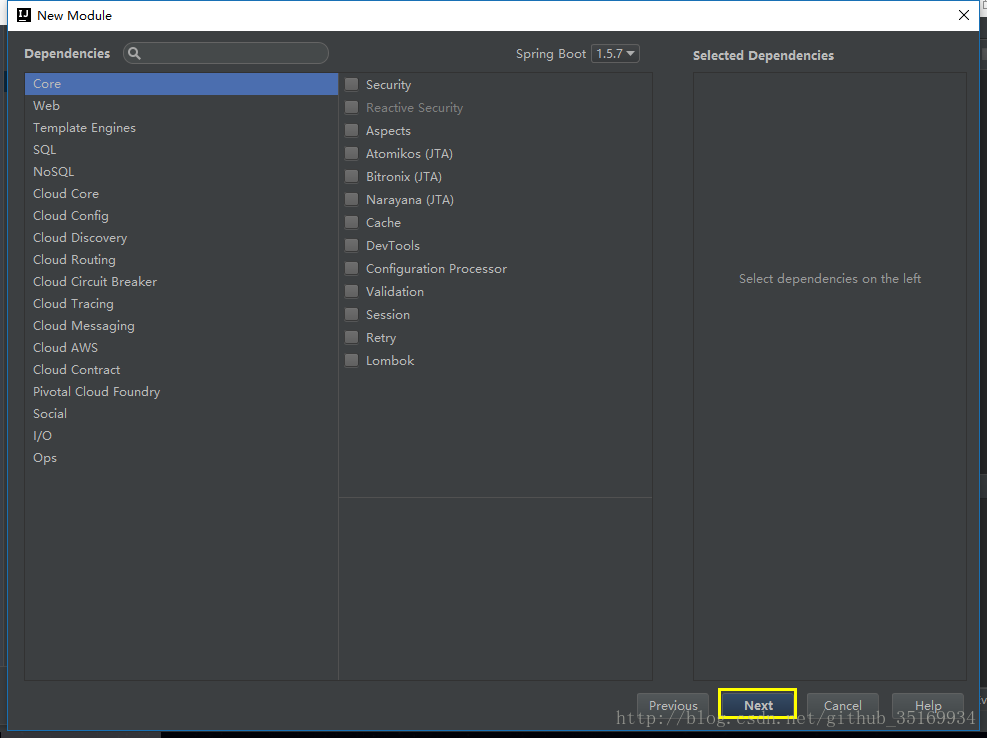
現在我們只是測試 Spring Boot 的 配置檔案的讀取,不需要其他的依賴,所以什麼都沒選,直接下一步 – 下一步 – 完成,專案目錄結構如下:

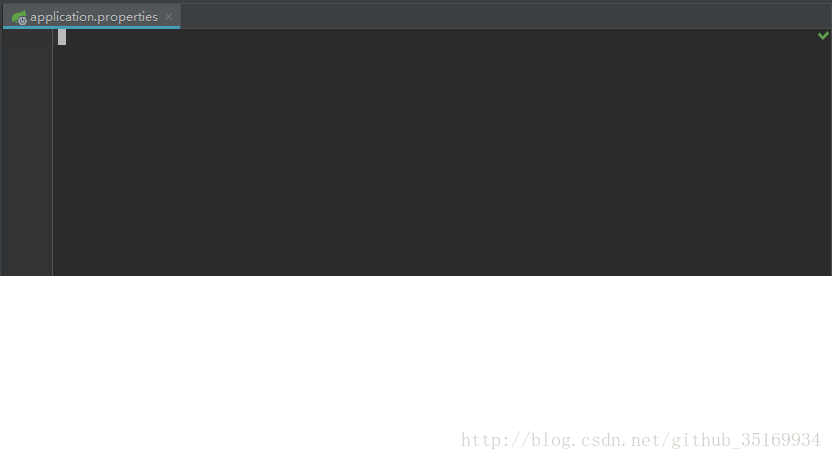
此時的 application.properties 的內容為空
POM 檔案內容為:
<?xml version="1.0" encoding="UTF-8"?> POM 檔案中的依賴是 IDEA 通過這種建立工程的方式給我們自動生成的。
第二步:在配置檔案中新增一些測試資訊。
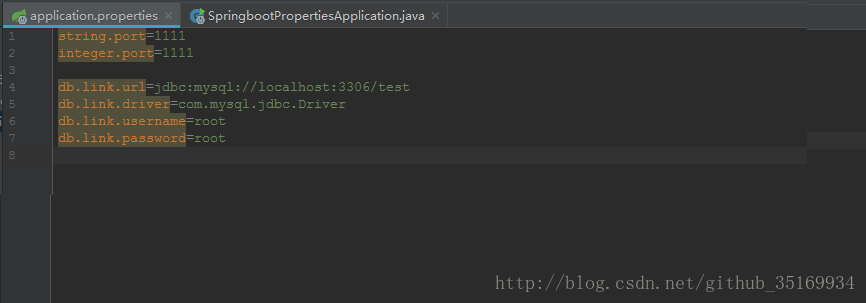
string.port=1111
integer.port=1111

db.link.url=jdbc:mysql://localhost:3306/test
db.link.driver=com.mysql.jdbc.Driver
db.link.username=root
db.link.password=root
上面的配置變數僅僅是為了測試而新增的,不具有實際意義。string.port 與 integer.port 都是string 型別普通變數,這裡只是做個名稱區分而已。
一、 通過獲取環境變數來獲取配置引數
1.1. 主類
import org.springframework.boot.SpringApplication;
import org.springframework.boot.autoconfigure.SpringBootApplication;
import org.springframework.context.ConfigurableApplicationContext;

@SpringBootApplication
public class SpringbootPropertiesApplication {

    public static void main(String[] args) {
        // 獲取 Spring Boot 上下文
        ConfigurableApplicationContext ctx = SpringApplication.run(SpringbootPropertiesApplication.class, args);
        // ctx.getEnvironment(); // 獲取 邊境變數
        System.out.println("===========================================");
        //獲取字串
        System.out.println("String: " + (ctx.getEnvironment().getProperty("string.port") + 1111) );

        //獲取整數
        System.out.println("Interger:   " + (ctx.getEnvironment().getProperty("integer.port",Integer.class) + 1111 ));
        System.out.println(ctx.getEnvironment().getProperty("db.link.url"));
        System.out.println(ctx.getEnvironment().getProperty("db.link.driver"));
        System.out.println(ctx.getEnvironment().getProperty("db.link.username"));
        System.out.println(ctx.getEnvironment().getProperty("db.link.password"));
        System.out.println("===========================================");

    }
}
1.2. 執行主類
===========================================
String: 11111111
Interger:   2222
jdbc:mysql://localhost:3306/test
com.mysql.jdbc.Driver
root
root
===========================================
可以看到配置檔案中相同格式的port變數,可以獲取到不同的格式資料。
- 1 新建 bean,通過注入環境變數來獲取配置資訊。
import org.springframework.beans.factory.annotation.Autowired;
import org.springframework.core.env.Environment;
import org.springframework.stereotype.Component;

@Component
public class MyConf {

    @Autowired
    private Environment env;

    public void show(){
        System.out.println("===========================================");
        //獲取字串
        System.out.println("String: " +env.getProperty("string.port") + 1111);

        //獲取整數
        System.out.println("Interger:   " + (env.getProperty("integer.port",Integer.class) + 1111 ));
        System.out.println(env.getProperty("db.link.url"));
        System.out.println(env.getProperty("db.link.driver"));
        System.out.println(env.getProperty("db.link.username"));
        System.out.println(env.getProperty("db.link.password"));
        System.out.println("===========================================");
    }
}
2.2 改造主類並執行
public static void main(String[] args) {

                ConfigurableApplicationContext ctx = SpringApplication.run(SpringbootPropApplication.class, args);

        MyConf myconf = (MyConf) ctx.getBean("myConf");
        myconf.show();

        ctx.close();
    }
結果:
===========================================
String: 11111111
Interger:   2222
jdbc:mysql://localhost:3306/test
com.mysql.jdbc.Driver
root
root
===========================================
二、通過註解獲取配置檔案資訊
- 改造上面的 bean 配置類 MyConf:
import org.springframework.beans.factory.annotation.Value;
import org.springframework.stereotype.Component;

@Component
public class MyConf {

    @Value("${string.port}")     private int intPort;
    @Value("${string.port}")     private  String stringPort;
    @Value("${db.link.url}")     private String dbUrl;
    @Value("${db.link.driver}")  private String dbDriver;
    @Value("${db.link.username}")private String dbUsername;
    @Value("${db.link.password}")private String dbPassword;

    public void show(){
        System.out.println("===========================================");
        System.out.println("intPort :   " + (intPort + 1111));
        System.out.println("stringPort :   " + (stringPort + 1111));
        System.out.println("string :   " + dbUrl);
        System.out.println("string :   " + dbDriver);
        System.out.println("string :   " + dbUsername);
        System.out.println("string :   " + dbPassword);
        System.out.println("===========================================");
    }
}- 執行主類可得:
===========================================
intPort :   2222
stringPort :   11111111
string :   jdbc:mysql://localhost:3306/test
string :   com.mysql.jdbc.Driver
string :   root
string :   root
===========================================- 指定配置檔案,@PropertySource可以宣告多個,
或者使用@PropertySources(@PropertySource(“xxx”),@PropertySource(“xxx”))。
2.1 新建配置檔案 my.prop
aaa.a=111
aaa.b=222
aaa.c=333
2.2 新建配置類
import org.springframework.beans.factory.annotation.Value;
import org.springframework.context.annotation.Configuration;
import org.springframework.context.annotation.PropertySource;

@Configuration
@PropertySource("classpath:config/my.prop")
public class PropConf {

    @Value("${aaa.a}")
    private String a;
    @Value("${aaa.b}")
    private String b;
    @Value("${aaa.c}")
    private String c;

    public void show(){
        System.out.println("a --- > " + a);
        System.out.println("b --- > " + b);
        System.out.println("c --- > " + c);
    }
}
2.3. 在主類中新增相應呼叫程式碼
PropConf conf = (PropConf) ctx.getBean("propConf");
conf.show();
2.4. 結果:
a --- > 111
b --- > 222
c --- > 333
改造一
可以改造上面的PropConf 類:新增@ConfigurationProperties(prefix = “aaa”)
指定配置檔案的字首,生成giter 和 setter 方法來獲取配置資訊。
import org.springframework.boot.context.properties.ConfigurationProperties;
import org.springframework.context.annotation.Configuration;
import org.springframework.context.annotation.PropertySource;

@Configuration
@PropertySource("classpath:config/my.prop")
@ConfigurationProperties(prefix = "aaa")
public class PropConf {

    private String a;
    private String b;
    private String c;

    public String getA() {return a;}
    public void setA(String a) {this.a = a;}
    public String getB() {return b;}
    public void setB(String b) {this.b = b;}
    public String getC() {return c;}
    public void setC(String c) {this.c = c;}

    public void show(){
        System.out.println("a --- > " + a);
        System.out.println("b --- > " + b);
        System.out.println("c --- > " + c);
    }
}
執行主類可以獲得同樣的結果。
改造二
可以只宣告 setter 方法:
import org.springframework.boot.context.properties.ConfigurationProperties;
import org.springframework.context.annotation.Configuration;
import org.springframework.context.annotation.PropertySource;

@Configuration
@PropertySource("classpath:config/my.prop")
@ConfigurationProperties(prefix = "aaa")
public class PropConf {

    private String a;
    private String b;
    private String c;

    public void setA(String a) {  this.a = a;  }
    public void setB(String b) { this.b = b;  }
    public void setC(String c) {  this.c = c; }

    public void show(){
        System.out.println("a --- > " + a);
        System.out.println("b --- > " + b);
        System.out.println("c --- > " + c);
    }
}
執行主類也可以得到同樣的結果:
a --- > 111
b --- > 222
c --- > 333
=======================================
筆記1
上面獲取配置檔案的位置都是在 classpath 根目錄下面的,Spring Boot 預設的配置檔案地址有兩個:(application.properties 為預設的配置檔名稱)
1. classpath: 即放在resources裡面。
2. classpath:config裡面。
3. file:/
4. file:/config/
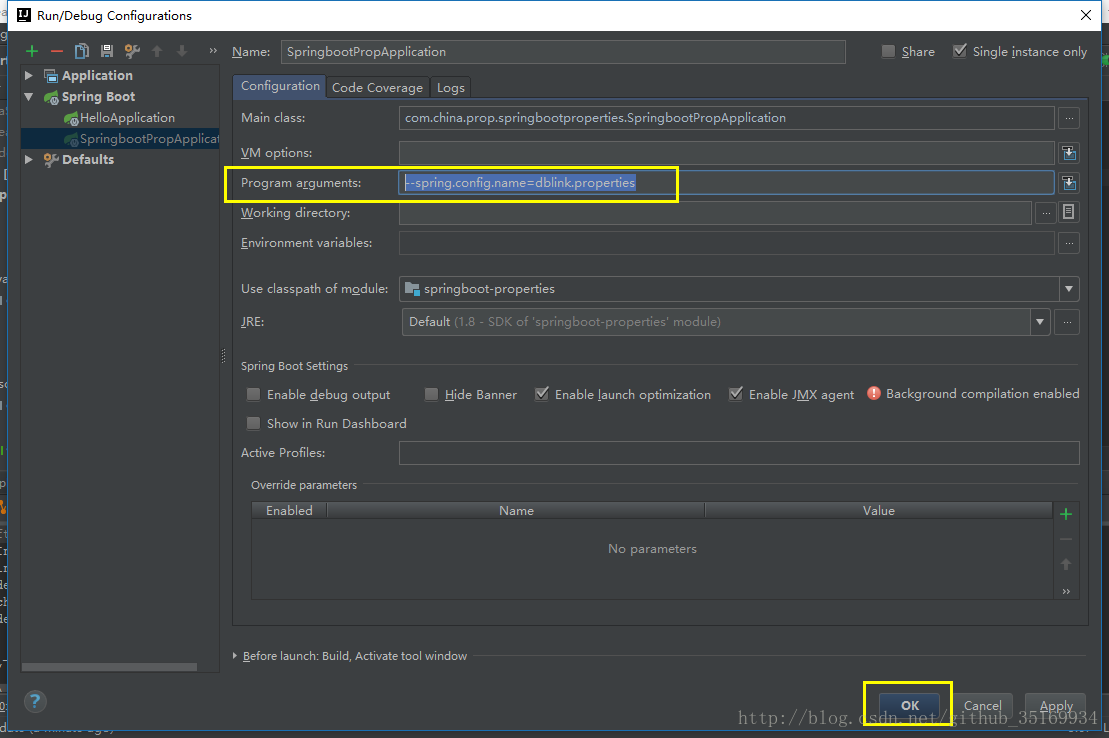
筆記2
在系統系統時可以通過 –spring.config.name=xxx.properties 環境變數指定配置檔案。
比如resources下有一個 dblink.properties,然後新增啟動引數:
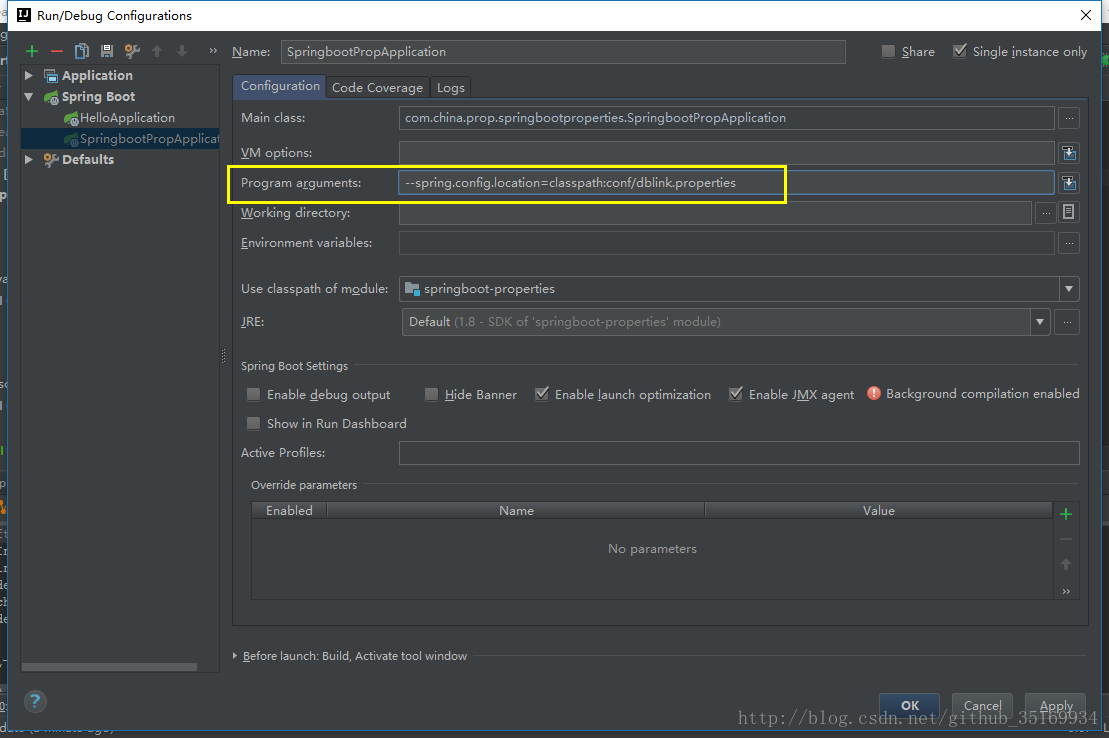
筆記3 應用啟動可以指定配置檔案地址
筆記4 Spring Boot 配置檔案可以使用變數

筆記5 配置檔案可以使用陣列或者集合
- 在配置檔案中新增集合資訊
aaa.host[0]=127.0.0.1
aaa.host[1]=10.66.0.108
aaa.host[2]=10.66.0.111
aaa.host[3]=10.66.0.12
aaa.host[4]=10.66.0.134- 在配置類中注入引數
- 輸出 host變數 可得:
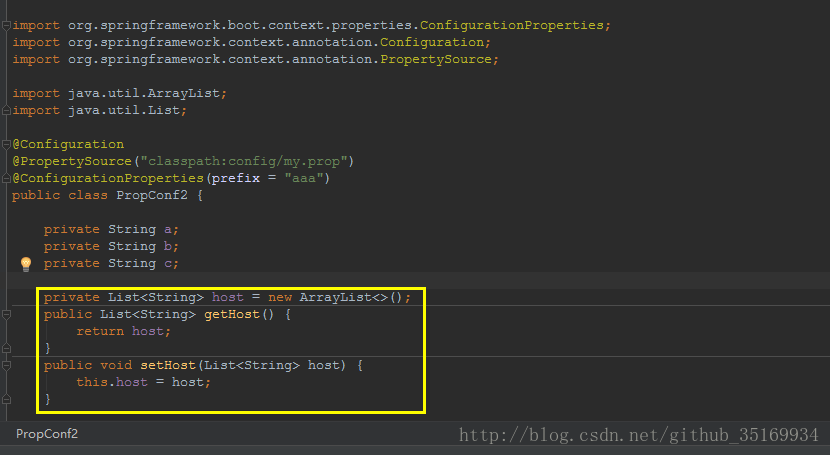
[127.0.0.1, 10.66.0.108, 10.66.0.111, 10.66.0.12, 10.66.0.134]