
ffmpeg學習八:軟體生成yuv420p視訊並將其編碼為H264格式
通過前面對ffmpeg中常用的幾個api的原始碼分析,從而對api有了更好的理解。之前已經做過視訊的解碼了,今天來嘗試視訊的編碼。ffmpeg已經給我們提供了相應的可供參考的程式:doc/examples/decoding_encoding.c檔案就是解碼和編碼的例程。仔細閱讀它的程式碼後,我們可以按照自己的理解,寫自己的視訊編碼程式。我們將會把一個yuv420p格式的檔案,使用h264編碼器進行編碼。
生成yuv視訊
yuv影象的格式,可以參考這篇部落格: 圖文詳解YUV420資料格式。
如果你讀yuv格式有所瞭解,或者認真閱讀了上面的部落格,那麼閱讀下面的程式碼就非常容易了。它的功能就是生成一個有200幀的yuv視訊。
//created by Jinwei Liu
#include <math.h>
#include <stdlib.h>
#include <libavutil/opt.h>
#include <libavcodec/avcodec.h>
#include <libavutil/channel_layout.h>
#include <libavutil/common.h>
#include <libavutil/imgutils.h>
#include <libavutil/mathematics.h>
#include <libavutil/samplefmt.h> 注意:這裡標示一行影象寬度的時linesize,這個時候,播放會有問題。其生成的資料格式如下:
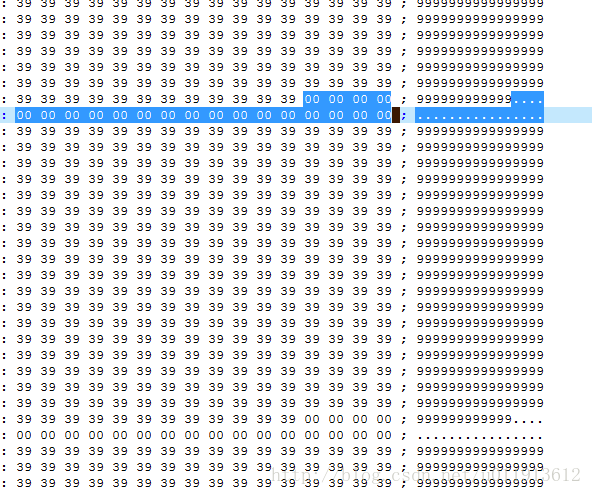
因此,我們要注意frame->width和frame->linesize的區別。使用linesize時,生成的資料有一些邊界資料。不過這樣的生成的yuv格式的資料也是可以播的,要注意使用的一幀影象的寬度位linesize,所以命令如下:
./encodec.bin 300 200
播放生成的yuv視訊:
ffplay -f rawvideo -s 320x200 soft.yuv
將其轉換為gif格式:
ffmpeg -f rawvideo -s 320x200 -i soft.yuv soft.gif
為什麼時320而不是其他置呢?這個我也是通過列印frame->linesize[0]得知的,因為這個值時ffmpeg計算得出的,所以想知道這個值為什麼是320的需要閱讀相應的原始碼。
如果我們想得到沒有無效資料的yuv視訊,那就不要使用frame->linesize,而是直接使用frame->width。像下面這樣:
    for (i = 0; i < 200; i++) {
        /* prepare a dummy image */
        /* Y */
        for (y = 0; y < frame->height; y++) {
            for (x = 0; x < frame->width; x++) {
                frame->data[0][y * frame->width + x] = (x + y + i * 3)%255;
            }
        }

        /* Cb and Cr */
        for (y = 0; y < frame->height/2; y++) {
            for (x = 0; x < frame->width/2; x++) {
                frame->data[1][y * frame->width/2 + x] = (y + y + i * 2)%255;
                frame->data[2][y * frame->width/2 + x] = (x + x + i * 5)%255;
            }
        }
        //以上就是軟體生成一幀的yuv格式的影象。
        fwrite(frame->data[0],1,frame->width*frame->height,file_fd);
        fwrite(frame->data[1],1,frame->width*frame->height/4,file_fd);
        fwrite(frame->data[2],1,frame->width*frame->height/4,file_fd);
        //寫入到檔案,我們儲存的格式為yuv420p而不是420sp。
    }
以上程式,我們通篇使用的視訊的寬度frame->width來表示,這樣生成的yuv資料沒有邊界資料。
編譯完成後執行可執行檔案:
./encodec.bin 300 200
播放生成的yuv視訊:
ffplay -f rawvideo -s 300x200 soft.yuv
將其轉換為gif格式:
ffmpeg -f rawvideo -s 300x200 -i soft.yuv soft.gif
生成的gif如下:

接下來,我們把生成的這個Yuv視訊編碼成h.264格式(我們使用的yuv是使用frame->linesize來標示視訊寬度的)。
yuv編碼為h.264
程式如下,程式碼中已有詳細註釋。
//created by Jinwei Liu
#include <math.h>
#include <stdlib.h>
#include <libavutil/opt.h>
#include <libavcodec/avcodec.h>
#include <libavutil/channel_layout.h>
#include <libavutil/common.h>
#include <libavutil/imgutils.h>
#include <libavutil/mathematics.h>
#include <libavutil/samplefmt.h>
#include <libavutil/frame.h>
#include <libavformat/avformat.h>
#include <libswscale/swscale.h>


int main(int argc, char **argv)
{
    AVFrame *frame;
    AVCodec *codec = NULL;
    AVPacket packet;
    AVCodecContext *codecContext;
    int readSize=0;
    int ret=0,getPacket;
    FILE * fileIn,*fileOut;
    int frameCount=0;
    /* register all the codecs */
    av_register_all();

    if(argc!=4){
        fprintf(stdout,"usage:./encodec.bin xxx.yuv width height\n");
        return -1;
    }

    //1.我們需要讀一幀一幀的資料,所以需要AVFrame結構
    //讀出的一幀資料儲存在AVFrame中。
    frame  = av_frame_alloc();
    frame->width = atoi(argv[2]);
    frame->height = atoi(argv[3]);
    fprintf(stdout,"width=%d,height=%d\n",frame->width,frame->height);
    frame->format = AV_PIX_FMT_YUV420P;
    av_image_alloc(frame->data,frame->linesize,frame->width,frame->height,frame->format,32);
    fileIn =fopen(argv[1],"r+");

    //2.讀出來的資料儲存在AVPacket中,因此,我們還需要AVPacket結構體
    //初始化packet
    av_init_packet(&packet);


    //3.讀出來的資料,我們需要編碼,因此需要編碼器
    //下面的函式找到h.264型別的編碼器
    /* find the mpeg1 video encoder */
    codec = avcodec_find_encoder(AV_CODEC_ID_H264);
    if (!codec) {
        fprintf(stderr, "Codec not found\n");
        exit(1);
    }

    //有了編碼器,我們還需要編碼器的上下文環境,用來控制編碼的過程
    codecContext = avcodec_alloc_context3(codec);//分配AVCodecContext例項
    if (!codecContext)
    {
        fprintf(stderr, "Could not allocate video codec context\n");
        return -1;
    }
    /* put sample parameters */
    codecContext->bit_rate = 400000;
    /* resolution must be a multiple of two */
    codecContext->width = 300;
    codecContext->height = 200;
    /* frames per second */
    codecContext->time_base = (AVRational){1,25};
    /* emit one intra frame every ten frames
     * check frame pict_type before passing frame
     * to encoder, if frame->pict_type is AV_PICTURE_TYPE_I
     * then gop_size is ignored and the output of encoder
     * will always be I frame irrespective to gop_size
     */
    codecContext->gop_size = 10;
    codecContext->max_b_frames = 1;
    codecContext->pix_fmt = AV_PIX_FMT_YUV420P;
    av_opt_set(codecContext->priv_data, "preset", "slow", 0);

    //準備好了編碼器和編碼器上下文環境,現在可以開啟編碼器了
    if (avcodec_open2(codecContext, codec, NULL) < 0)      //根據編碼器上下文開啟編碼器
    {
        fprintf(stderr, "Could not open codec\n");
        return -1;
    }

    //4.準備輸出檔案
    fileOut= fopen("test.h264","w+");
    //下面開始編碼
    while(1){
        //讀一幀資料出來
        readSize = fread(frame->data[0],1,frame->linesize[0]*frame->height,fileIn);
        if(readSize == 0){
            fprintf(stdout,"end of file\n");
            frameCount++;
            break;
        }
        readSize = fread(frame->data[1],1,frame->linesize[1]*frame->height/2,fileIn);
        readSize = fread(frame->data[2],1,frame->linesize[2]*frame->height/2,fileIn);
        //初始化packet
        av_init_packet(&packet);
        /* encode the image */
        frame->pts = frameCount;
        ret = avcodec_encode_video2(codecContext, &packet, frame, &getPacket); //將AVFrame中的畫素資訊編碼為AVPacket中的碼流
        if (ret < 0)
        {
            fprintf(stderr, "Error encoding frame\n");
            return -1;
        }

        if (getPacket)
        {
            frameCount++;
            //獲得一個完整的編碼幀
            printf("Write frame %3d (size=%5d)\n", frameCount, packet.size);
            fwrite(packet.data, 1,packet.size, fileOut);
            av_packet_unref(&packet);
        }

    }

    /* flush buffer */
    for ( getPacket= 1; getPacket; frameCount++)
    {
        fflush(stdout);
        frame->pts = frameCount;
        ret = avcodec_encode_video2(codecContext, &packet, NULL, &getPacket);       //輸出編碼器中剩餘的碼流
        if (ret < 0)
        {
            fprintf(stderr, "Error encoding frame\n");
            return -1;
        }

        if (getPacket)
        {
            printf("Write frame %3d (size=%5d)\n", frameCount, packet.size);
            fwrite(packet.data, 1, packet.size, fileOut);
            av_packet_unref(&packet);
        }
    } //for (got_output = 1; got_output; frameIdx++)

    fclose(fileIn);
    fclose(fileOut);
    av_frame_free(&frame);
    avcodec_close(codecContext);
    av_free(codecContext);

    return 0;
}
編譯程式碼後,執行發現,找不好解碼器…什麼情況呢?google了一下,原來ffmpeg支援h.264編碼器需要相應庫的支援,我的系統沒有安裝這個庫,因此編譯ffmpeg的時候,ffmpeg檢測到沒有這個庫,所以就不會編譯h.264相關的模組。
因此,我們需要安裝libx264庫,執行命令如下:
sudo apt-get install libx264-dev
安裝好以後,需要重新編譯ffmpeg庫。
1.執行
./configure –enable-libx264 –enable-gpl –enable-decoder=h264 –enable-encoder=libx264 –enable-shared –enable-static –disable-yasm –enable-shared –prefix=tmp
2.make
3.make install
這樣配置的ffmpeg就開始支援h264編解碼器了。
然後重新編譯我們程式碼,編譯完成後使用案例如下:
首先進行編碼:
./encodech264.bin soft.yuv 300 200
程式會生成test.h264檔案,我們可以播放來看:
ffplay test.h264