建站教程(二):Ubuntu上如何配置Nginx+MySQL+PHP7(LNMP)
阿新 • • 發佈:2019-01-26
在Linux上搭建個人網站,最常用的就是Nginx+MySQL+PHP環境,即LNMP。搭建LNMP的一鍵指令碼很多,不過本文介紹如何不用指令碼一步一步自己搭建LNMP環境,這樣以後自己的網站遇到什麼問題也會清楚如何修改。
安裝Nginx
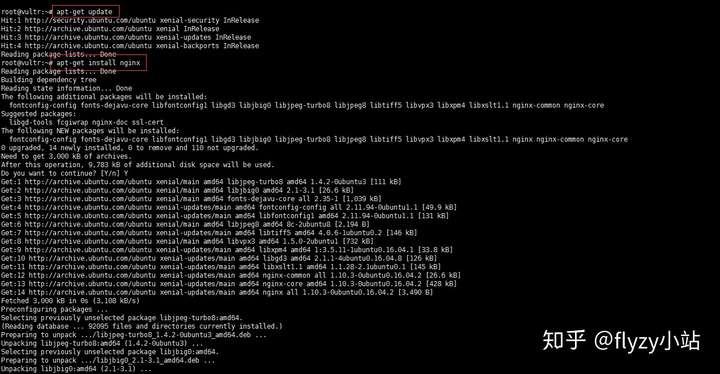
Ubutun(本教程是基於Ubuntu 16.04)安裝nginx還是很簡單的,就兩句命令(全部root許可權):
apt-get update
apt-get install nginx

安裝好後,可以訪問或者是你的域名),如果顯示下圖所示結果,就說明成功了:

安裝MySQL
還是很簡單,一行命令:
apt-get install mysql-server
輸入完之後你會被要求輸入root的密碼,輸完之後就安裝成功了:

安裝PHP
安裝命令:
apt-get install php-fpm php-mysql
配置Nginx使用PHP
現在我們已經安裝了所有需要的軟體,目前要做的是修改Nginx的配置檔案來使用PHP processor來處理動態內容。
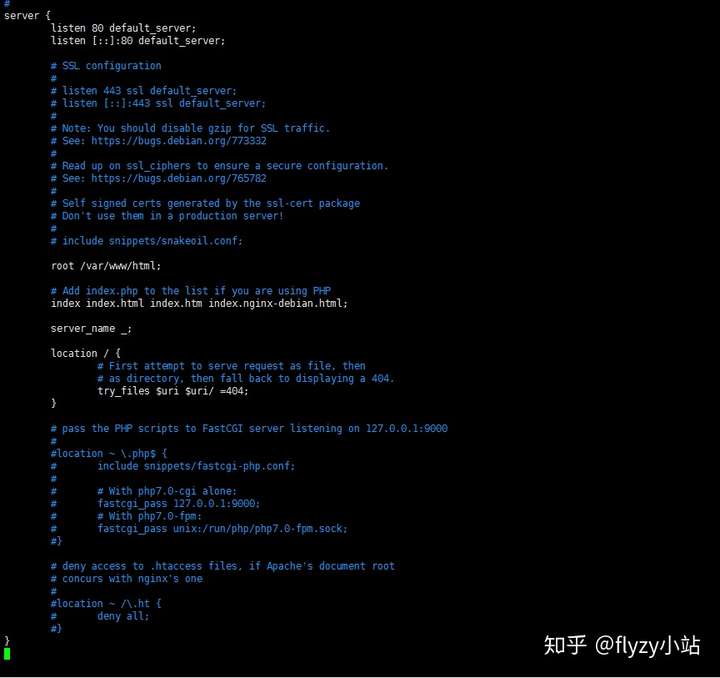
修改Nginx的server block configuration:
vim /etc/nginx/sites-available/default
開啟應該是這樣的:

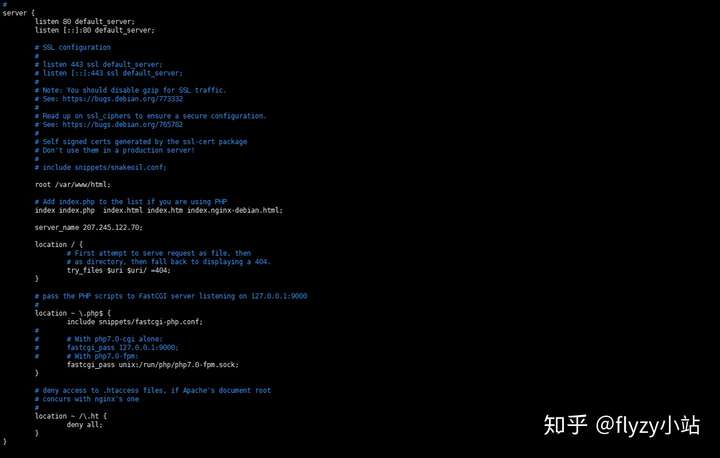
我們需要做如下修改:
- 新增index.php作為我們的起始頁面;
- 修改server_name來指向我們的域名或者是公網IP;
- 忽略那些以#開頭的行。(原文:For the actual PHP processing, we just need to uncomment a segment of the file that handles PHP requests by removing the pound symbols (#) from in front of each line. This will be the
location ~\.php$location block, the includedfastcgi-php.confsnippet, and the socket associated withphp-fpm) - 用同樣的方法忽略.htaccess檔案。(原文:We will also uncomment the location block dealing with
.htaccessfiles using the same method. Nginx doesn’t process these files. If any of these files happen to find their way into the document root, they should not be served to visitors.)
所以,修改完後我們的配置檔案應該是這個樣子的:

驗證配置檔案有沒有錯誤:
nginx -t
如果提示OK則說明配置搞定:

重啟Nginx:
/etc/init.d/nginx restart
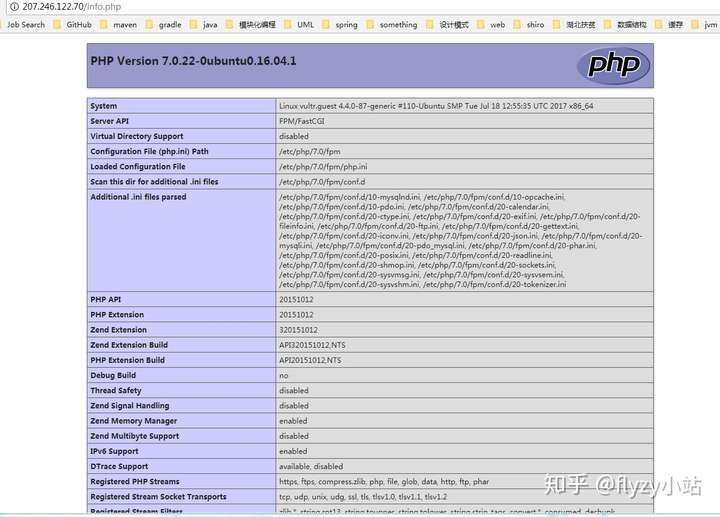
測試PHP與Nginx有沒有整合成功
新增一個info.php:(這裡的 /var/www/html/ 對應配置檔案中root的路徑)
vim /var/www/html/info.php
內容為:
<?php
phpinfo();

