
【Android 初學者】寫一個簡單的 撥號 apk
之前有介紹過 Android studio 的功能面板了,現在做一個apk試試
下面我們開始寫一個android 專案,
就先用studio 寫吧:
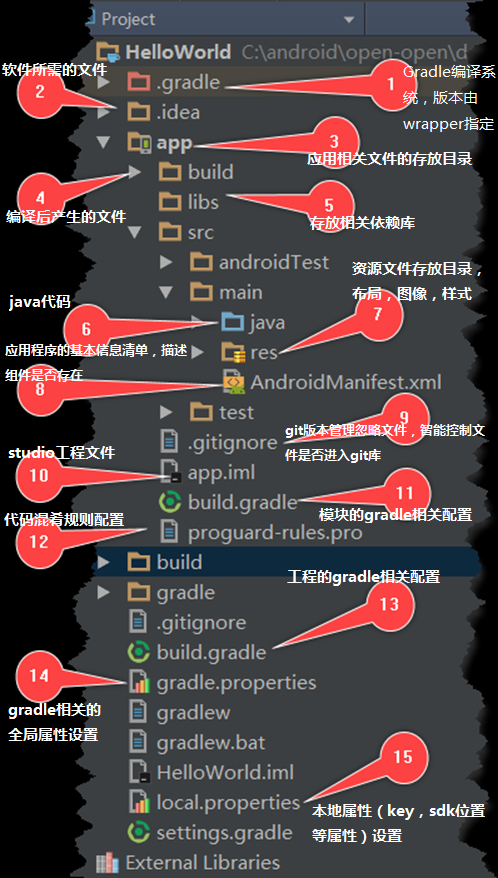
一、左上角,將project 換為 android

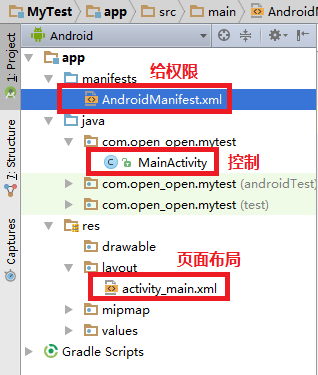
二、activity_main.xml
中間內容,拖動一個 button 按鈕到 螢幕中

回到test 下方,我們回到程式碼模式![]() 現在寫xml
現在寫xml
修改一下 id , 我們嘗試 寫一個單擊 方法:doTest
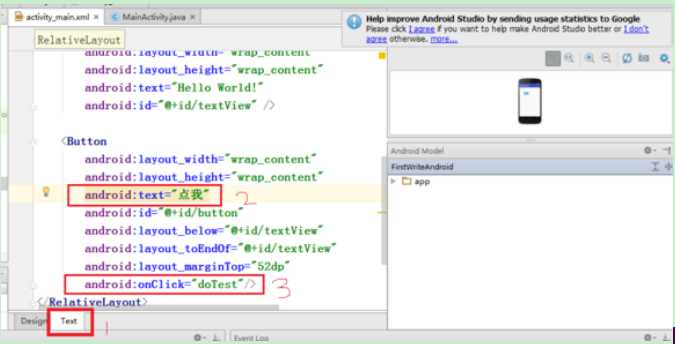
<?xml version="1.0" encoding="utf-8"?>
<RelativeLayout xmlns:android="http://schemas.android.com/apk/res/android"
    xmlns:tools="http://schemas.android.com/tools"
    android:layout_width="match_parent"
    android:layout_height="match_parent"
    android:paddingBottom="@dimen/activity_vertical_margin"
    android:paddingLeft="@dimen/activity_horizontal_margin"
    android:paddingRight="@dimen/activity_horizontal_margin"
    android:paddingTop="@dimen/activity_vertical_margin"
    tools:context="com.open_open.mytest.MainActivity">

    <TextView
        android:layout_width="wrap_content"
        android:layout_height="wrap_content"
        android:text="一鍵撥號"
        android:textSize="25sp"
        android:textColor="#00A2E8"
        android:id="@+id/textView" />

    <Button
        android:layout_width="wrap_content"
        android:layout_height="wrap_content"
        android:text="撥號"
        android:id="@+id/button"
        android:textSize="30sp"
        android:onClick="doTest"
        android:layout_centerHorizontal="true"
        android:layout_marginTop="70dp" />

</RelativeLayout>
三、現在寫java 我們一個按鈕
就 撥號:10086 ![]()
![]()
移動:(.....)
MainActivity.java
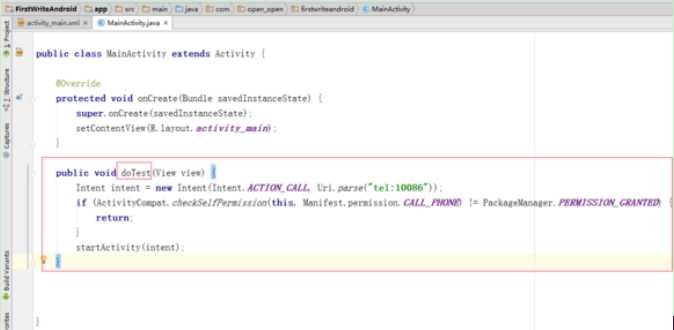
package com.open_open.mytest;

import android.Manifest;
import android.content.Intent;
import android.content.pm.PackageManager;
import android.net.Uri;
import android.support.v4.app.ActivityCompat;
import android.support.v7.app.AppCompatActivity;
import android.os.Bundle;
import android.view.View;

public class MainActivity extends AppCompatActivity {

    @Override
    protected void onCreate(Bundle savedInstanceState) {
        super.onCreate(savedInstanceState);
        setContentView(R.layout.activity_main);
    }
    public void doTest(View view) {
        Intent intent = new Intent(Intent.ACTION_CALL, Uri.parse("tel:1008611"));
        if (ActivityCompat.checkSelfPermission(this, Manifest.permission.CALL_PHONE)
                != PackageManager.PERMISSION_GRANTED) {
            return;
        }
        startActivity(intent);
    }
}
四、左上角,再開啟一個xml,加入一句程式碼,給一鍵撥號 許可權!![]()
不給就 報錯

<?xml version="1.0" encoding="utf-8"?>
<manifest xmlns:android="http://schemas.android.com/apk/res/android"
    package="com.open_open.mytest">
<!-- 把執行撥號的許可權開啟 -->
    <uses-permission android:name="android.permission.CALL_PHONE"/>

    <application
        android:allowBackup="true"
        android:icon="@mipmap/ic_launcher"
        android:label="@string/app_name"
        android:supportsRtl="true"
        android:theme="@style/AppTheme">
        <activity android:name=".MainActivity">
            <intent-filter>
                <action android:name="android.intent.action.MAIN" />

                <category android:name="android.intent.category.LAUNCHER" />
            </intent-filter>
        </activity>
    </application>

</manifest>
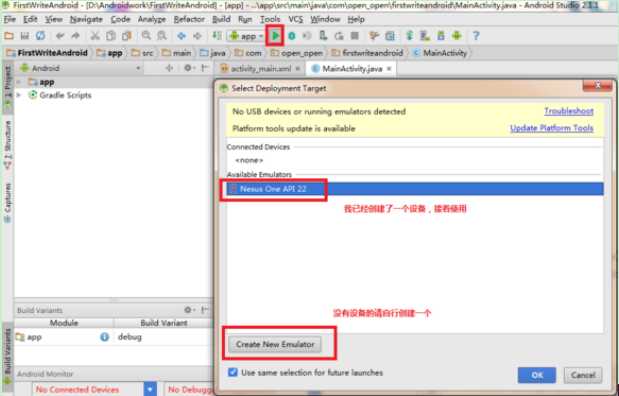
中間 的綠色 按鈕,執行
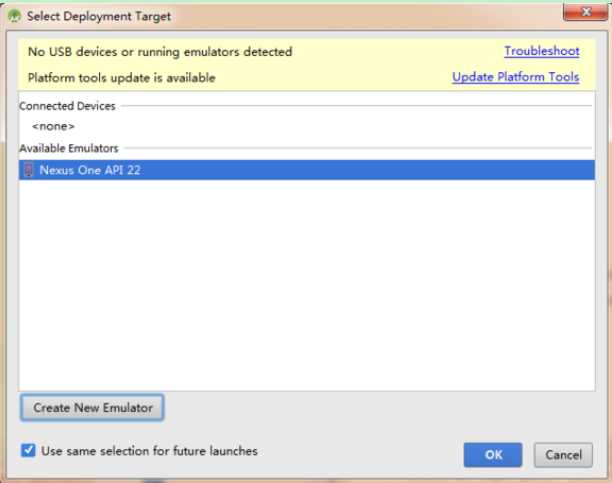
我們現在還沒有 虛擬機器,(你看到的是我之前已經建立好的![]() ,你們第一次執行時是沒有的!)
,你們第一次執行時是沒有的!)
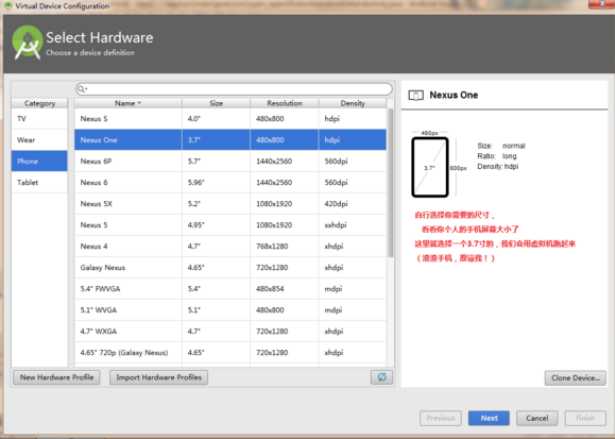
五、先建立一個虛擬機器
選擇手機 尺寸
選擇api 版本,看看你sdk的下載時選擇了什麼版本呢?
Android 的版本很有意思,都是以甜品 命名!![]()
以 萌安卓
吧,作為參考!
這麼說,我都餓了![]()


下一步,下一步

看到你們(我本來)創建出來的 虛擬機器
六、點選執行
溫馨提示:首次執行將會比較卡,多次執行後,速度將會極大提升哦!
(建議用手機跑)
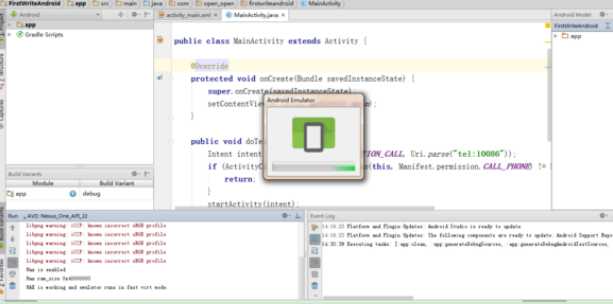
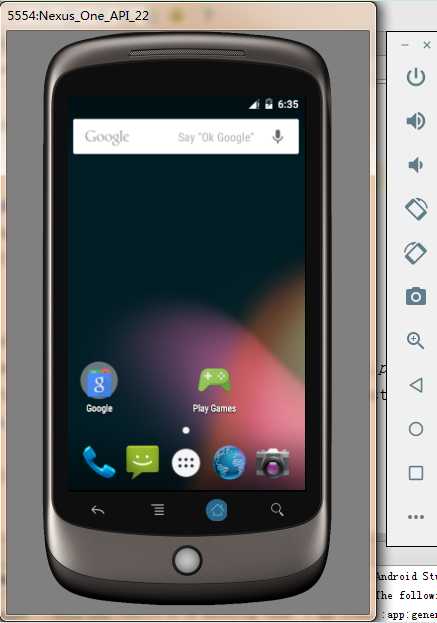
看到studio 創建出了 一臺手機,不要吐槽介面簡陋
改手機正在開機中
看到介面了嗎?還有打電話 ,發簡訊 功能哦
(做夢!你的電腦又沒有SIM卡!)
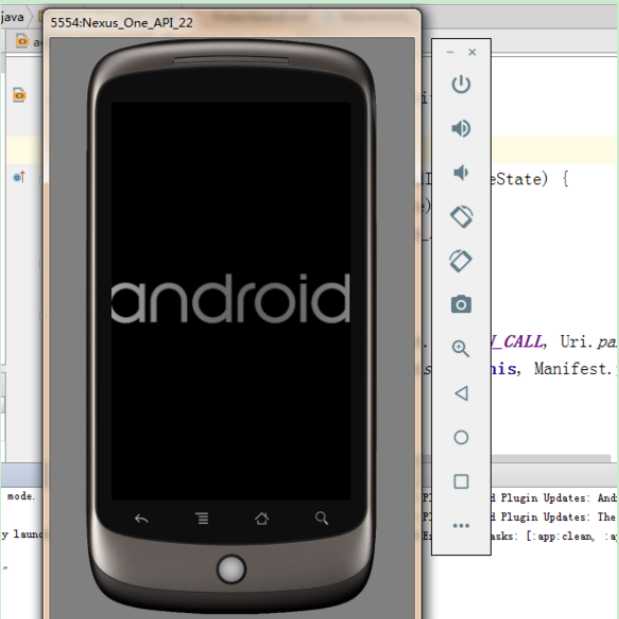

再等等就會出現我們的頁面:
太小的可以用 放大鏡
工具

點選 按鈕,即可撥打 10086 了![]()
![]()
當然,沒有SIM 卡,是打不通的,但是虛擬機器還是可以模擬出 打電話 和按鍵 的聲音哦!
點選 返回,我們回到介面了!
一個程式就寫完,測試完了(僅限4寸以下的手機![]()
![]() 沒有做相容性)
沒有做相容性)

java_eclipse
的過程:略![]() ,反正原理都一樣
,反正原理都一樣
不過你們不用更新sdk了,我發的壓縮包,你們解壓即可使用,自帶4.0.4
到4.4版本![]()
![]()
要是電腦執行慢,可以用手機,先
把:開發者 模式開啟
用資料線 連線電腦後,可以自動識別 手機,
比如我的渣手機![]() 酷派
酷派
執行後,不到10秒,安卓手機自動 撥打 了10086,
還能聽到 客服人員 的甜美 的聲音 ![]()
![]()

(要是沒有反應,請檢查你的手機線 是否有鬆動![]() )
)
匯出apk,請參考前面的例子。
一個視訊講解的:功能板塊分析:
一個是論壇,自己整合的分析:

詳細例子:請 光臨《二次元的程式設計師》吧