spring類掃描注入-----類掃描的註解解析器
阿新 • • 發佈:2019-01-31
通過類掃描注入到容器中,這種方式,在實際開發中還是很常用的,可以看下自己的配置檔案,就會發現,自己公司的專案,搞不好就是這麼注入的。
起碼,我發現我公司的專案就是這麼幹的。
下面來演示一下簡單的例子:
此例子和上一篇的差別很微弱,相比較而言,就是在xml配置檔案裡面的配置又變得少了。
關於要注入到容器的bean,不用自己一個個的去寫,省去了很多的重複的步驟。簡化了操作。
當然我說這麼多,你不看看我前面的幾篇文章,不親自實現一下,是不太明朗的。當然你要是瞭解這個的話,我就顯得關公門前耍大刀啦。
附上,上一篇的連結,如下:
然後再上這次的測試程式碼:
import org.springframework.context.ApplicationContext;
import org.springframework.context.support.FileSystemXmlApplicationContext;
import org.springframework.stereotype.Component;

import javax.annotation.Resource;

/**
 * @Component 等價於 <bean id="student" class="..Student">
 */
@Component("sb")
class Student {
    void say() {
        System.out.println("student");
    }
}

/**
 * @Component 等價於 <bean id="person" class="..Person">
 * @Component("p") 等價於 <bean id="p" class="..Person">
 */
@Component("p")
class Person {
    //Student類的@Component("sb")註解帶有value值sb,所以bean的ID就相當於是sb
    //所以下面的@Resource(name = "sb")或者@Resource都是可以正確執行的。
    @Resource(name = "sb")
    private Student student;

    void say() {
        this.student.say();
    }
}

/**
 * Created by lxk on 2016/9/30
 */
class AtInterfaceTest {
    public static void main(String[] args) {
        //ApplicationContext ctx = new ClassPathXmlApplicationContext("file:E:/fusion/intellij_work/TrunkNew/sss.xml");
        //ApplicationContext ctx = new FileSystemXmlApplicationContext("src/sss.xml");//這個時候sss.xml是在專案的根目錄下的src資料夾下
        ApplicationContext ctx = new FileSystemXmlApplicationContext("sss.xml");//這個時候sss.xml是在專案的根目錄下
        Person p = (Person) ctx.getBean("p");//Person類的@Component("p")帶有value值,所以bean的ID就相當於改啦
        p.say();
    }
}
然後是對應的配置檔案,如下:
也能達到,測試的效果。<?xml version="1.0" encoding="UTF-8"?> <beans xmlns="http://www.springframework.org/schema/beans" xmlns:xsi="http://www.w3.org/2001/XMLSchema-instance" xmlns:context="http://www.springframework.org/schema/context" xsi:schemaLocation="http://www.springframework.org/schema/beans http://www.springframework.org/schema/beans/spring-beans.xsd http://www.springframework.org/schema/context http://www.springframework.org/schema/context/spring-context-2.5.xsd"> <context:component-scan base-package="com.xxx.x.model.s"/> </beans>
具體有如下總結:
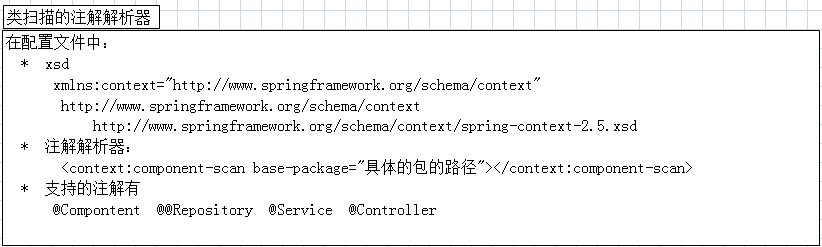
   		原理:
   		   *  類掃描的註解解析器包含了---依賴注入---的註解解析器
   		   *  原理:
   		       當啟動spring容器的時候,
   		       ApplicationContext context = new FileSystemXmlApplicationContext("sss.xml");
   		       spring容器會載入配置檔案,並且解析配置檔案,就會解析到
   		          1*   類掃描的註解解析器,會在base-package包及子包中掃描所有的類(包括內部類,因為的測試是把所有的class放在一個class裡面搞的測試)
		   		      *  檢查類上是否有@Compontent註解
		   		         *  如果有
		   		             *  @Compontent是否有value屬性
		   		                 *  沒有value屬性
		   		                          則會把這個註解所在的類的類名的第一個字母變成小寫,其餘的不變當做bean的id
		   		                 *  如果有value屬性
		   		                          則value屬性的值就是bean的id
		   		          *  如果沒有
						            do nothing

   		          2*   類掃描註解解析完以後,所有的在base-package包及子包下的帶有@Compontent註解的類就被納入spring管理了

   		          3*   在納入spring管理的類中掃描各個屬性,看屬性是否有@Resource,再根據這個註解的規則進行操作。具體參考上一篇文章,在最上方有連結

                  4*   掃描的次數:
                         *  根據base-package包及子包進行掃描
                         *  掃描納入spring管理的所有的bean的屬性
                         *  屬性的name的值和bean中的id進行匹配
再有,關於--類掃描註解總結如下: